|
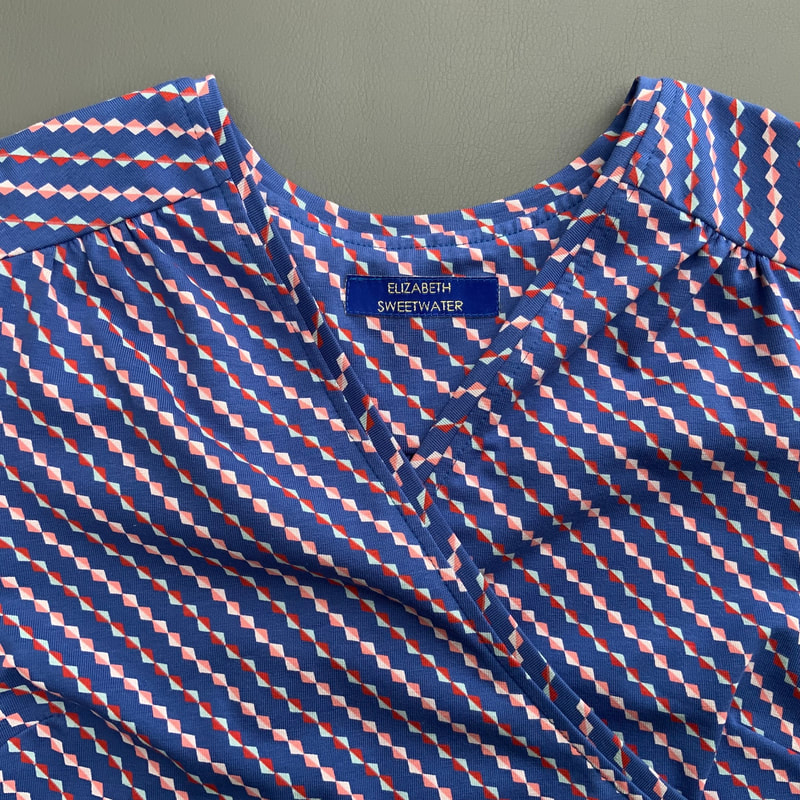
Overslag V-hals Jurk
Introduction
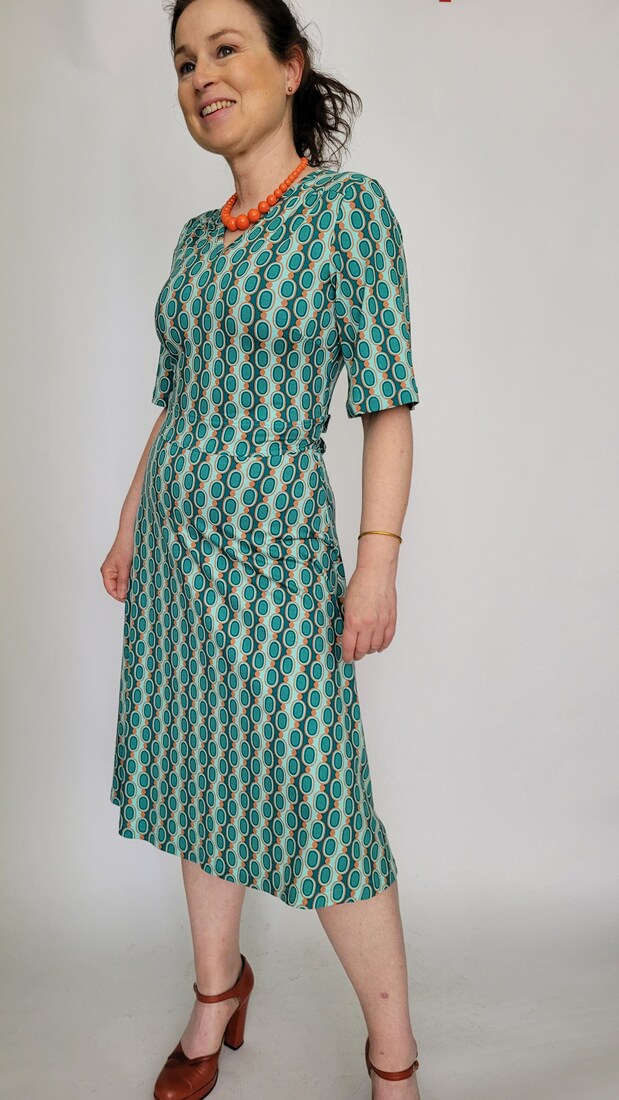
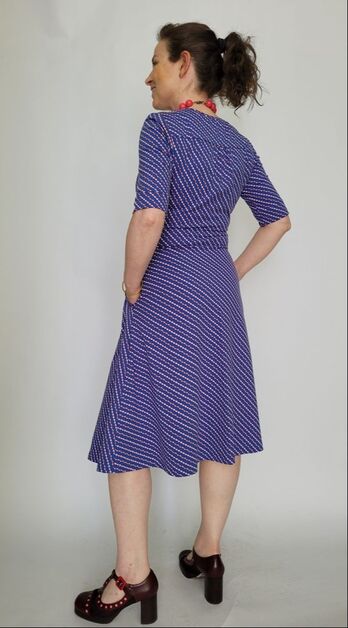
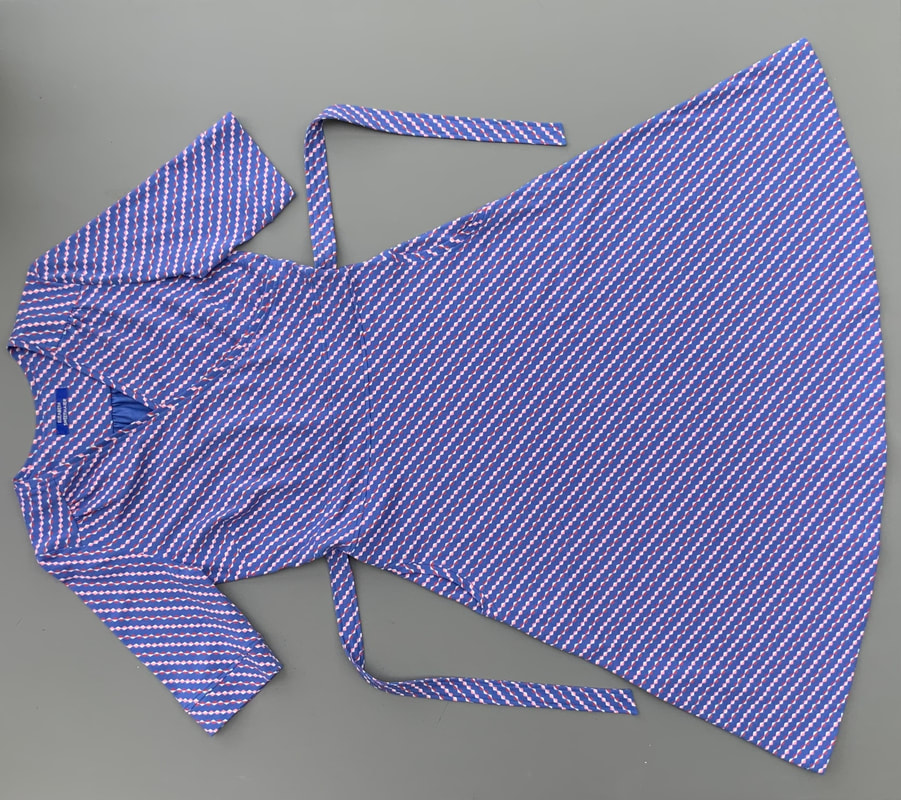
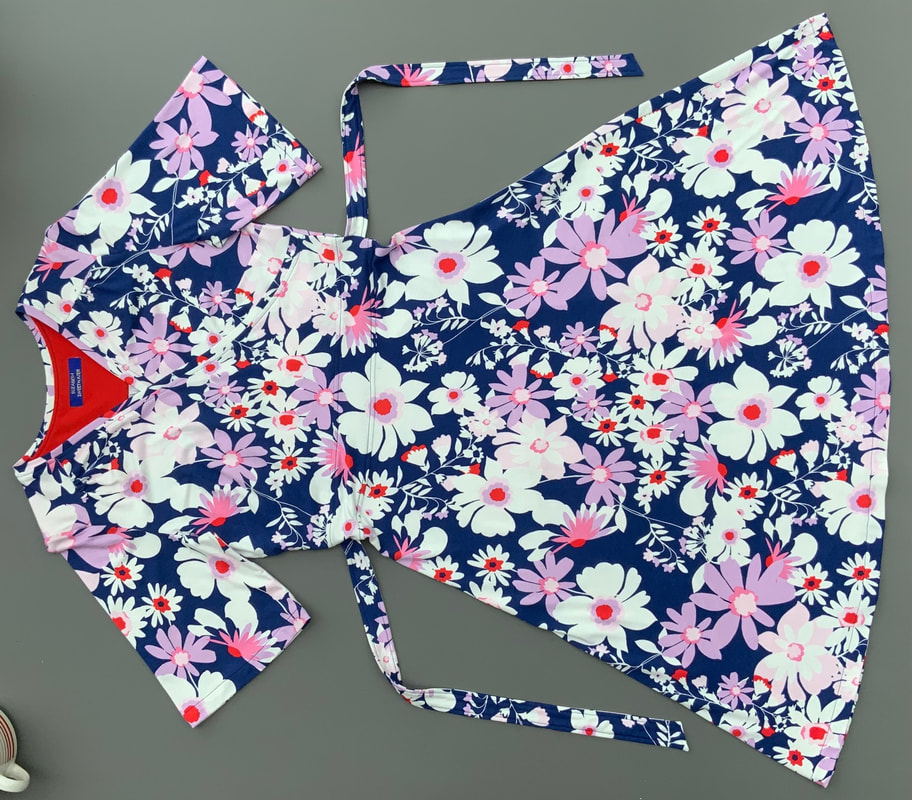
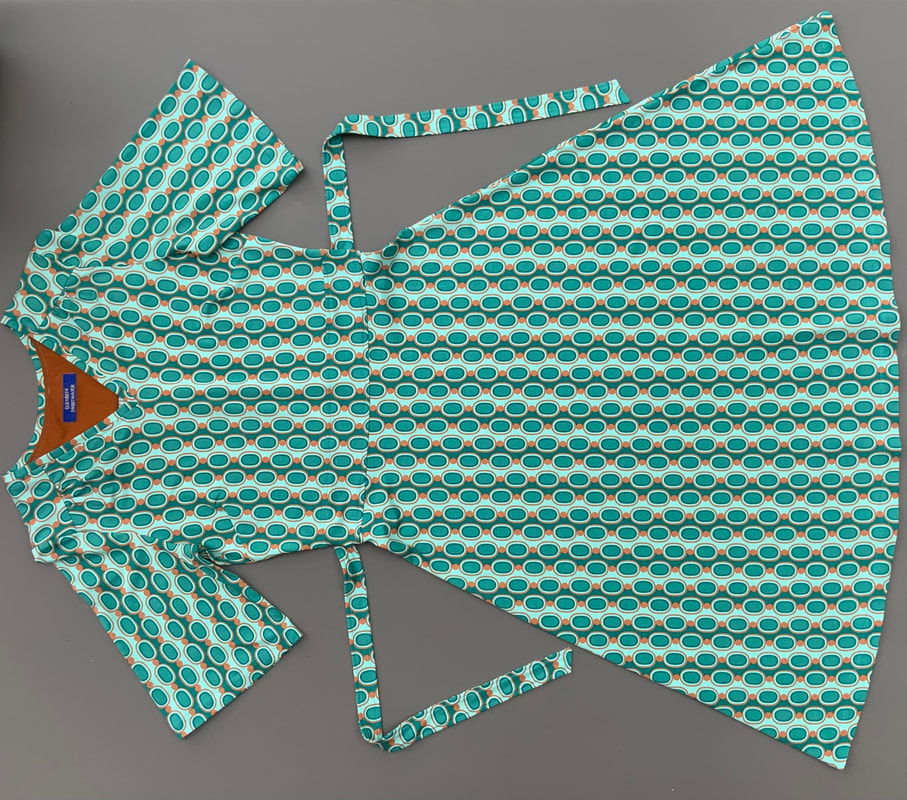
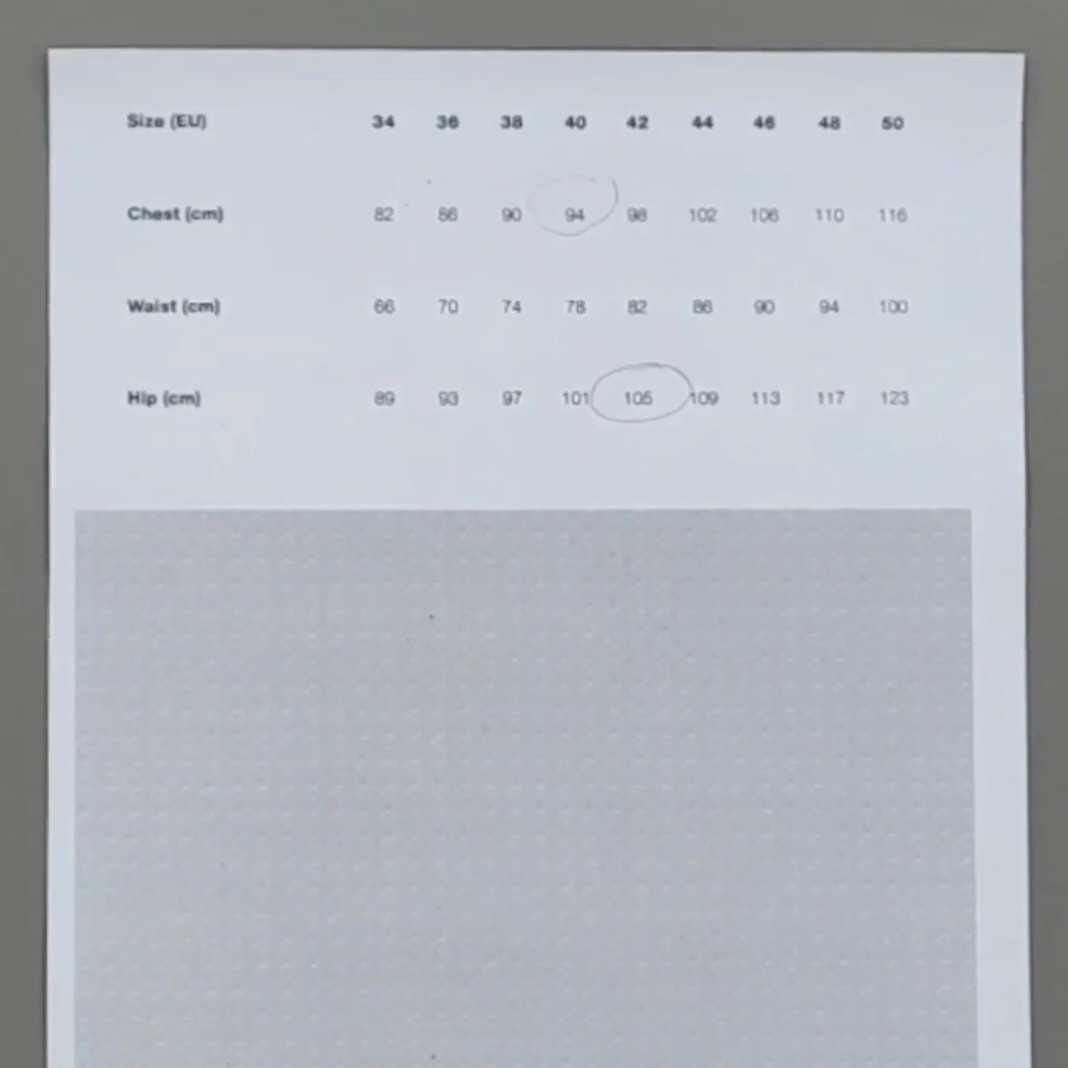
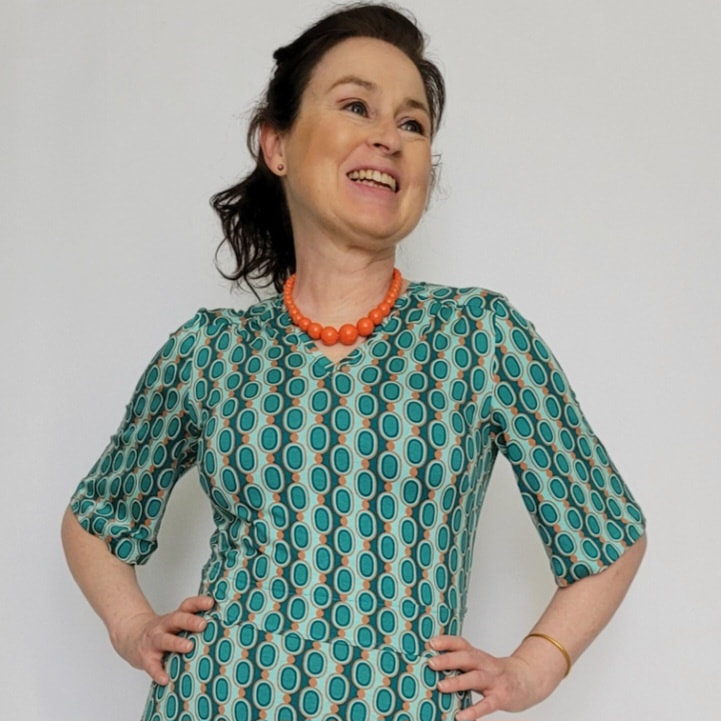
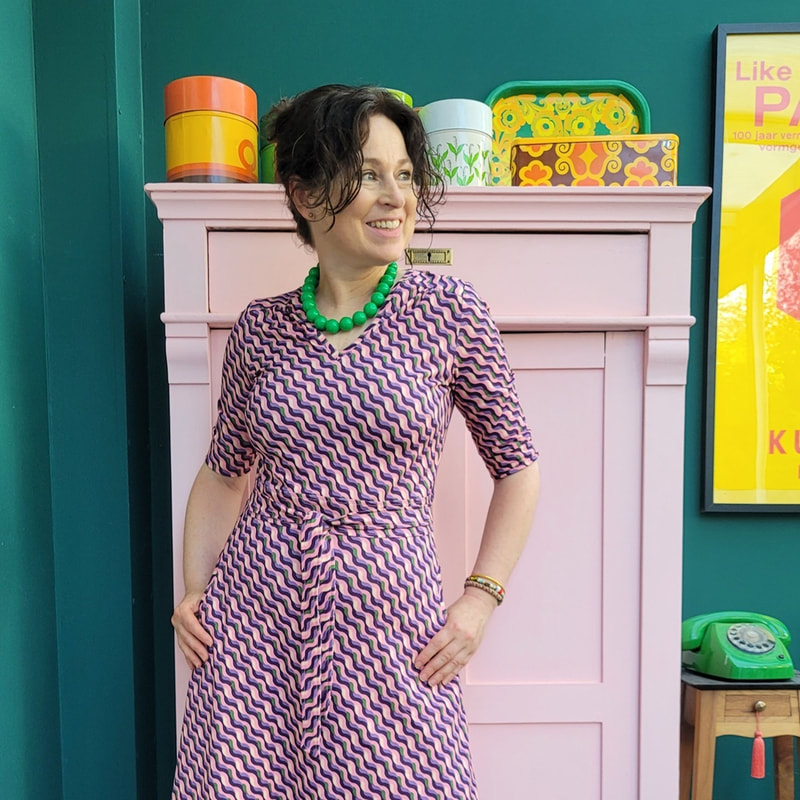
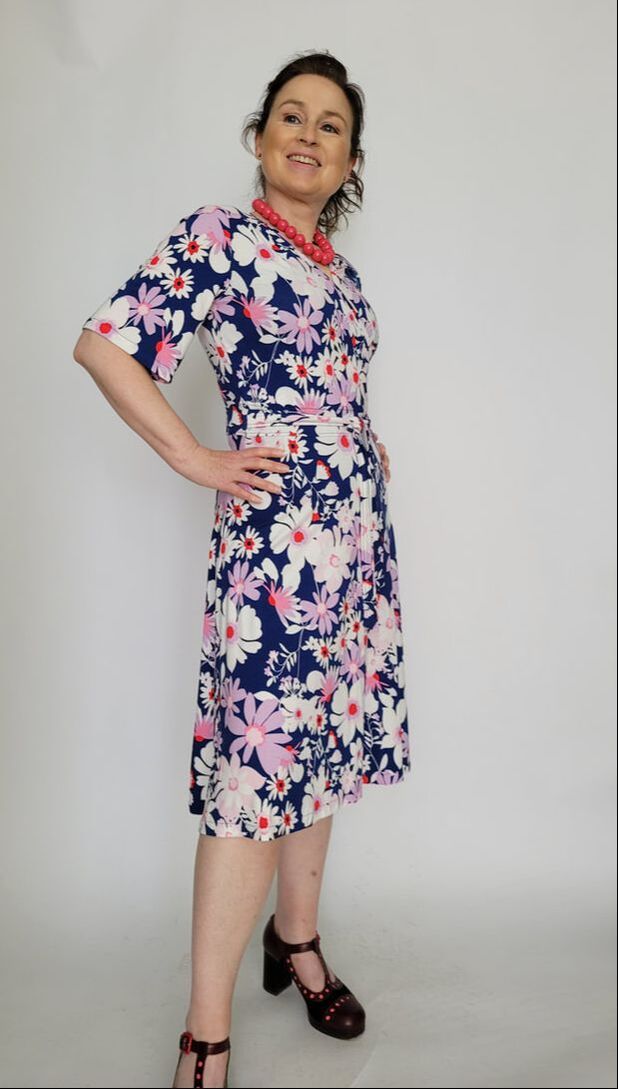
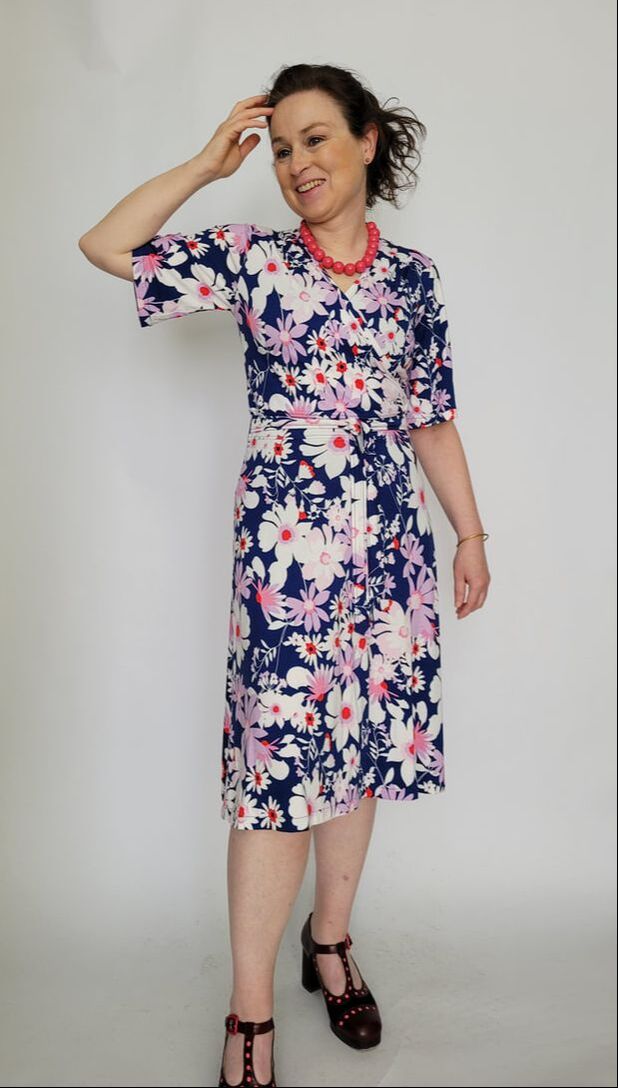
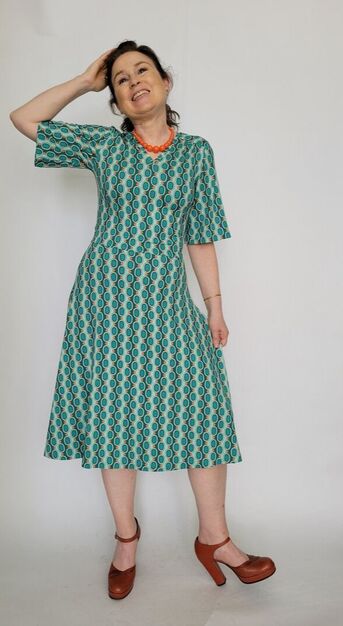
A dress with and overlap front and wide skirt should not be missing in your handmade retro wardrobe. This dress is very feminine with its gathered front and back, slightly waistband with ties and wrap neckline. The skirt is flared and you can choose between fitted or flared sleeves that reach just above the elbow. In this tutorial I explain step by step how to make this dress, there is also a youtube video available. Also keep an eye on our social media, where we show you how to adapt this pattern into a jumpsuit. Suitable fabrics are bi-stretch cotton or viscose single jersey, french terry, punta and scuba crepe. Before you start, check the size chart for the correct size. The model in the photos is 158cm tall and wears size 36.
1.
Voorbereiding Preparation
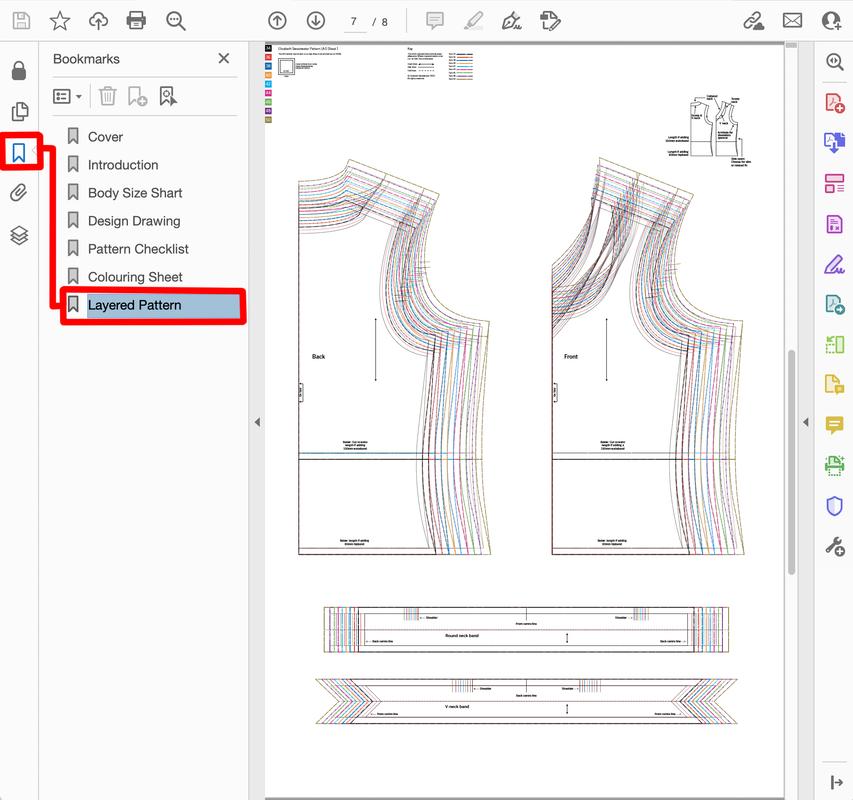
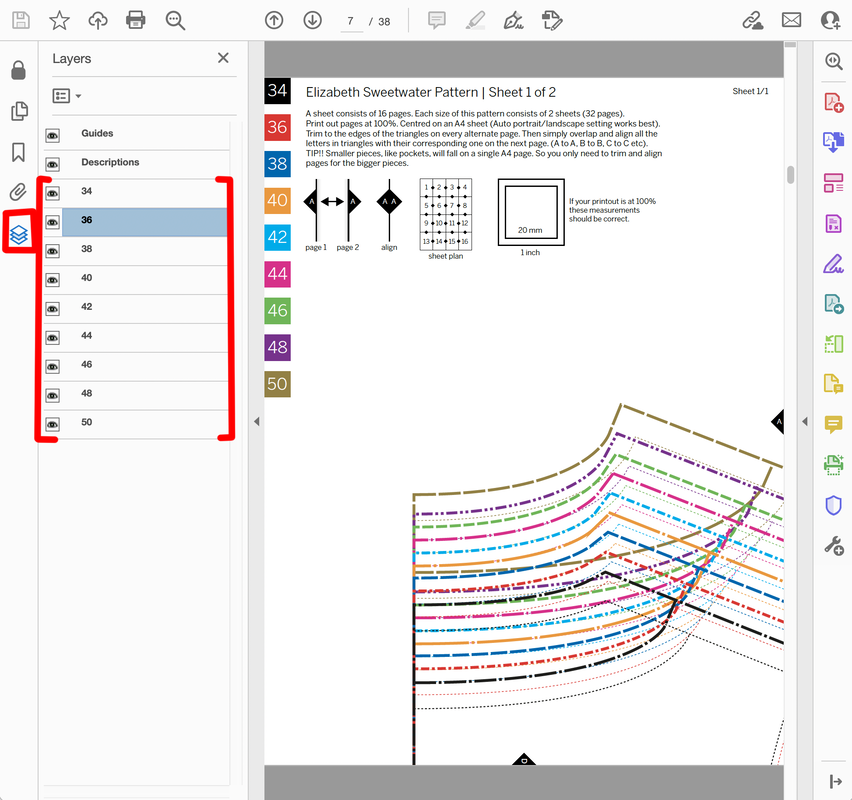
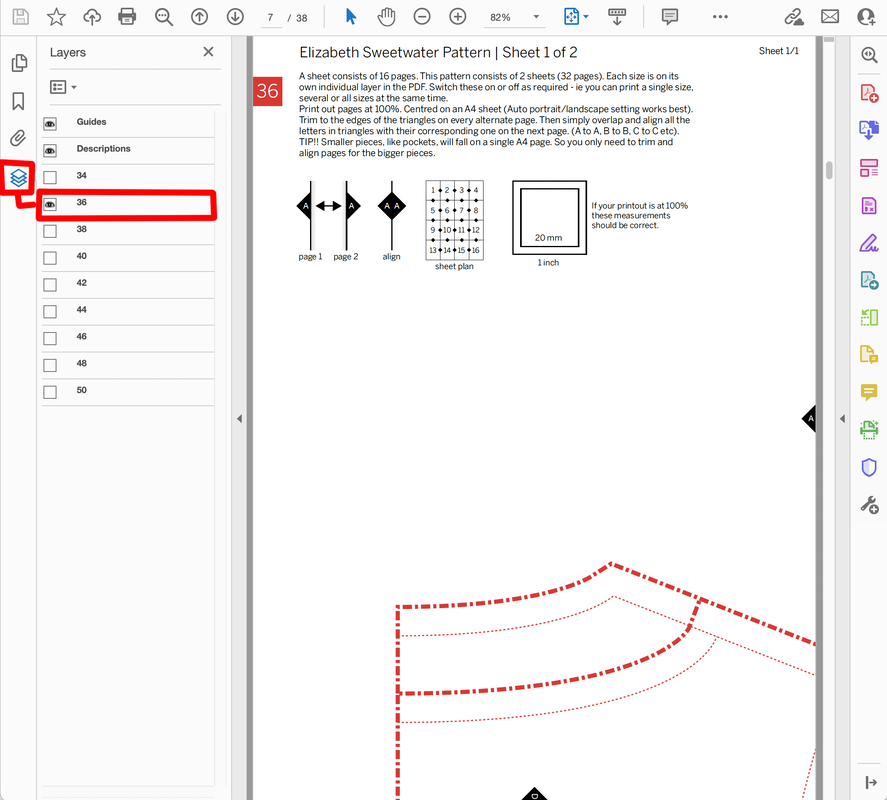
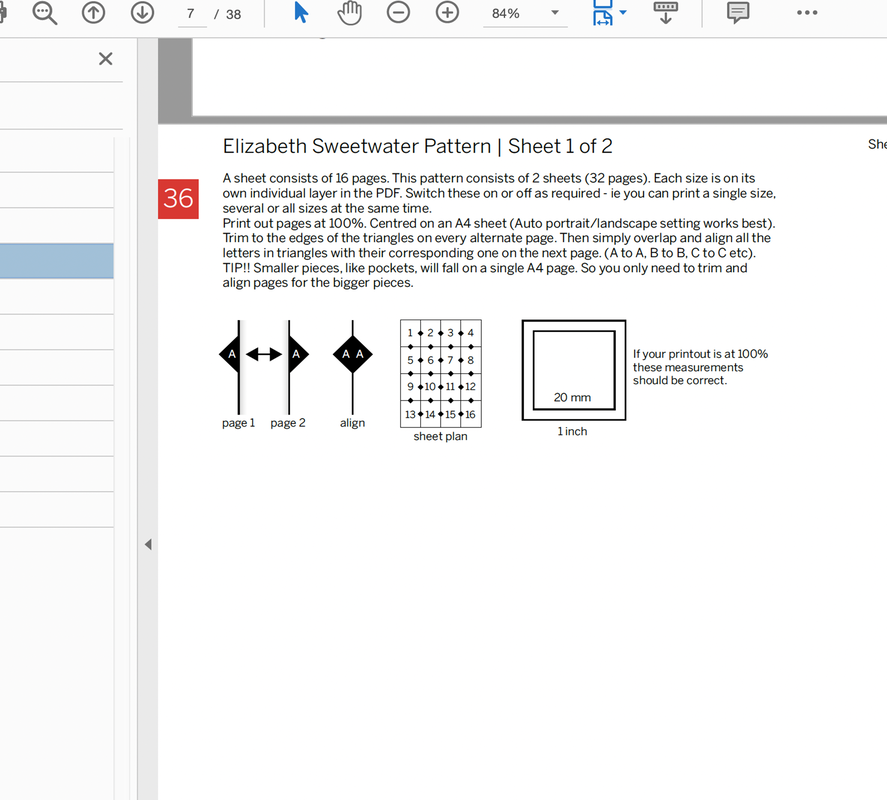
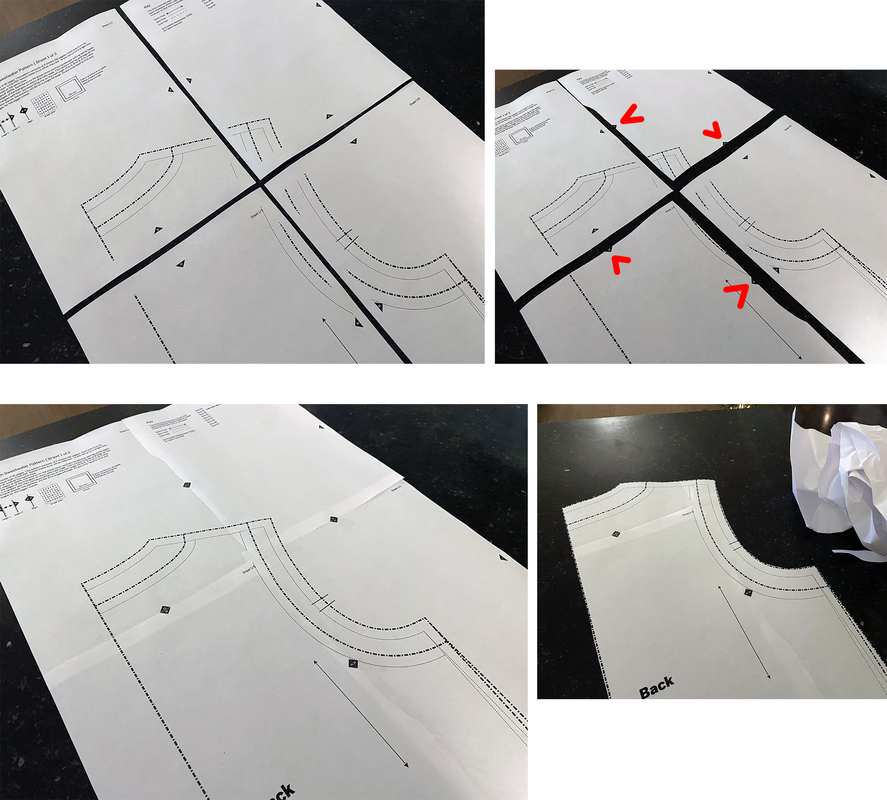
Bij aankoop van een van onze patronen ontvangt u 3 PDF-bestanden: een voor thuisprinters om op A4-papier af te drukken, een tweede voor A0-gebruikers om af te drukken in een printshop en een derde is voor mensen die een overheadprojector gebruiken. De volgende algemene introductietekst geeft een overzicht van hoe onze patroon-pdf's zijn opgezet en legt uit hoe je de A4-versie kunt afdrukken en hoe je de pagina's aan elkaar kunt plakken. A0-gebruikers kunnen bij hun printshop aangeven welke pagina's ze nodig hebben. Op de projector bestanden staan alle panden in dezelfde richting.
On purchasing any of our patterns you will receive 3 PDF files: one for home printers to print on A4 paper, a second at A0 is for printshop users and a third is for sewers who use an overhead projector. The following general introduction text provides an overview of how our pattern pdfs are set up and explains how to print out the A4 version and how to stick the pages together. A0 users should simply instruct their printshop which pages they require. Projector users will note that all pieces have the grain direction facing the same way.
1g.
Raadpleeg het onderstaande overzicht van alle modellen om je voor te bereiden op het uitknippen van de door jou gekozen stof. Consult the overview of all styles below to prepare yourself for the next stage of cutting out the pieces from your chosen material.
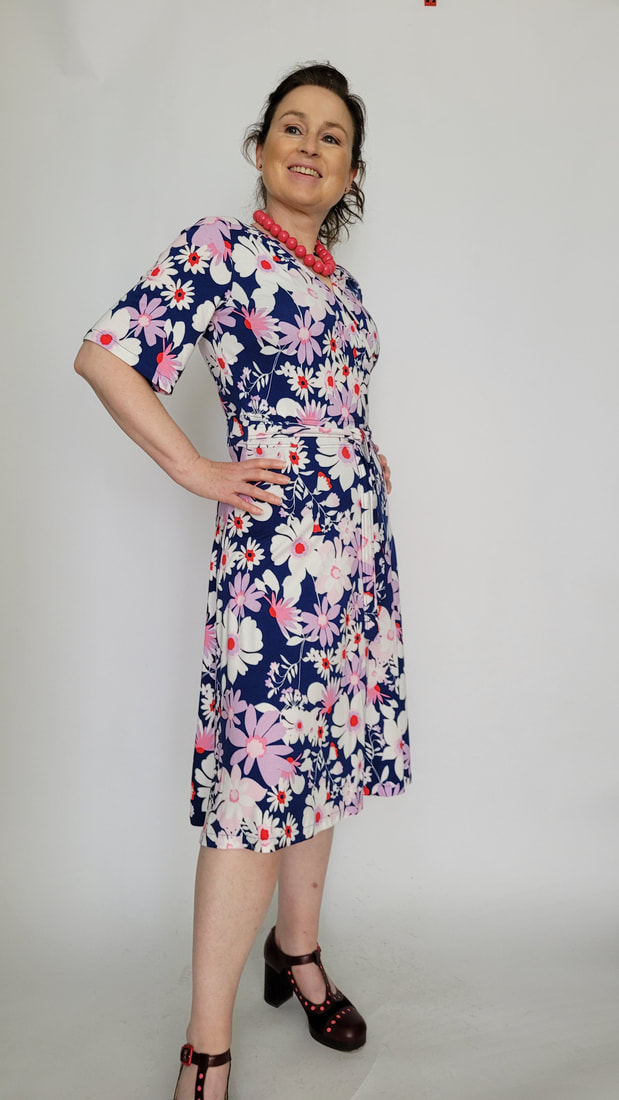
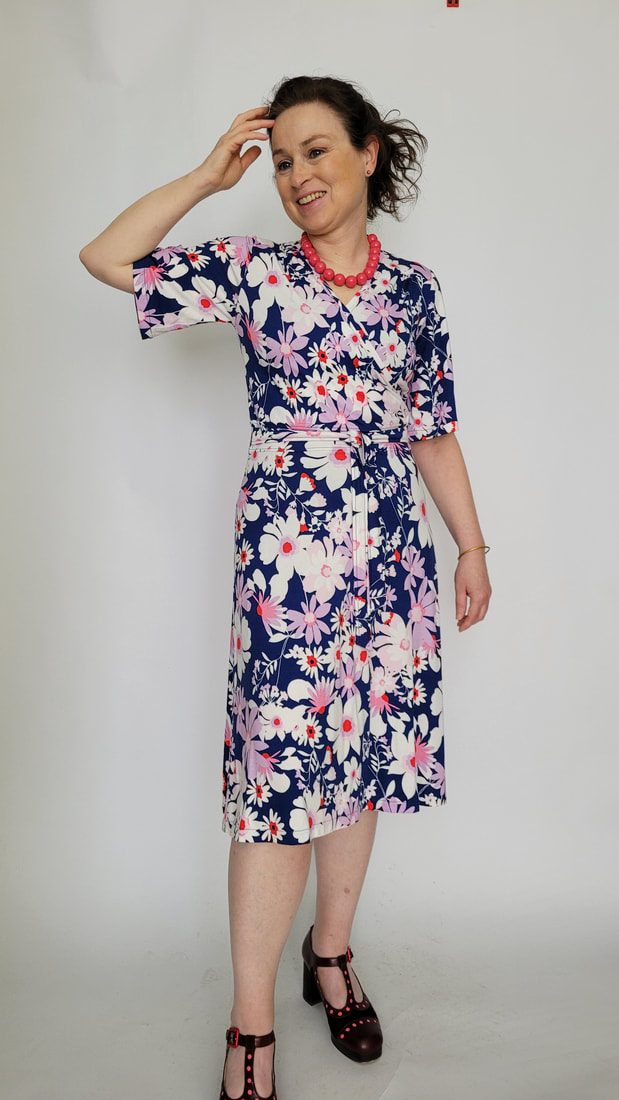
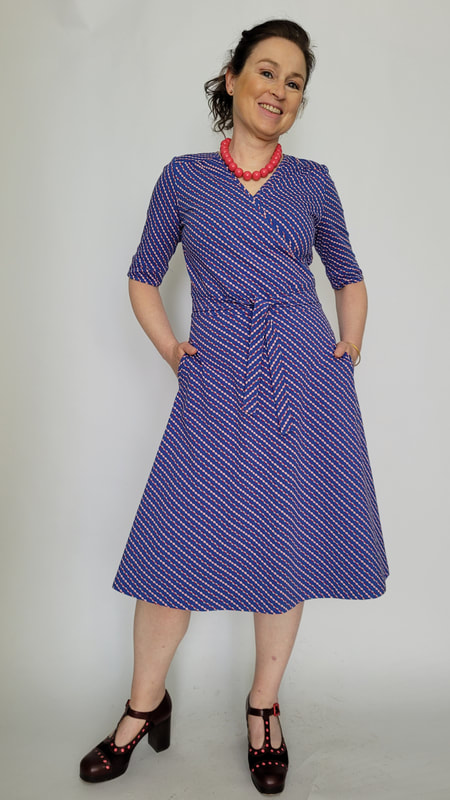
Style opties/Style options
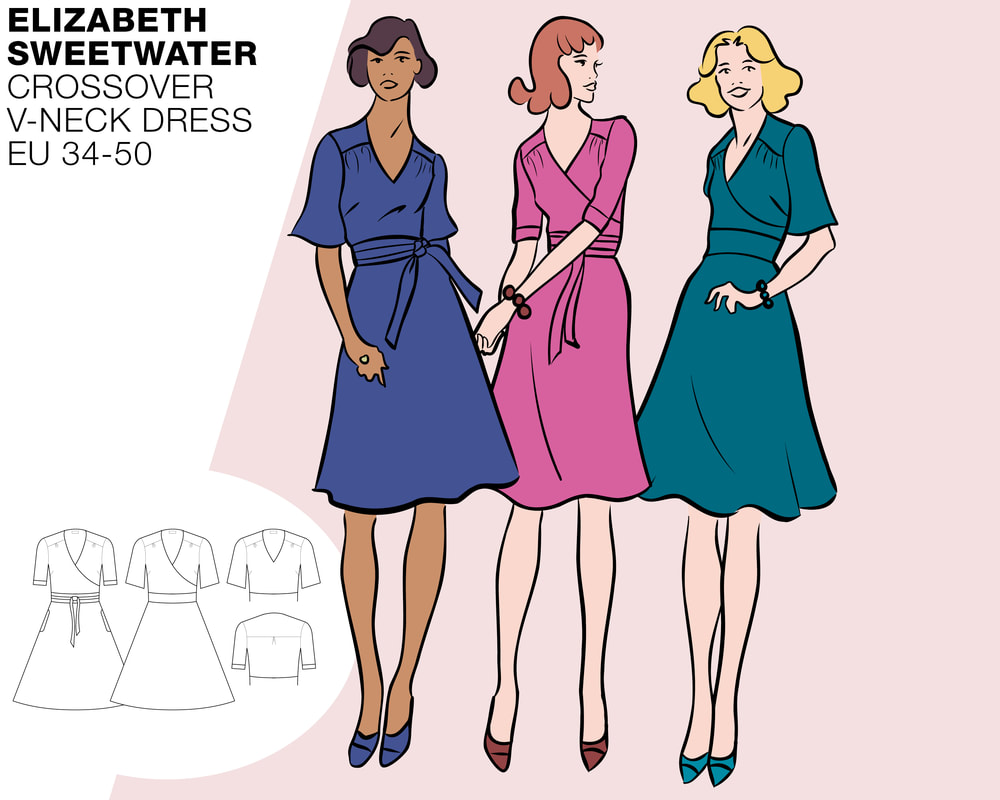
Er zijn 3 voorbeeldmodellen, uiteraard kunnen alle details onderling gecombineerd worden.
There's 3 example styles, ofcourse all details can be combined.
Hoeveelheid stof nodig/amount of fabric needed
Fournituren/Haberdasheries
Fournituren alle variaties:
- Eventueel een geweven label. - Eventueel rekbaar stikgaren (seraflex van mettler bijvoorbeeld) of gewoon stikgaren in combinatie met een stretchsteek setting op de naaimachine. - Lockgaren. - Een klein stukje plakvlieseline voor variatie c of in combinatie met dunne of viscose stoffen. Haberdasheries all variations: - Optionally a woven label. - Optionally stretch yarn (seraflex from mettler for example) or regular yarn in combination with the stretch stitch setting on the sewingmachine. - Overlock yarn. - A very small piece of stretch fusible interlining for variation C and/or in combination with very lightweight or viscose jersey.
Patroondelen checklist/pattern checklist
Goed om te weten:
Ik ga in deze werkbeschrijving uit van het gebruik van een overlock machine. Mocht je daar niet over beschikken dan kun je een zig-zag steek gebruiken op een gewone naaimachine. Ik raad dan wel aan om er altijd een stretch stiksel naast te plaatsen. De naadtoeslag van de patronen is 1cm. Check wat de breedte instelling van je naad is op je lockmachine is. Is het 0,7cm dan kun je tijdens het stikken 3mm wegsnijden. De stretchnaden stik je met een stretchsteek instelling op de gewone naaimachine. Behalve een stretchsteek setting op je naaimachine kun je ook voor stretch garen kiezen, bijvoorbeeld seraflex van mettler. Zet de garen spanning in een zo laag mogelijke instelling als je werkt met stretch garen. De naden werk je af met een overlockmachine (of een zigzag steek op een reguliere machine). Good to know For this tutorial an overlock machine was being used for sewing most of the garment. However, it is possible to use a regular sewing machine and sew with a zigzag stitch. I do recommend sewing an extra stretch stitch next to it to create clean lines. The seam allowance of the patterns is 1cm. Check the seam width setting of your overlock machine. If it is 0.7cm you can cut away 3mm while sewing. The stretch seams can be sewn using the stretch setting on a regular sewing machine. Apart from using a stretchstitch setting on your sewing machine ypu can also choose stretch yarn (seraflex by Mettler). Adjust the tension to the lowest possible setting when using stretch yarn. Finish seams with an overlock machine or zigzag on a regular machine.
2.
Opmerkingen en algemene Aanpassingen Remarks and common Adjustments
Tip
Ik adviseer om eerst een proefmodel te maken voor je in een dure stof knipt. Onderstaand vind je wat aanpassingen die je kunt doen aan het jurk patroon. I recommend making a test model before cutting in expensive fabric. Underneath you'll find some adjustments you can make on the dress pattern.
2a.
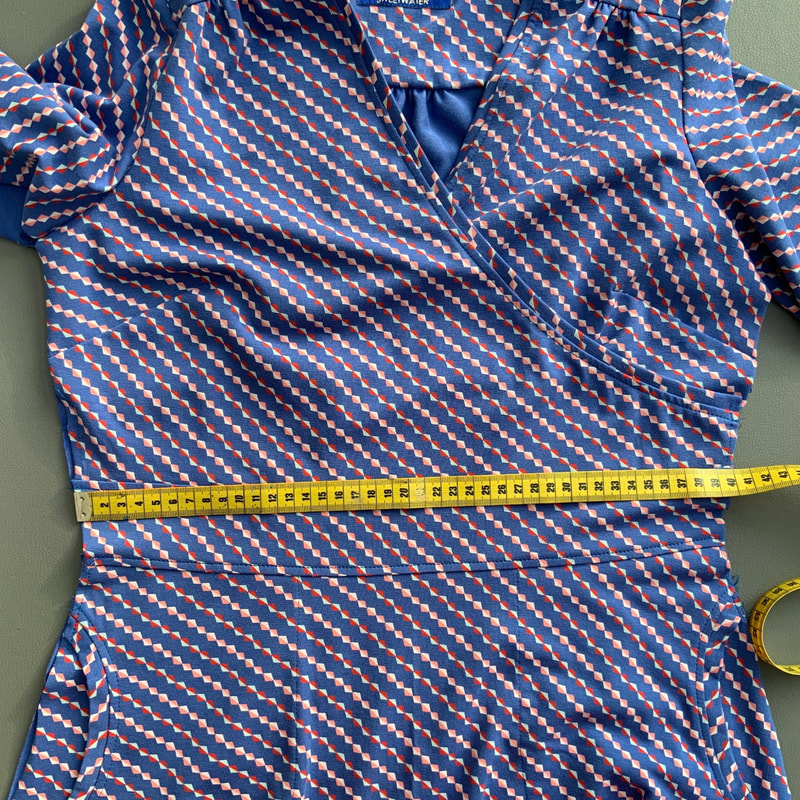
Het aanpassen van taille Adjusting the waist
2b.
Grotere heupmaat Widening the hip
2c.
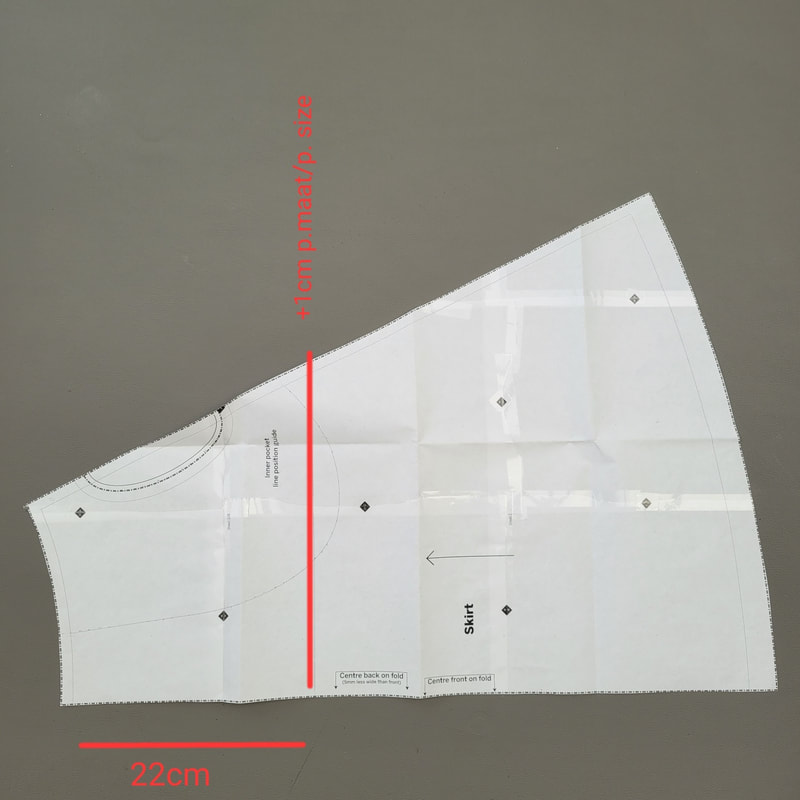
Verlengen Lengthen 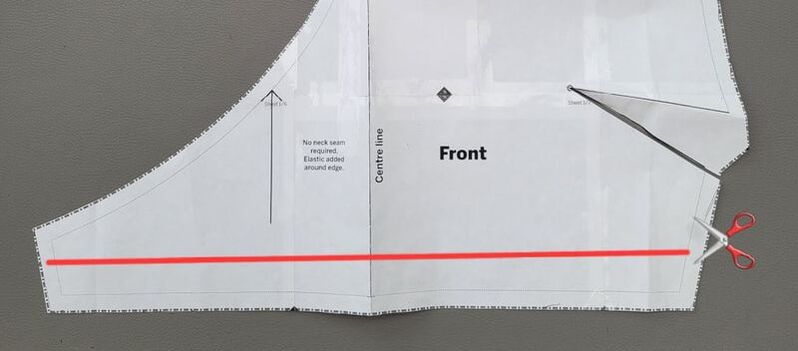
2c-1.
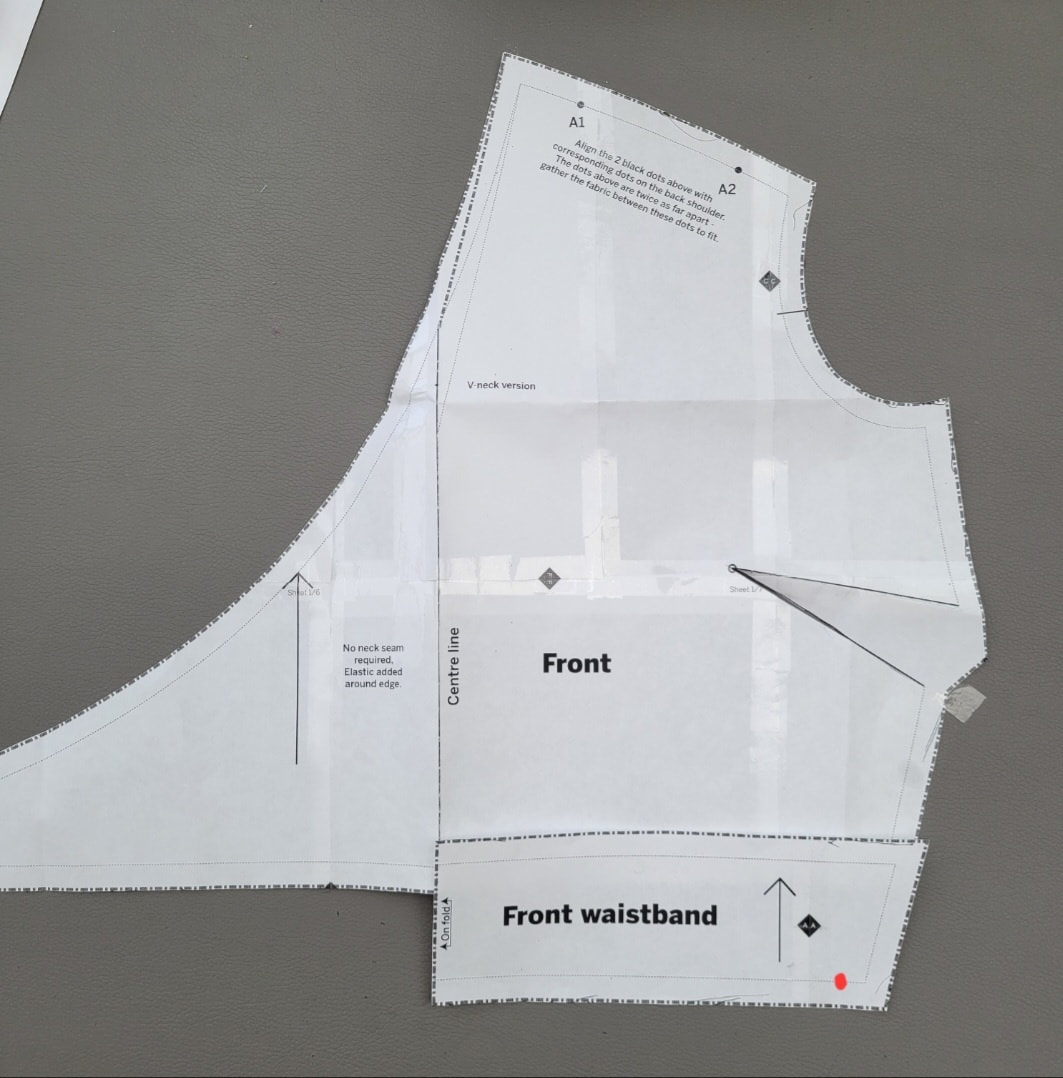
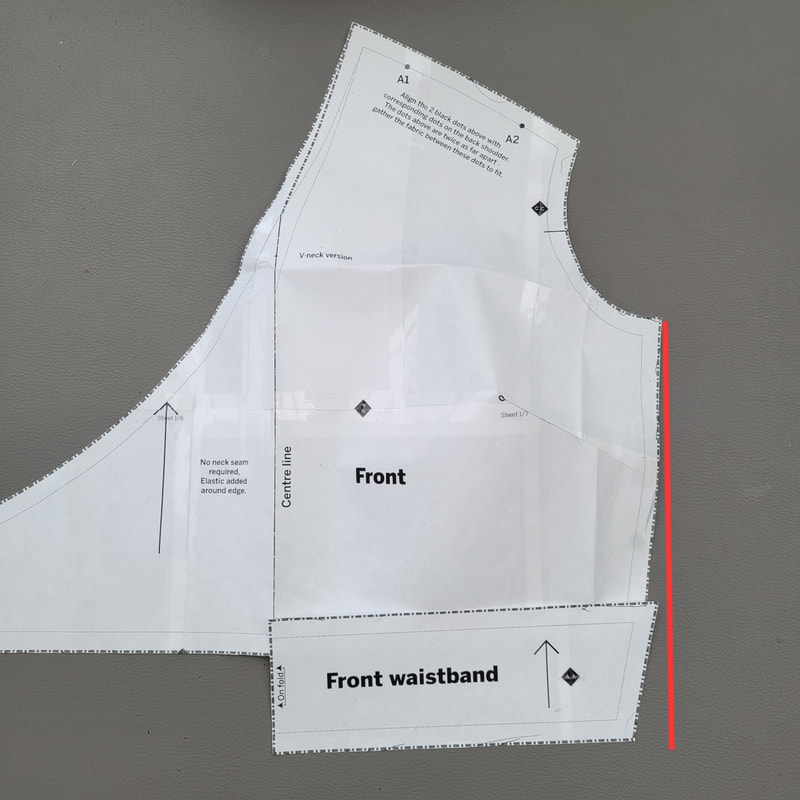
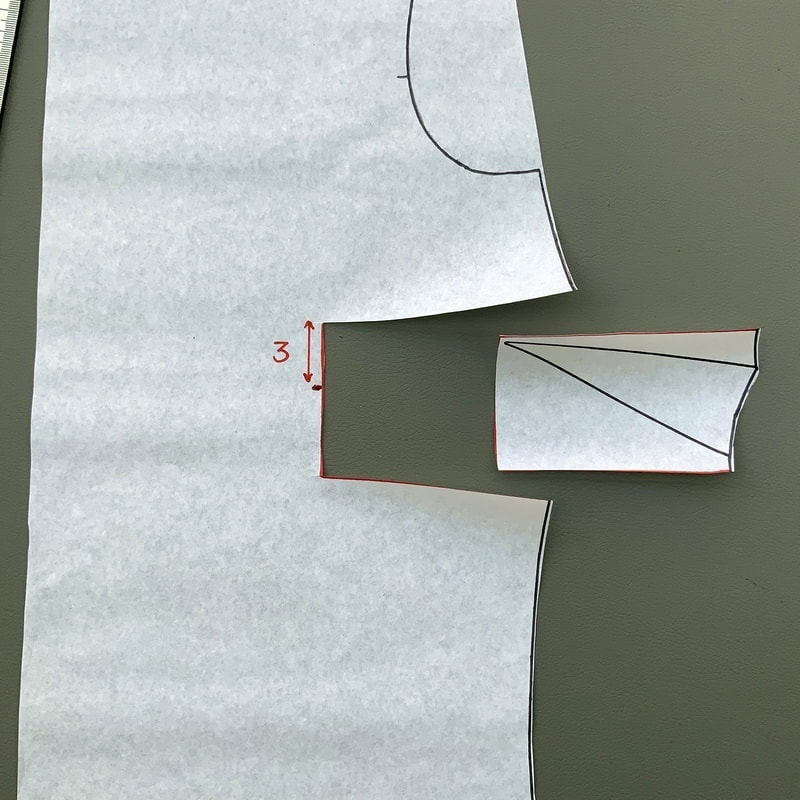
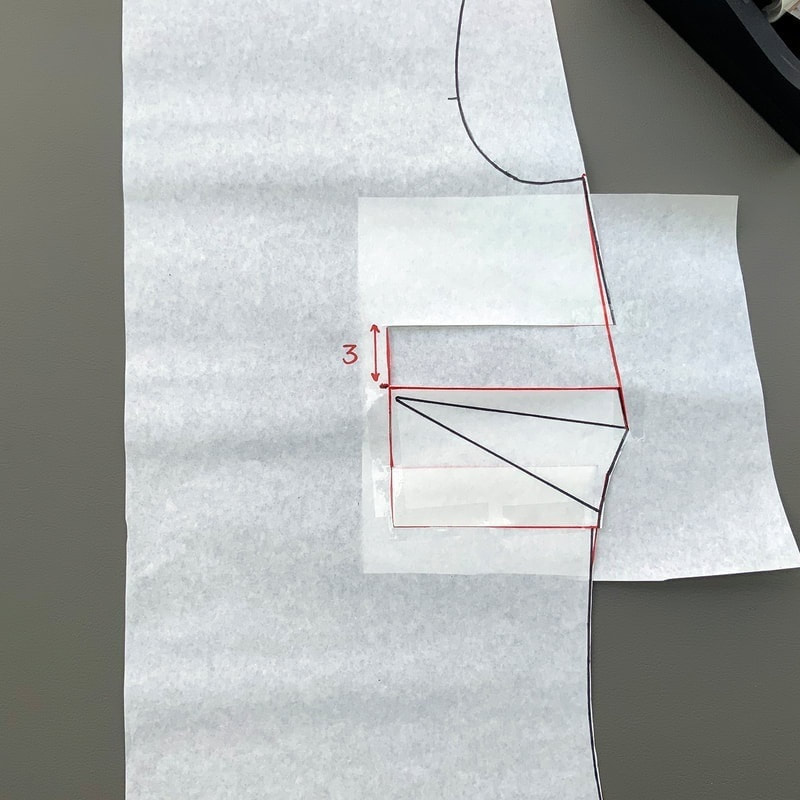
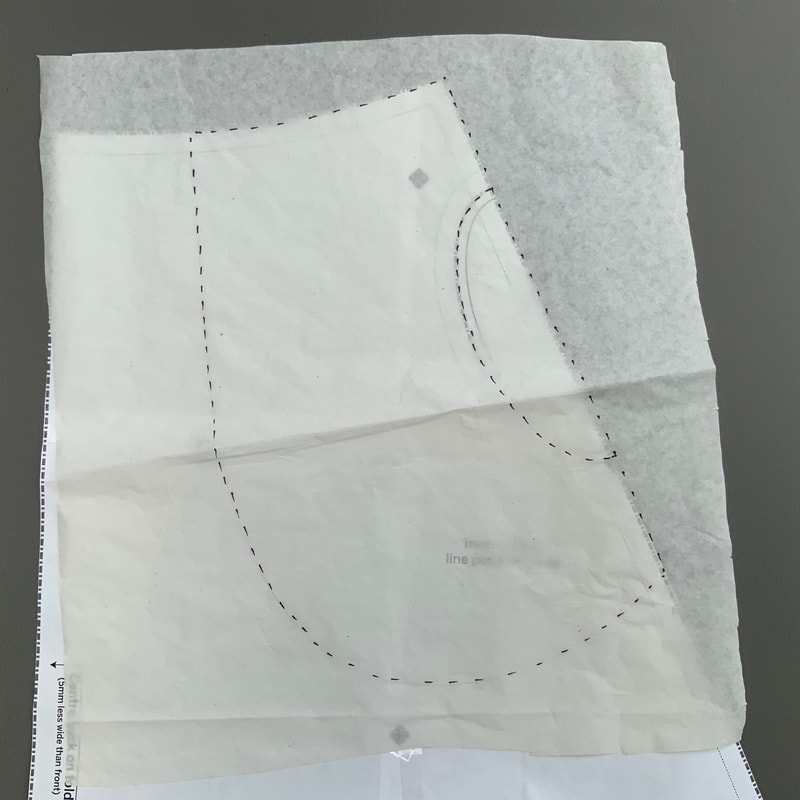
Verlengen: Als je langer dan 1.70m bent en je wilt dat de band in de taille valt, wil je misschien het bovenlijf met een paar cm te verlengen. Knip hiervoor het patroon door zoals aangegevenop de afbeelding. Leg hier een strook (patroon) papier onder en teken de zijnaad bij. Vergeet niet ook de achterkant te verlengen. Extend: If you are taller than 1.70m and you want the band to fit at the waist, you may want to lengthen the upper body by a few cm. To do this, cut the pattern as indicated on the image. Place a strip of (pattern) paper underneath and redraw the side seam. Don't forget to also lengthen the back piece.
2d.
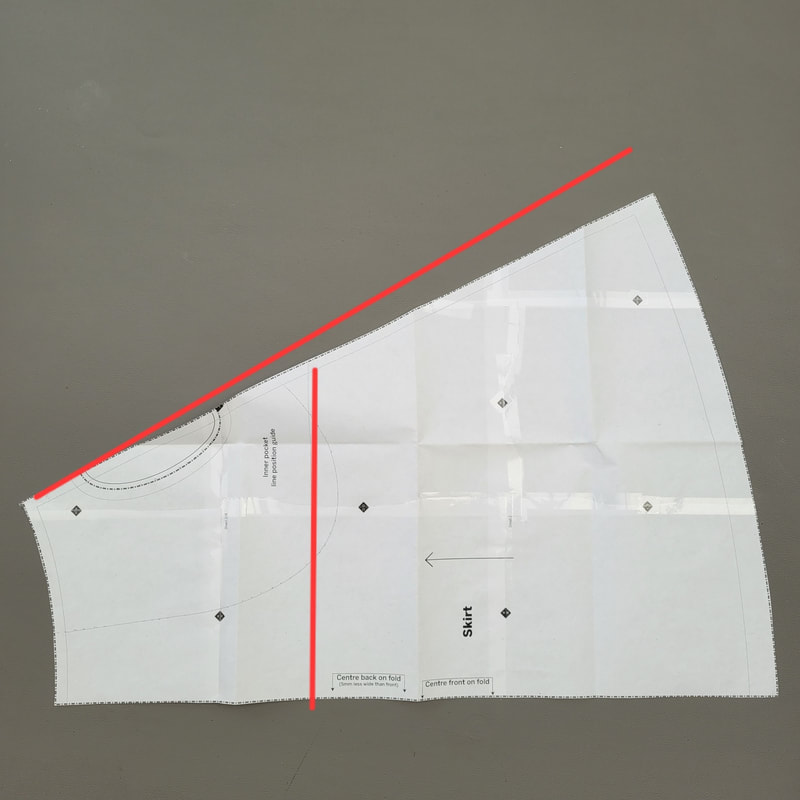
Verhoogde taille High waist 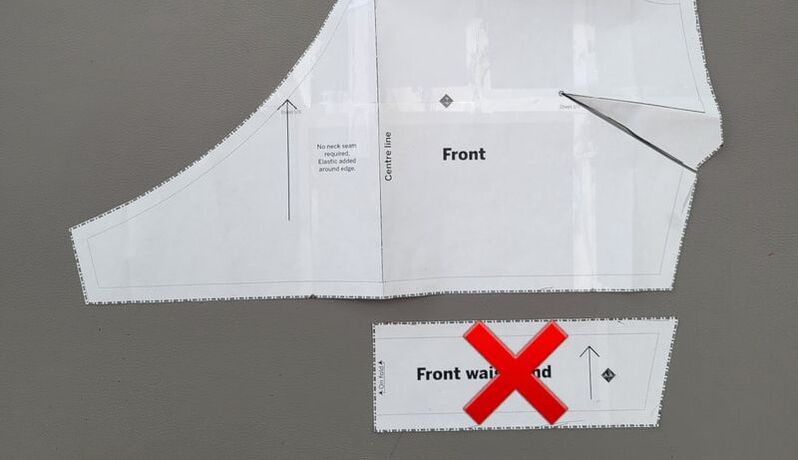
2d-1.
Verhoogde taille: Door de tailleband weg te laten kun je heel eenvoudig een verhoogde taille creëren. Pas dan wel de rok aan, verleng deze met 5cm en maak de bovenkant van de rok gelijk aan de onderwijdte van het bovenstuk. Doe dit ook met de achterkant. High waist: By leaving out the waistband you can easily create a high waist. Then adjust the skirt, lengthen it by 5cm and make the top of the skirt equal to the bottom width of the top. Do this with the back as well.
2e.
Verschillende mouwen Different sleeves 
2e.
Mouwen van andere patronen toevoegen: Wil je variëren met een andere mouw? Je kunt alle JURK mouwen gebruiken van andere E.S. patronen. To add sleeves from other patterns: Do you want to vary with a different sleeve? You can use all DRESS sleeves from other E.S. patterns.
2f.
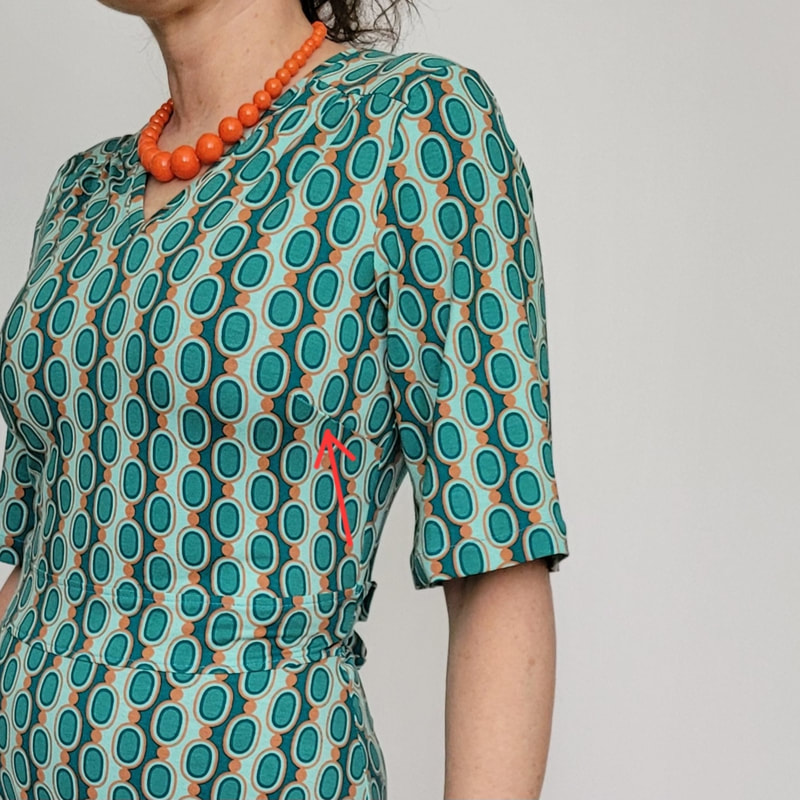
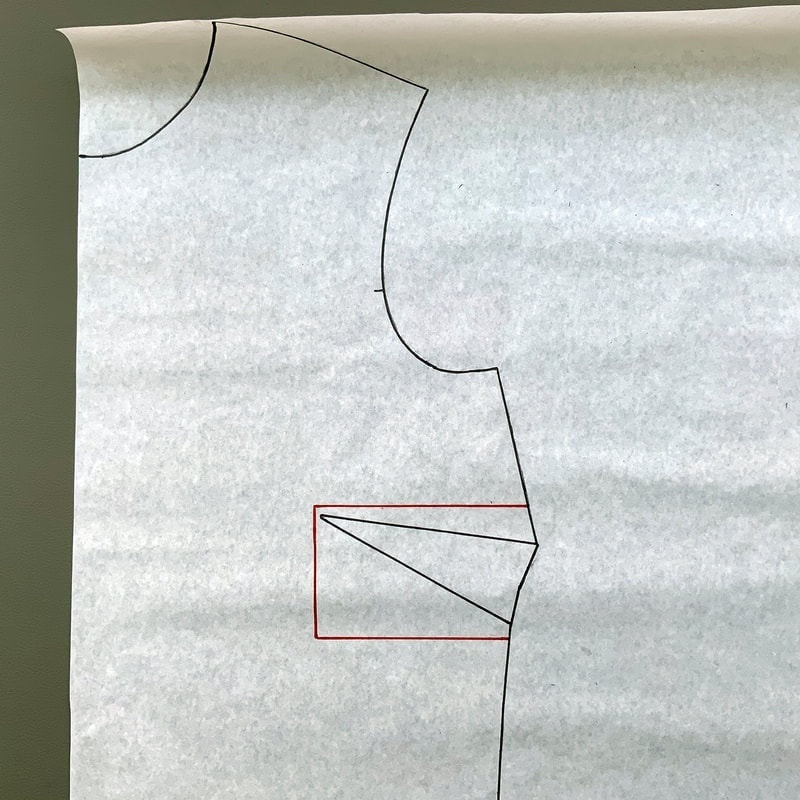
Het verlagen van de bustenaad The lowering of the bust dart
2g.
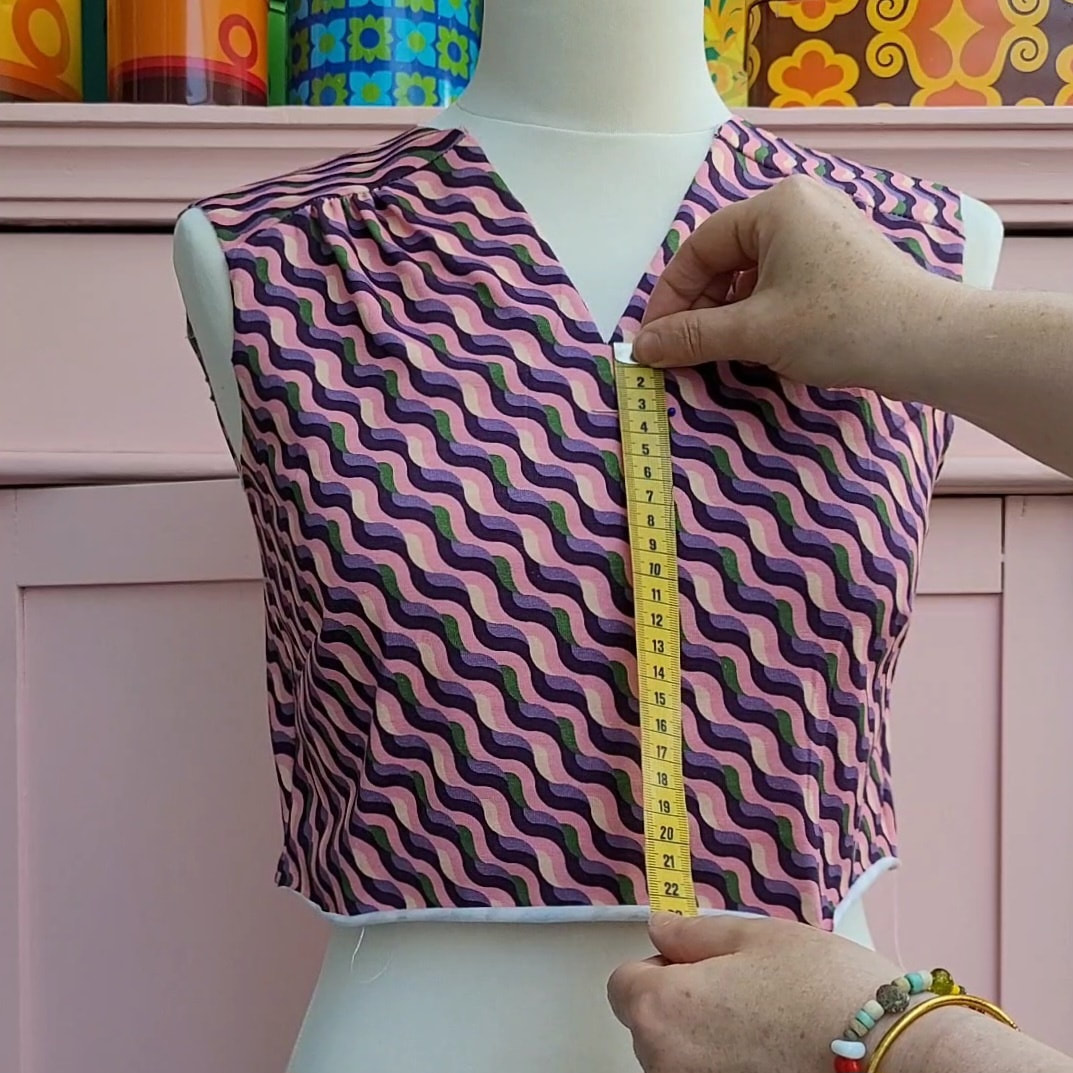
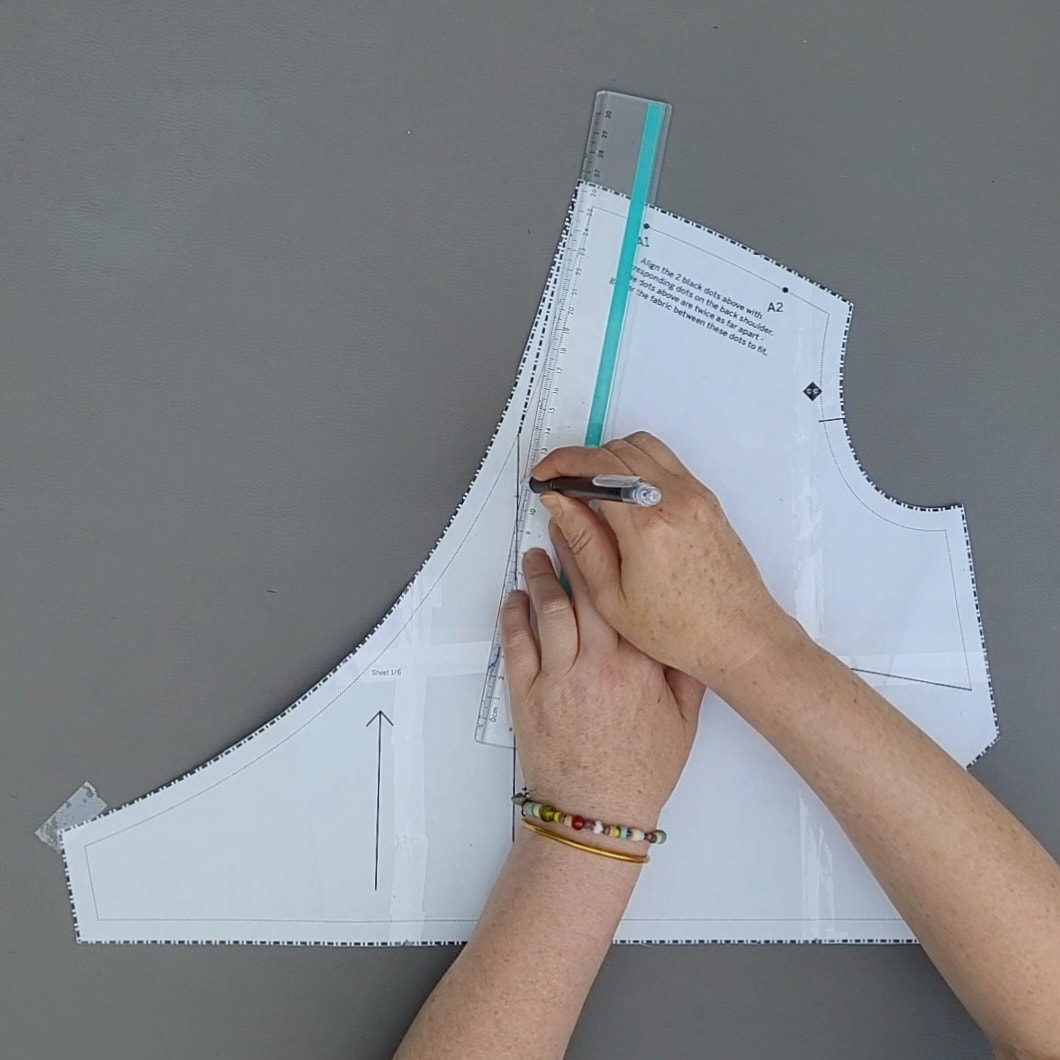
Uitdiepen V-hals Making the V-nieck deeper
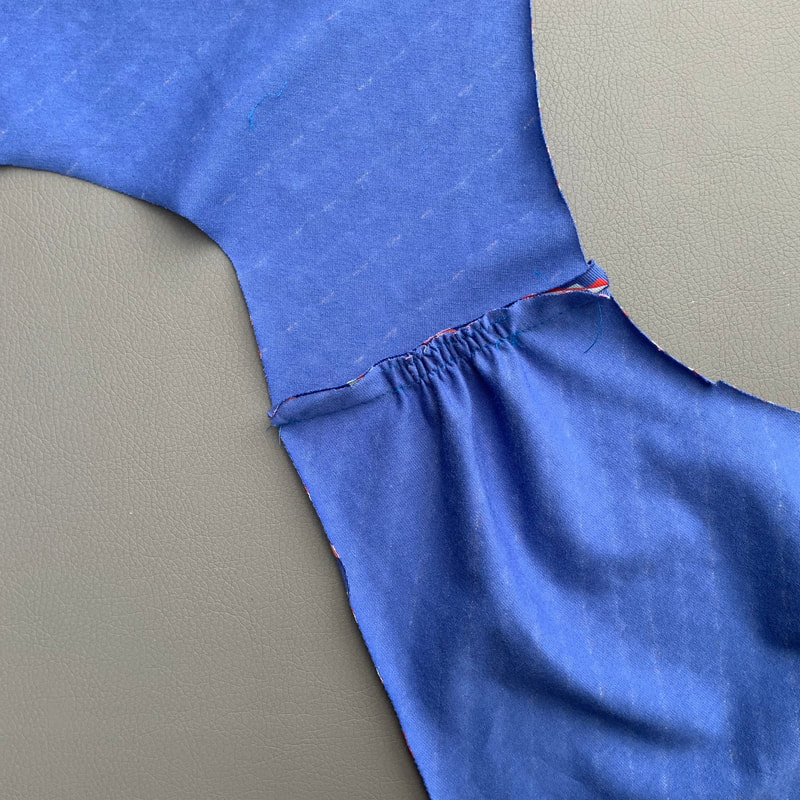
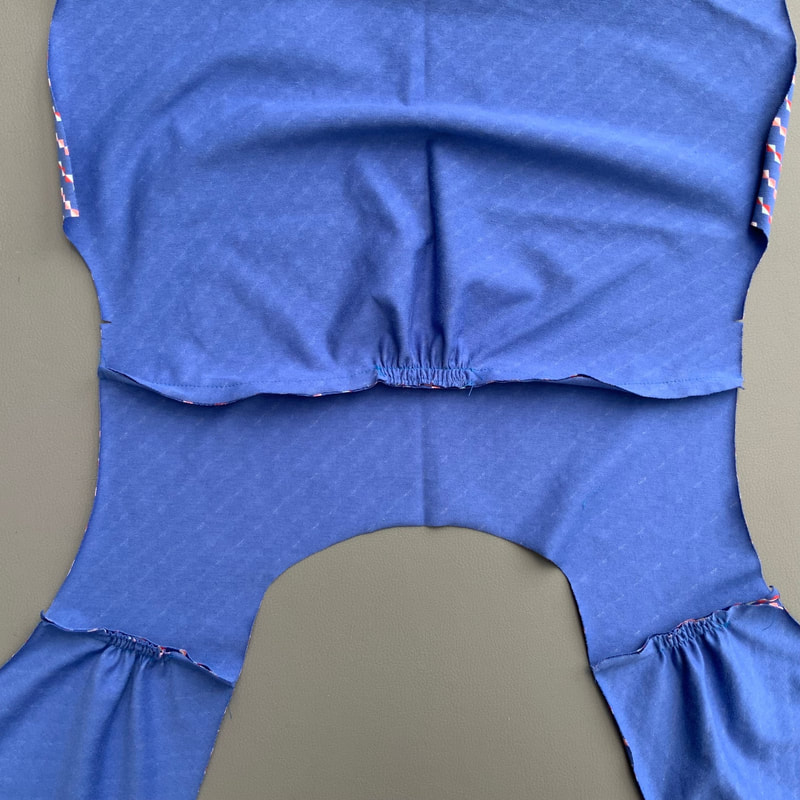
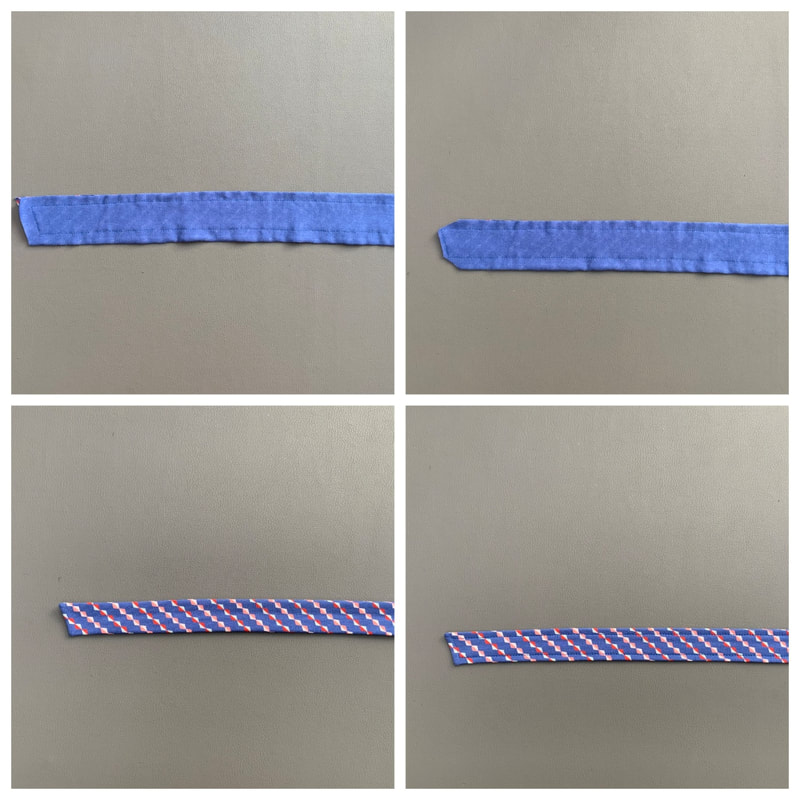
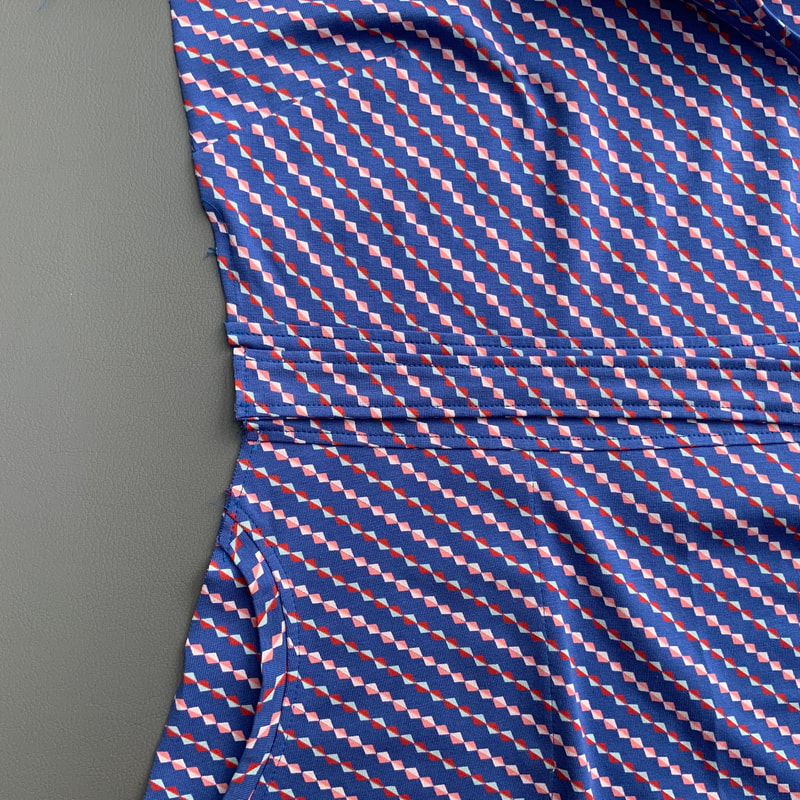
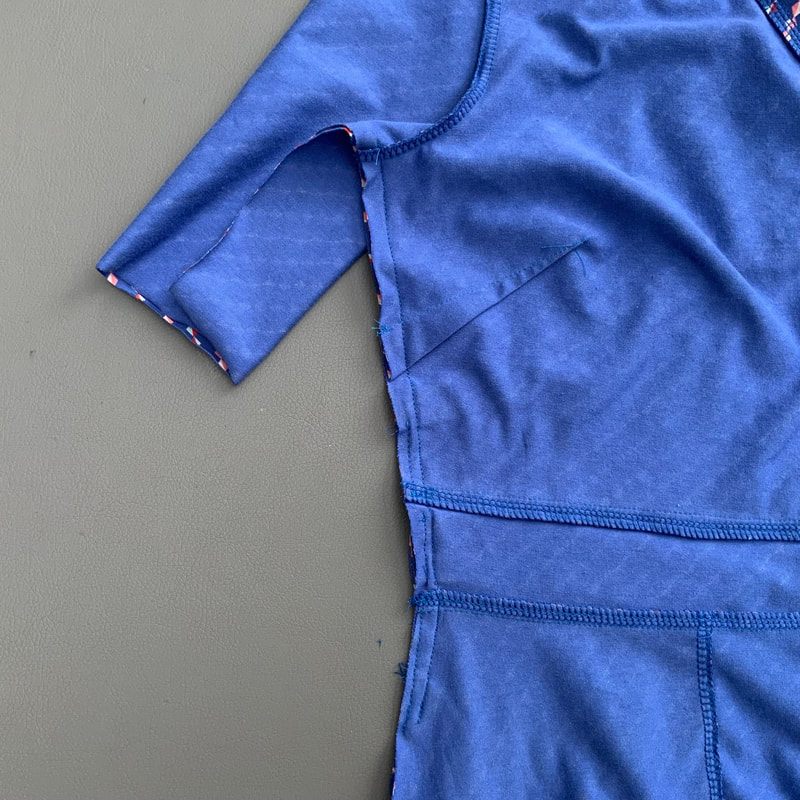
3.
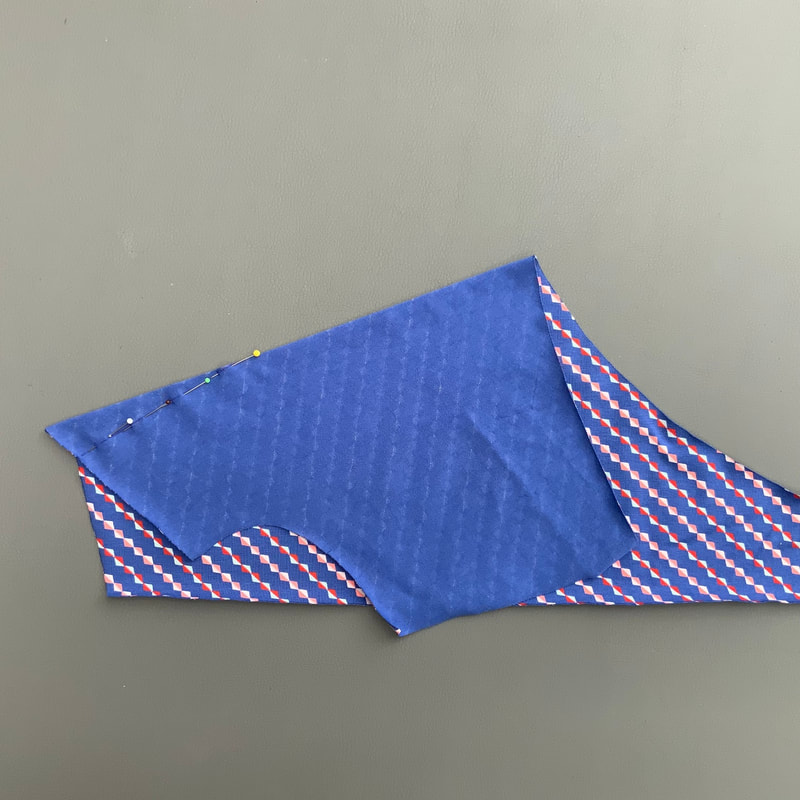
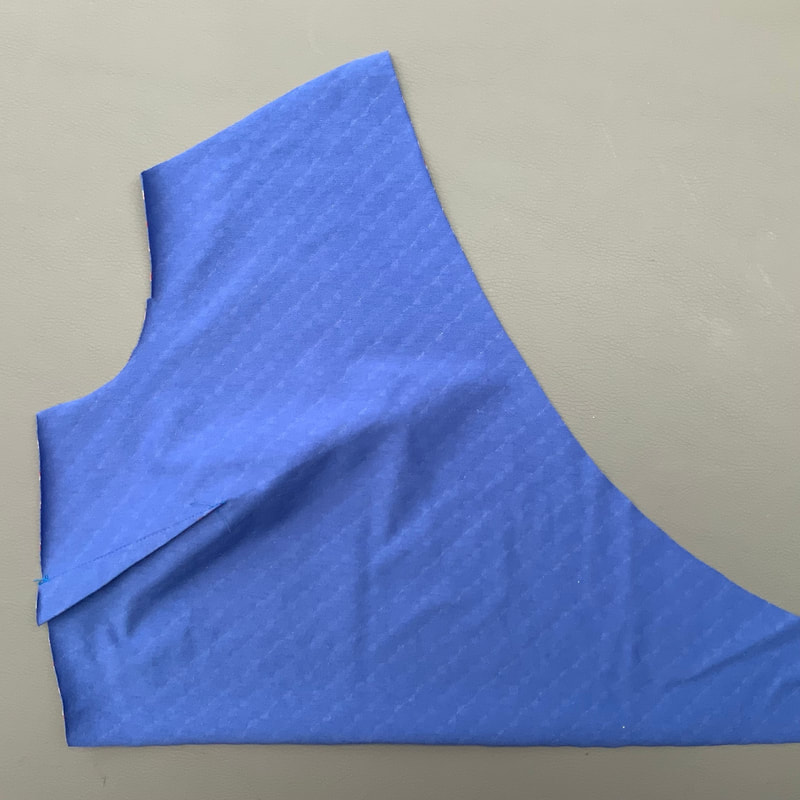
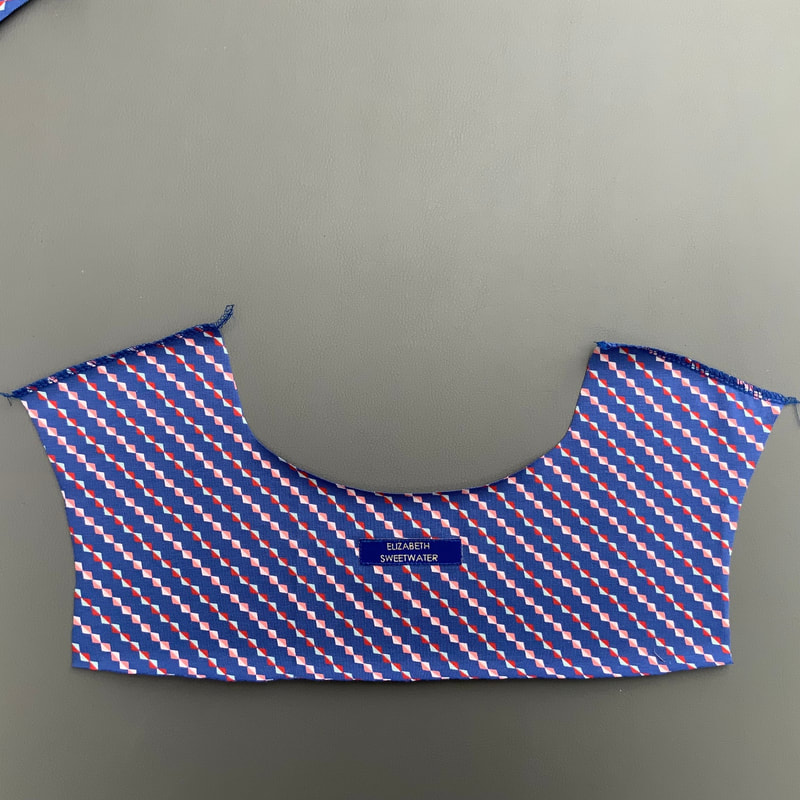
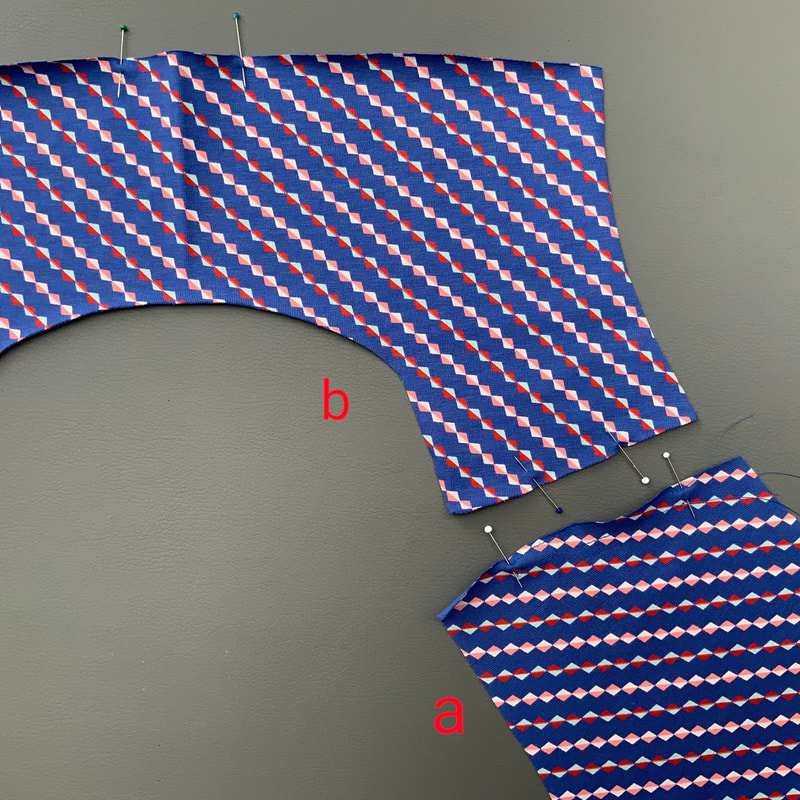
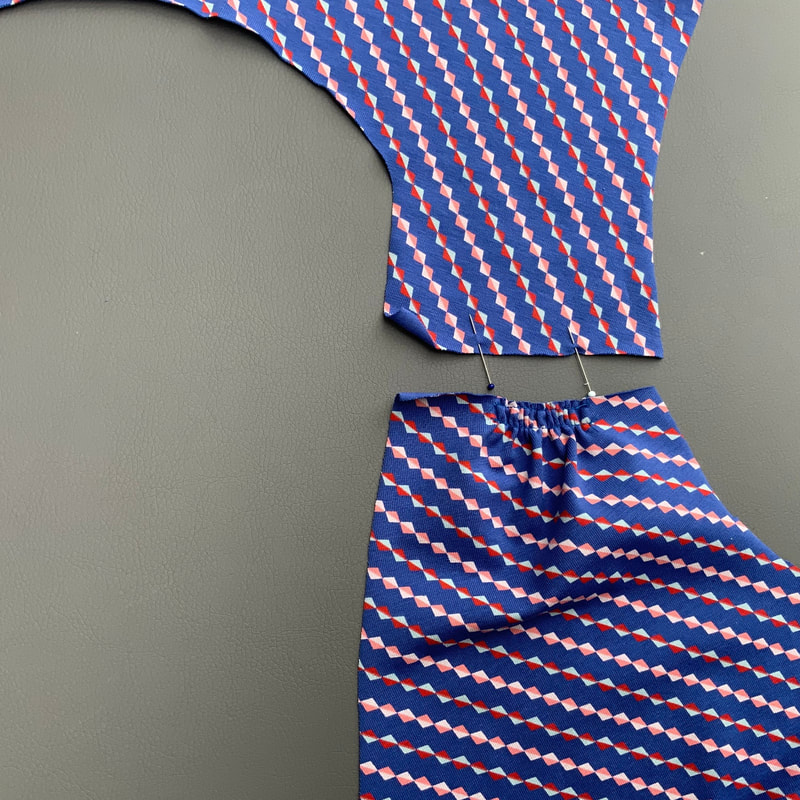
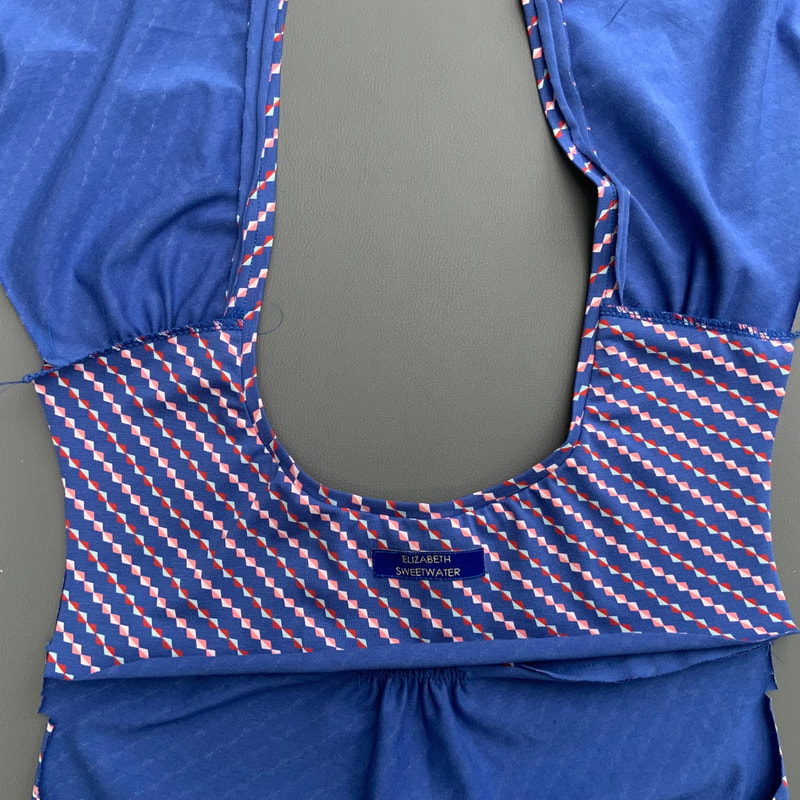
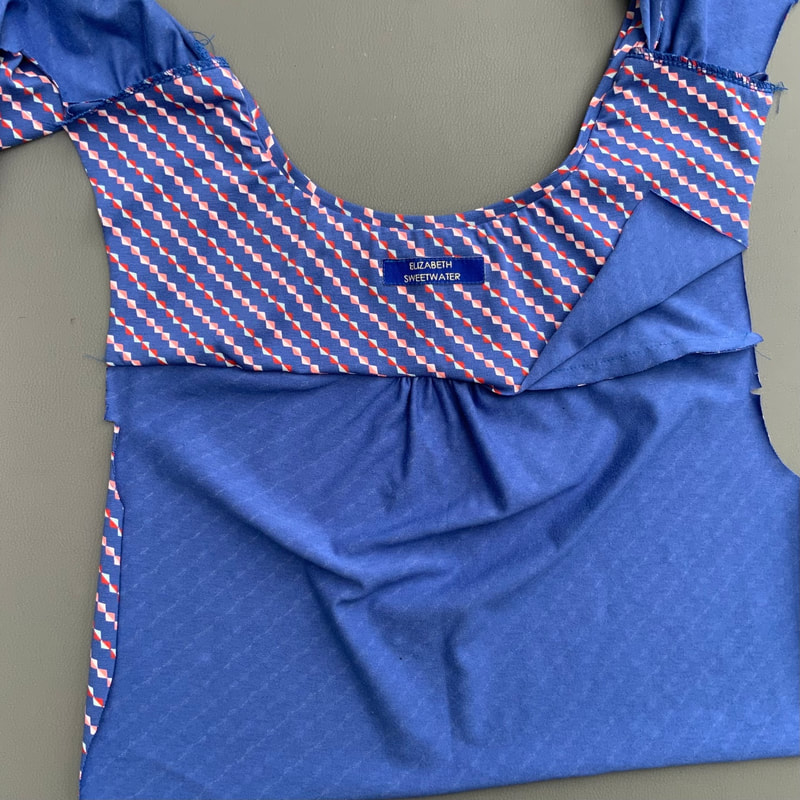
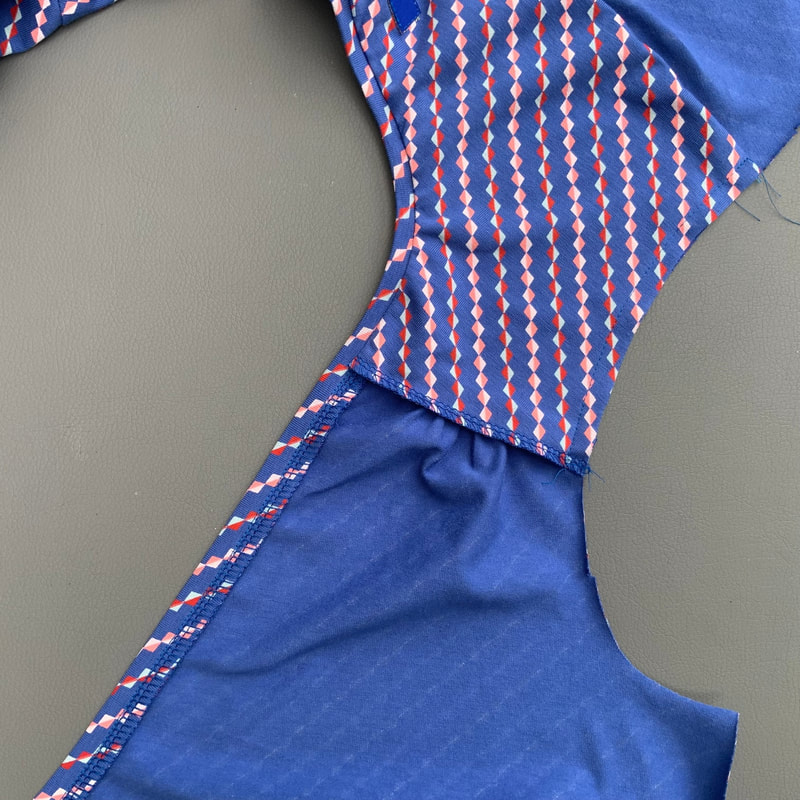
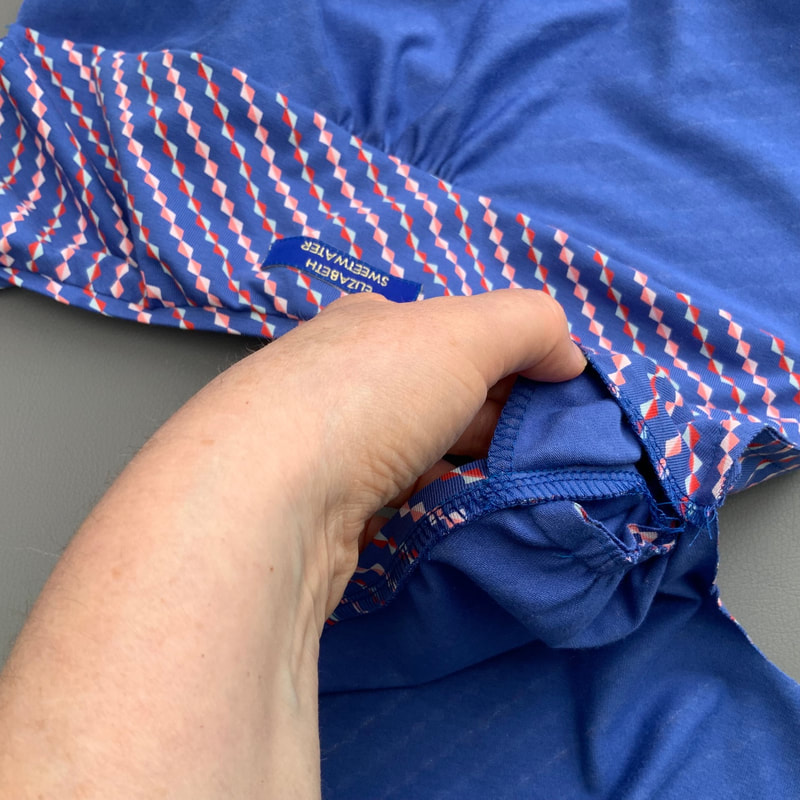
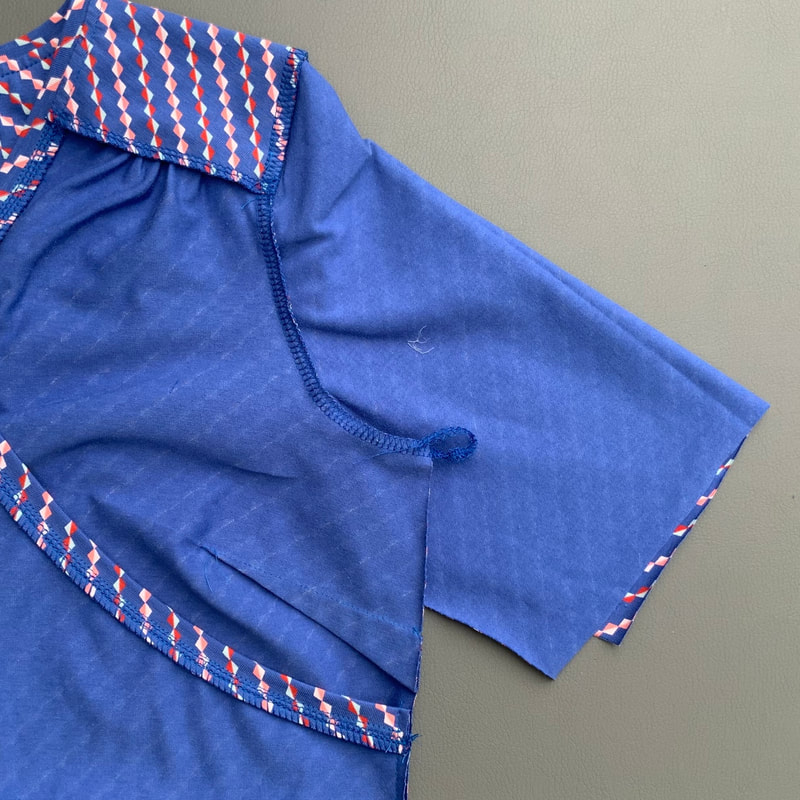
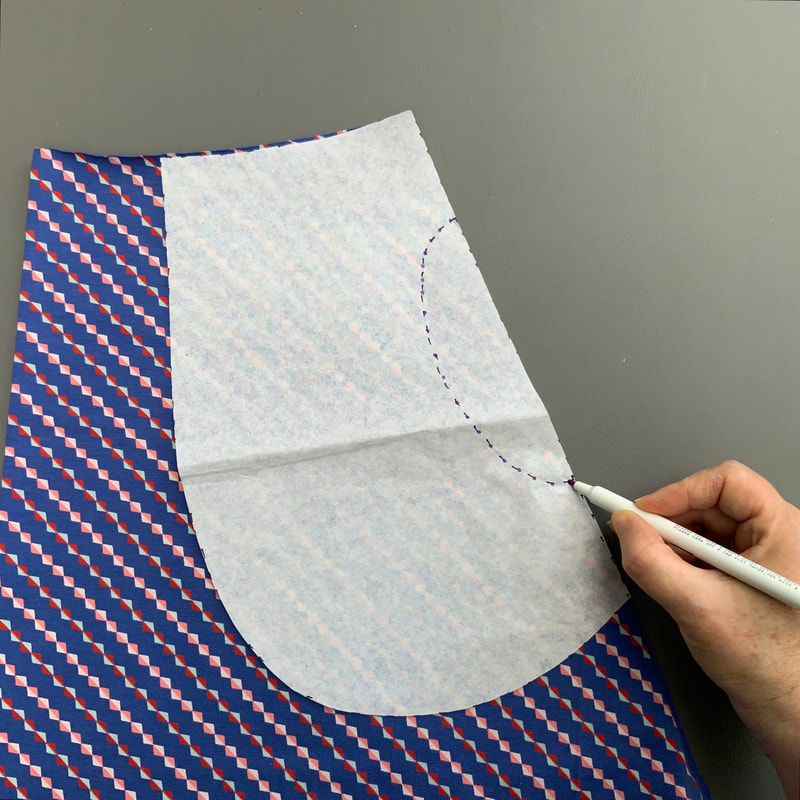
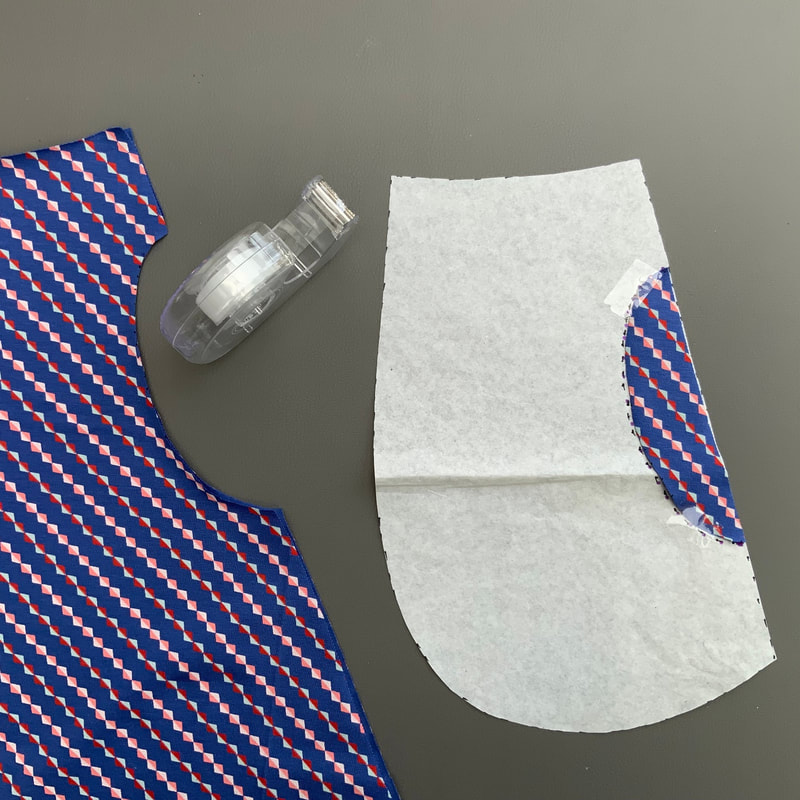
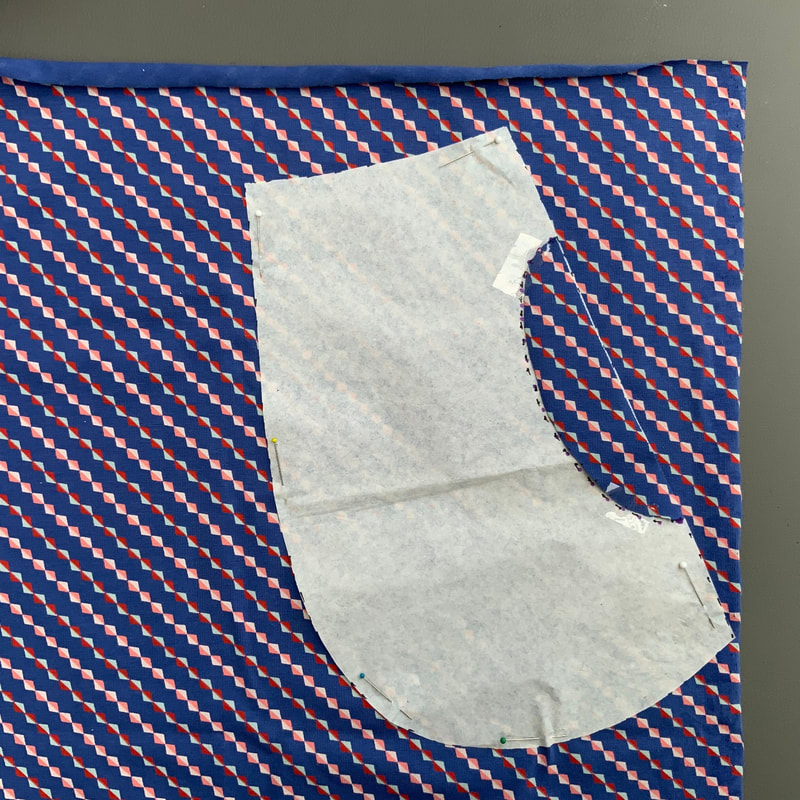
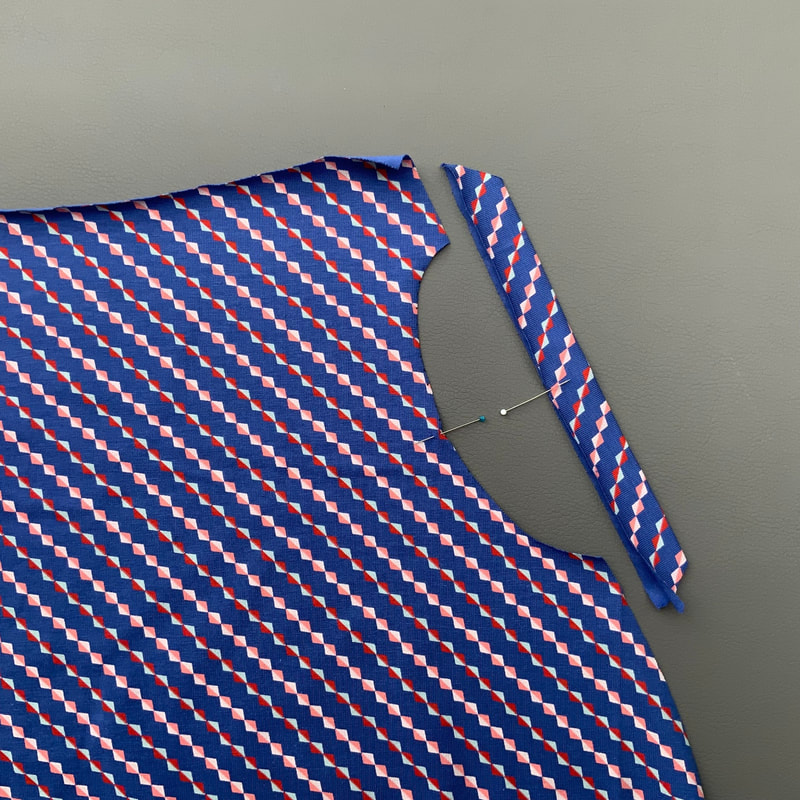
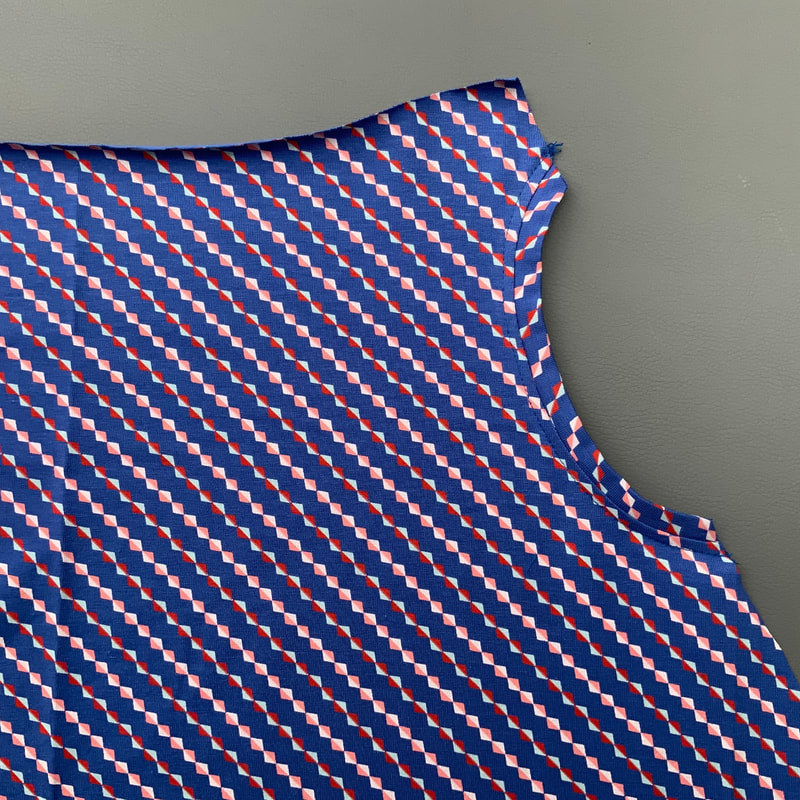
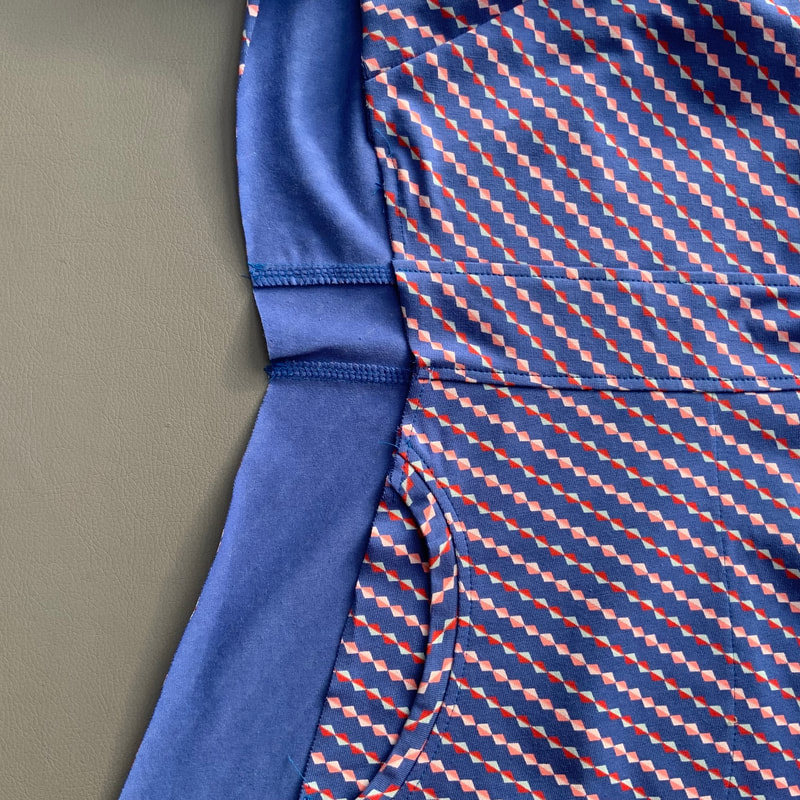
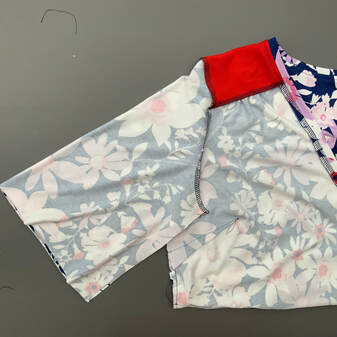
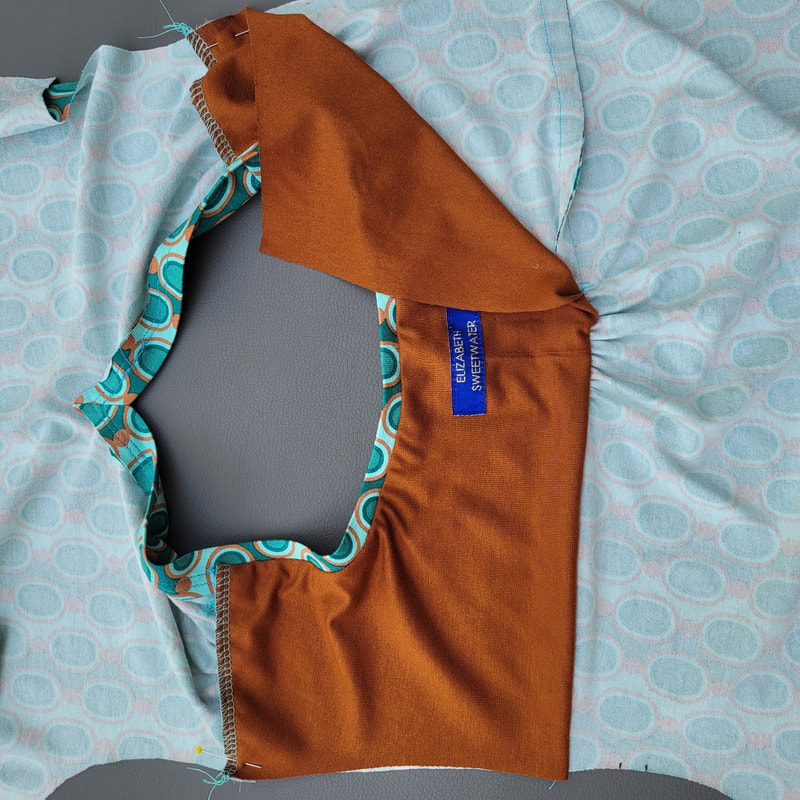
Jurk met aangesloten mouw, overslaghals en steekzakken Dress with fitted sleeve, overlap neckline and inserted pockets
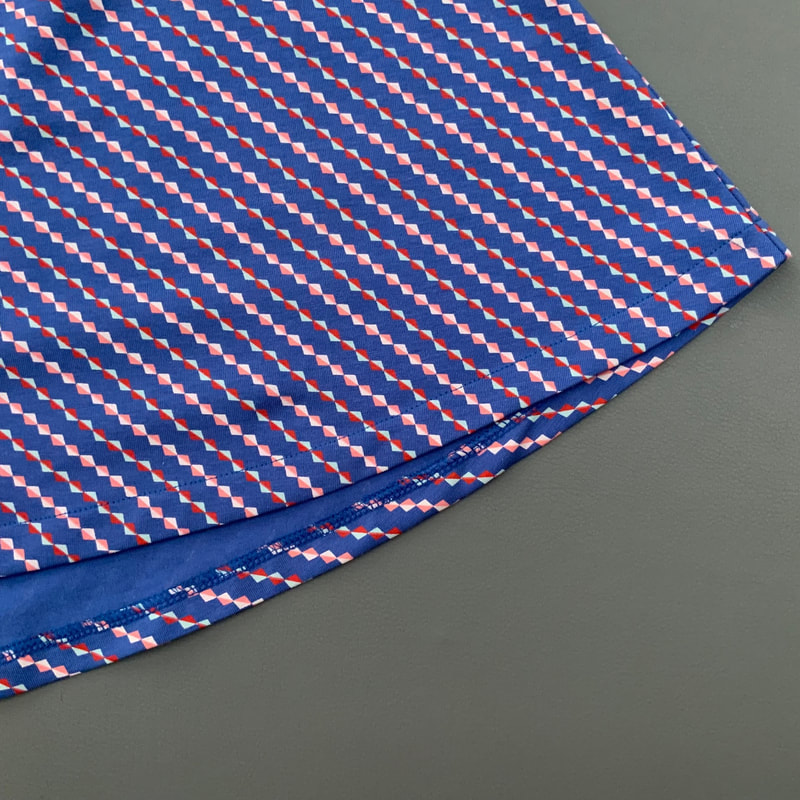
4.
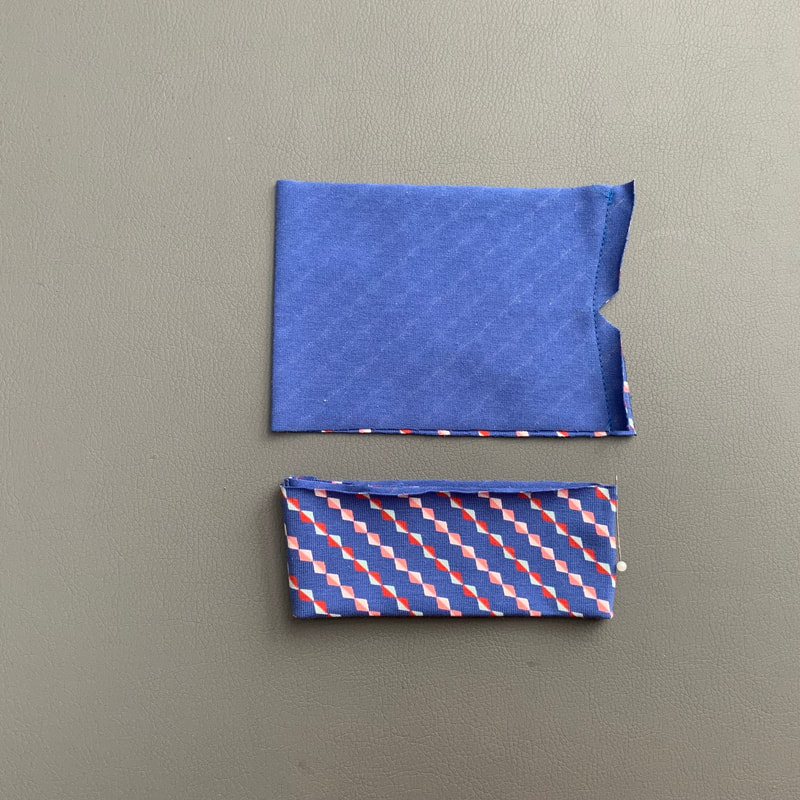
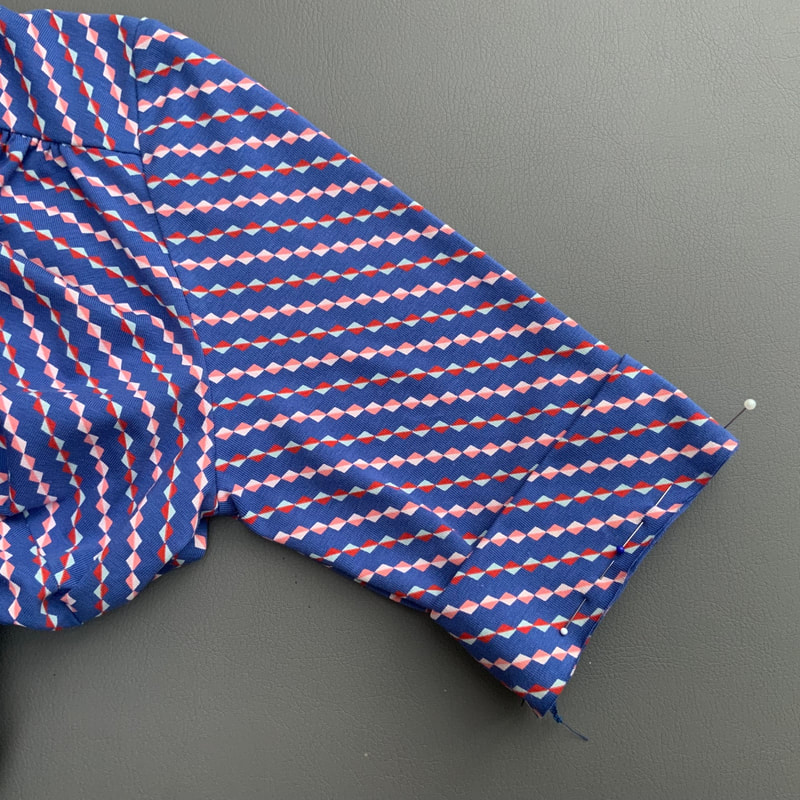
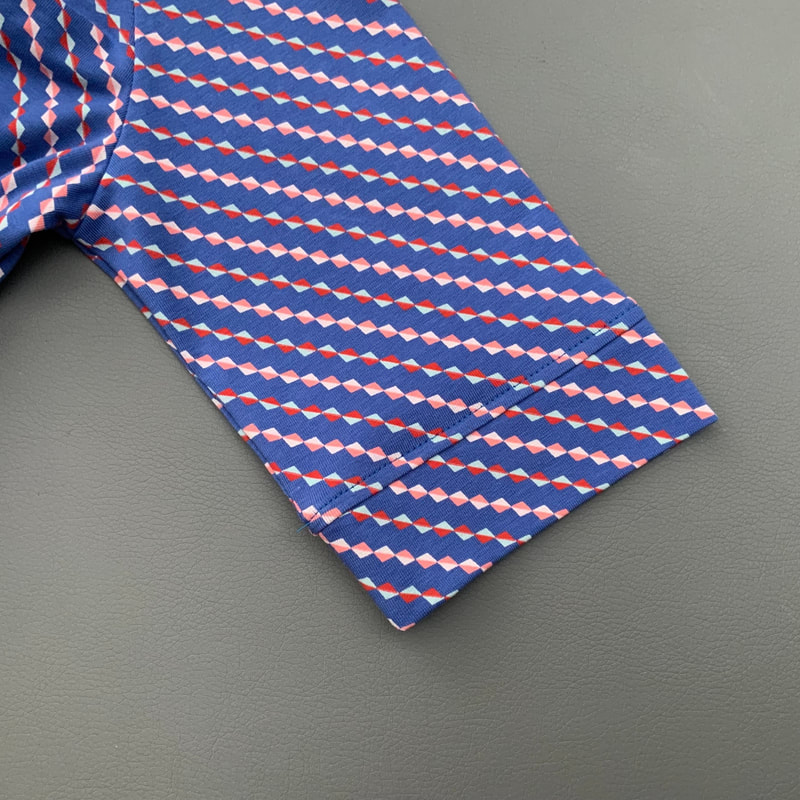
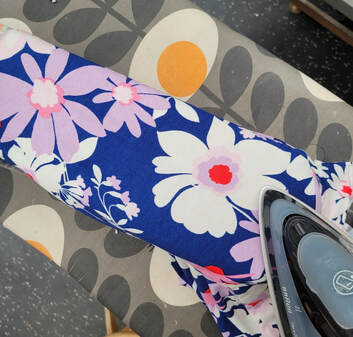
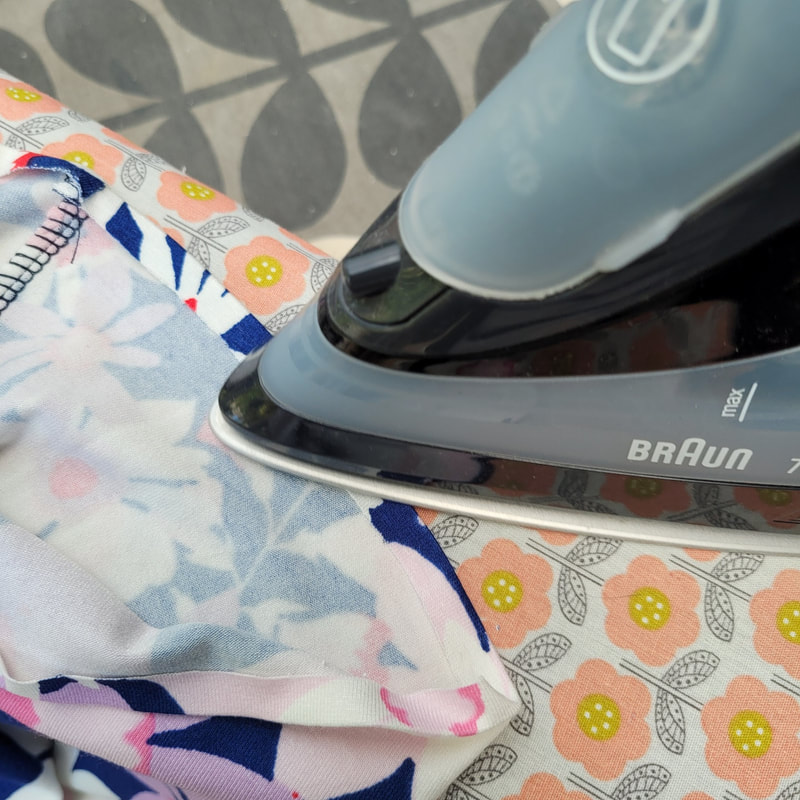
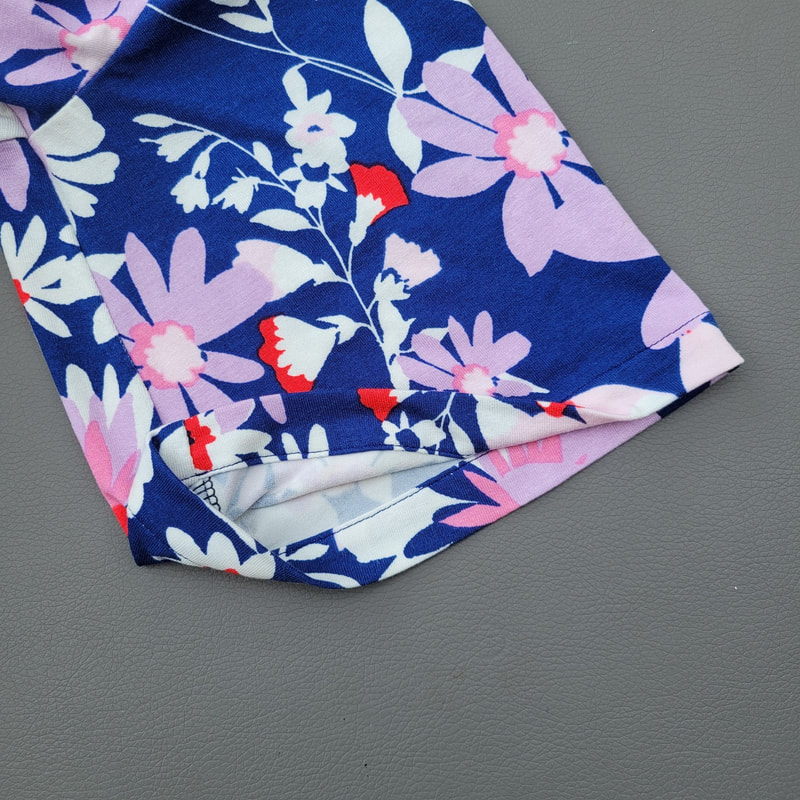
Mouwen en zoom Sleeves and hem
Nu de jurk netjes strijken en ze is klaar!
Give your dress a final press and she's finished!
5.
Uitlopende mouw Flared sleeve
Nu de jurk netjes strijken en ze is klaar!
Give your dress a final press and she's finished!
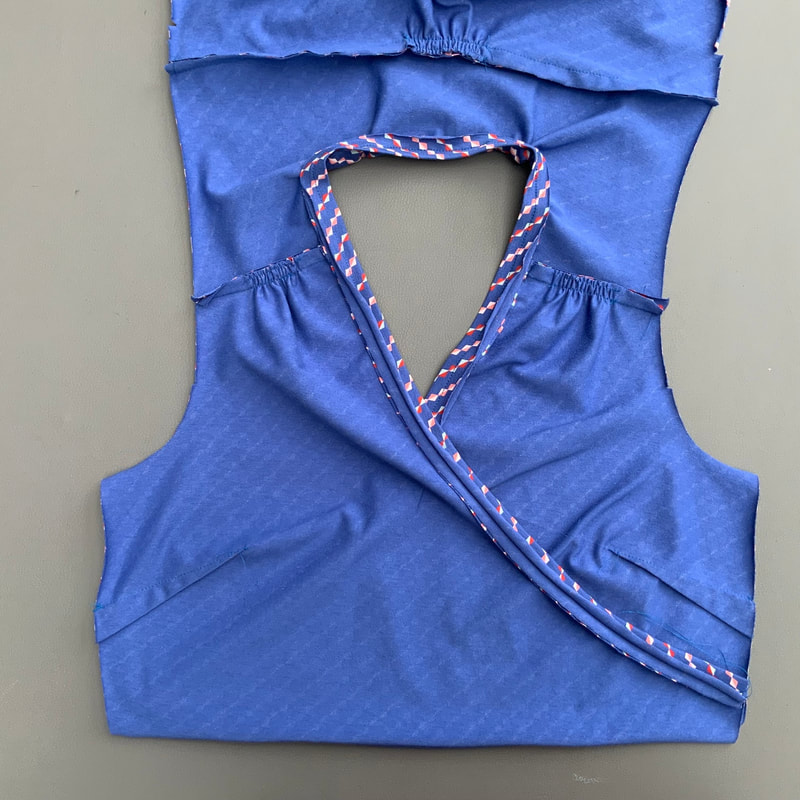
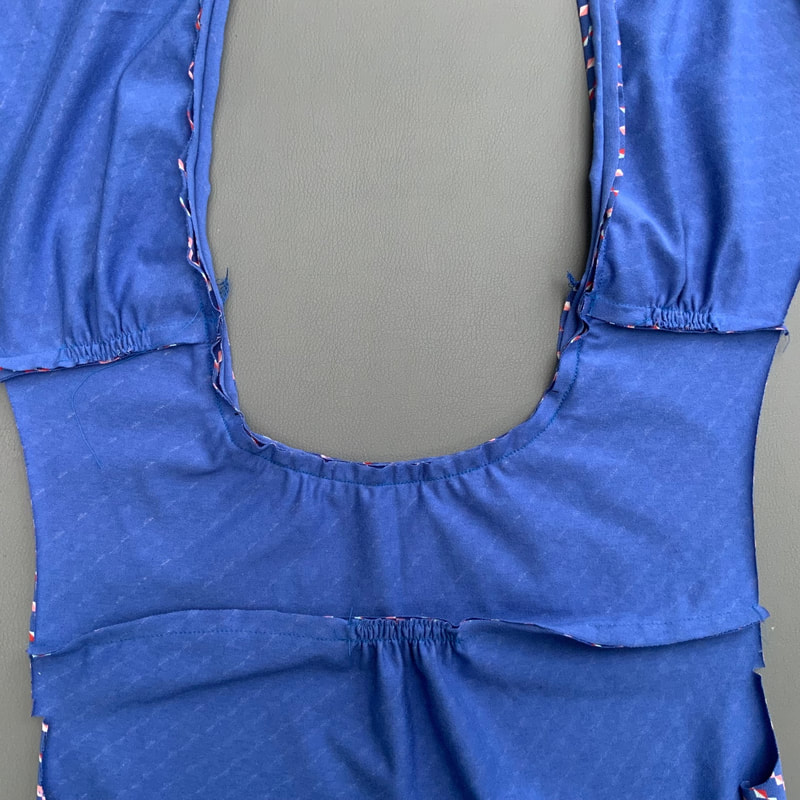
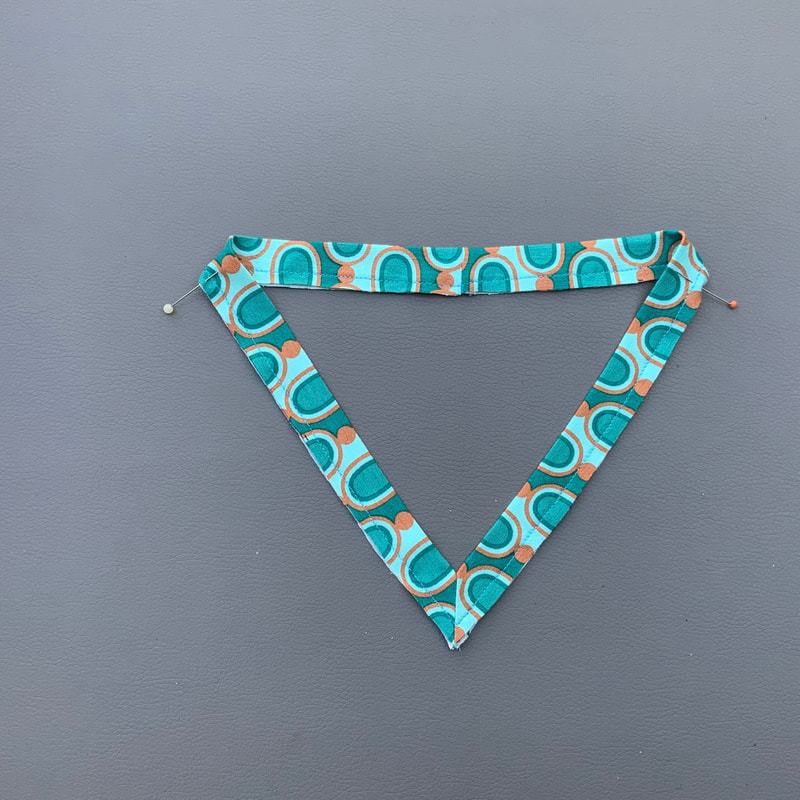
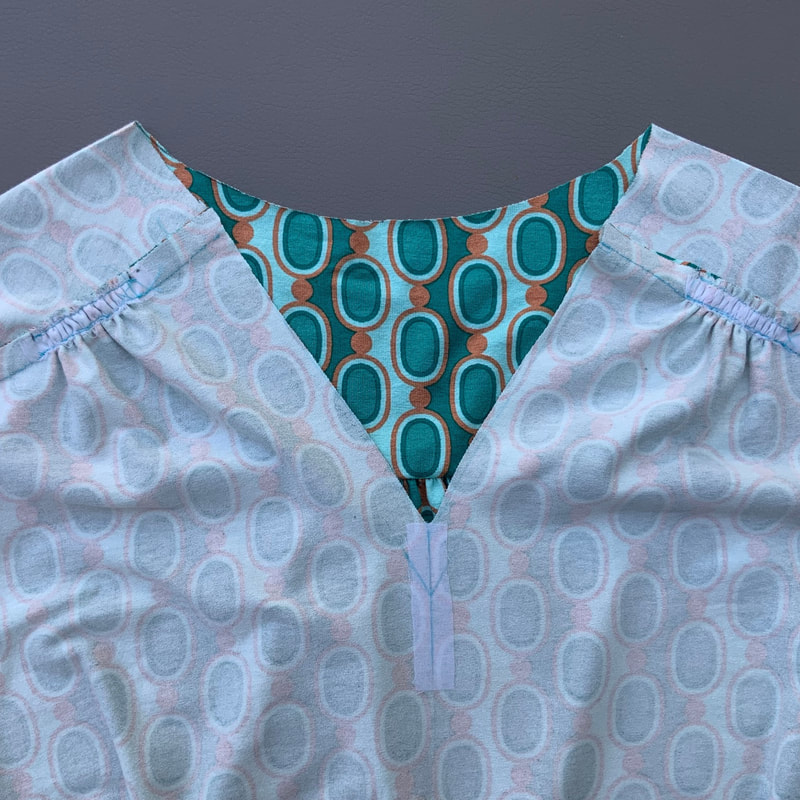
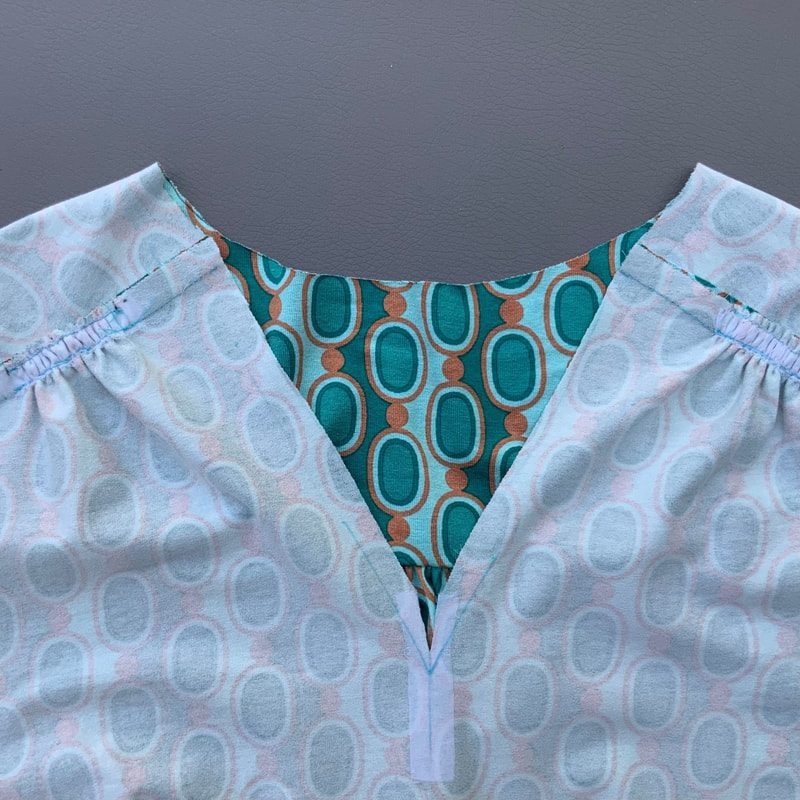
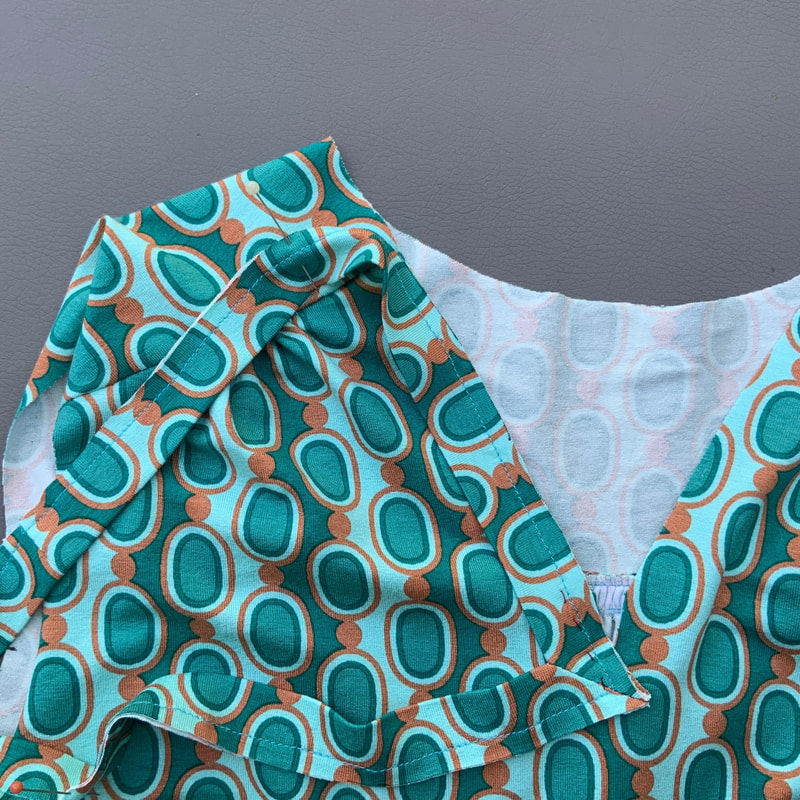
6.
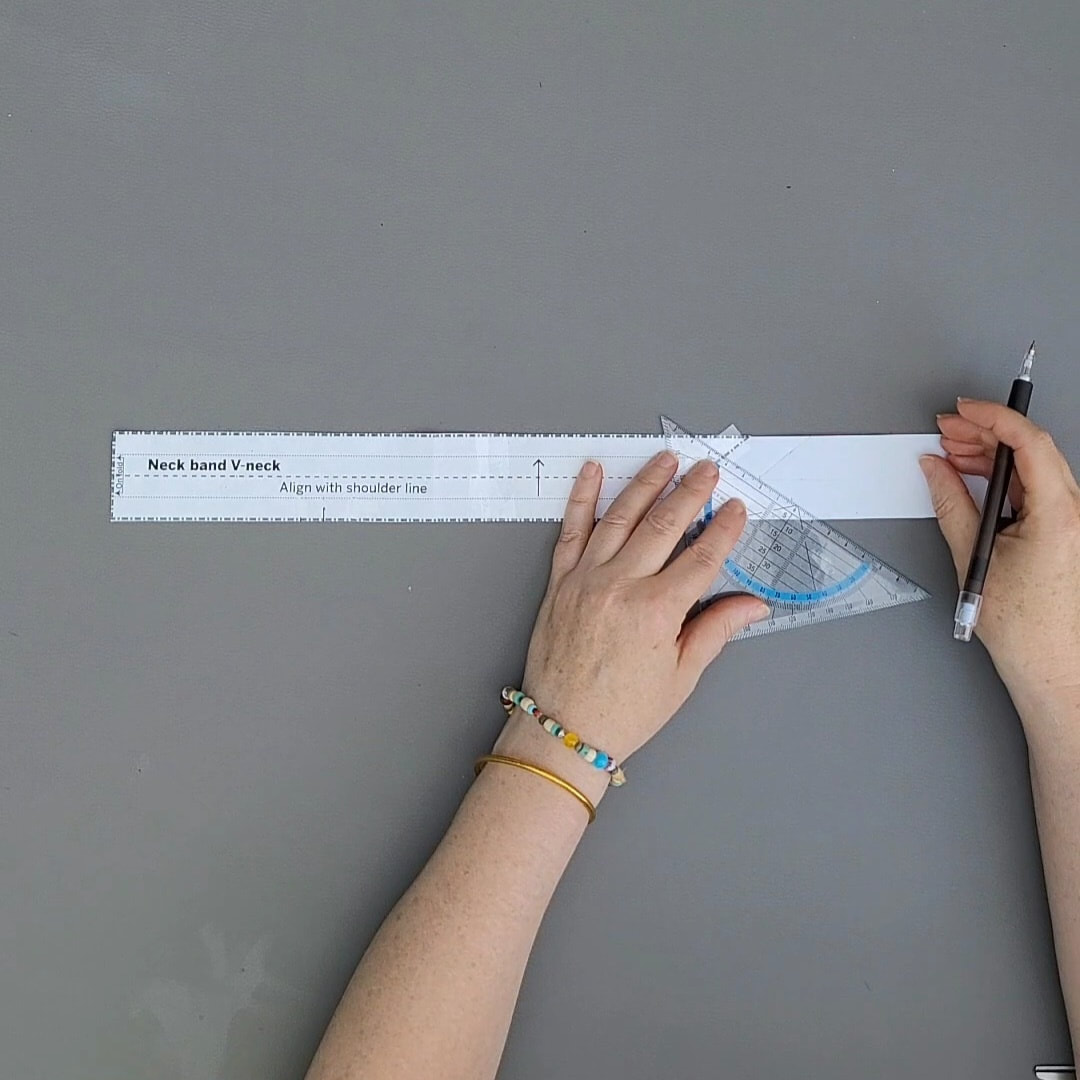
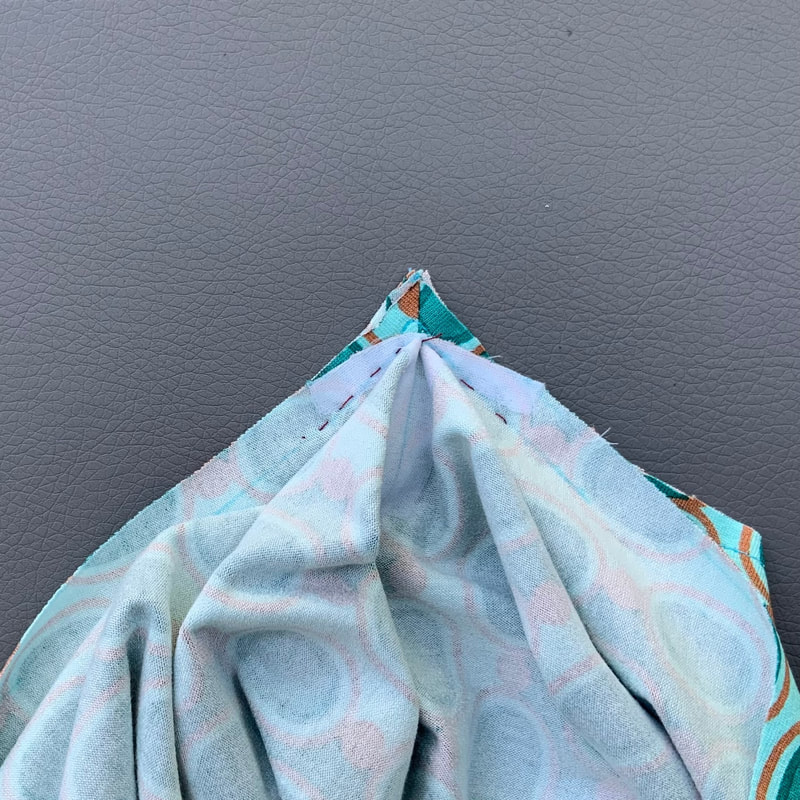
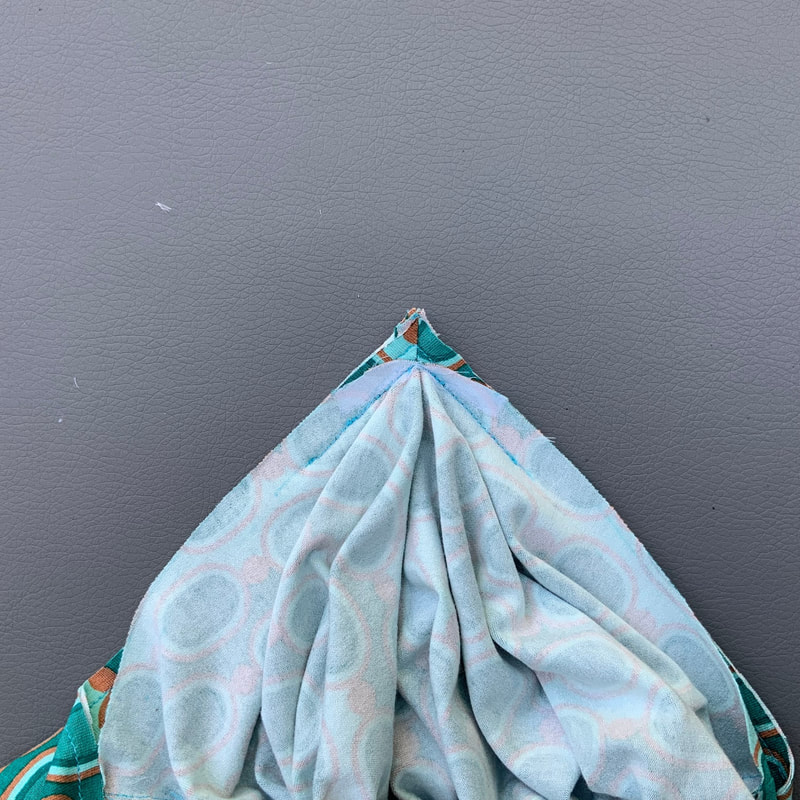
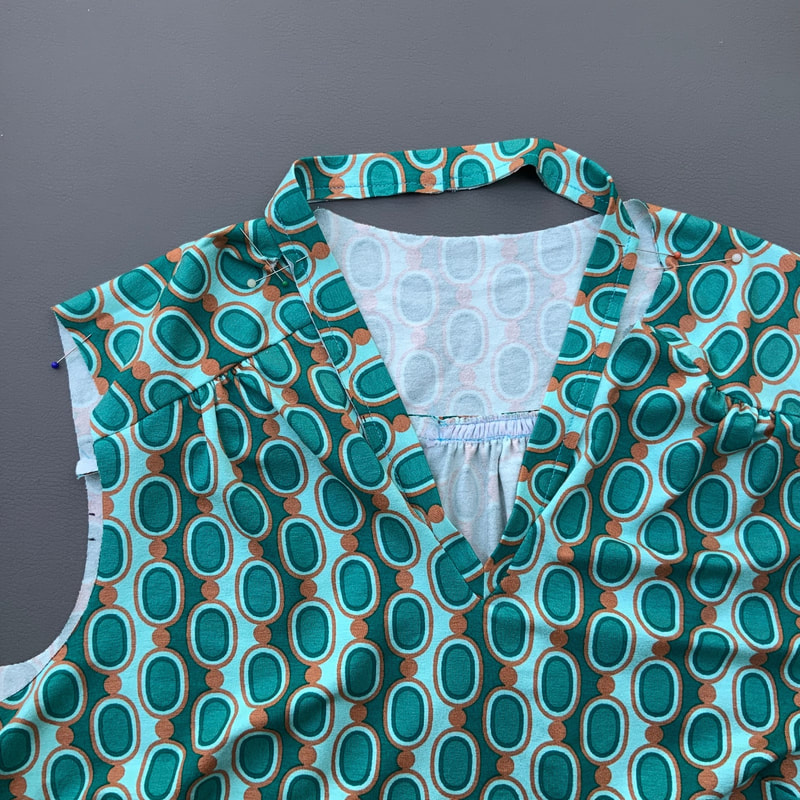
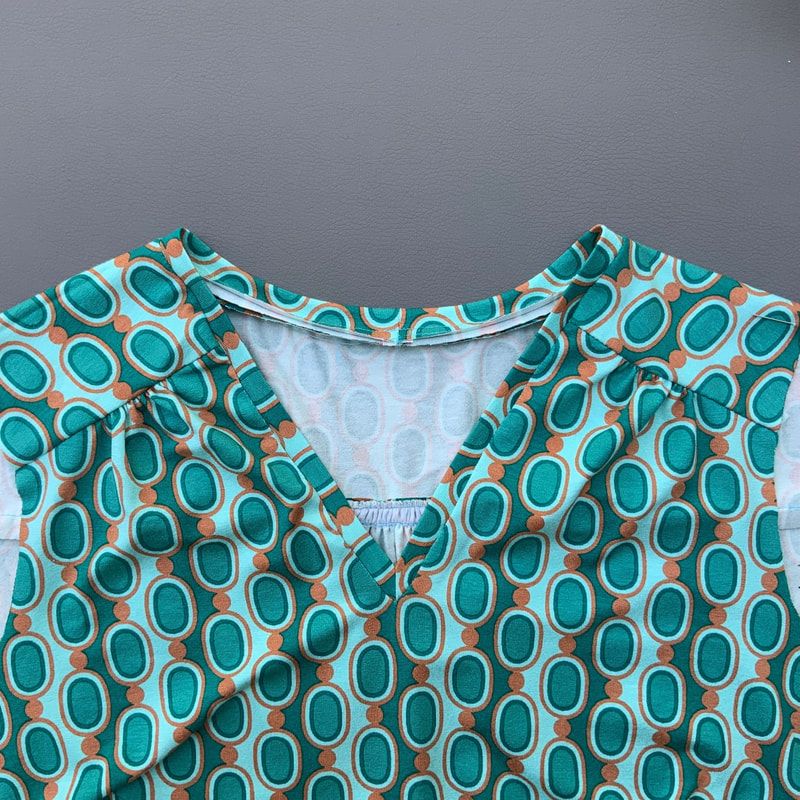
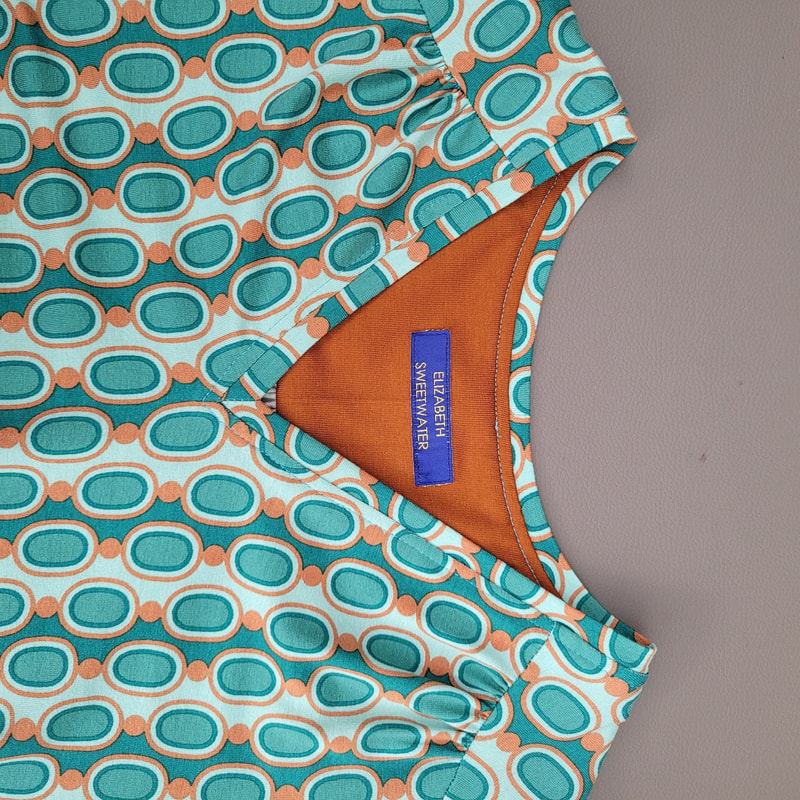
V-hals V-neck
Nu de jurk netjes strijken en ze is klaar!
Give your dress a final press and she's finished!
0 Comments
|
For all the latest patterns to buy visit my Webshop. |