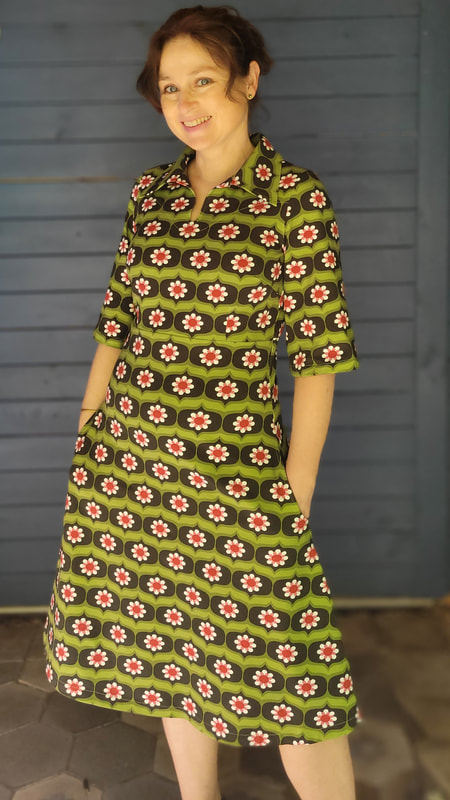
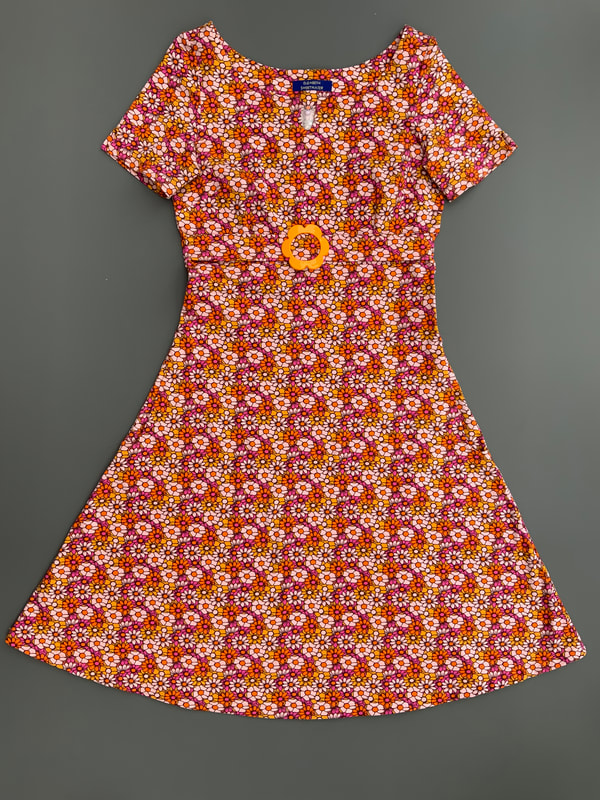
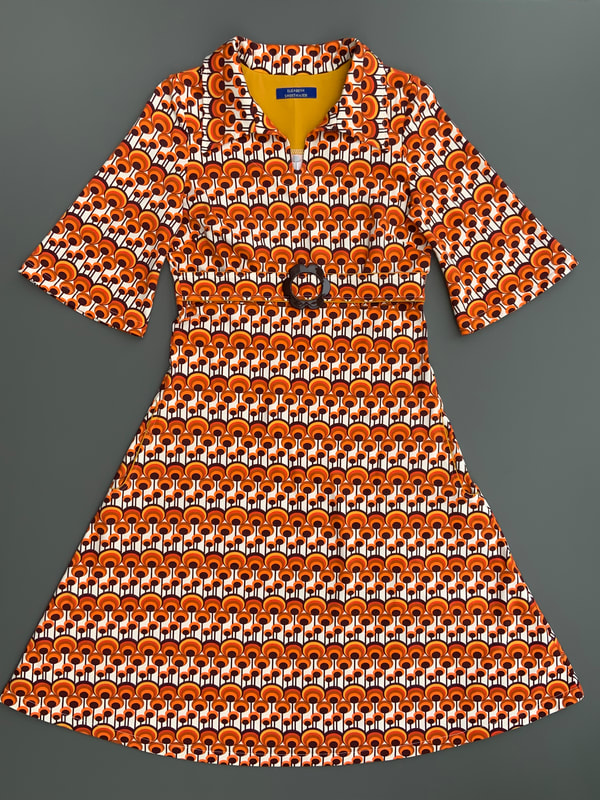
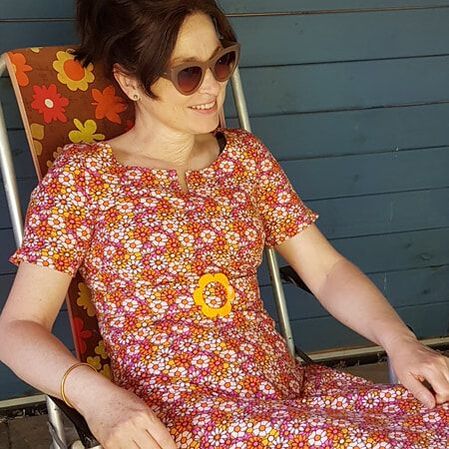
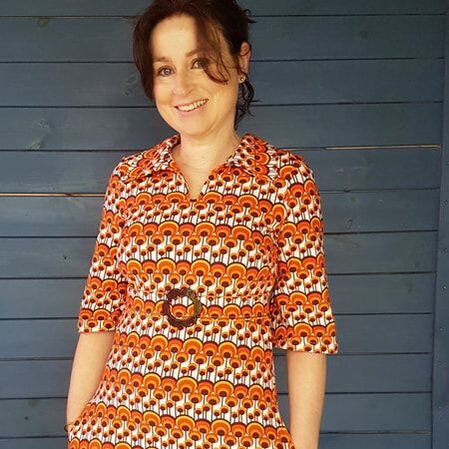
Vakantie Jurk 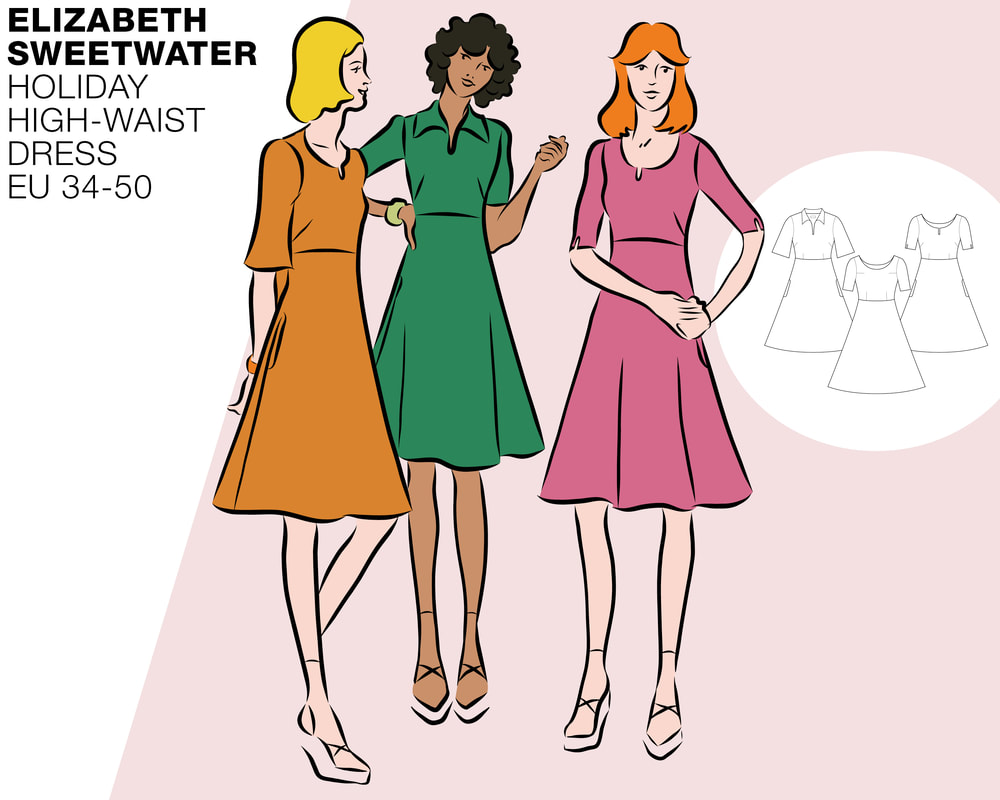 Introductie De holiday dress, die gaat mee in je vakantie koffer! Deze veelzijdige jurk met verhoogde taille is hèt retro jurkje wat nog ontbrak in je garderobe. Zoals altijd zijn er veel verschillende jurkjes te maken met alle toegevoegde details. Je kunt de jurk maken in een uni tricot met piping effect maar in een print komt dit jurkje echt tot z'n recht. Er is de keuze uit verschillende mouwlengtes- en wijdtes en diverse halsvariaties. De jurk heeft een wat uitlopende a-lijn met buste- en taillenaden. Het patroon is geschikt voor diverse soorten jersey zoals een scuba, single jersey, french terry of jacquard jersey. Dit te gekke jurkje ga je vaak maken en dragen! Alle jurken in deze tutorial zijn ingekort tot 100 cm lengte gemeten vanaf de schouder. Het model heeft een lengte van 158cm en draagt maat 36. Alle samples zijn gemaakt met de regular waist optie. Wil je liever wat meer ruimte rond de taille kies dan voor de relaxed waist. Introduction Our holiday dress is the one to pack in your vacation suitcase! This elegant dress with a high waist is a retro dress that can't go missing in your wardrobe. As always, there are many different styles to make with all the added details. You can make the dress in a plain jersey with a piping effect, but this dress really comes into its own in a print. There is a choice of different sleeve lengths and widths and various neck variations. The dress has a slightly flared A-line with bust and waist seams. The pattern is suitable for various types of jersey such as scuba, single jersey, french terry or jacquard jersey. You will often make and wear this awesome dress! All dresses in this tutorial have been shortened to 100cm in length measured from the shoulder. The model is 158cm tall and wears size 36. All samples are made with the regular waist option. If you prefer a little more room around the waist, choose the relaxed fit.
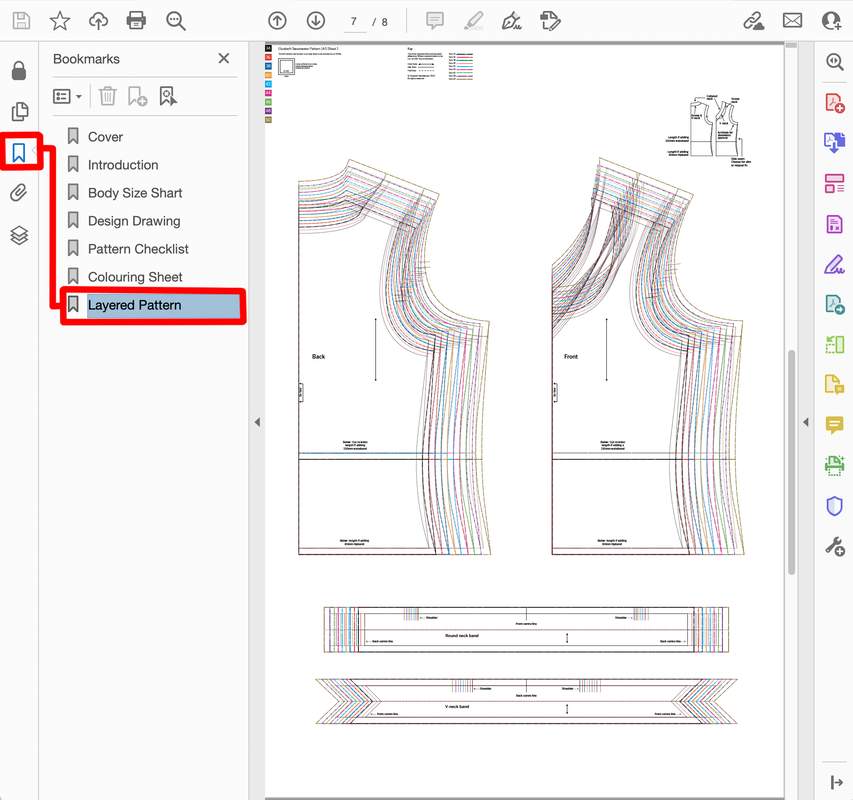
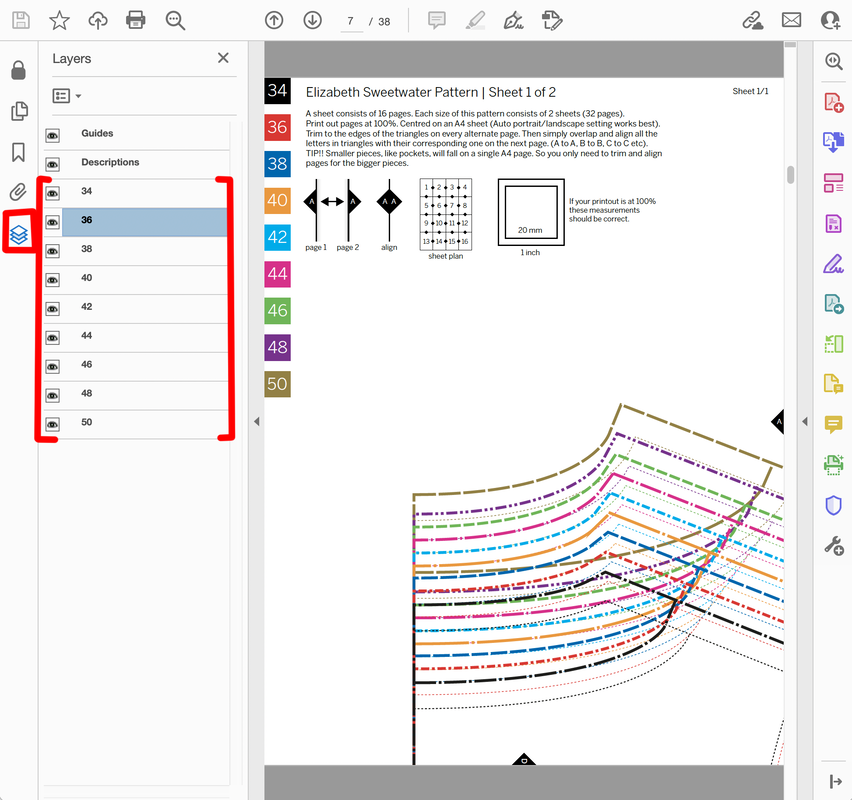
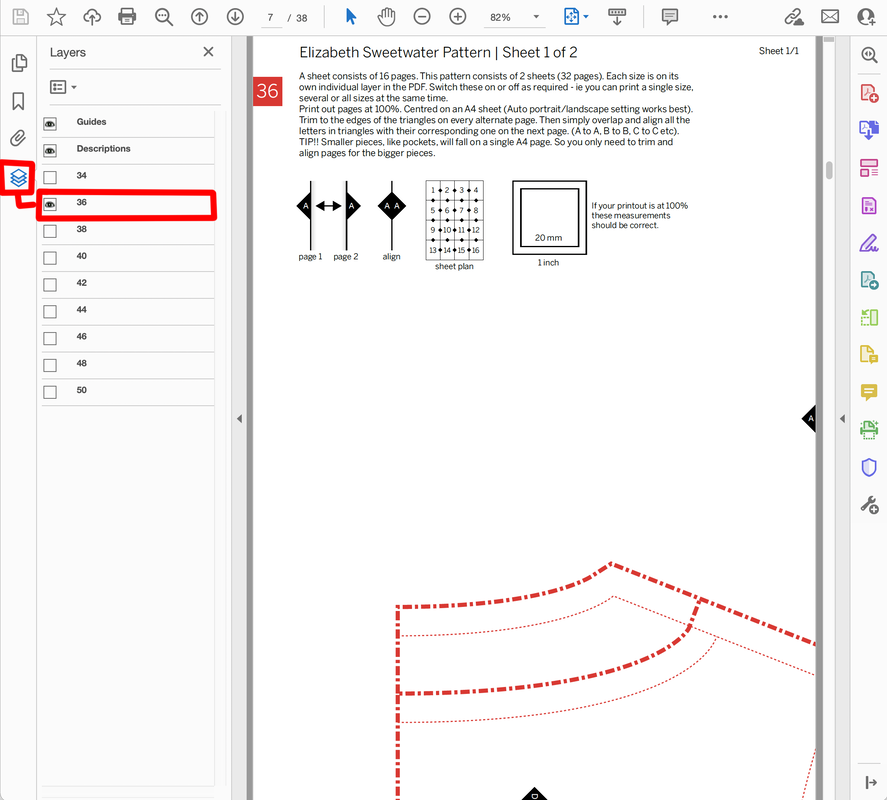
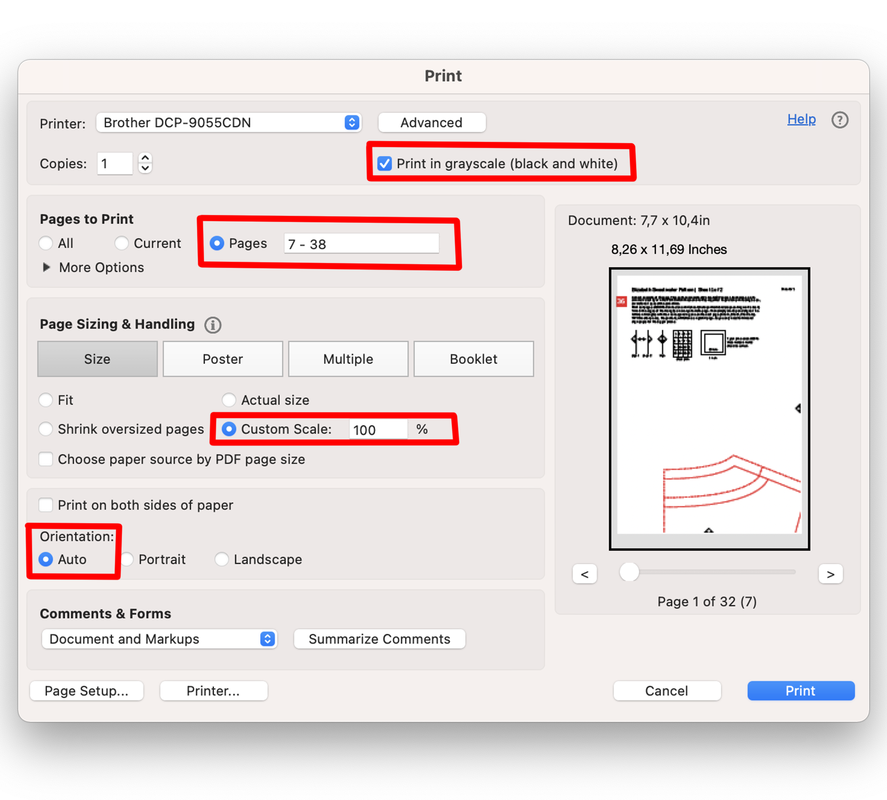
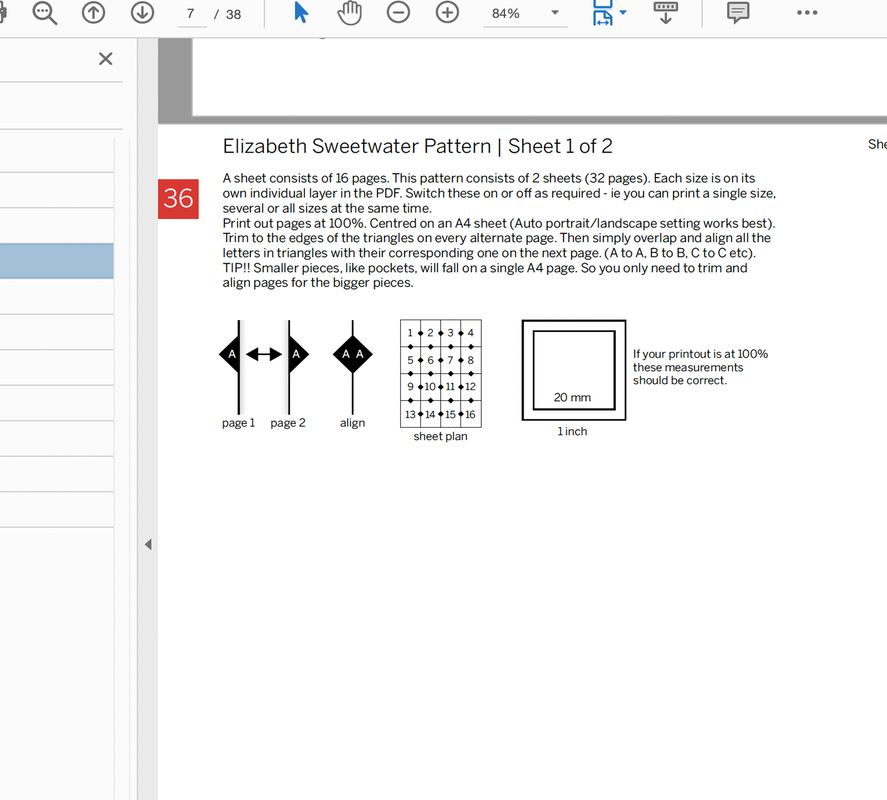
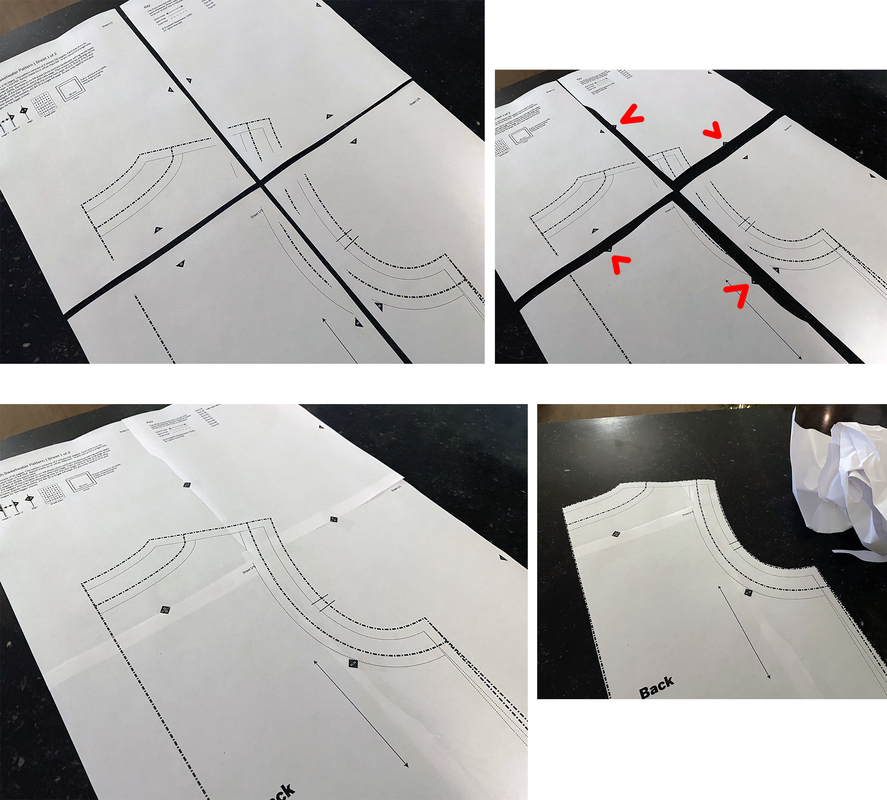
1. Voorbereiding Preparation Bij aankoop van een van onze patronen ontvangt u 3 PDF-bestanden: een voor thuisprinters om op A4-papier af te drukken, een tweede voor A0-gebruikers om af te drukken in een printshop en een derde is voor mensen die een overheadprojector gebruiken. De volgende algemene introductietekst geeft een overzicht van hoe onze patroon-pdf's zijn opgezet en legt uit hoe je de A4-versie kunt afdrukken en hoe je de pagina's aan elkaar kunt plakken. A0-gebruikers kunnen bij hun printshop aangeven welke pagina's ze nodig hebben. Op de projector bestanden staan alle panden in dezelfde richting. On purchasing any of our patterns you will receive 3 PDF files: one for home printers to print on A4 paper, a second at A0 is for printshop users and a third is for sewers who use an overhead projector. The following general introduction text provides an overview of how our pattern pdfs are set up and explains how to print out the A4 version and how to stick the pages together. A0 users should simply instruct their printshop which pages they require. Projector users will note that all pieces have the grain direction facing the same way.
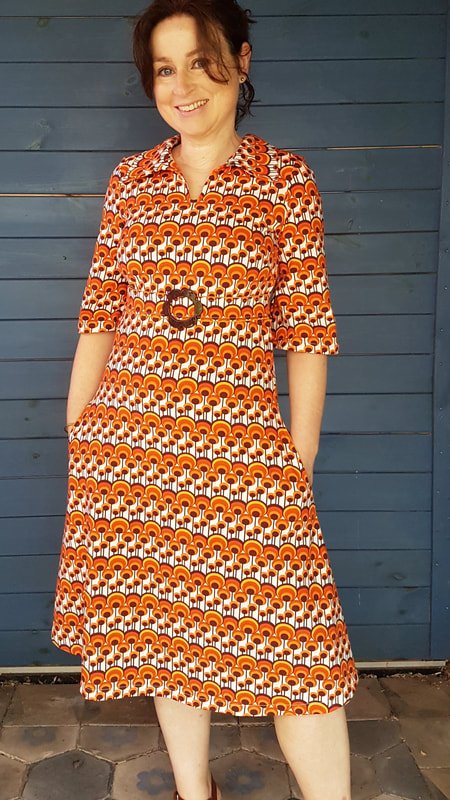
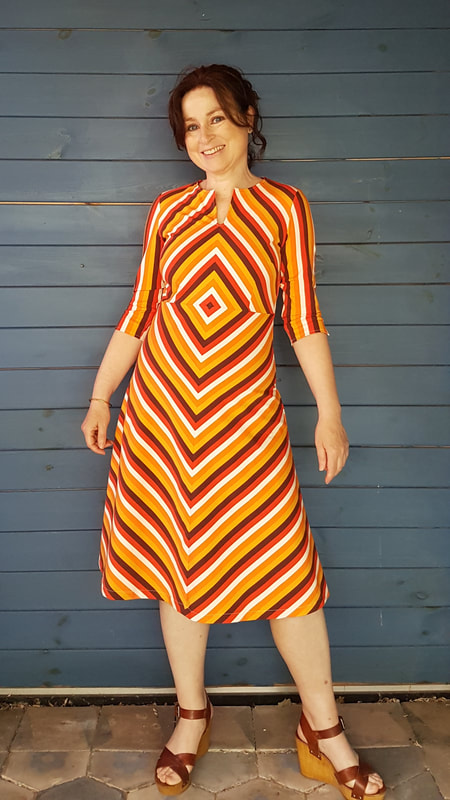
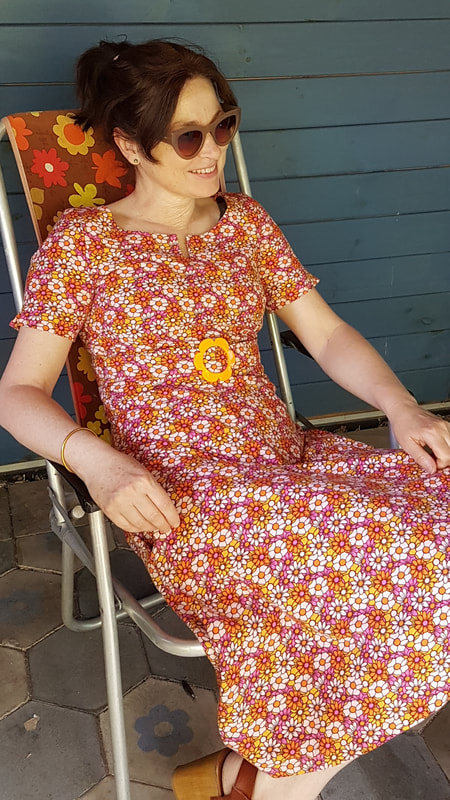
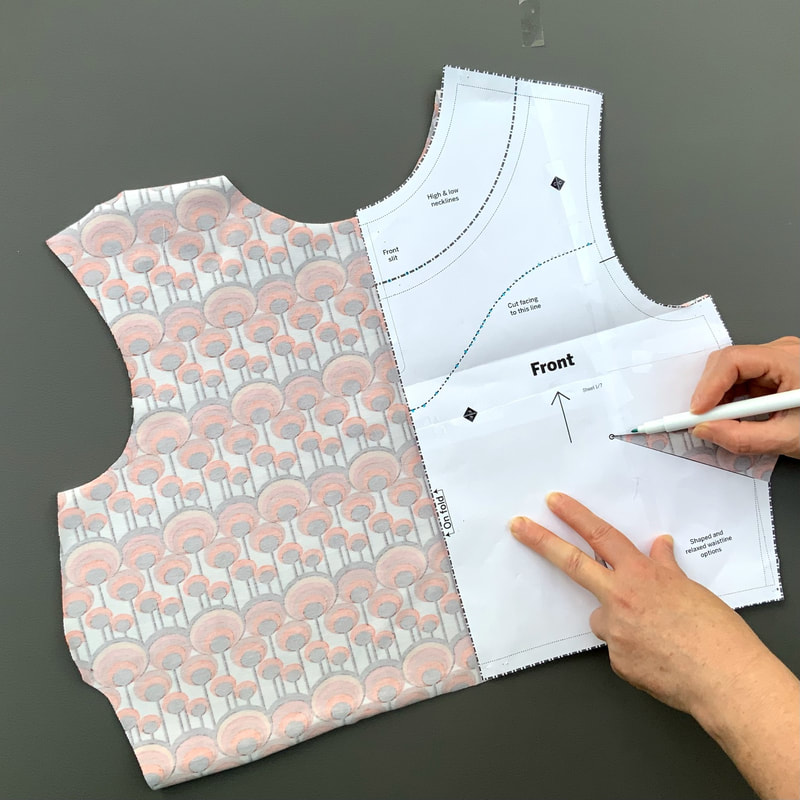
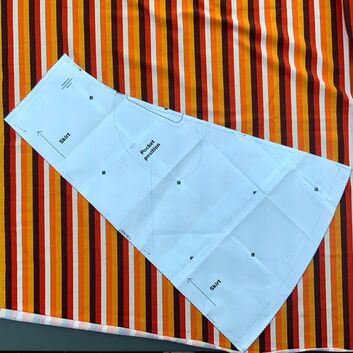
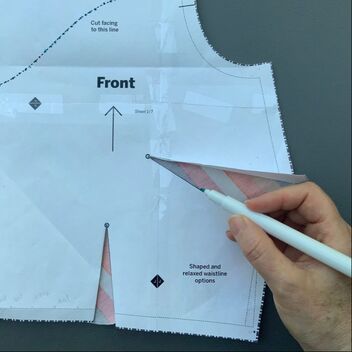
1g. Raadpleeg het onderstaande overzicht van alle modellen om je voor te bereiden op het uitknippen van de door jou gekozen stof. Consult the overview of all styles below to prepare yourself for the next stage of cutting out the pieces from your chosen material. Er zijn verschillende variaties mogelijk maar de basis van de jurk is voor alle modellen gelijk. Voor elke van de stylen zie hier beneden om te beginnen. There are several variations possible but the base of the dress is for all styles the same. For all of the style options see below to choose where to begin. Style A Vakantie jurk met diepe halslijn en korte mouw Holiday dress with deep neckline and short sleeve Volg stappen 4 & 5 / Follow steps 4 & 5
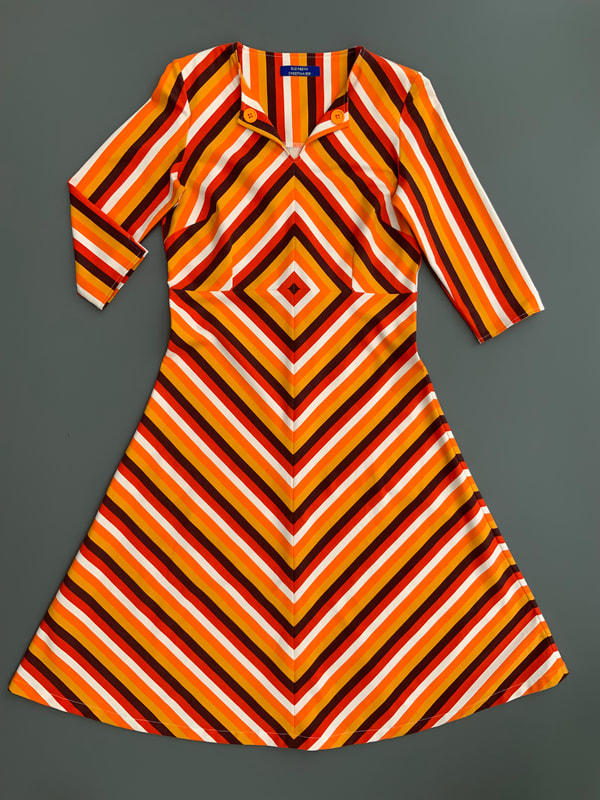
Style B Vakantie jurk met hoge halslijn en flare mouw Holiday dress with high neckline and flared sleeve Volg stappen 6 & 7 / Follow steps 6 & 7
Style C Vakantie jurk met hoge halslijn en 3/4 mouw Holiday dress with high neckline and 3/4 sleeve Volg stappen 8 & 9 / Follow steps 8 & 9
2. Opmerkingen en algemene Aanpassingen Remarks and common Adjustments Tips Ik adviseer om eerst een proefmodel te maken voor je in een dure stof knipt. Ga bij een jurk uit van je bovenwijdte, de taille en heupwijdte zijn eenvoudig aan te passen door in de zijnaden iets weg te nemen of toe te voegen. De taille is het smalste deel van het rokpand. De heup is ongeveer 18/20 cm onder de taille. I recommend making a test model before cutting in expensive fabric. With a dress, start from your bust, the waist and hip width are easy to adjust by removing or adding something in the side seams. The waist is the narrowest part of the skirt. The hip is approximately 18/20 cm below the waist. 2a. Het aanpassen van taille en heup Adjusting waist and hip
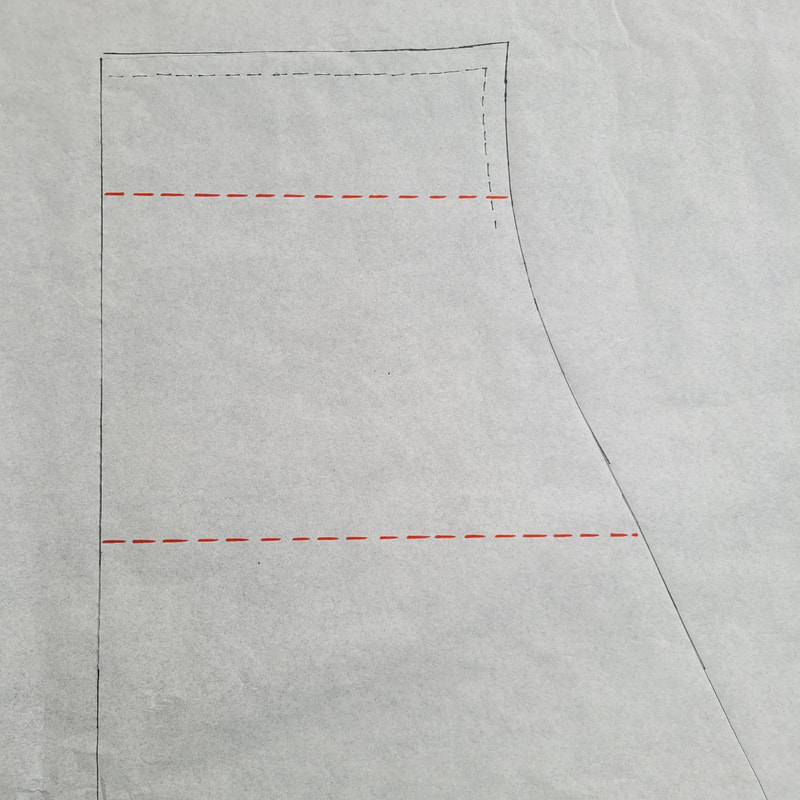
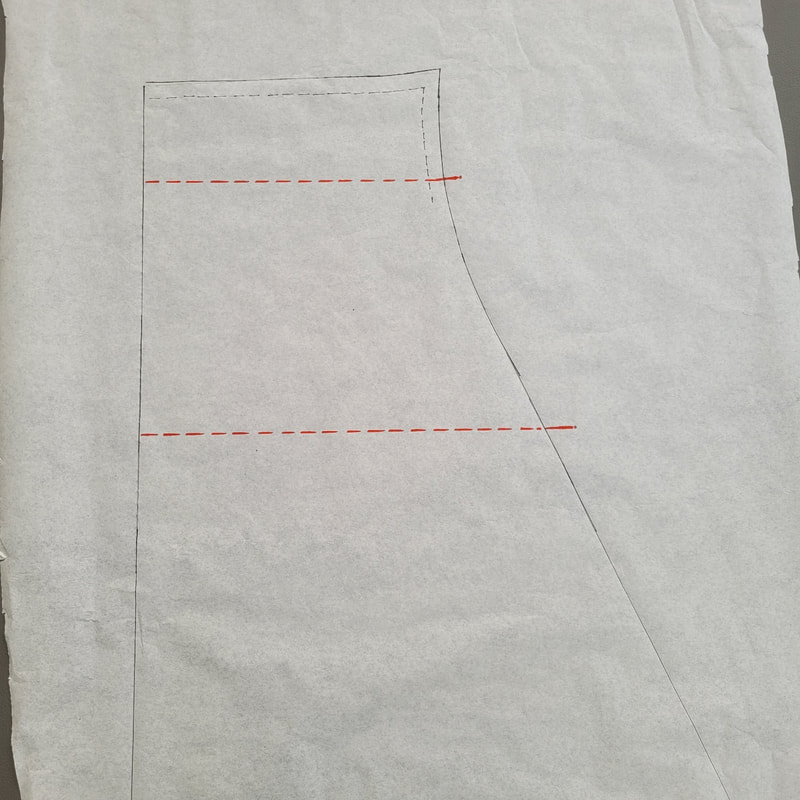
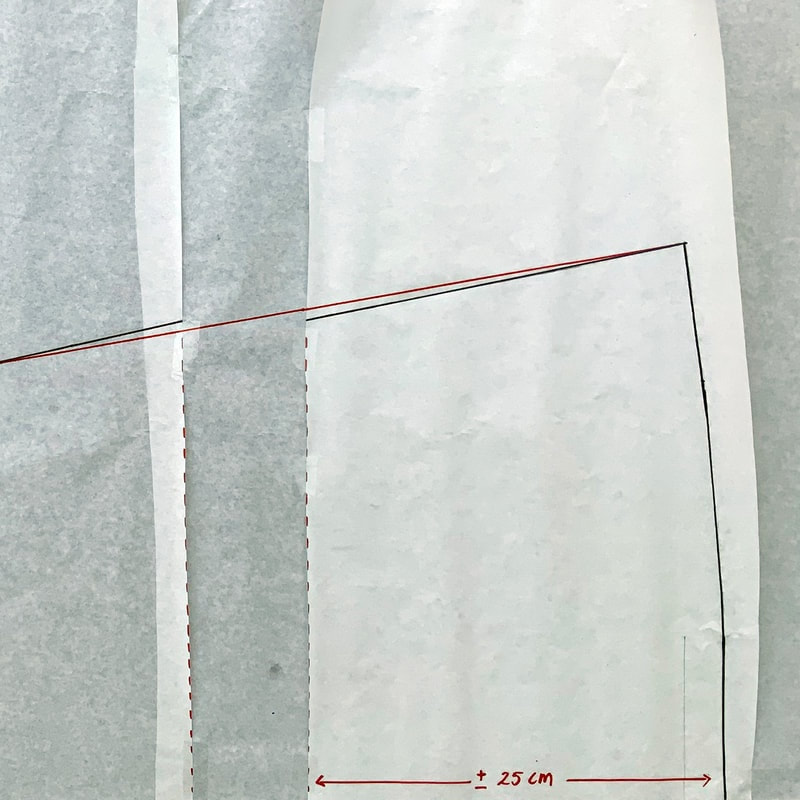
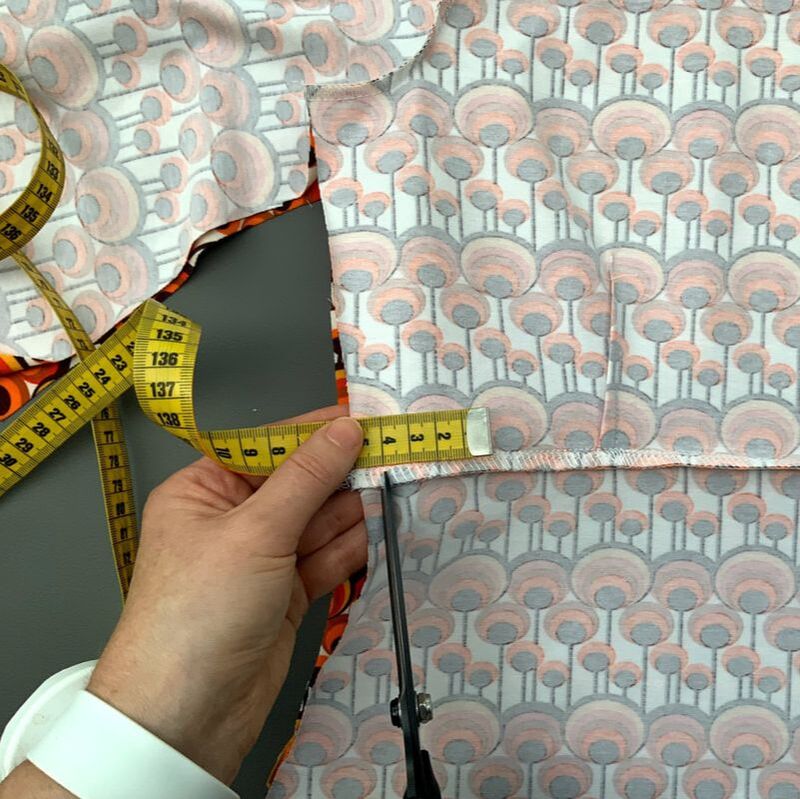
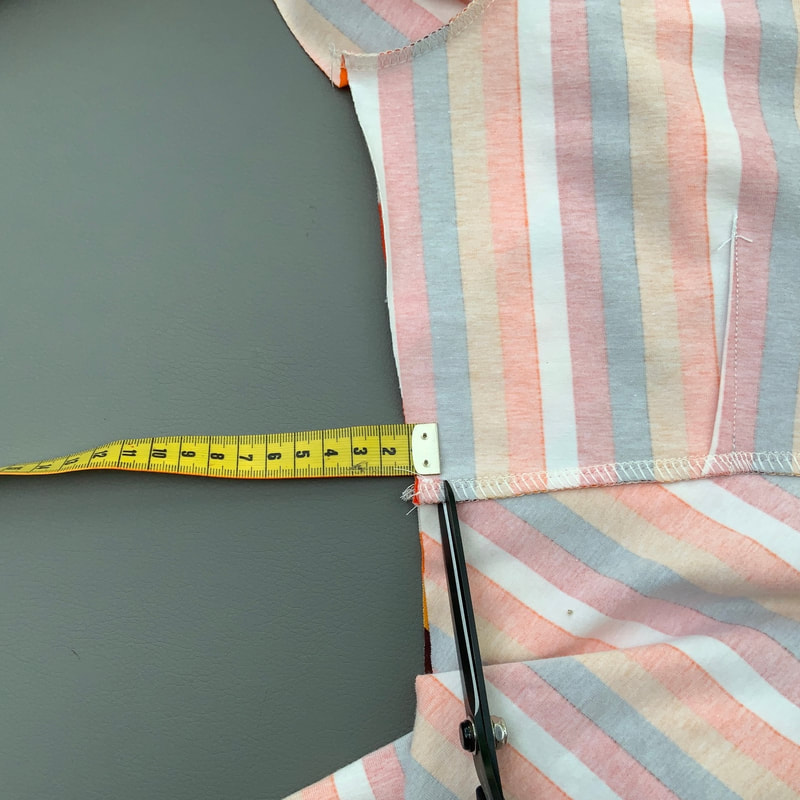
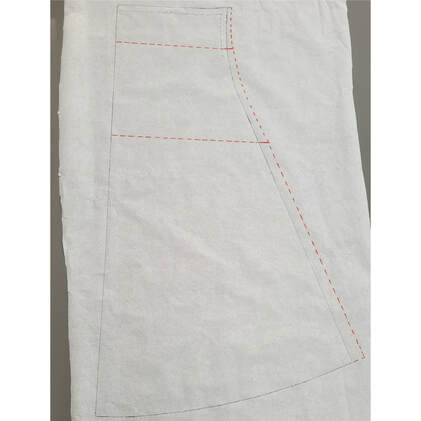 2a-3 Verbind nu de nieuwe taille en heup met elkaar en trek vanaf de heuplijn een rechte lijn naar de onderkant. De onderwijdte zal wijder worden. Meet de bovenkant van het rokdeel en maak de onderkant van het bovenstuk ietsje wijder zodat de rok netjes op het bovenstuk past. Heb je juist smalle heupen te opzichte van de taille? Dan hoef je niet de heup te versmallen, de rok zal wat losser vallen. Now connect the new waist and hip to each other and the new hip to the bottom in a straight line. The bottom will become a bit wider. Measure the top of the skirt part and widen the bottom of the top part slightly so that the skirt fits neatly on the top part. Do you have narrow hips in relation to the waist? Then you don't have to narrow the hip, the skirt will fall a bit looser. 2b. Het verlengen en verkorten van de jurk Lengthening and shortening the dress
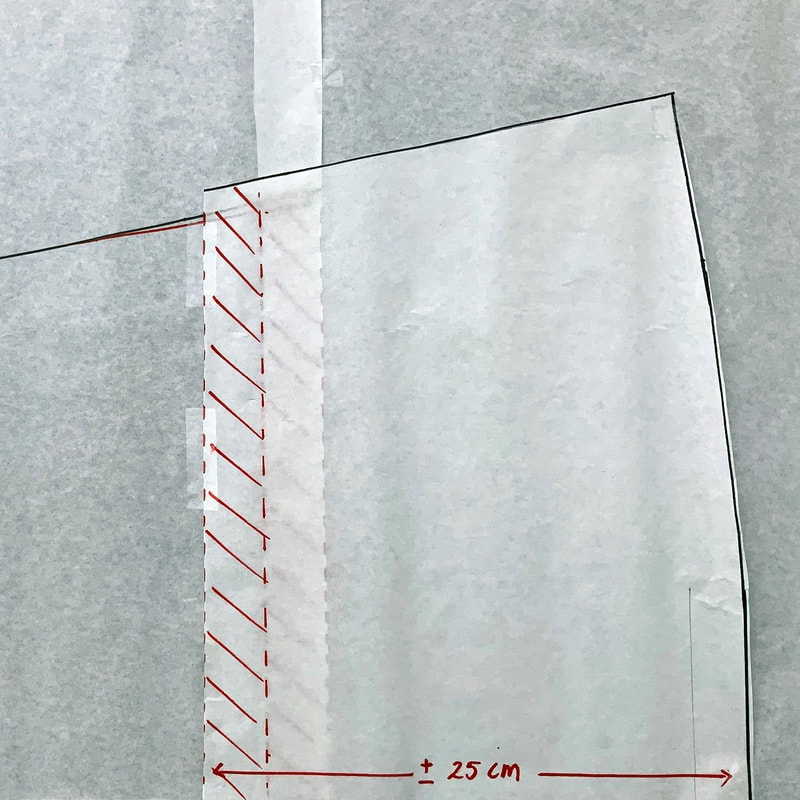
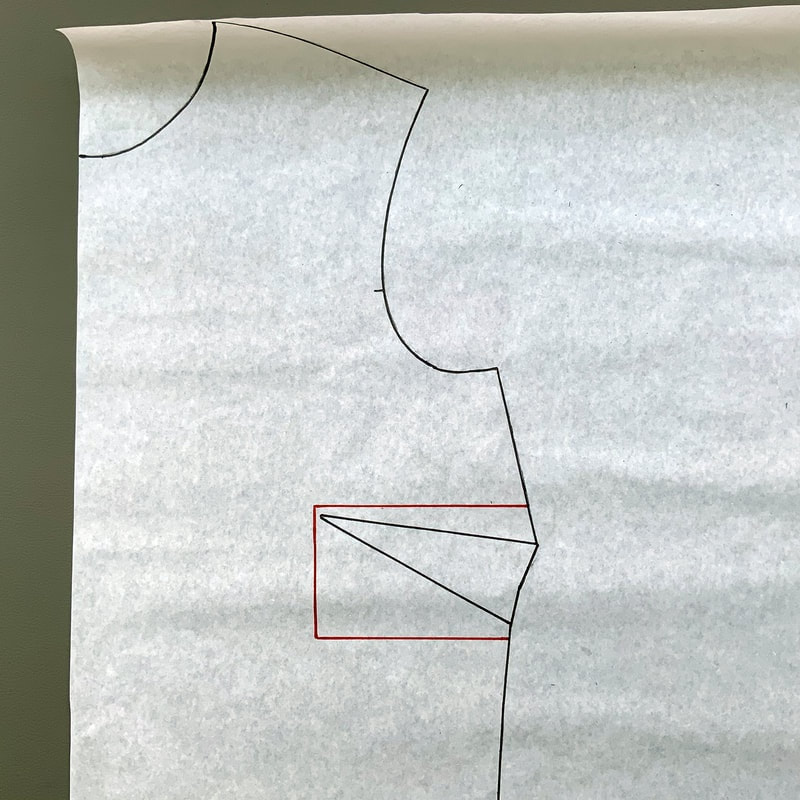
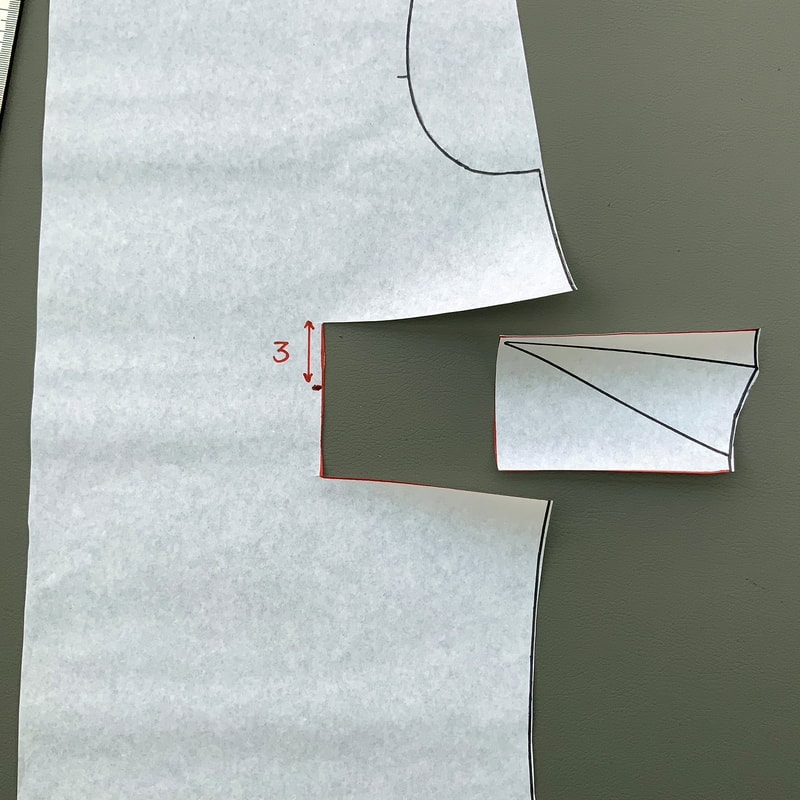
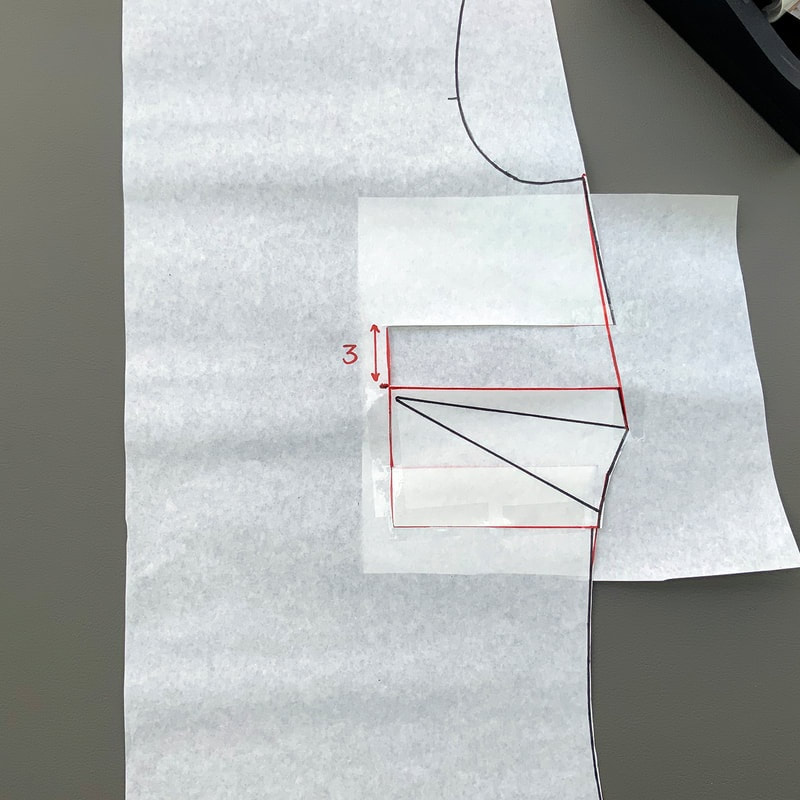
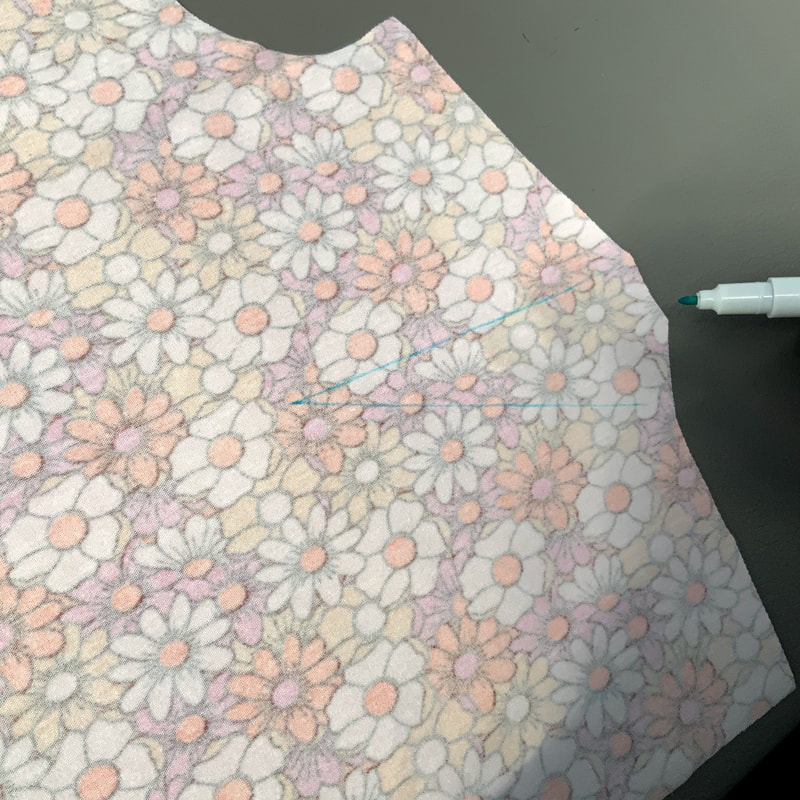
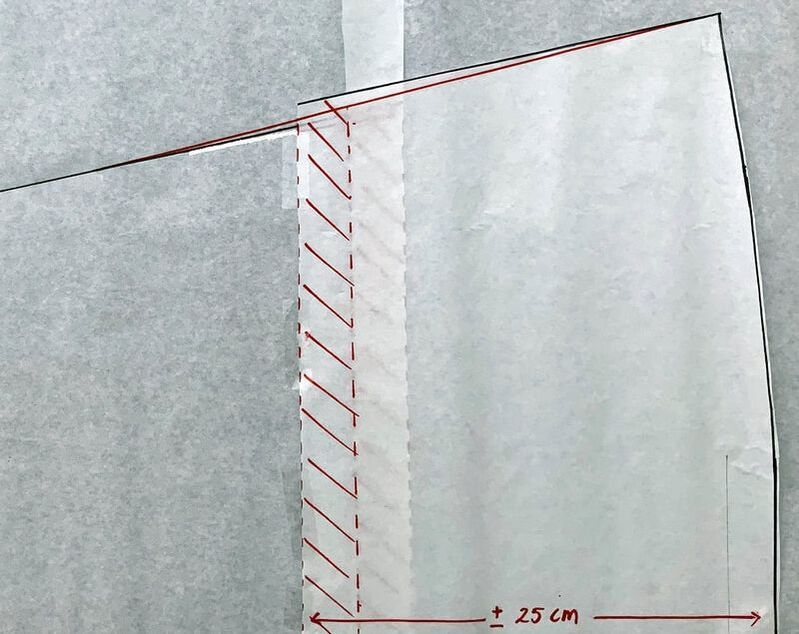 2b-3 Om te verkorten verdeel je de te verkorten afstand over de delen en plak je ze over elkaar. Teken de zijnaden opnieuw in volgens de afbeelding. To shorten, divide the distance to be shortened over the two parts and stick them over each other. Draw the side seams again according to the picture. 2c. Het verlagen van de bustenaad The lowering of the bustdart
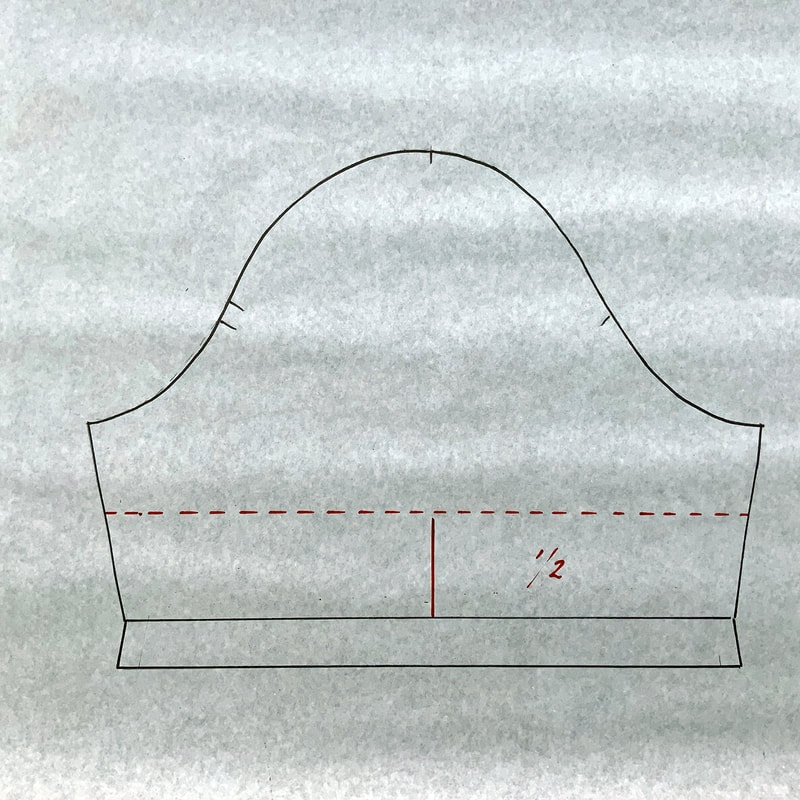
2d. Het tekenen van een mouwboord Drafting a cuff
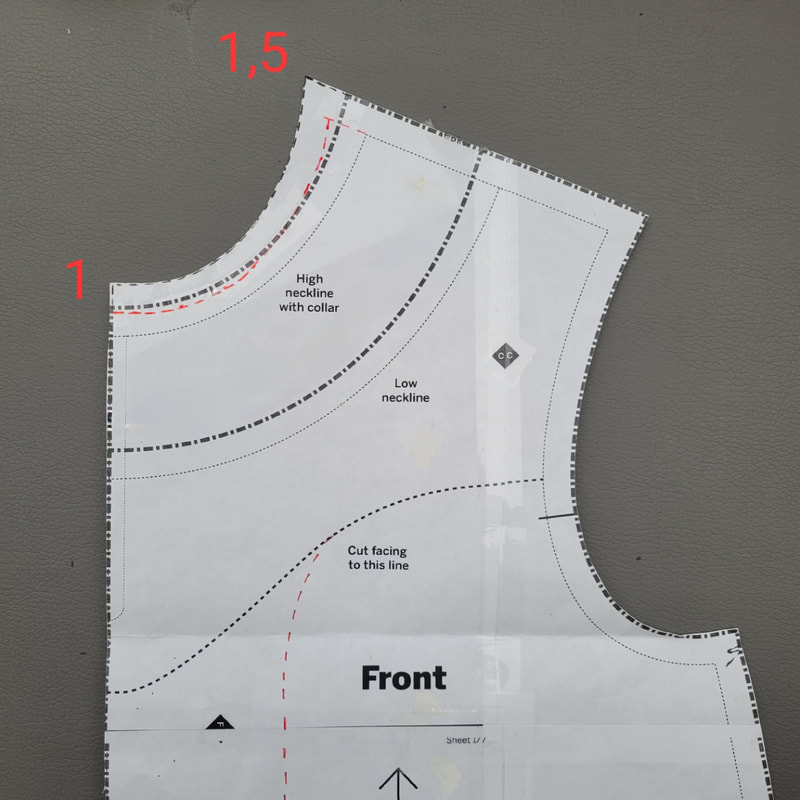
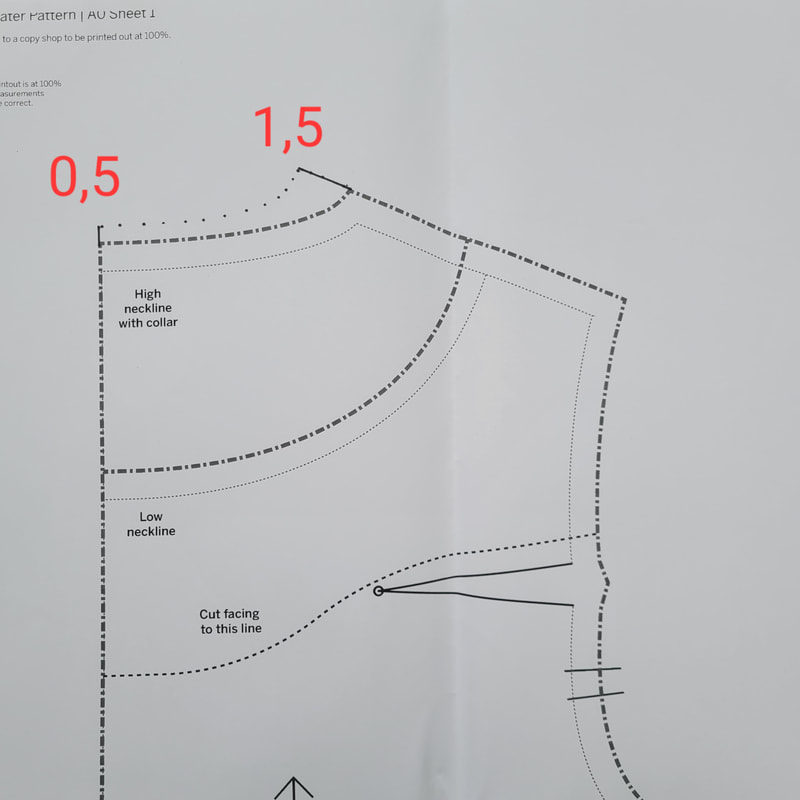
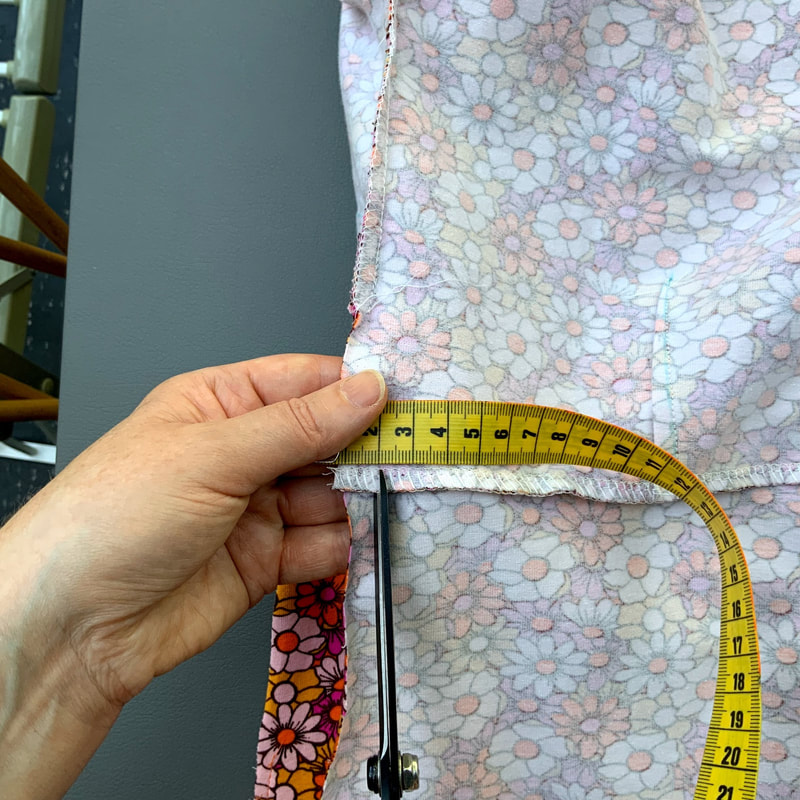
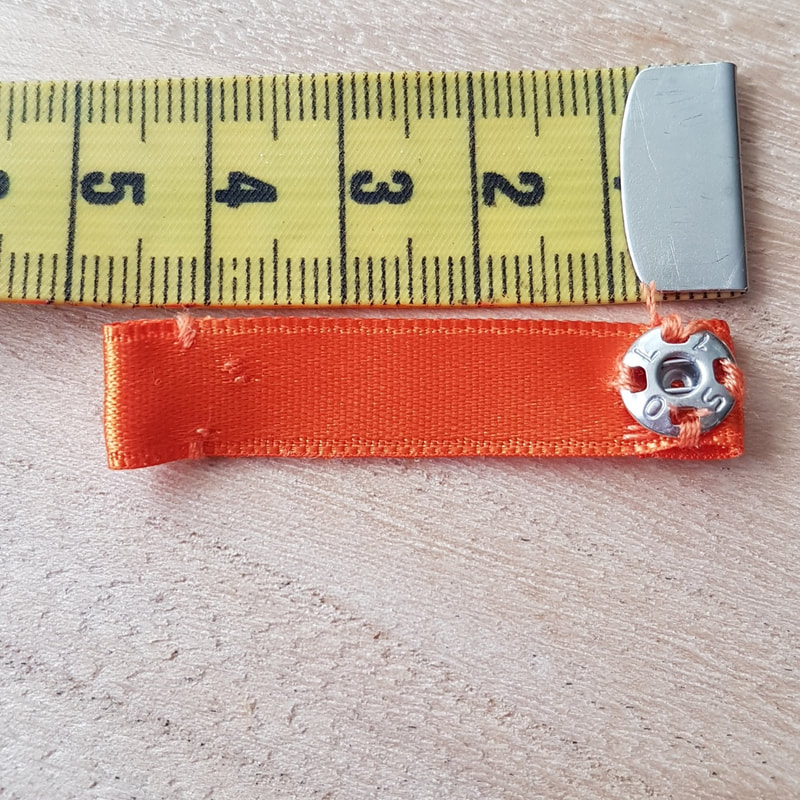
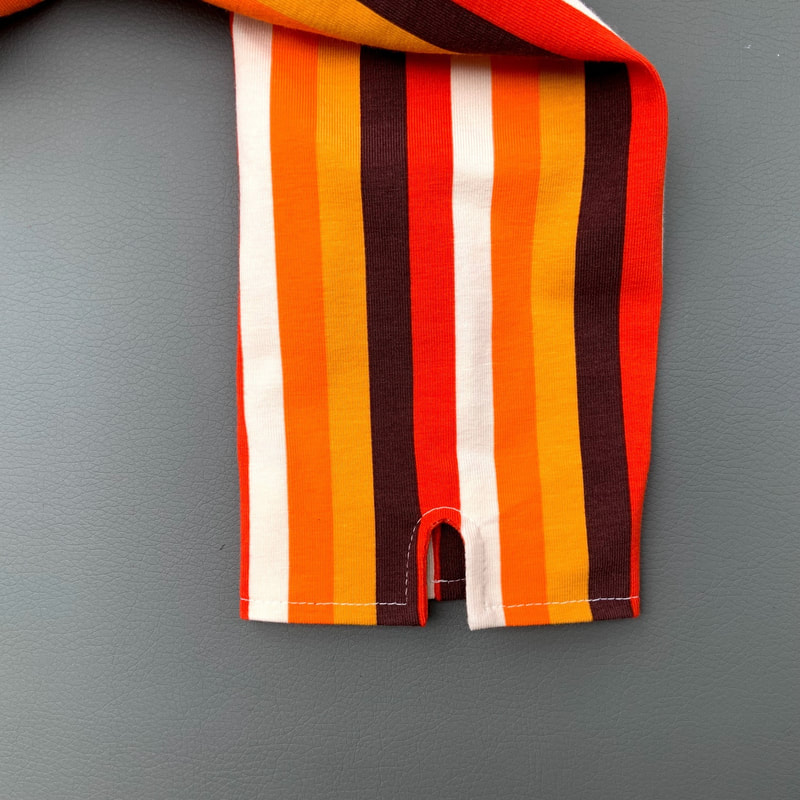
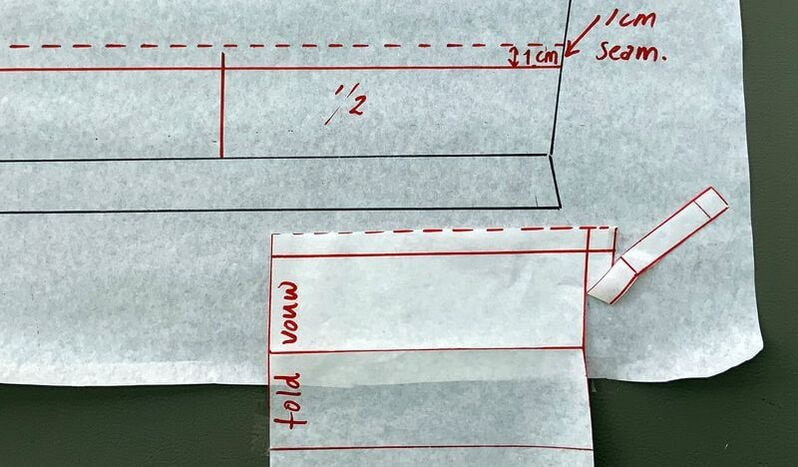 2d-3 Knip de naadtoeslag van het mouwboord. Deze moet net iets strakker zijn dan de mouw om mooi aan te sluiten. Als je de mouw gaat knippen om te verwerken met een mouwboord vergeet dan niet 1 cm naadtoeslag aan de onderkant van de mouw aan te tekenen. (Zie afbeelding). Trim the seam allowance of the sleeve cuff. It should be just a little tighter than the sleeve to fit nicely. If you are going to cut the sleeve to finish with a cuff, don't forget to add 1 cm seam allowance to the bottom of the sleeve (See image). 2e. Aanpassen van hals Adjustment of neck
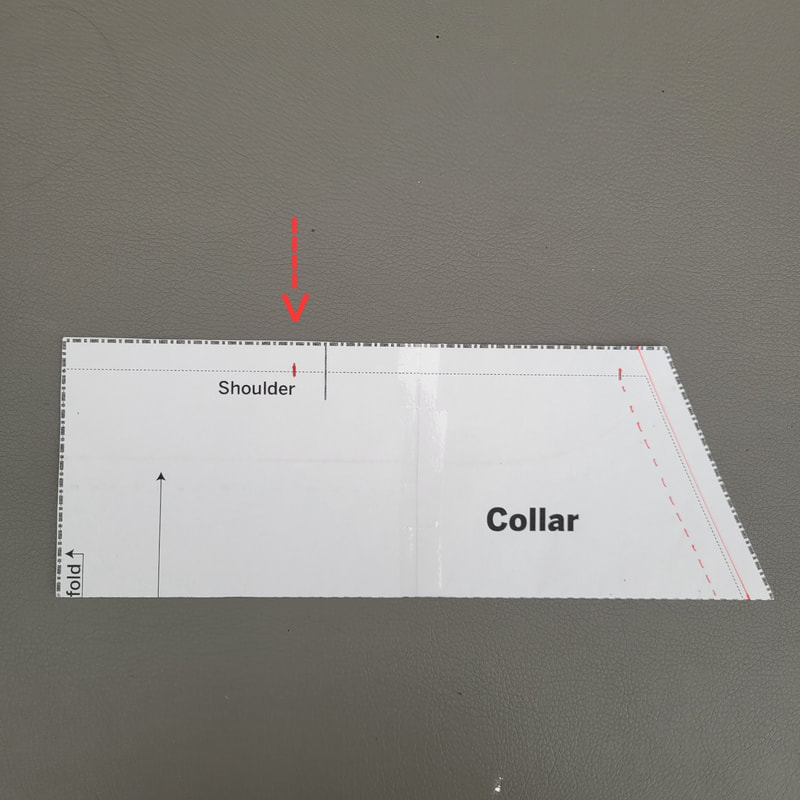
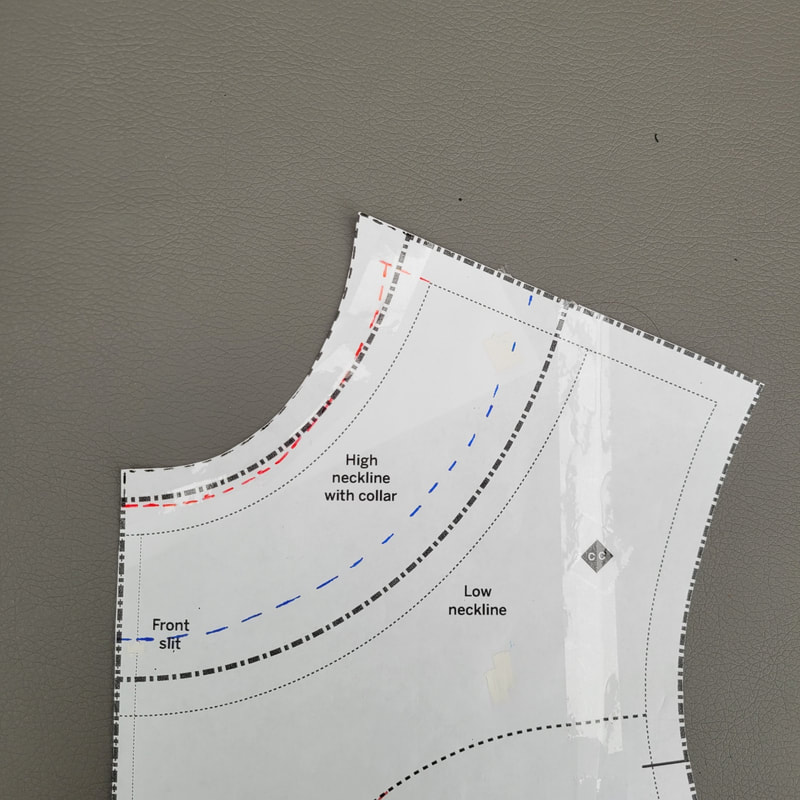
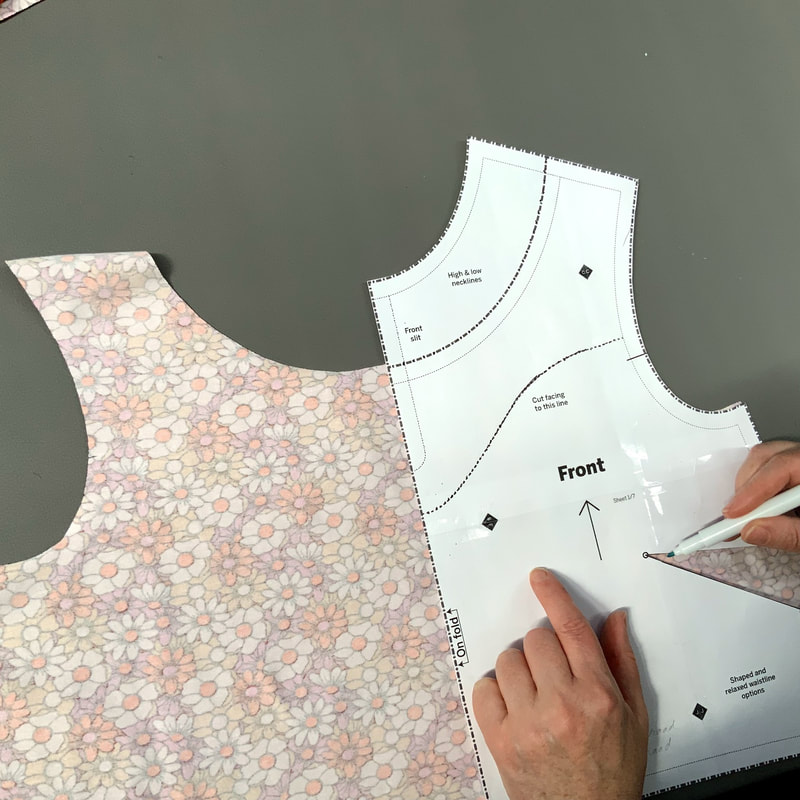
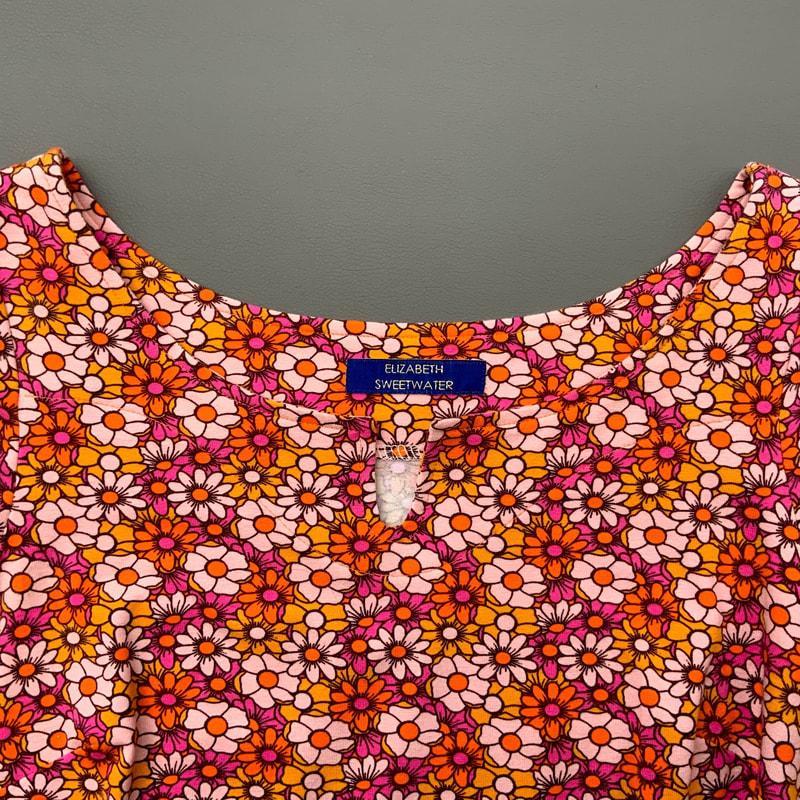
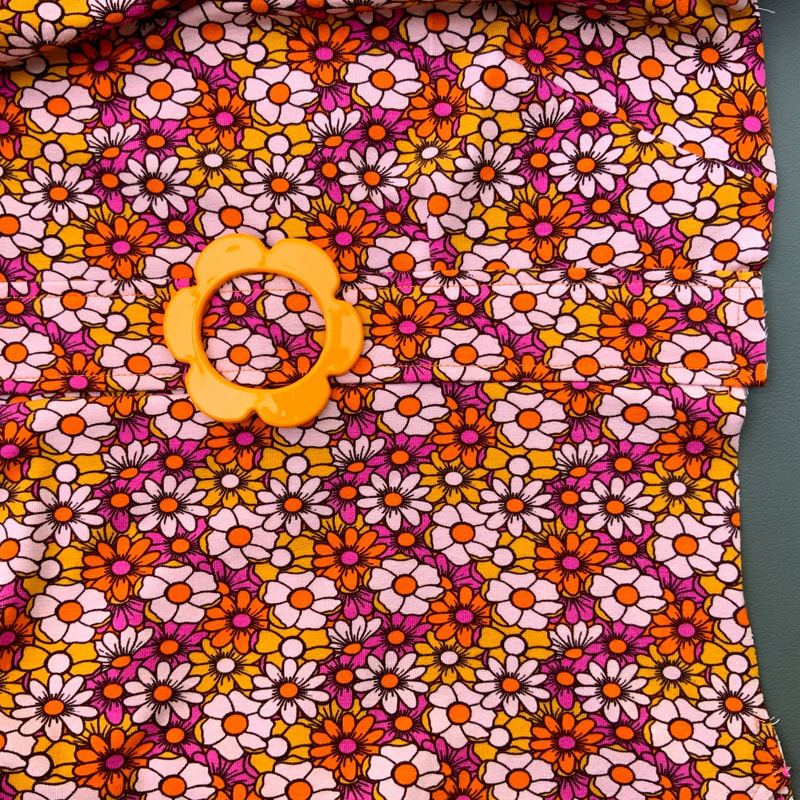
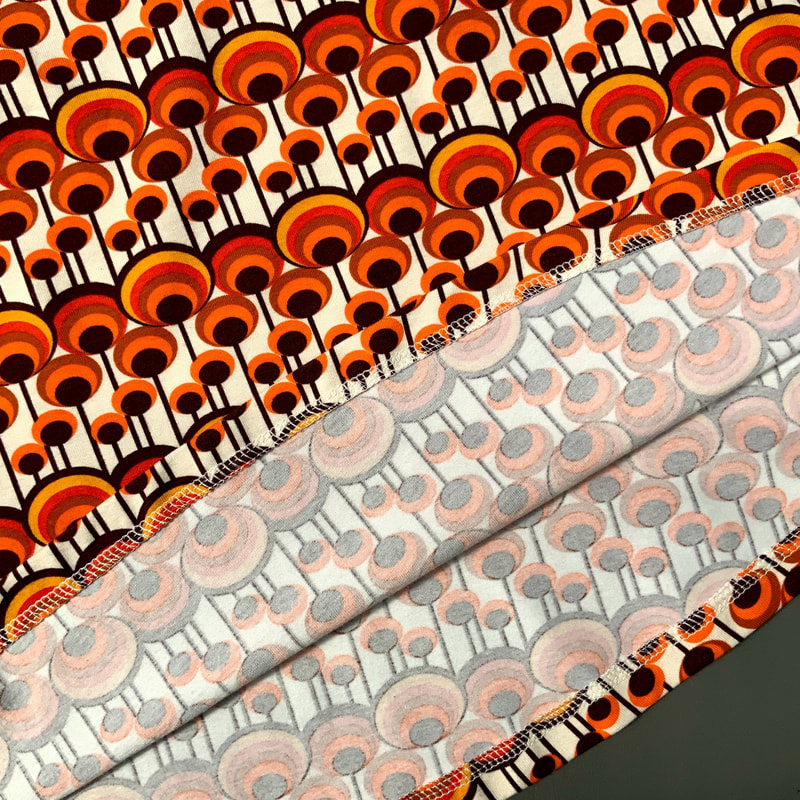
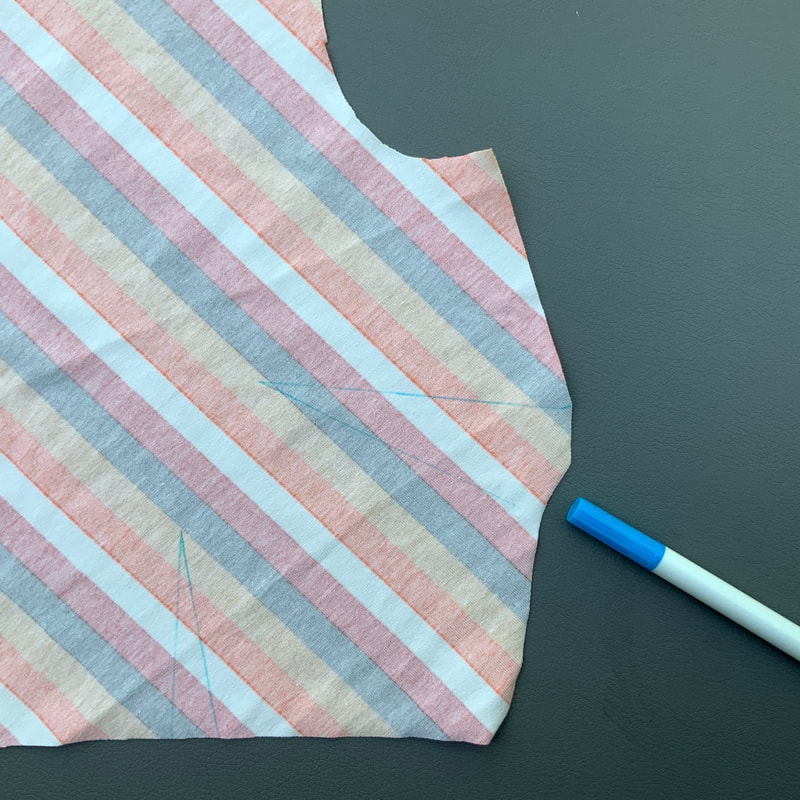
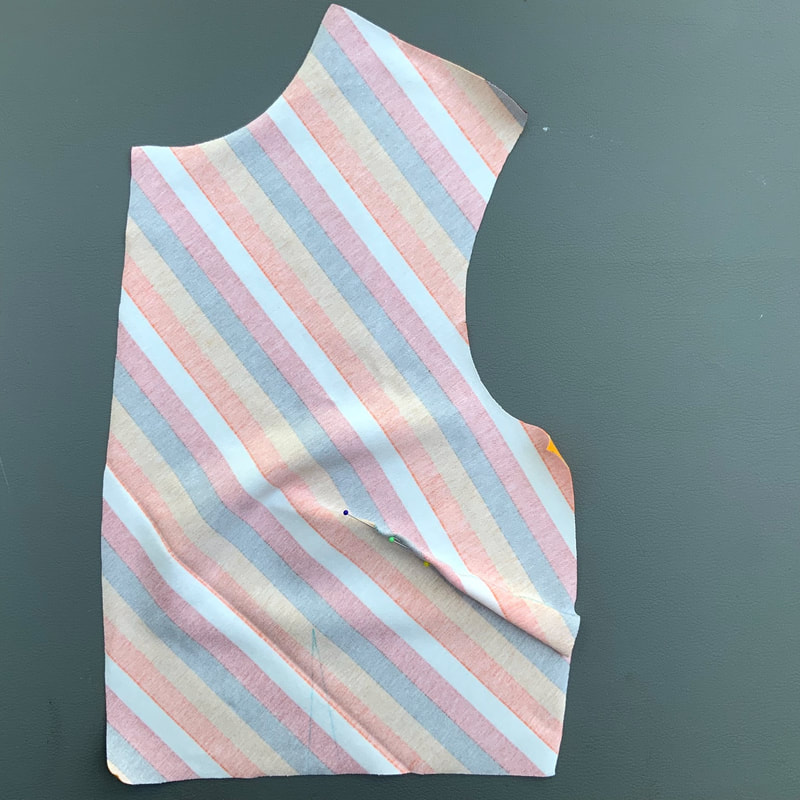
 TIP: Een leuke variatie op de hals is een ritsje met kraag. Op onze sociale media accounts vind je een video over het aanpassen van het patroon en het inzetten van de rits. A nice variation on the neck is a zipper with collar. On our social media accounts you will find a video about adjusting the pattern and inserting the zipper. 3. Checklijst Checklist Checklijst voor alle modellen Checklist for all styles Geschikte stoffen: katoen single jersey, french terry (dunne sweat, ongebrushed), jaquard tricot, scuba, vintage trevira tricot, punta di Roma (gladde stevige stof meestal polyester/viscose). Lichtgewicht viscose tricot is voor dit model minder geschikt. Suitable fabrics: Cotton single jersey, french terry (lightweight sweat, unbrushed), jacquard jersey, scuba, vintage trevira jersey, punta di Roma (smooth , firm jersey usually polyester/ viscose) . A lightweight viscose jersey would be less suitable for this style. Hoeveelheid stof nodig/amount fabric needed Tricot/jersey: 150cm breed/150 cm width Maat/size 34 t/m 42: 150 à 170cm Maat/size 44 t/m 50: 225cm voor alle modellen/for all styles.  Knippen model A/cut style A: Voorpand aan de vouw, achterpand aan de vouw, belegdelen aan de vouw, mouwen, ceintuur, zakdelen, rokdelen aan de vouw Front on fold, back on fold, facings on fold, sleeves, belt, pocket parts, skirtparts on fold. Fournituren/Haberdashery - Eventueel een geweven label. - Een stukje stretch plakvlieseline om ceintuur en beleg mee te verstevigen. - Eventueel een gesp geschikt voor een ceintuur van 4 cm breed. - Eventueel stretch stikgaren (seraflex van mettler). - A woven label (optional) - A piece of stretch iron on interlining to reinforce the belt and facing. - A buckle suitable for a 4cm wide belt (optional) - Stretch sewing yarn (seraflex by Mettler). 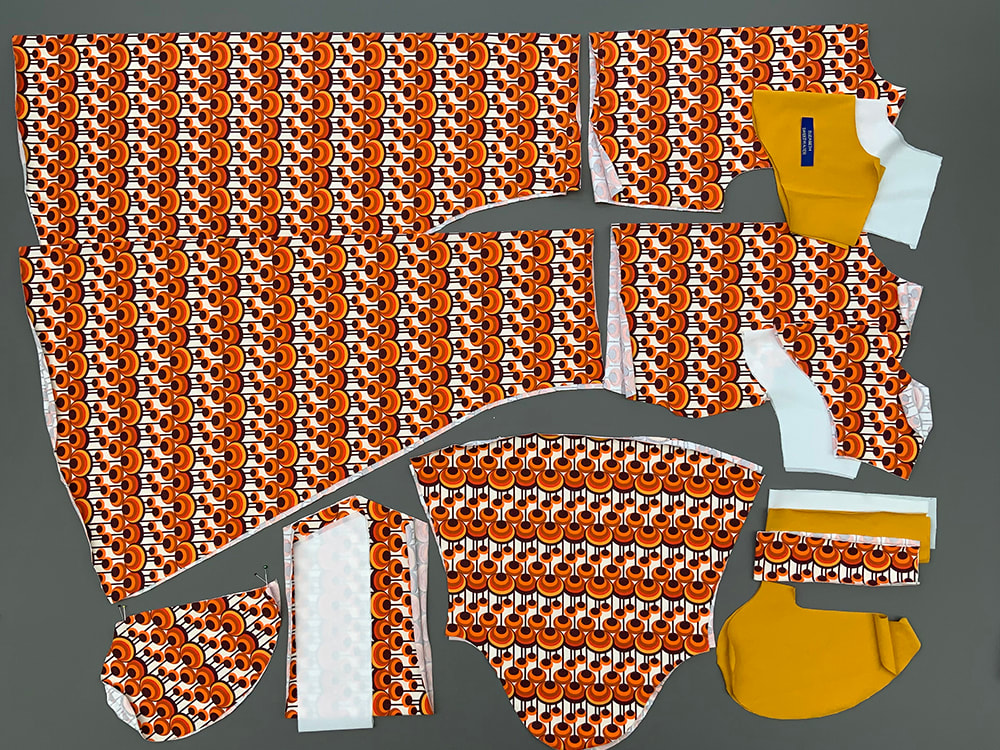 Knippen model B/cut style B: Voorpand aan de vouw, achterpand aan de vouw, kraag en belegdelen aan de vouw, mouwen, ceintuur (in deze variant bestaat de ceintuur uit 2 delen, zie werkbeschrijving), zakdelen, rokdelen aan de vouw. Hier zijn de voering zakdelen, het achterbeleg en de ceintuur voering geknipt in een contrast kleur. Front on fold, back on fold, collar on fold, facings on fold, sleeves, belt (in this version the belt is cut in 2 parts, see tutorial), pocket parts, skirtparts on fold. Here the pocket liningparts, the backfacing and the belt lining part are cut in a contrast fabric. Fournituren/Haberdashery - Eventueel een geweven label. - Een stukje stretch plakvlieseline om kraag, ceintuur en beleg mee te verstevigen. - Eventueel een gesp geschikt voor een ceintuur van 4 cm breed. - Eventueel stretch stikgaren (seraflex van mettler) - A woven label (optionally) - A piece of stretch iron on interlining to reinforce the collar, belt and facing. - A buckle suitable for a 4cm wide belt (optionally) - Stretch sewing yarn (seraflex by Mettler). 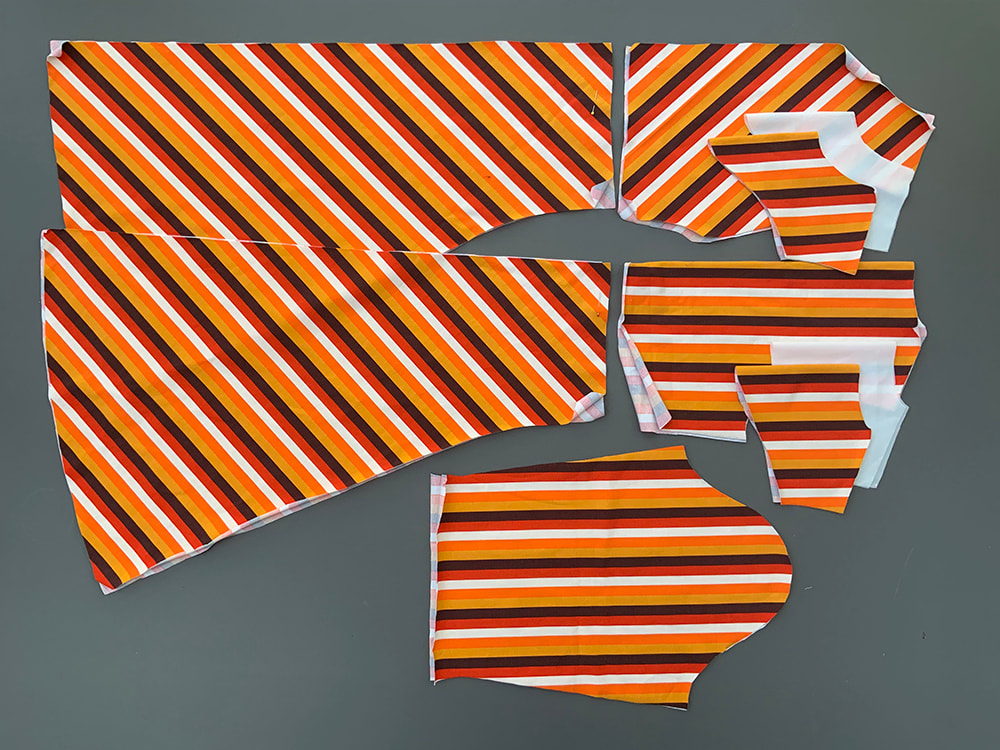 Knippen model C/cut style C: Voorpand met 1cm naadtoeslag, achterpand aan de vouw, belegdelen aan de vouw, mouwen, rokdelen met 1cm naadtoeslag. Front with one cm seam allowance, back on fold, facings on fold, sleeves, skirtparts with 1 cm seam allowance. Fournituren/Haberdashery - Eventueel een geweven label. - Een stukje stretch plakvlieseline om beleg mee te verstevigen. - Eventueel 2 knopen. - Eventueel stretch stikgaren (seraflex van mettler) - A woven label (optional) - A piece of stretch iron on interlining to reinforce the facing. - 2 buttonsbuckle (optional) - Stretch sewing yarn (seraflex by Mettler). BELANGRIJK/IMPORTANT De stofafmeting is een schatting en is afhankelijk van het soort model wat je maakt, maat, aanpassingen, stofbreedte, print etc. Ik adviseer om de patroondelen eerst in te leggen op een tafel waar je de juiste stofbreedte hebt afgemeten alvorens de stof te bestellen/kopen. Zo koop je nooit teveel/te weinig. The amount of fabric needed is an estimate and depends on the type of dress you make, size, adjustments, fabric width, print etc. I recommend placing the pattern pieces on a table where you have measured the correct fabric width before ordering/buying the fabric. That way you never buy too much/too little. Goed om te weten Ik ga in deze werkbeschrijving uit van het gebruik van een overlock machine. Mocht je daar niet over beschikken dan kun je een zig-zag steek gebruiken op een gewone naaimachine. Ik raad dan wel aan om er altijd een stretch stiksel naast te plaatsen. De naadtoeslag van de patronen is 1cm. Check wat de breedte instelling van je naad is op je lockmachine is. Is het 0,7cm dan kun je tijdens het stikken 3mm wegsnijden. De stretchnaden stik je met een stretchsteek instelling op de gewone naaimachine. Behalve een stretchsteek setting op je naaimachine kun je ook voor stretch garen kiezen, bijvoorbeeld seraflex van mettler. Zet de garen spanning in een zo laag mogelijke instelling als je werkt met stretch garen. De naden werk je af met een overlockmachine (of een zigzag steek op een reguliere machine). Good to know For this tutorial an overlock machine was being used for sewing most of the garment. However, it is possible to use a regular sewing machine and sew with a zigzag stitch. I do recommend sewing an extra stretch stitch next to it to create clean lines. The seam allowance of the patterns is 1cm. Check the seam width setting of your overlock machine. If it is 0.7cm you can cut away 3mm while sewing. The stretch seams can be sewn using the stretch setting on a regular sewing machine. Apart from using a stretchstitch setting on your sewing machine ypu can also choose stretch yarn (seraflex by Mettler). Adjust the tension to the lowest possible setting when using stretch yarn. Finish seams with an overlock machine or zigzag on a regular machine. 4. Holiday Dress A Coupenaden en de hals Darts and neck
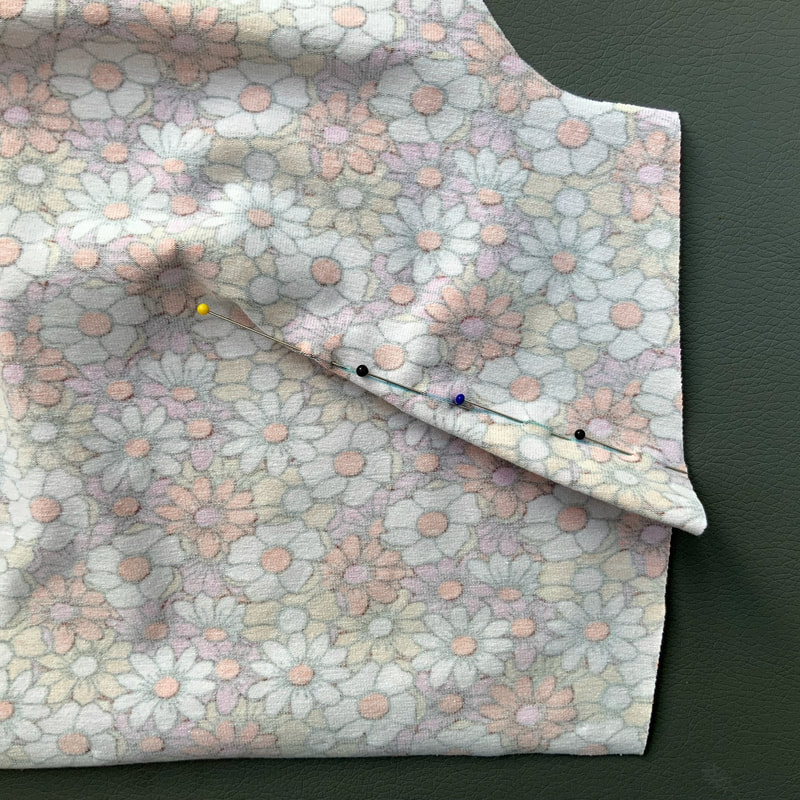
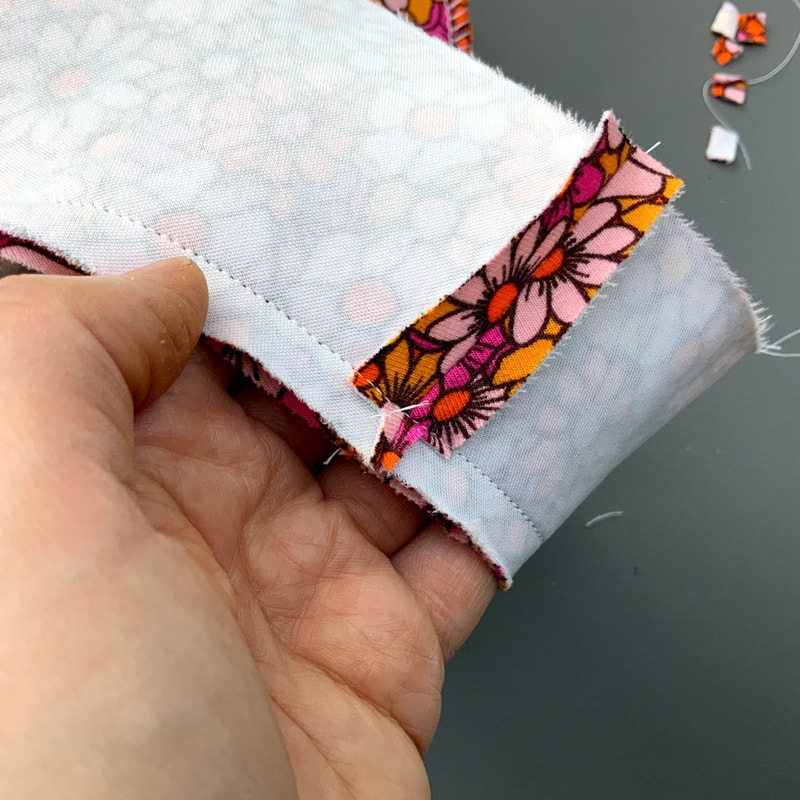
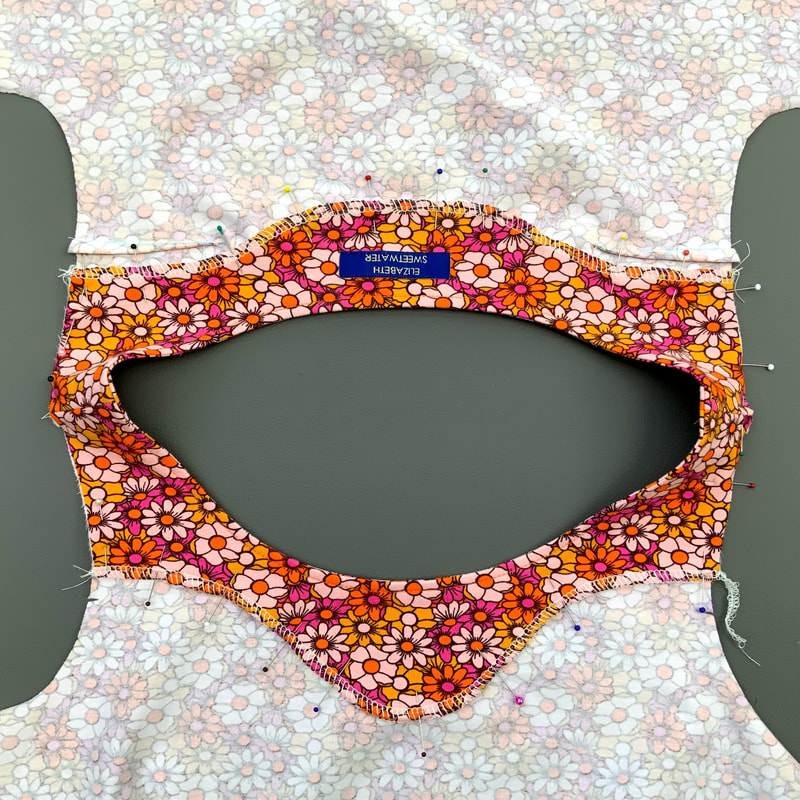
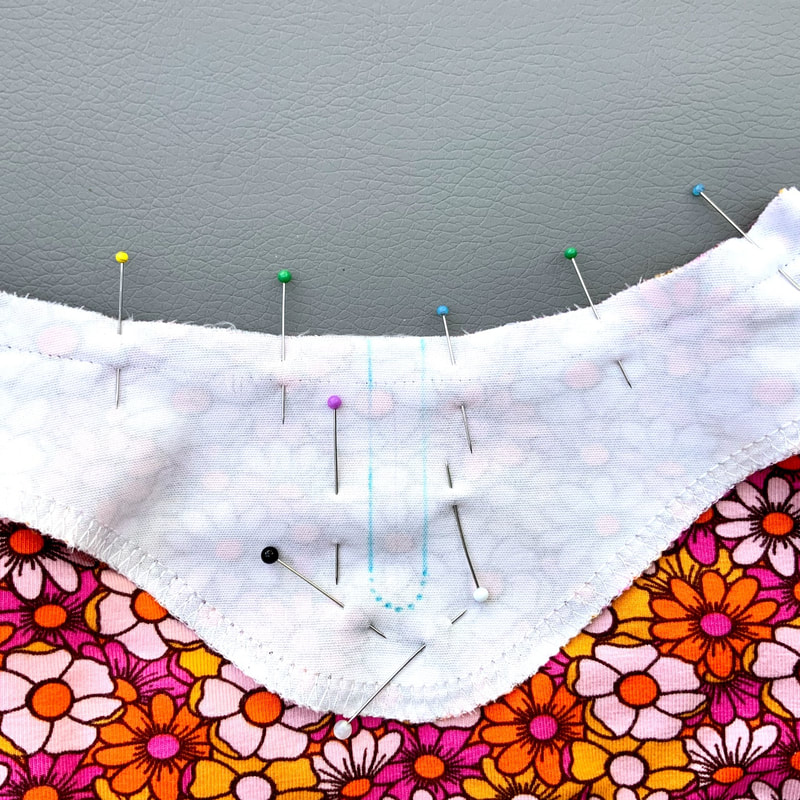
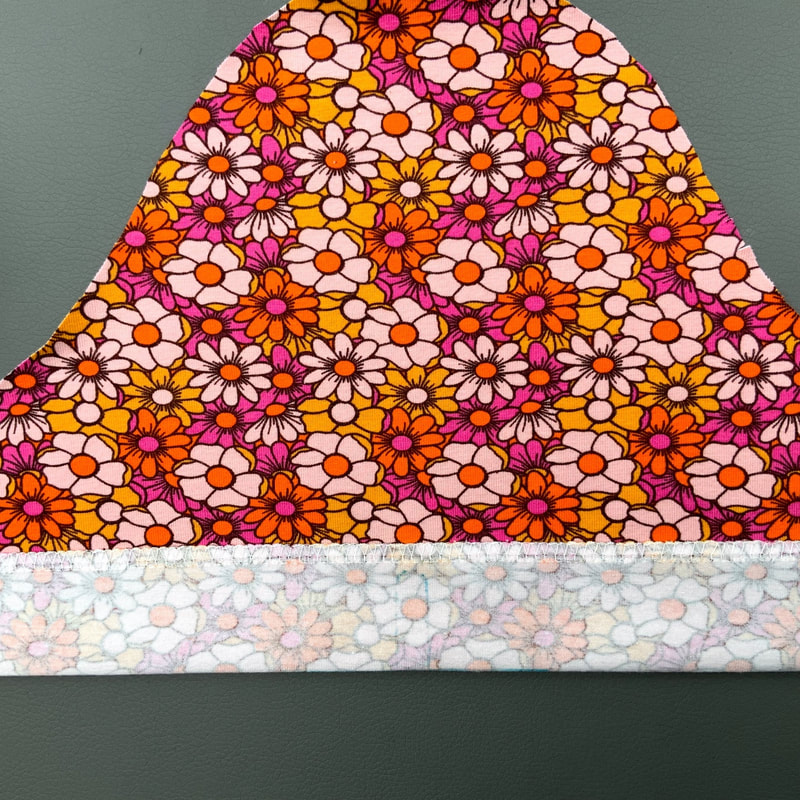
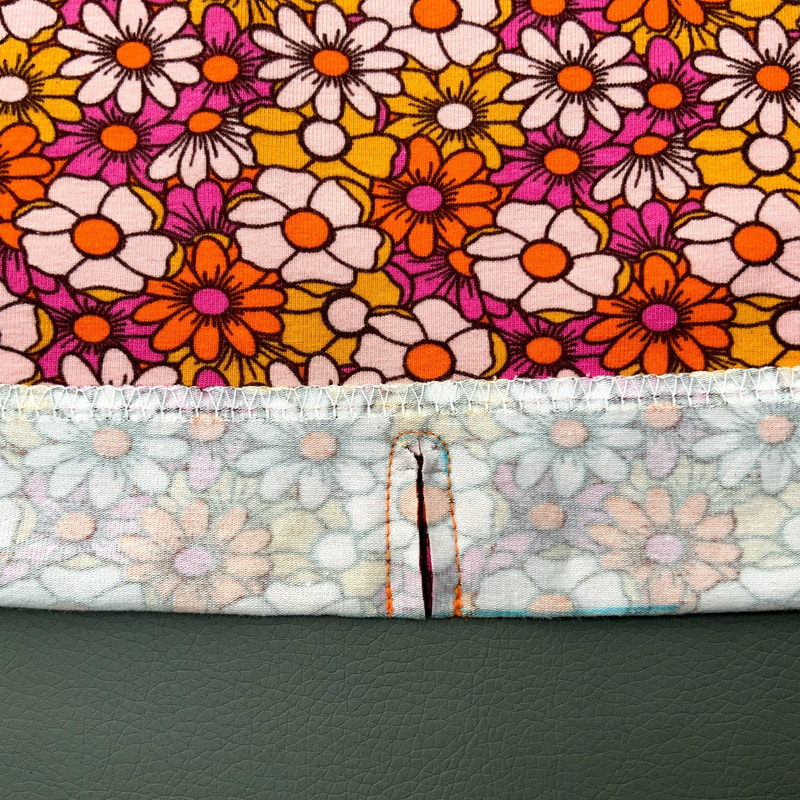
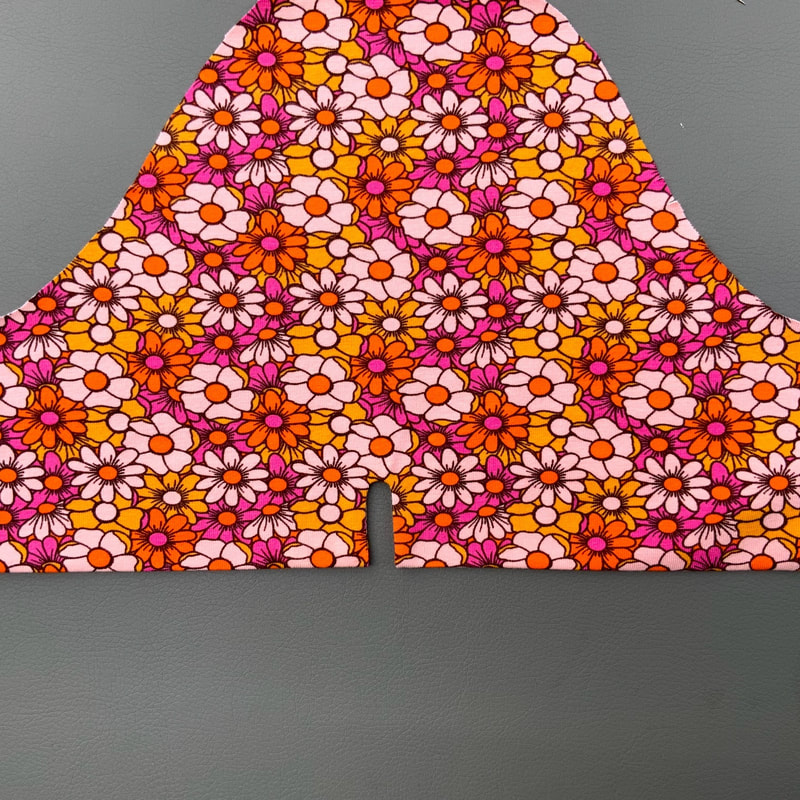
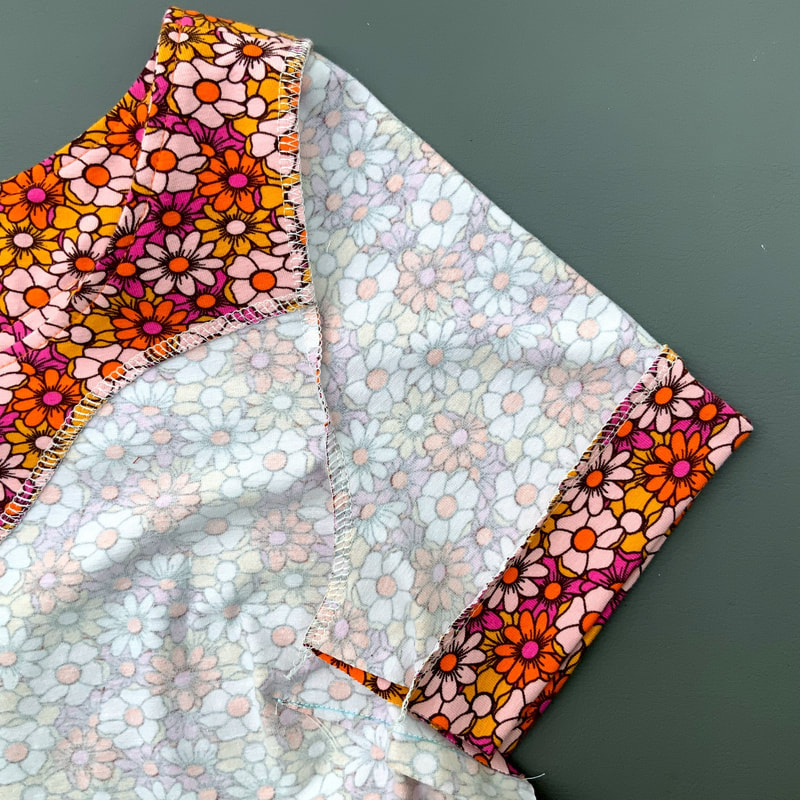
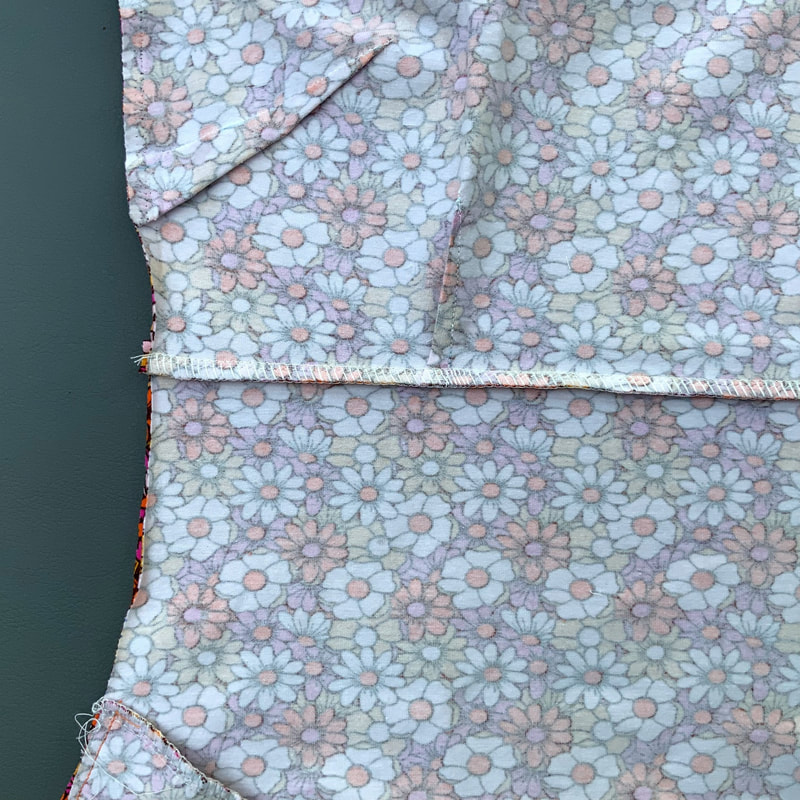
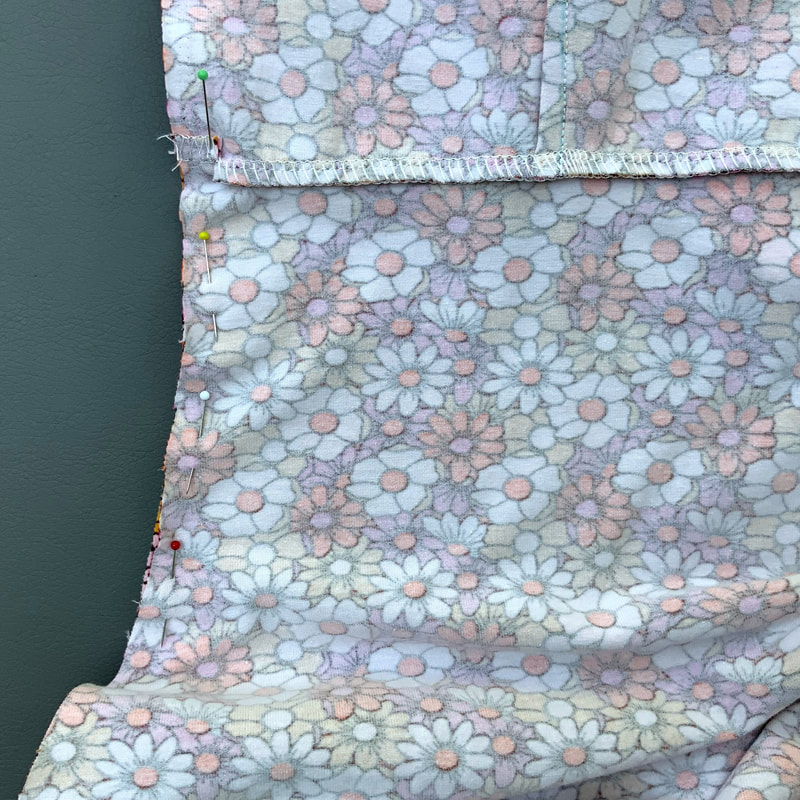
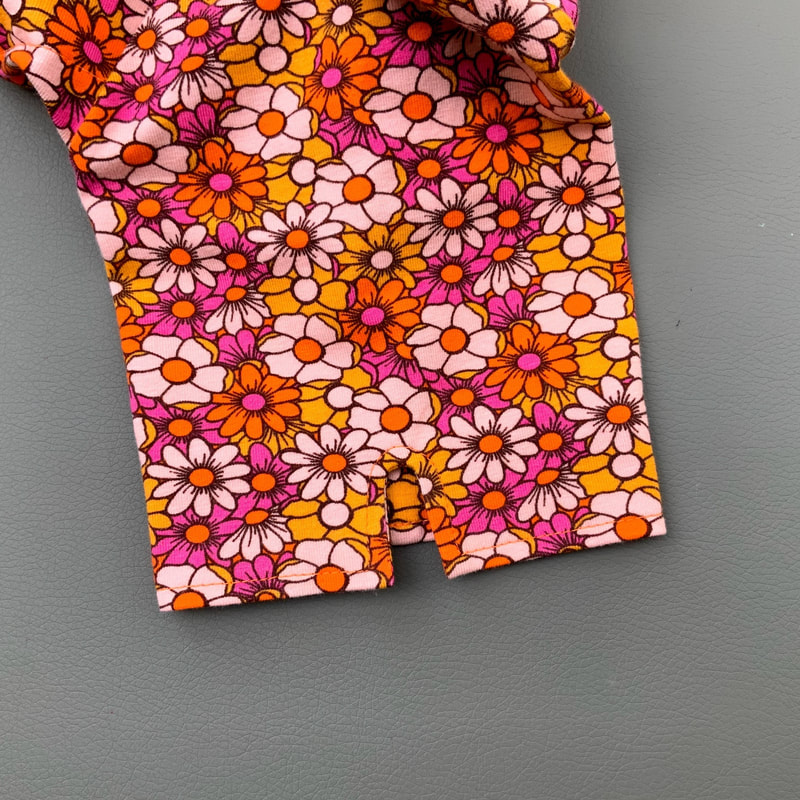
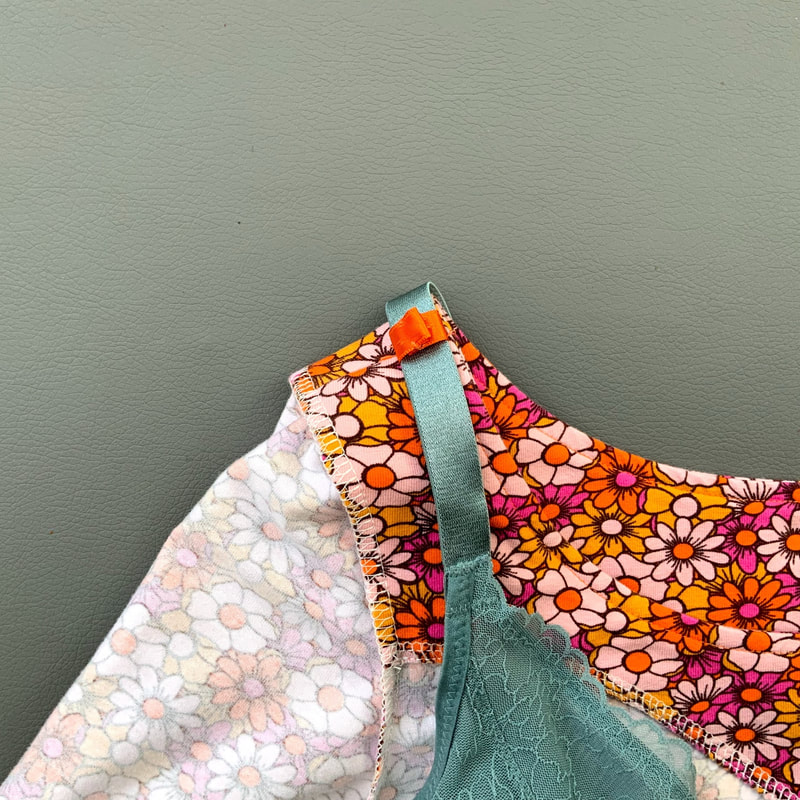
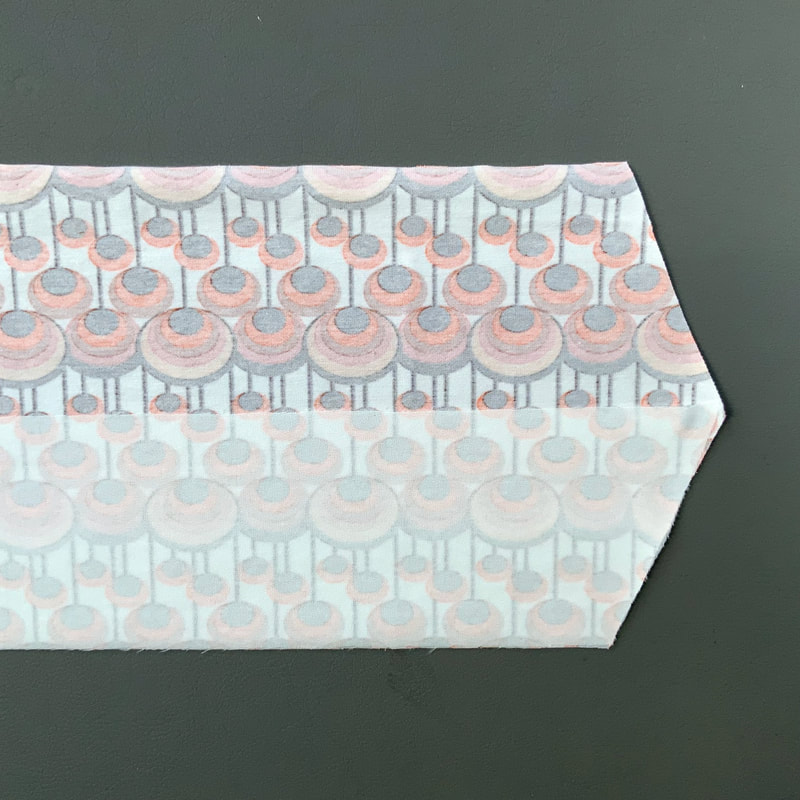
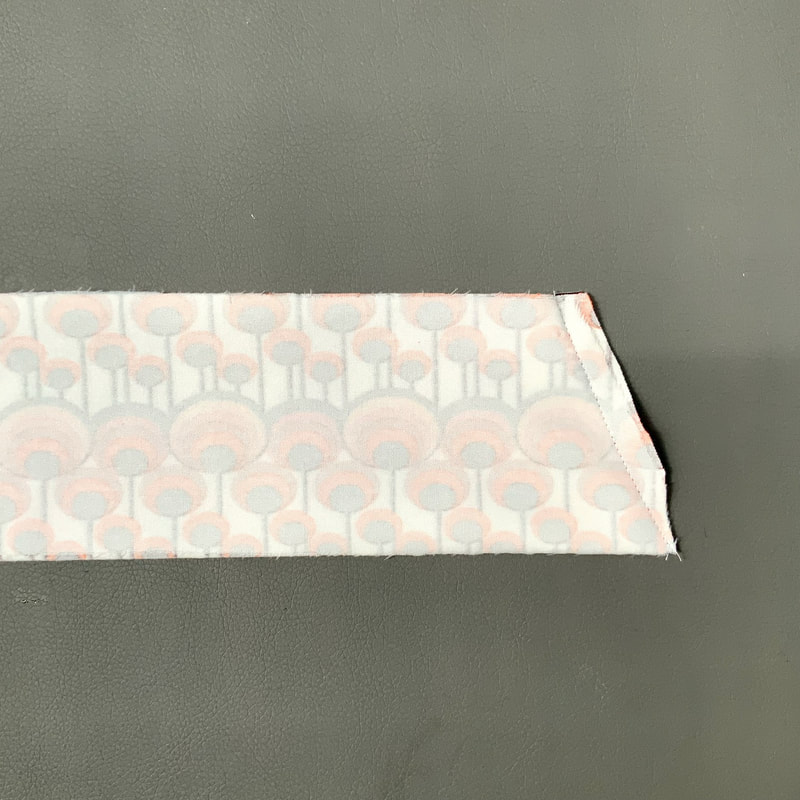
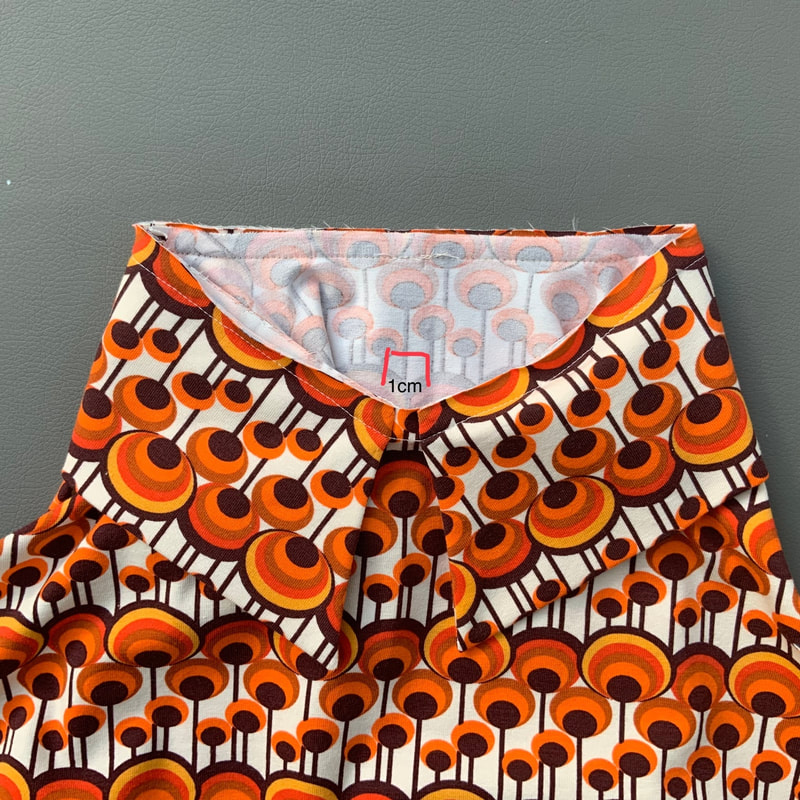
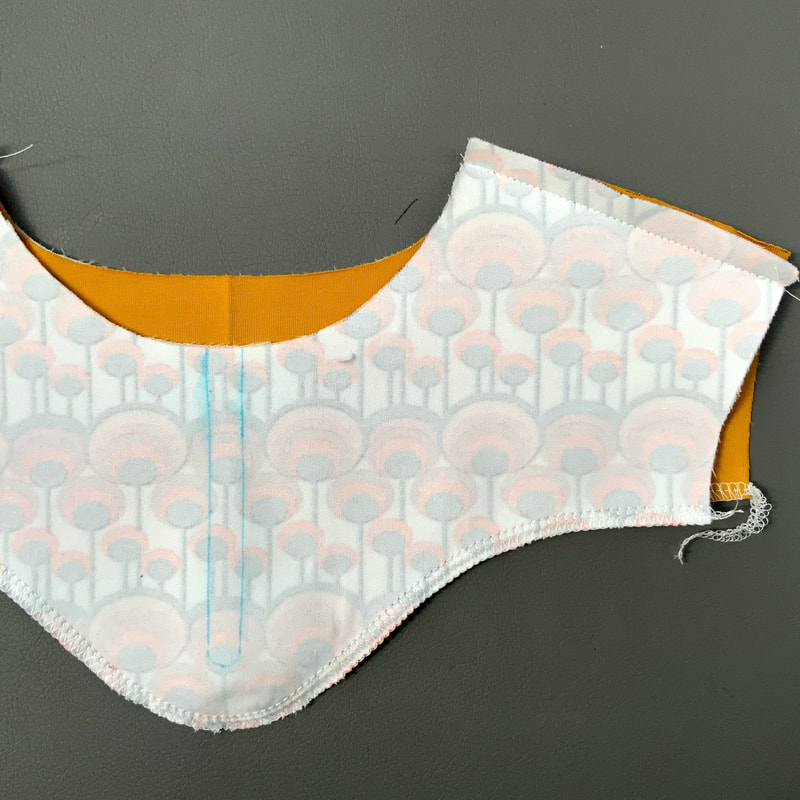
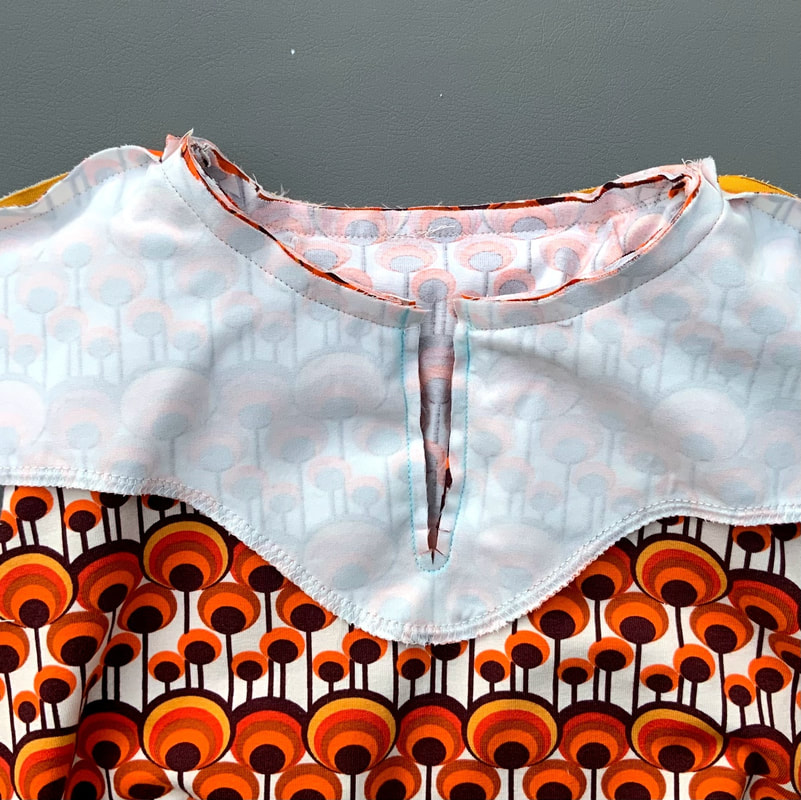
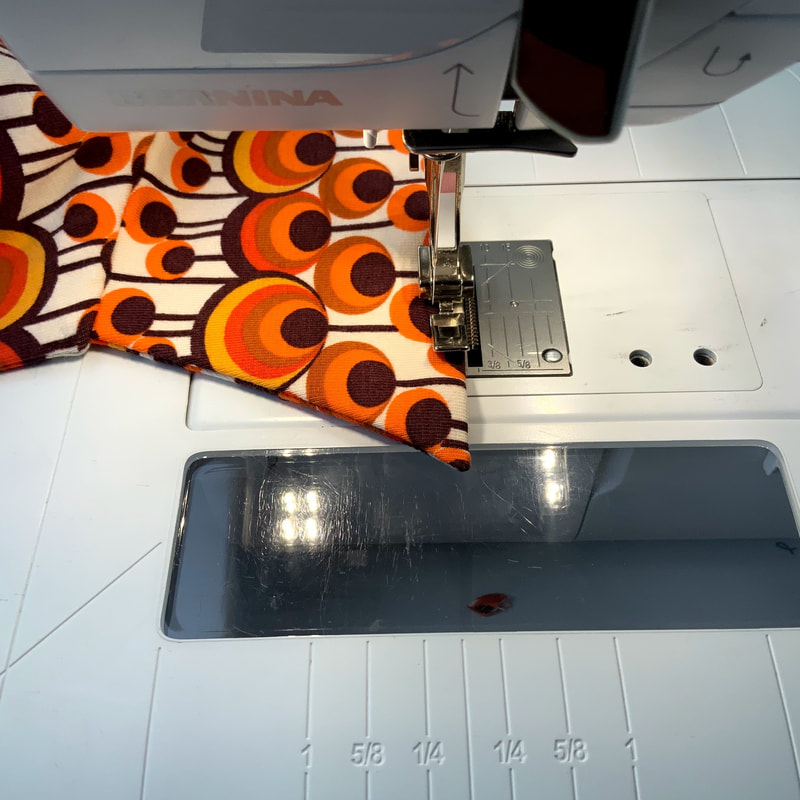
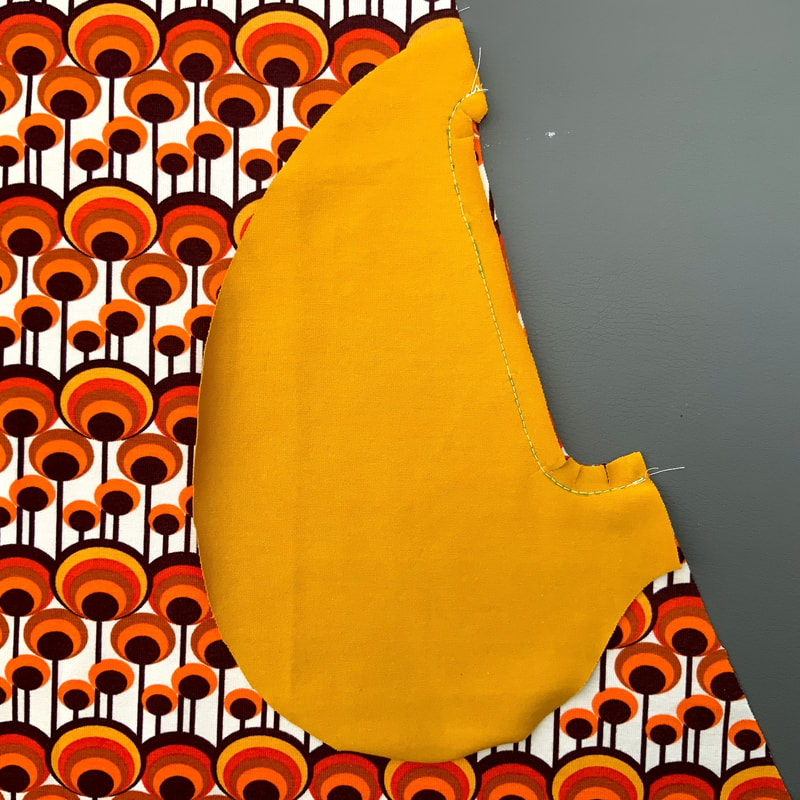
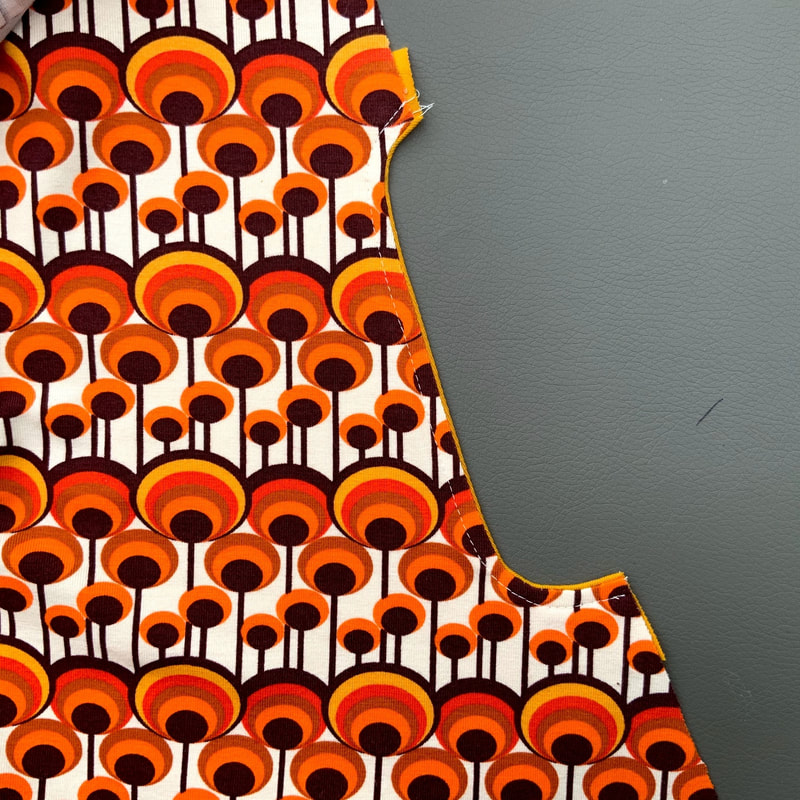
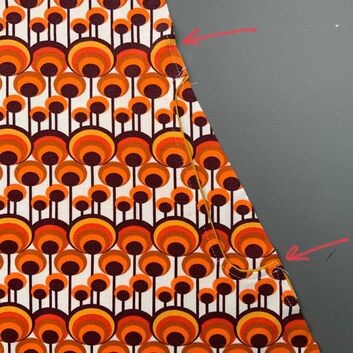
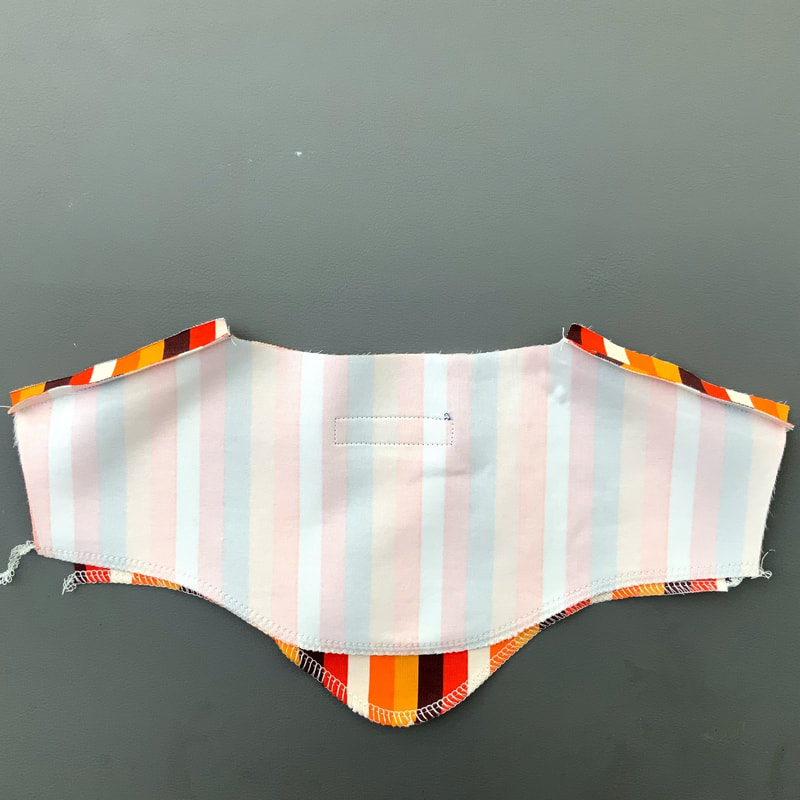
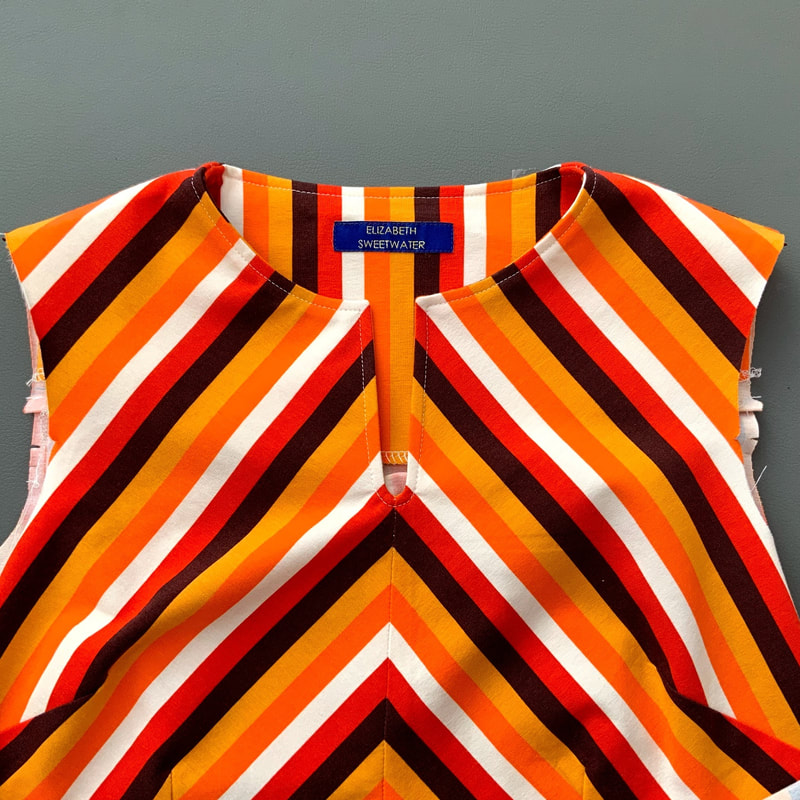
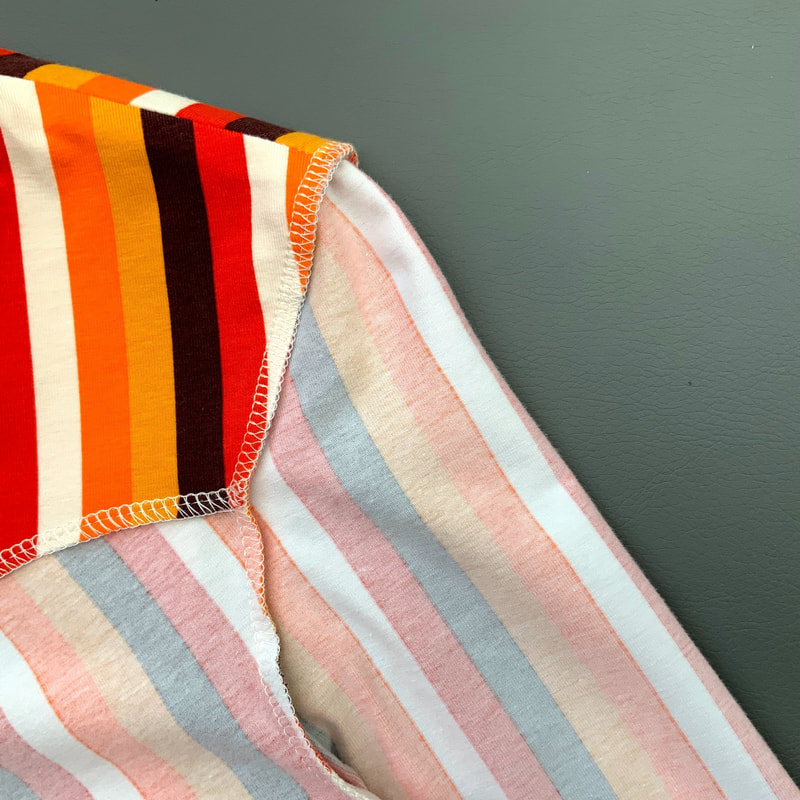
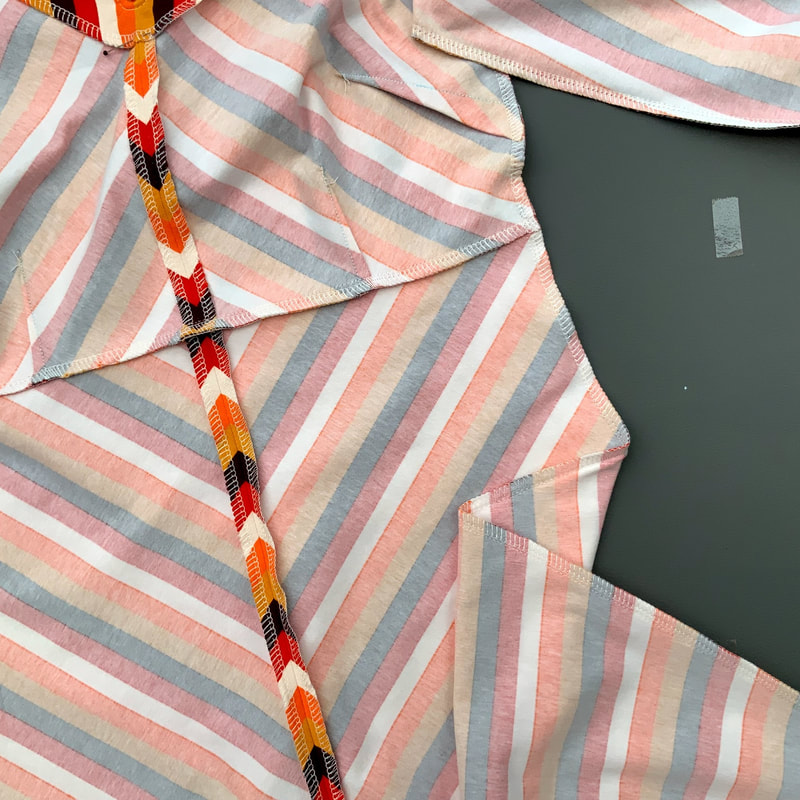
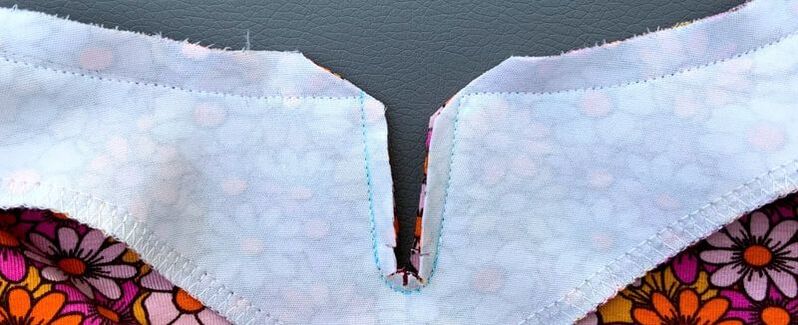 4m. Stik langs de hals en over de lijn van het splitje het beleg tegen het bovenstuk. Knip de split open tussen de stiklijnen. Knip de hoekjes schuin af. Geef wat knipjes in de ronding van het splitje. Sew along the neckline and over the line of the slit the facing to the top. Cut the slit open in between the two stitch lines. Clip the curve of the slit. Cut the corners at an angle.
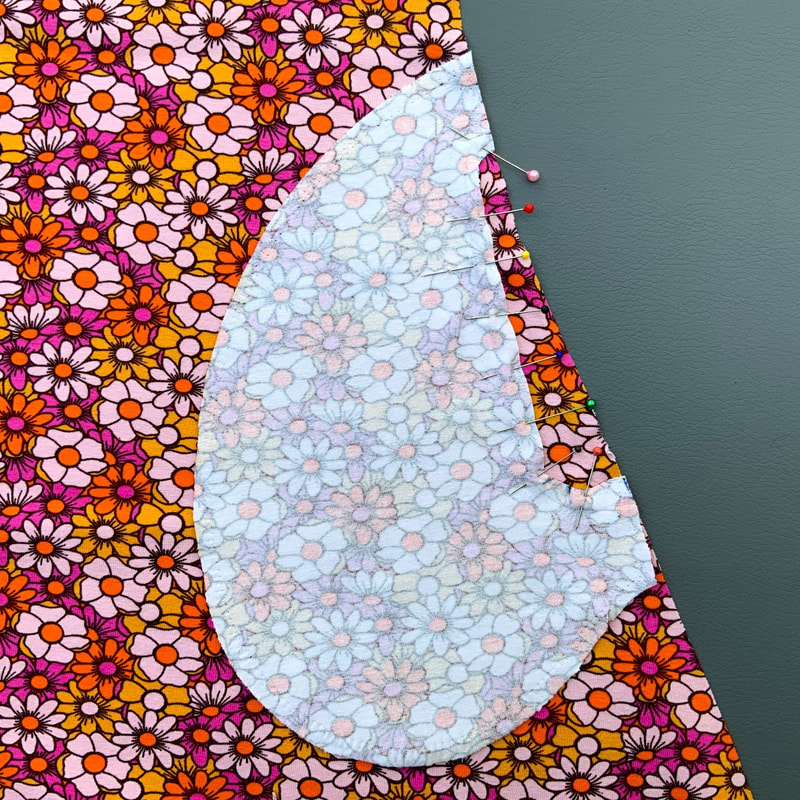
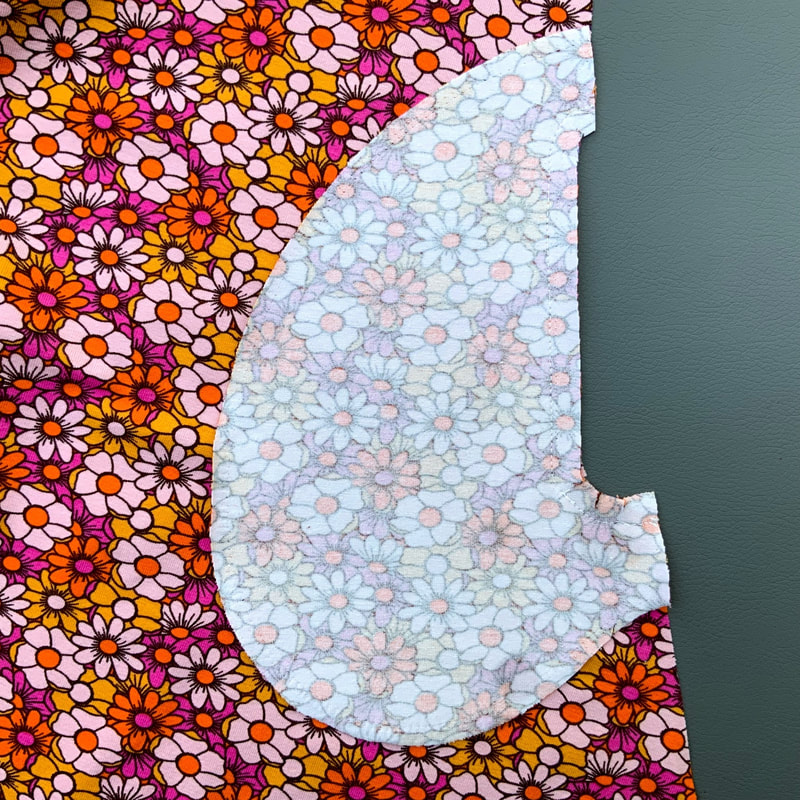
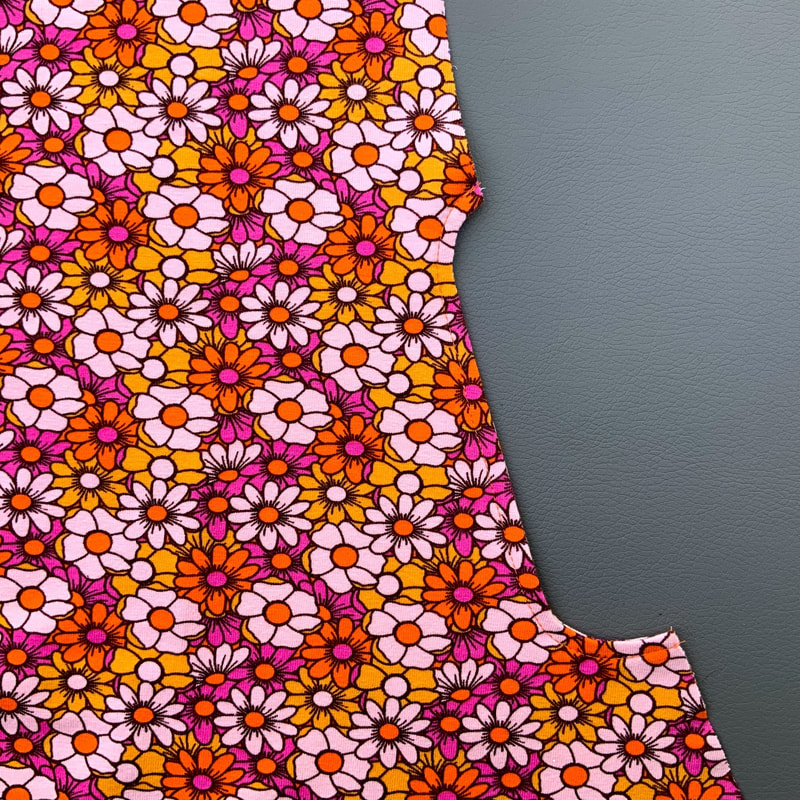
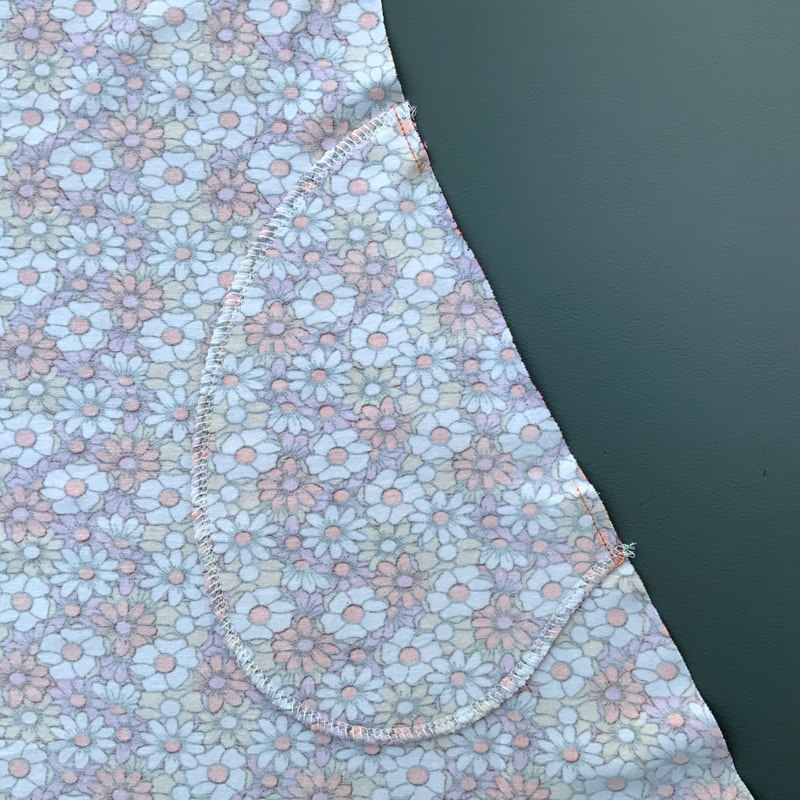
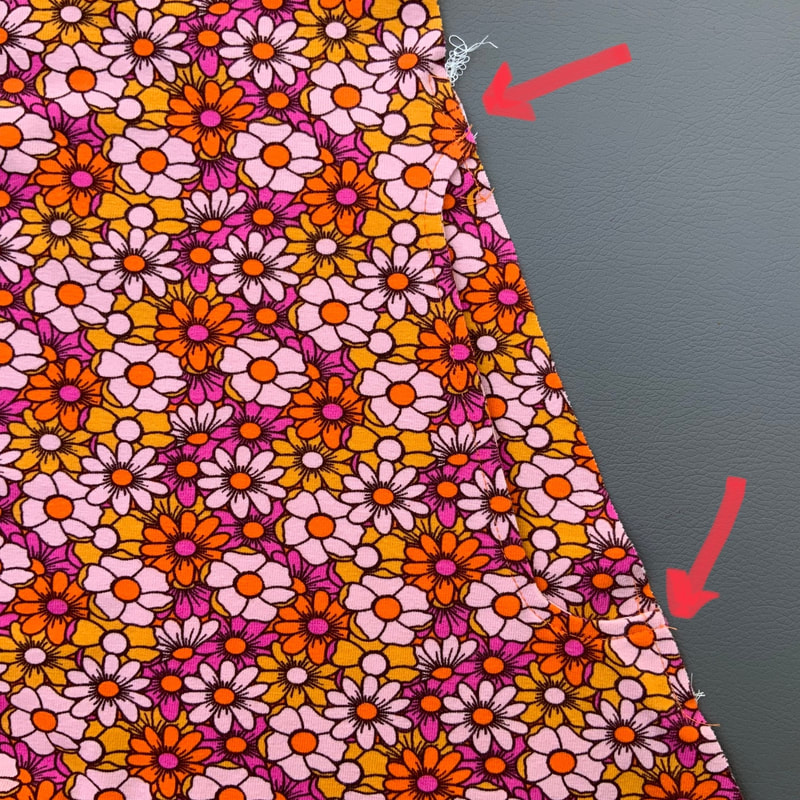
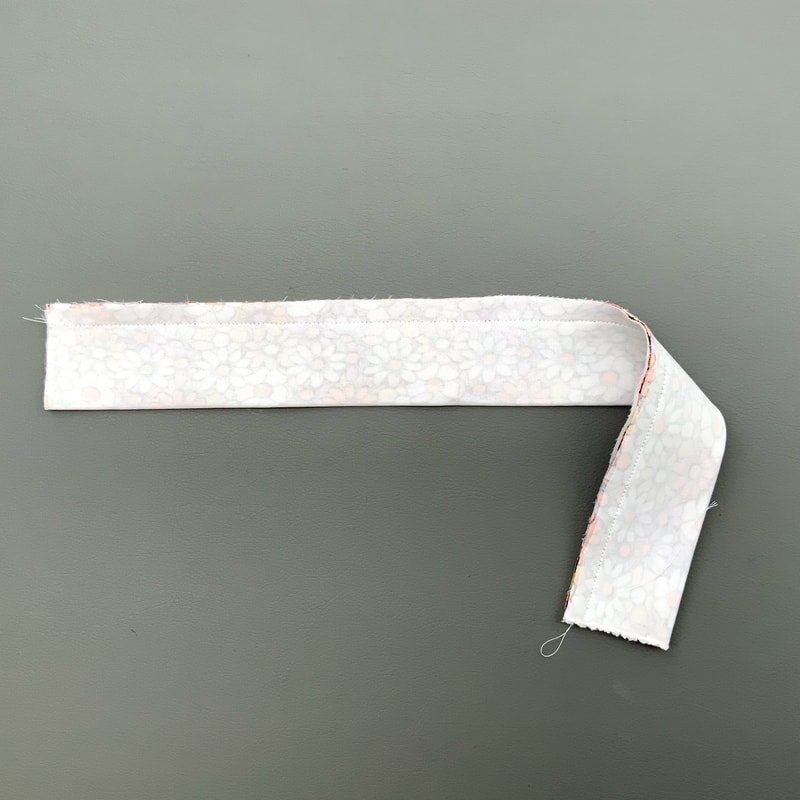
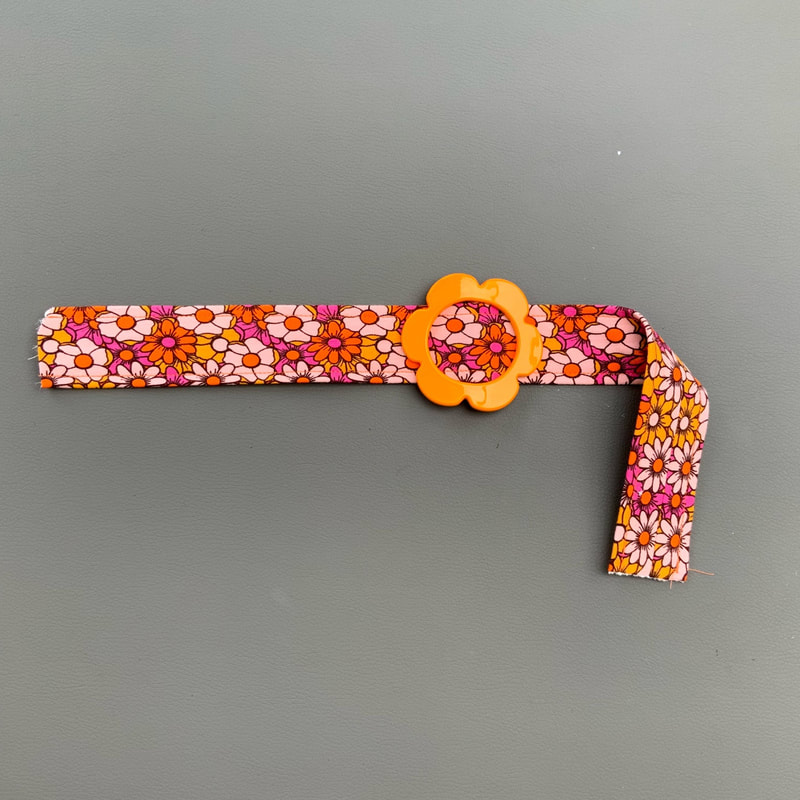
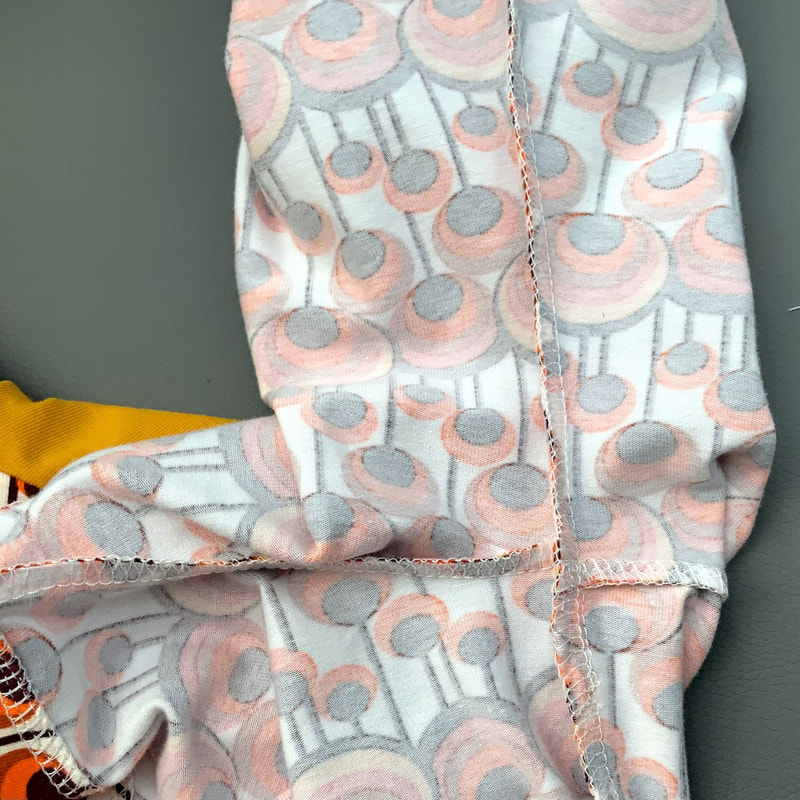
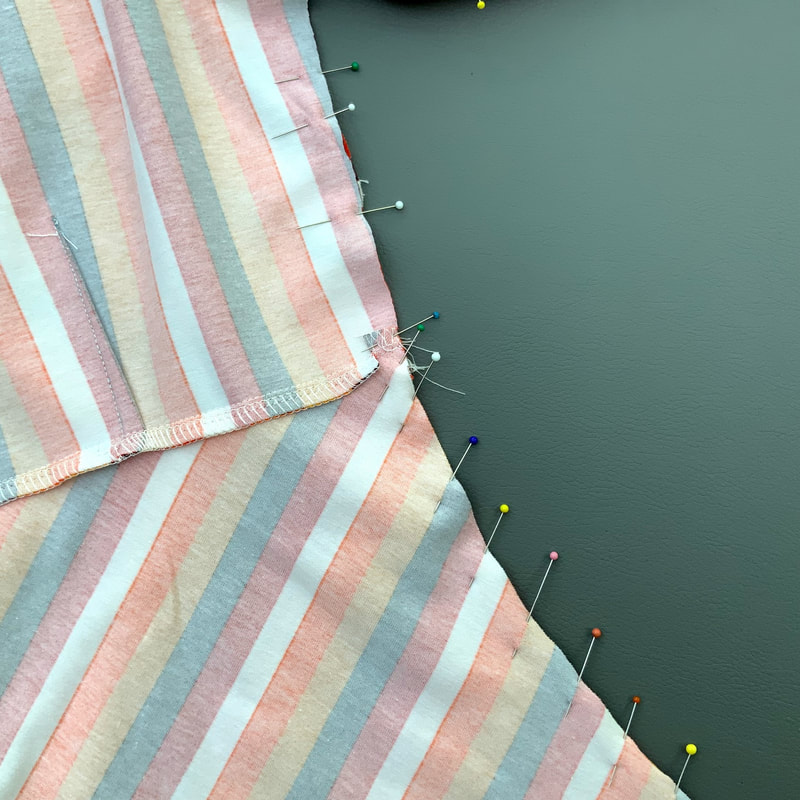
5. Holiday Dress A Mouwen, zakken en het in elkaar zetten Sleeves, pockets and assembling
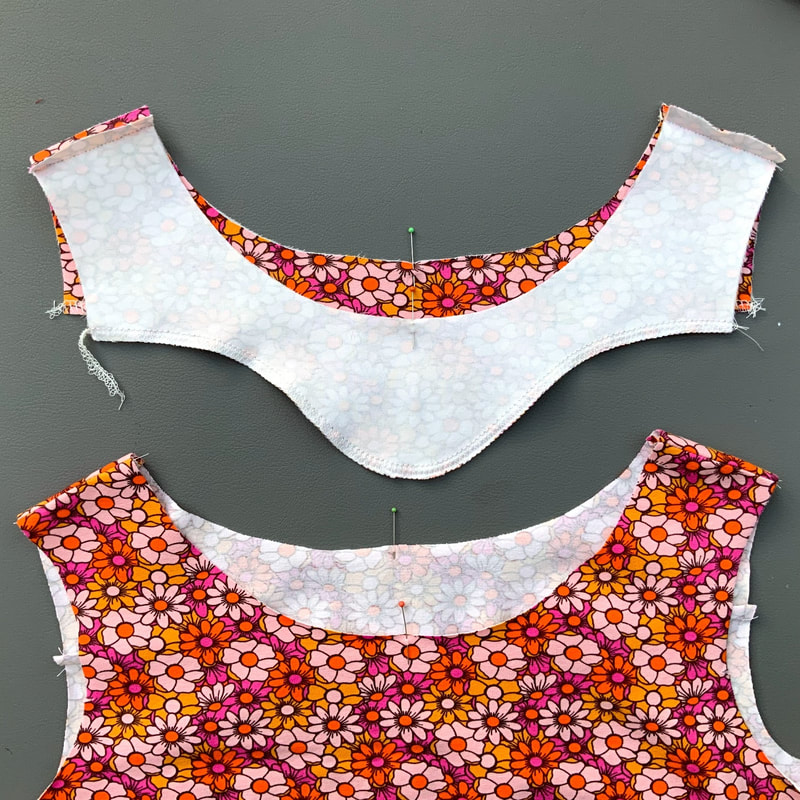
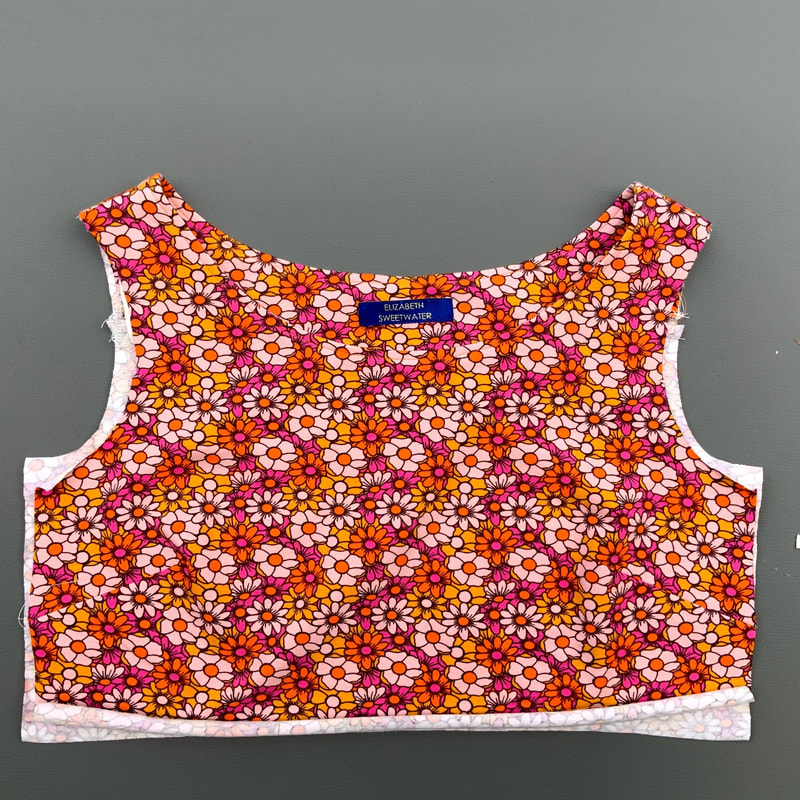
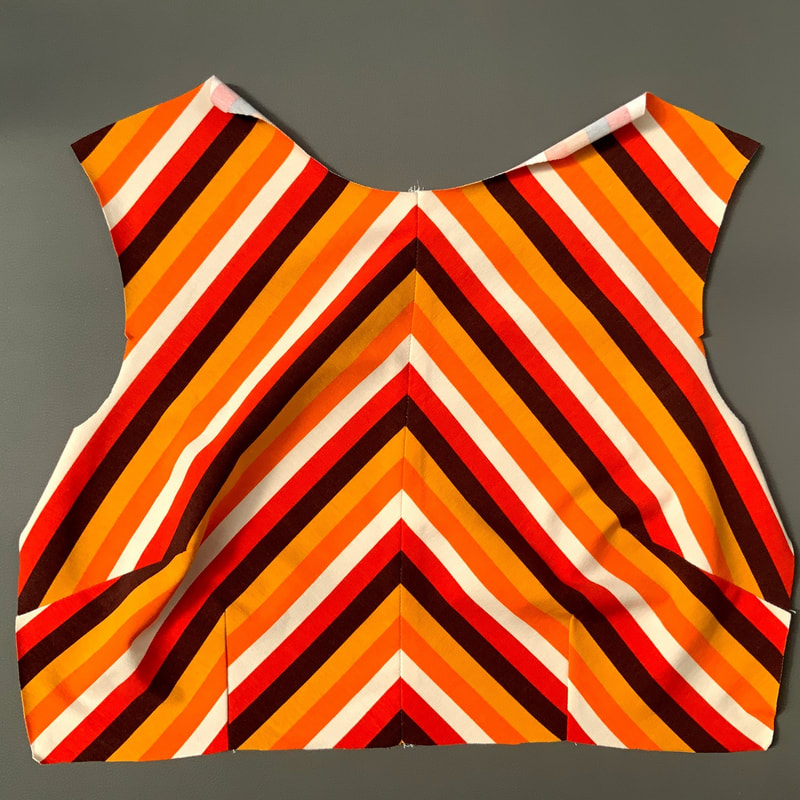
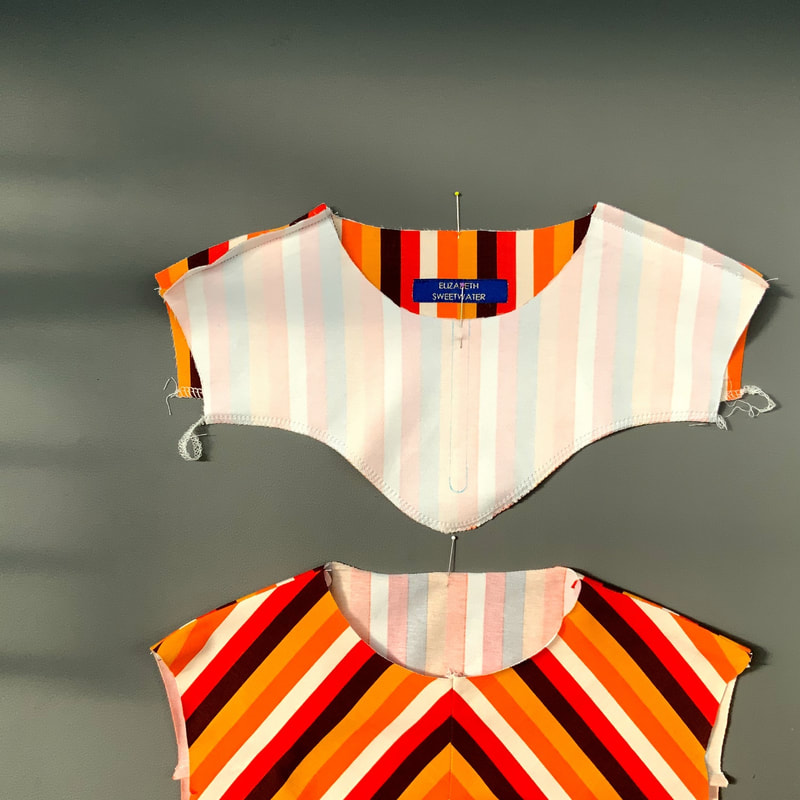
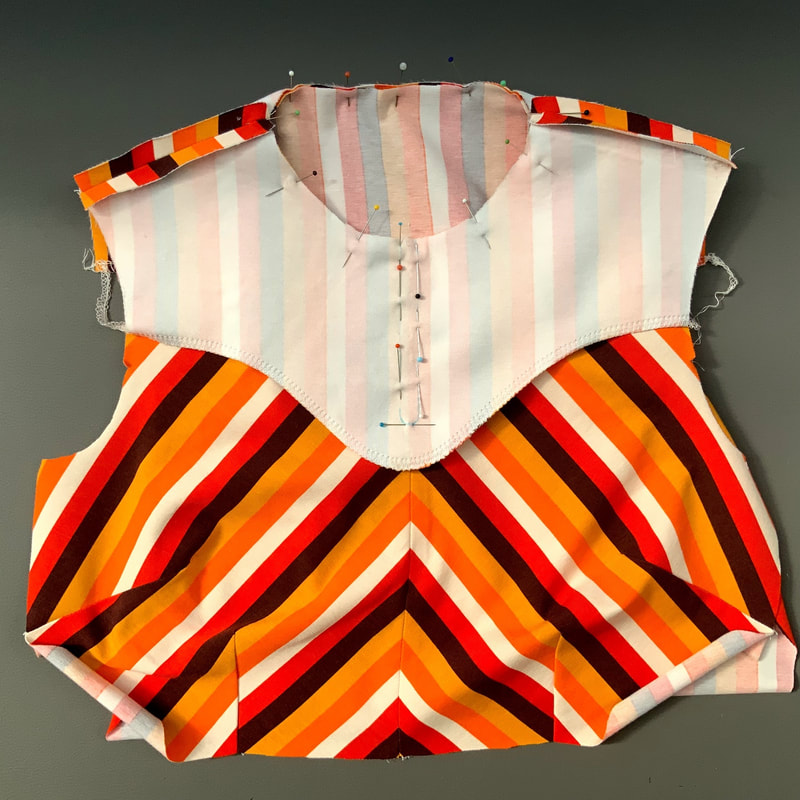
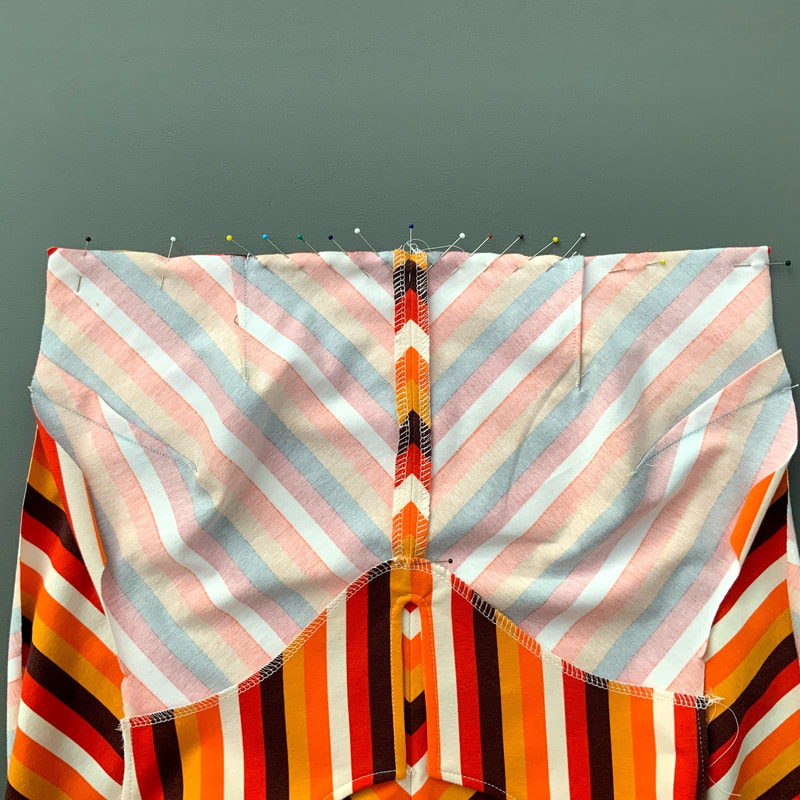
6. Holiday dress B Coupenaden en de hals Darts and neck
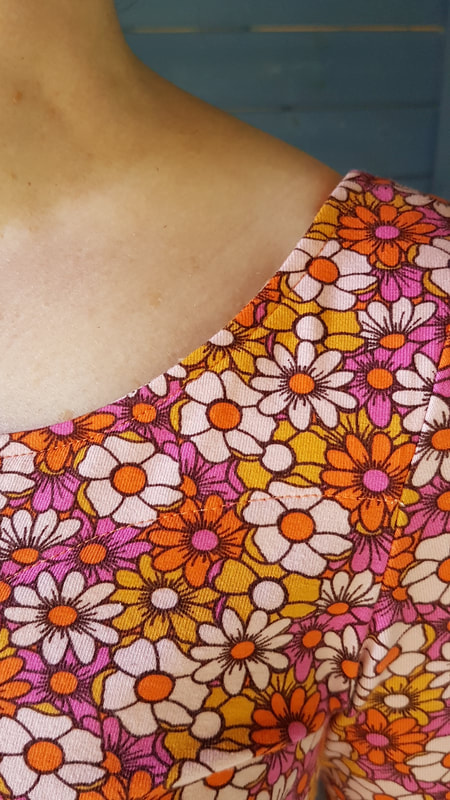
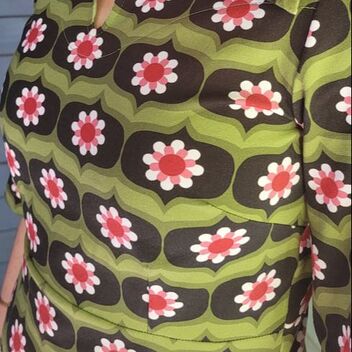
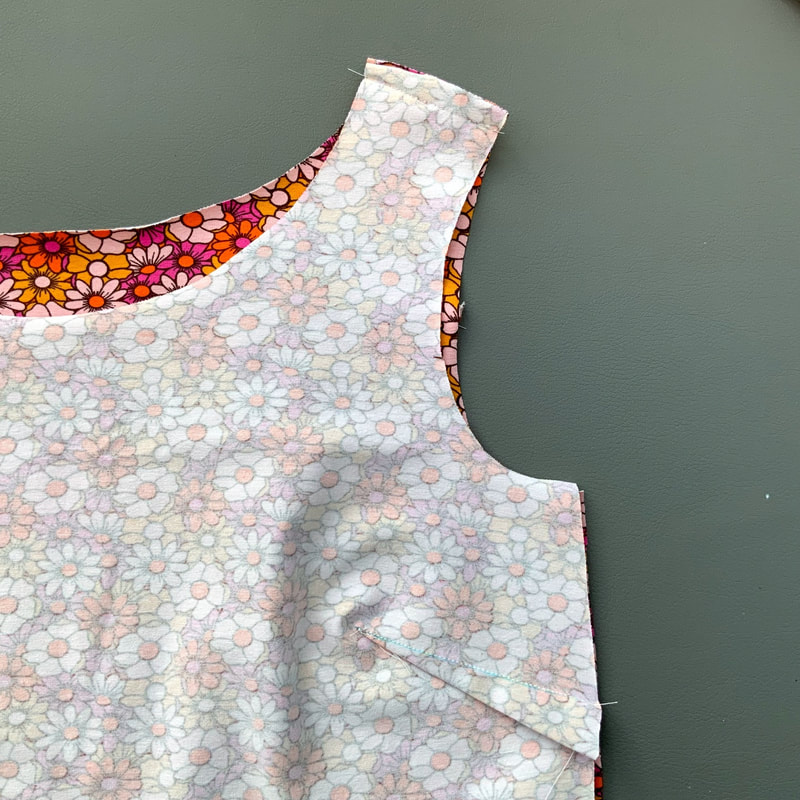
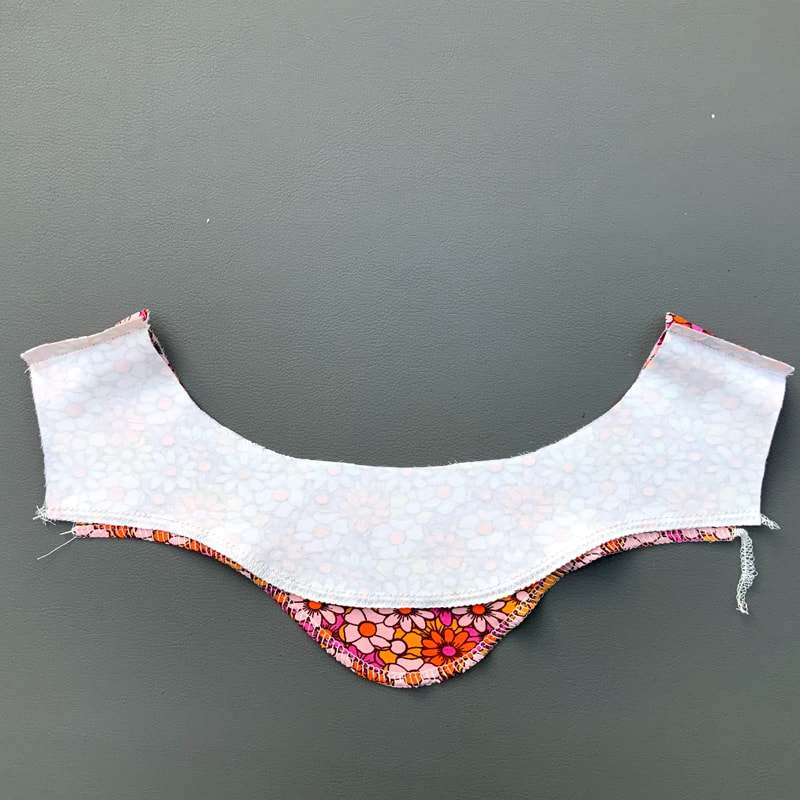
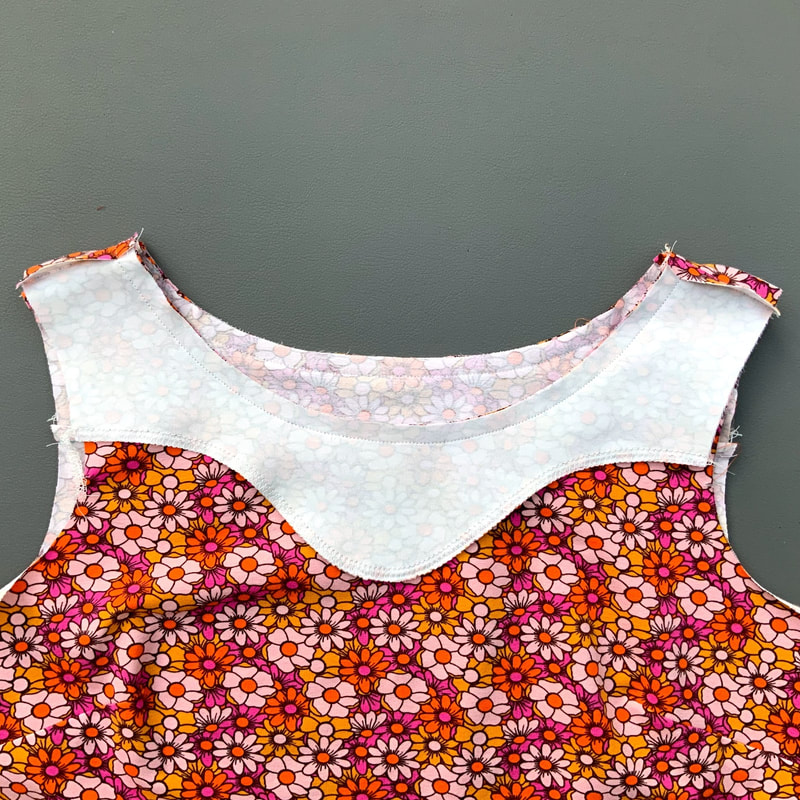
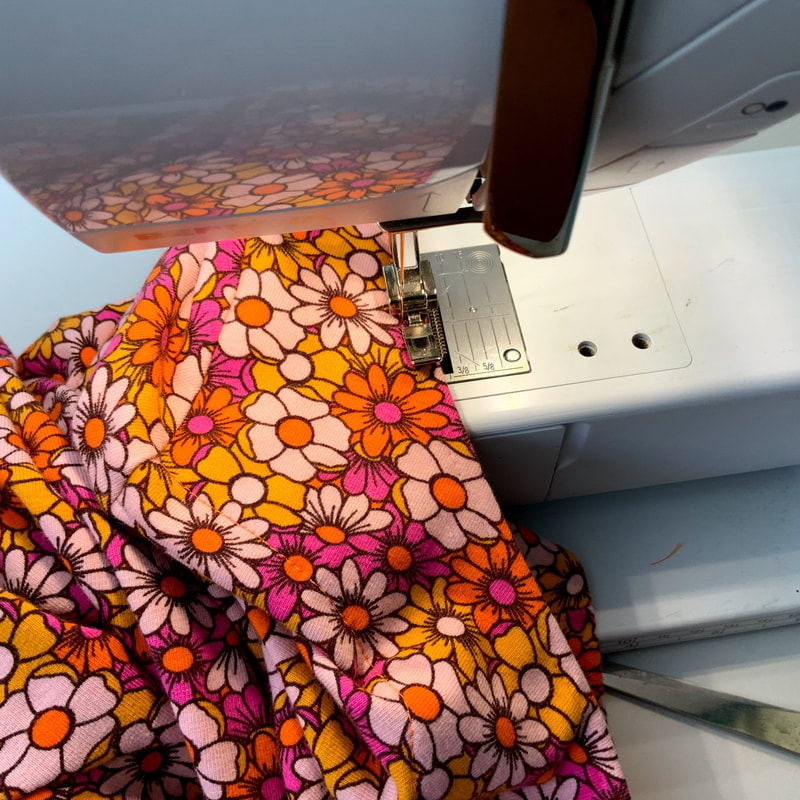
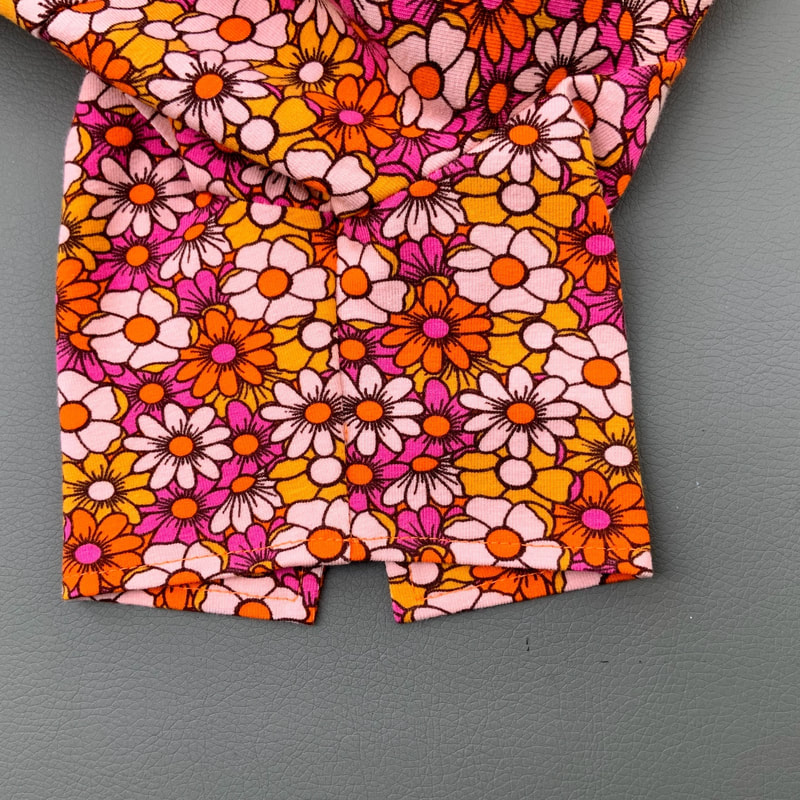
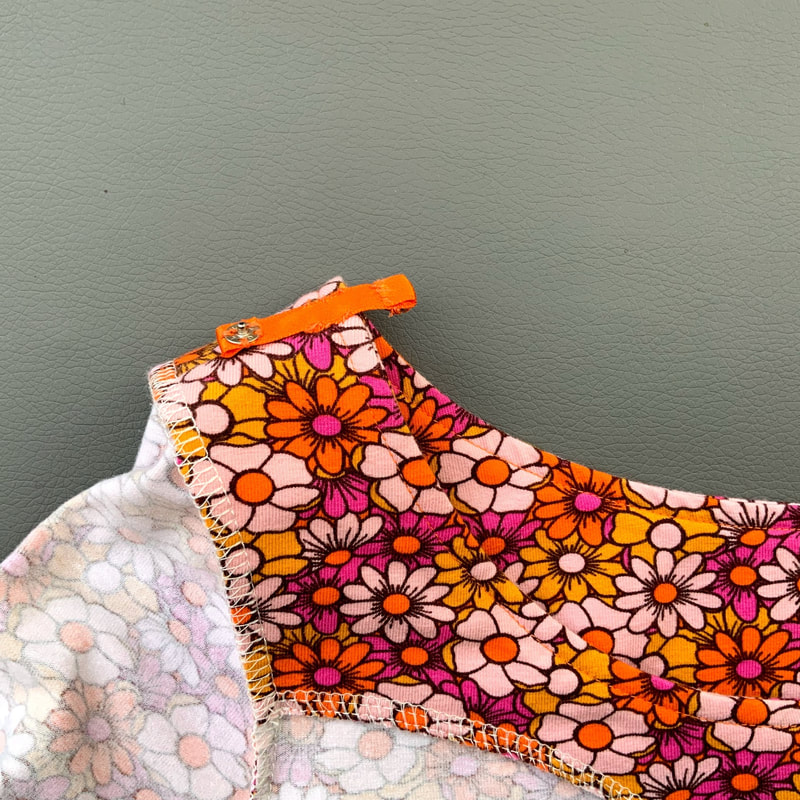
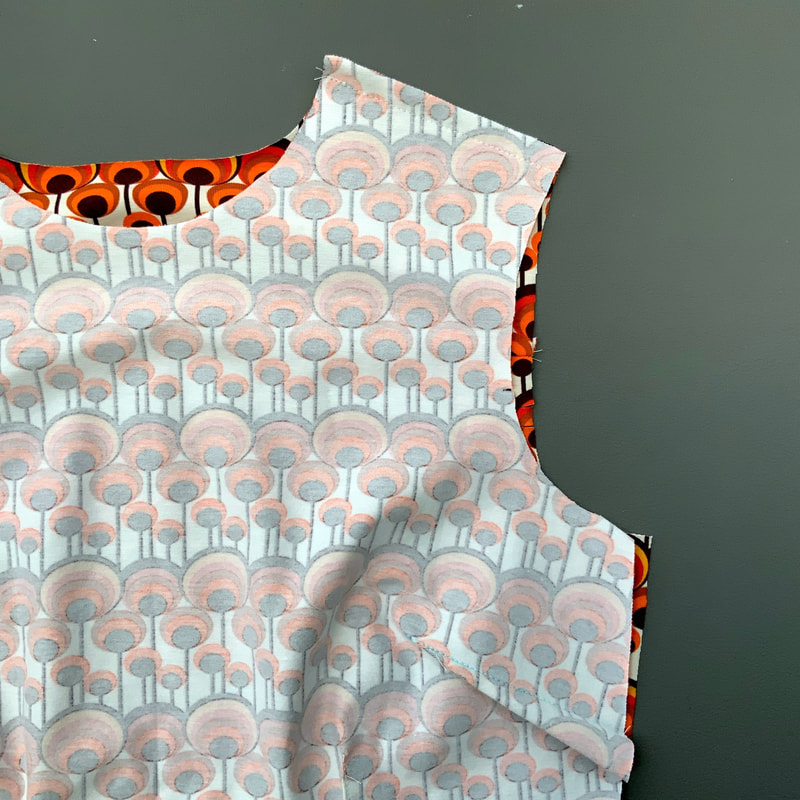
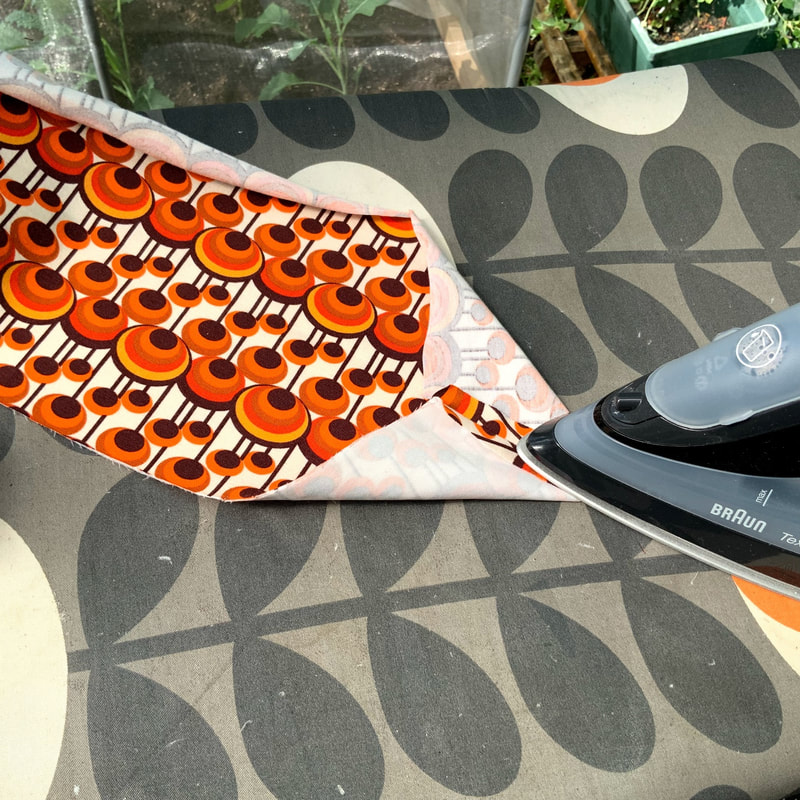
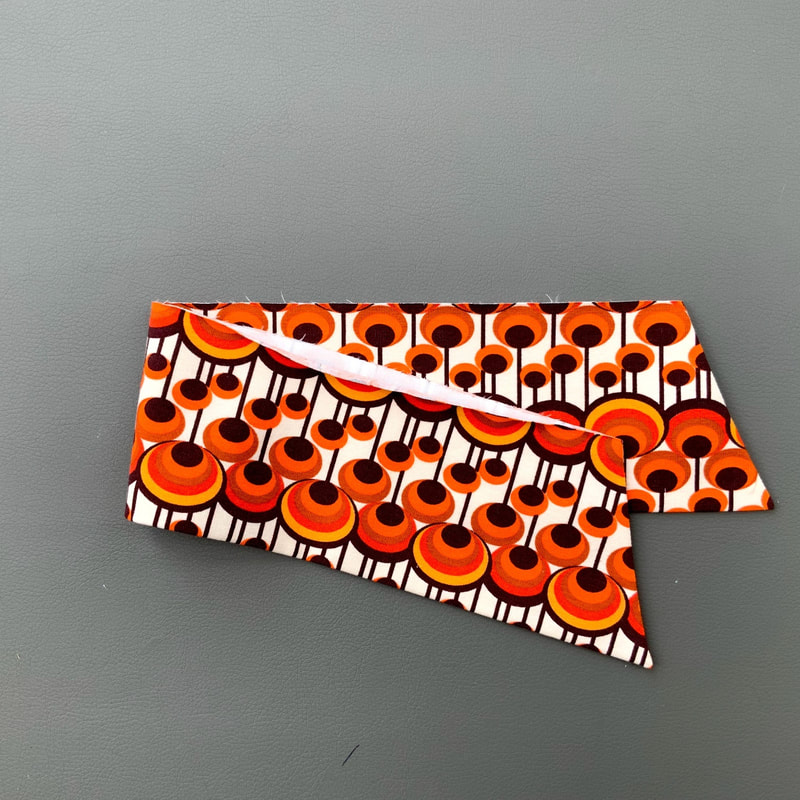
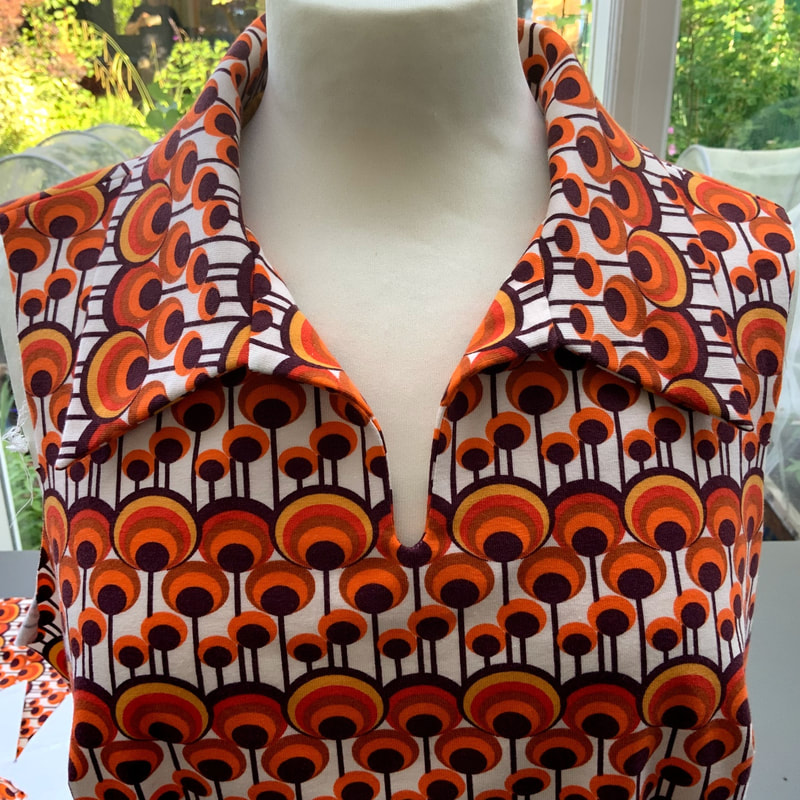
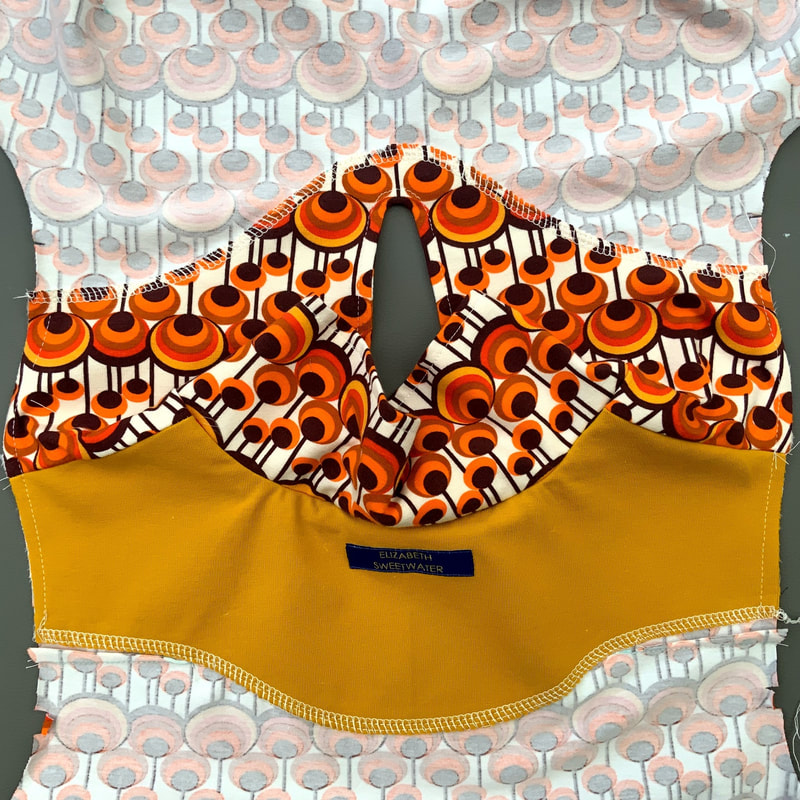
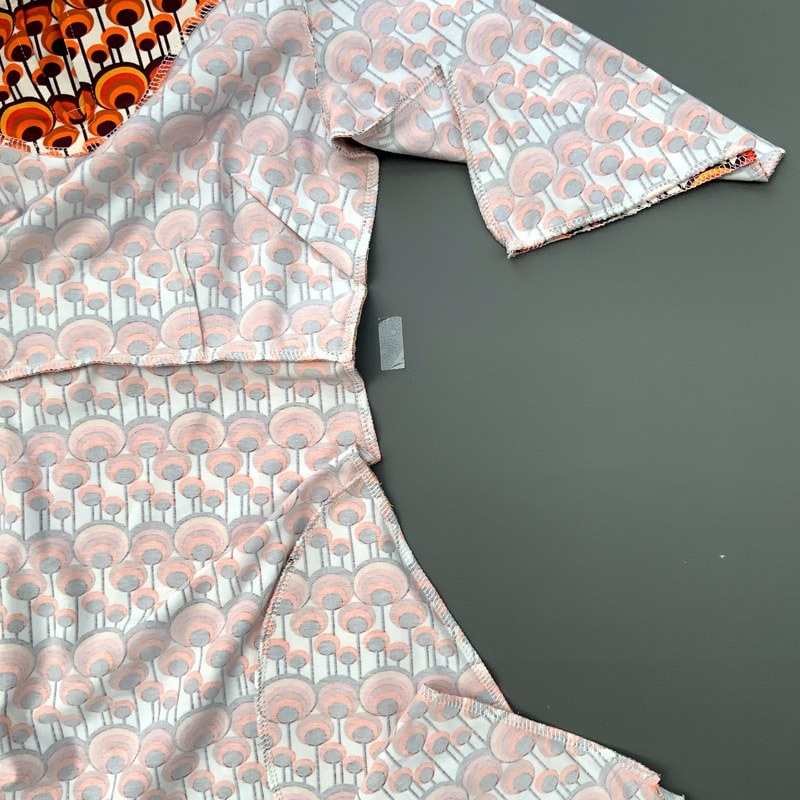
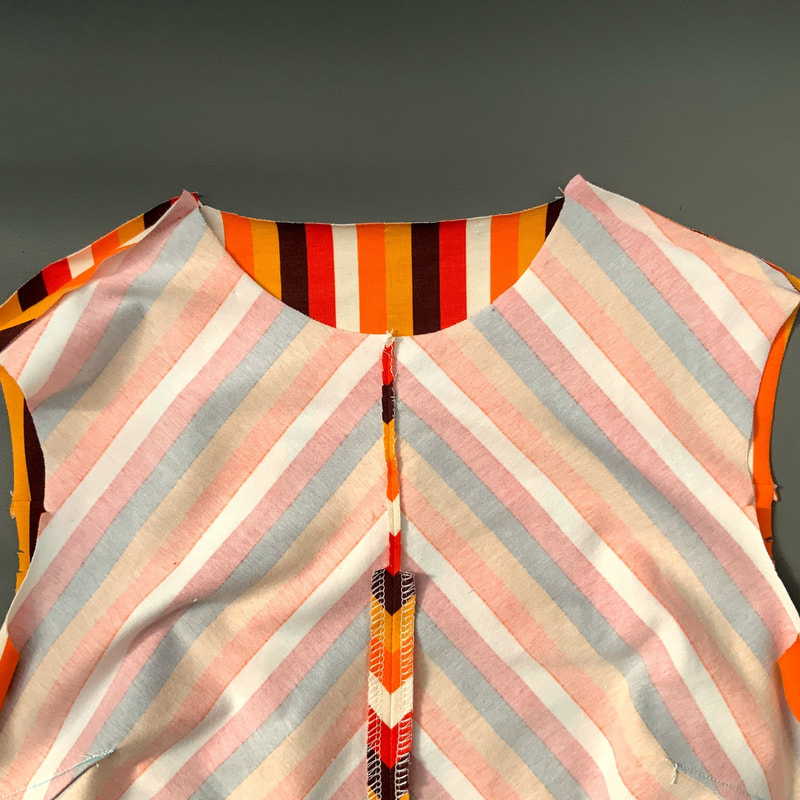
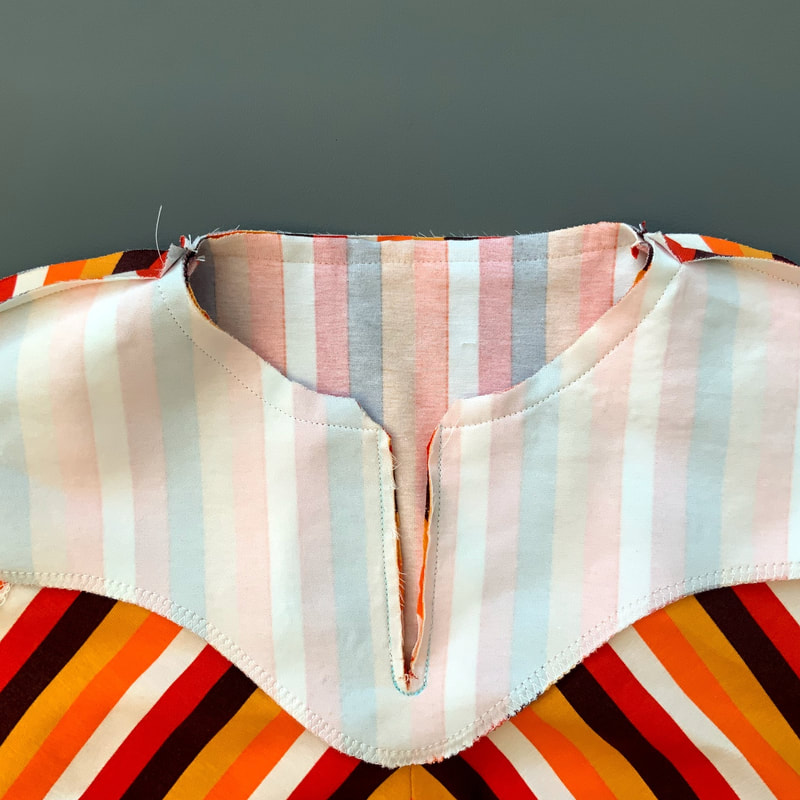
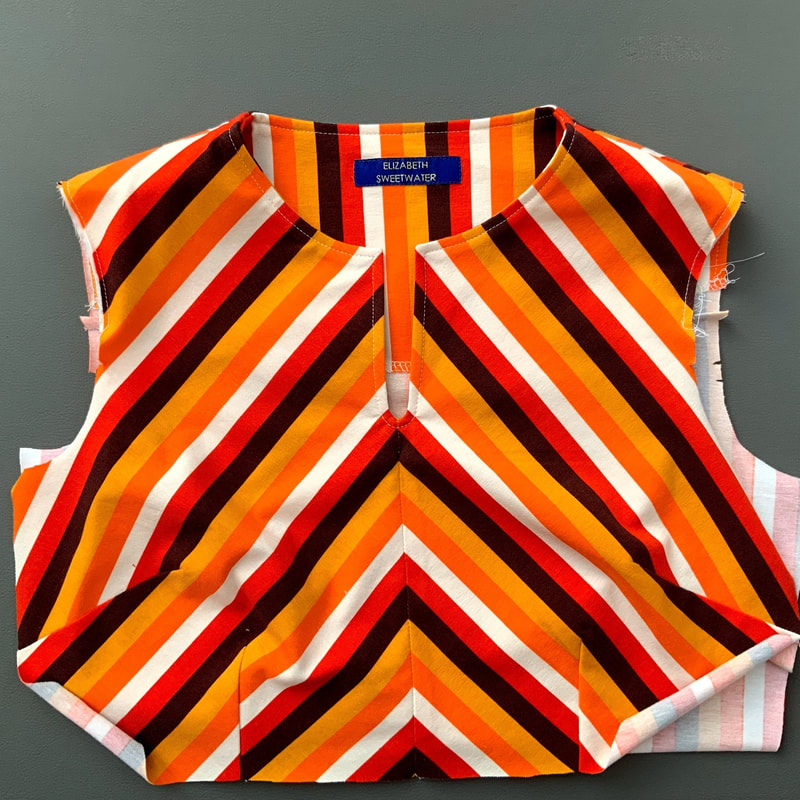
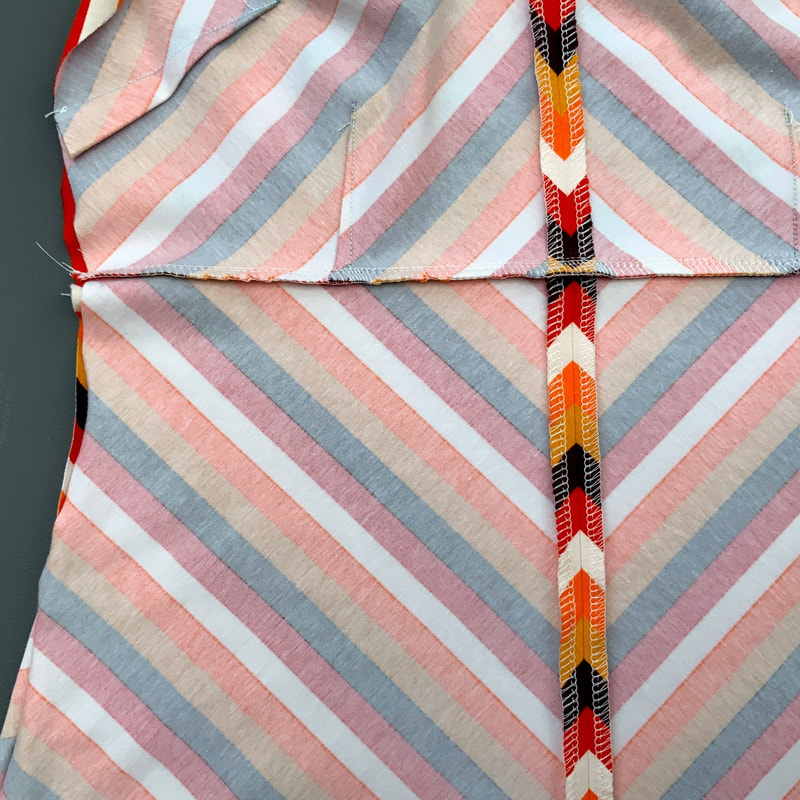
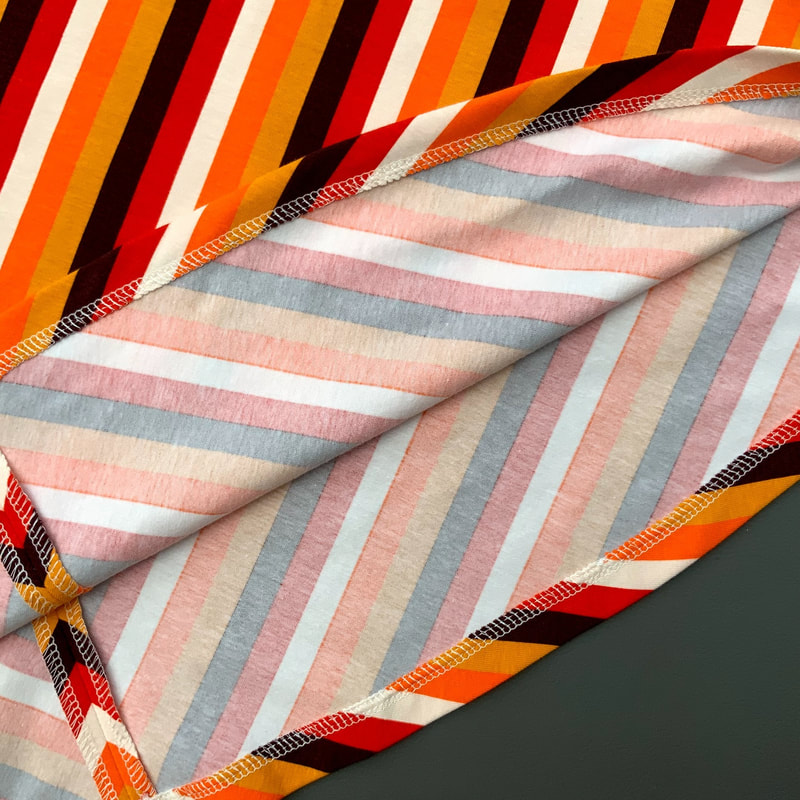
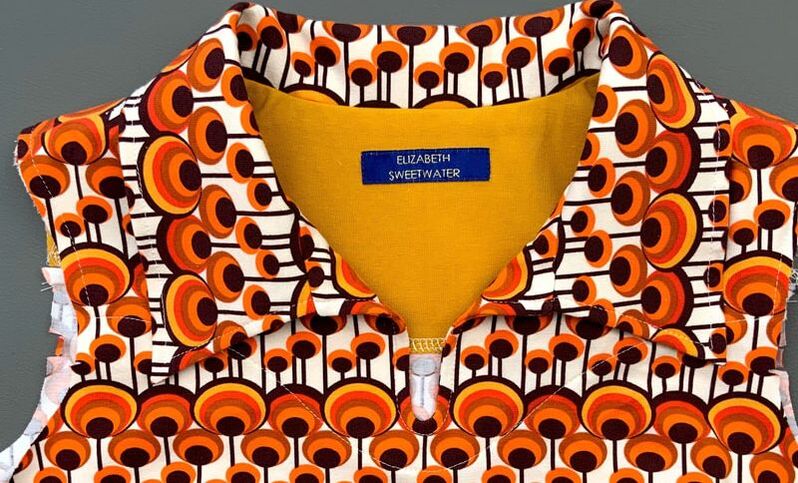 6p. De hals als deze is doorgestikt. The finished neck when topstitched. 7. Holiday dress B Mouwen, zakken en het in elkaar zetten Sleeves, pockets and assembling
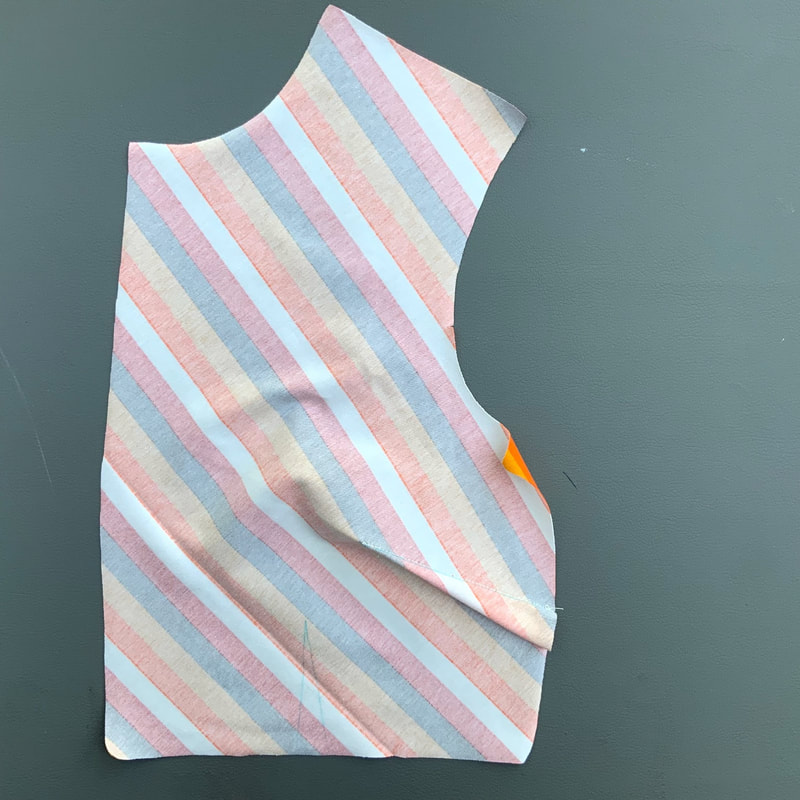
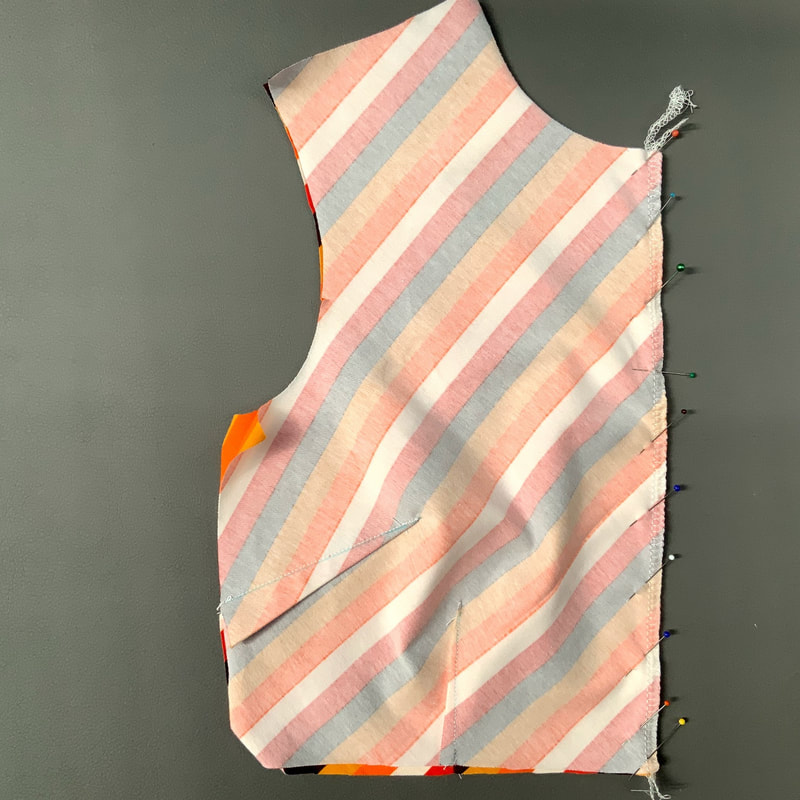
8. Holiday dress C Coupenaden en de hals Darts and neck
9. Holiday dress C Mouwen en het in elkaar zetten Sleeves and assembling
9m.
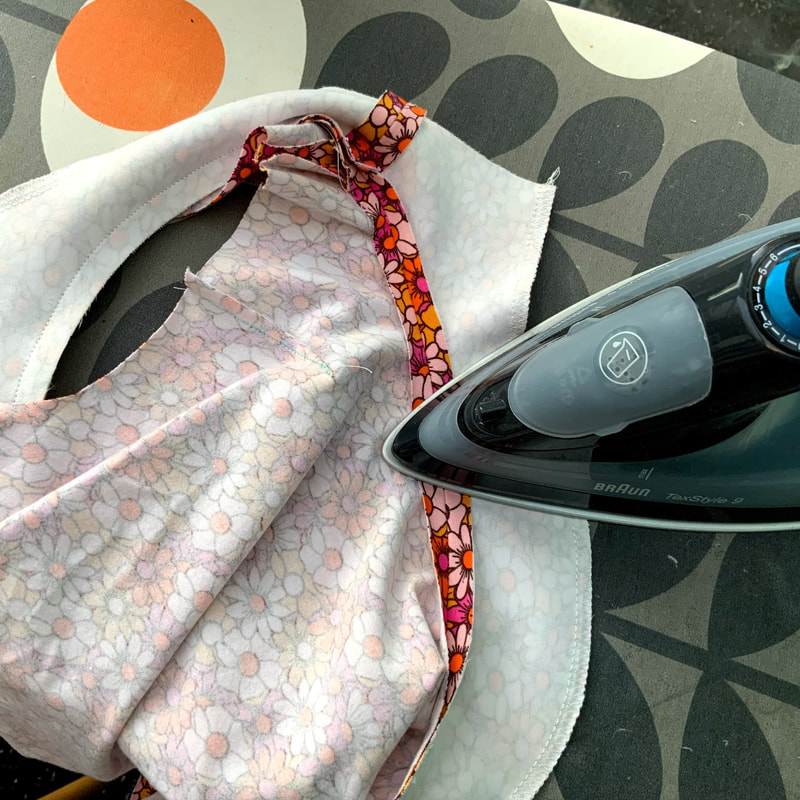
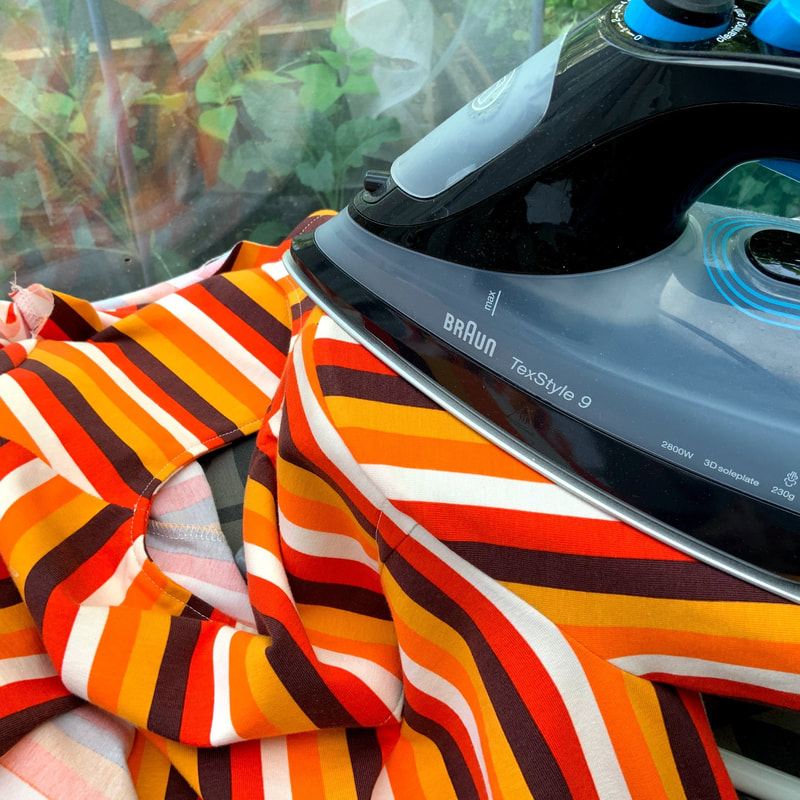
Nog een laatste keer strijken en je holiday dress is klaar! A final press and your holiday dress is finished! Comments are closed.
|

For all the latest patterns to buy visit my Webshop today. |