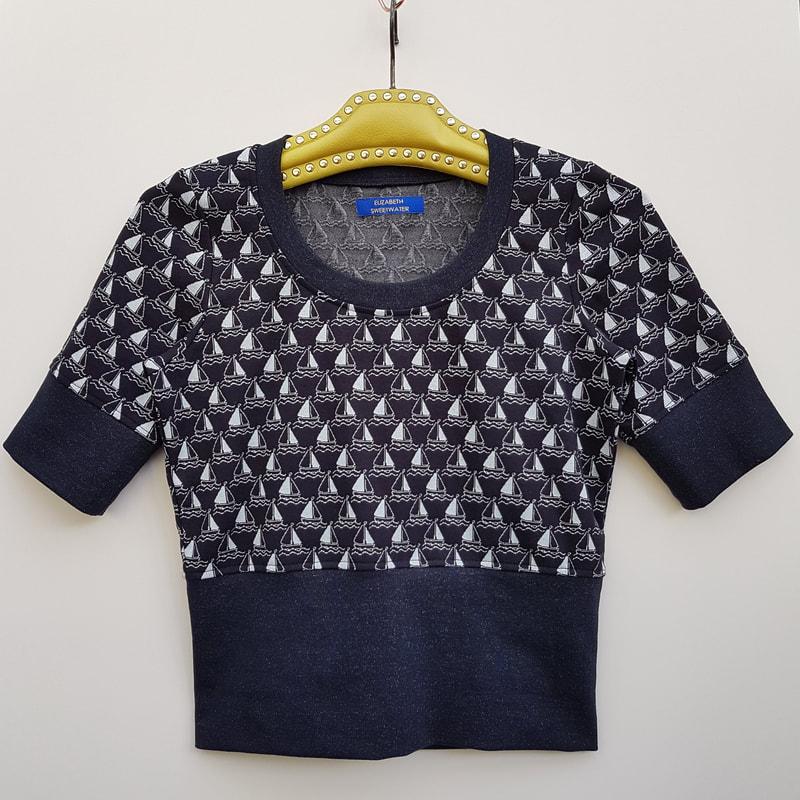
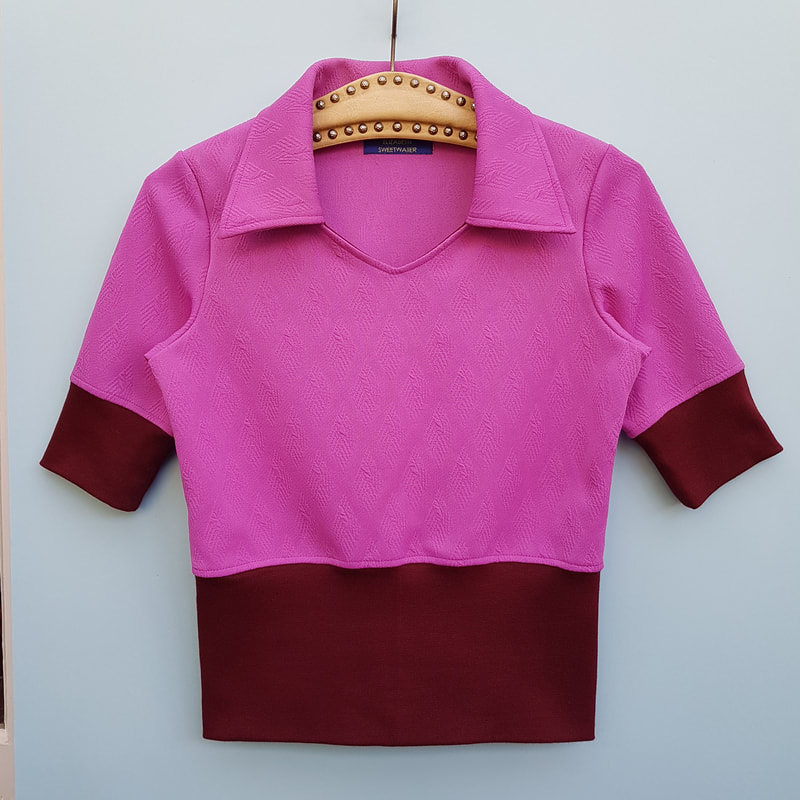
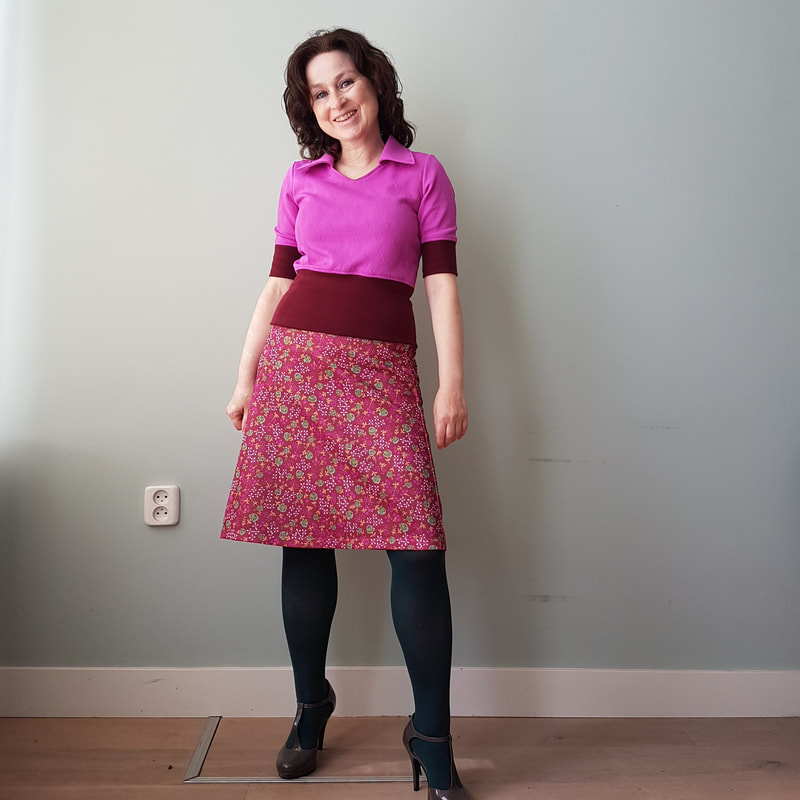
Elizabeth Sweetwater
  • Tutorials
  • Movies
  • Happy Sewers
  • About

Jumper/Spencer

9/12/2021

 
Jumper/Spencer
Picture
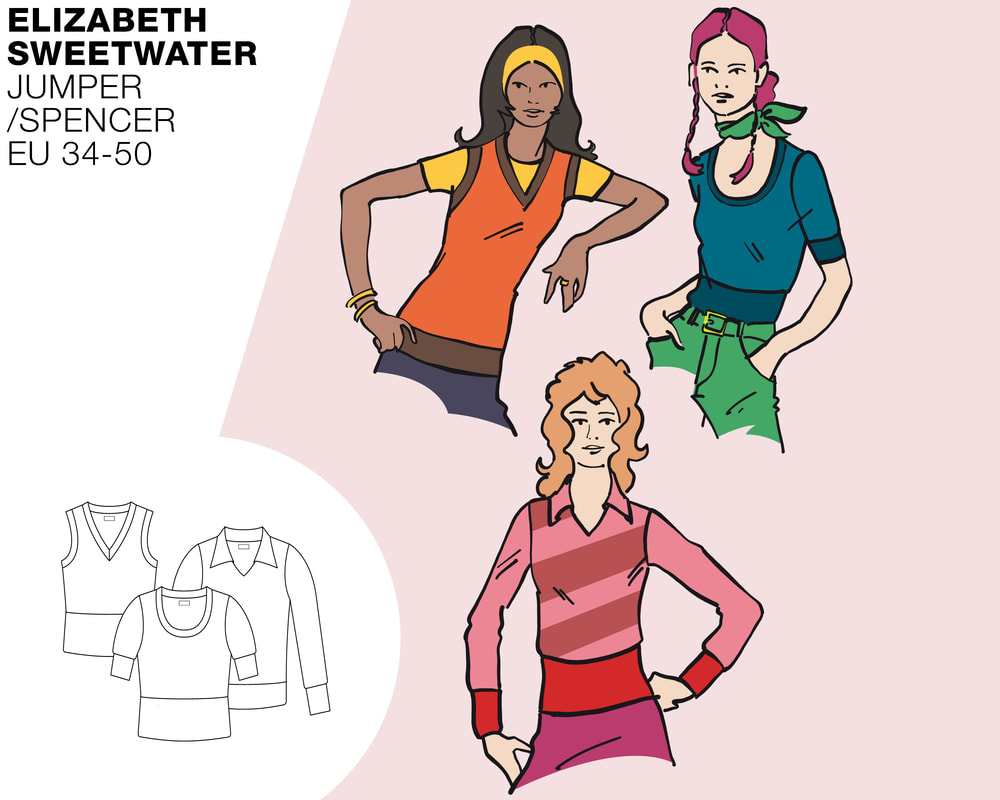
Introductie
Een echte retro klassieker deze jumper oftewel truitje. Een heel veelzijdig model die afhankelijk van het materiaal een heel ander uiterlijk krijgt. Maak je 'm in dunne sweat dan wordt 'ie sportief, in een (gerecycled) breisel ben je klaar voor de winter en in een Nicky velours met colourblock is de jumper helemaal seventies. Het heeft een fijne pasvorm en heel veel extra's. Je kunt kiezen uit een aangesloten model of een iets lossere fit. Er zijn driehalsopties waarvan 1 met kraagje, 2 mouwlengtes en een mouwloze versie (spencer). Ook kun je kiezen uit twee lengtes. Er is behalve deze gratis werkbeschrijving ook een youtube filmpje beschikbaar. 

Introduction 
A real retro classic, this jumper or sweater. A very versatile model that gets a completely different look depending on the material. If you make it in lightweight sweat it will be sporty, in a (recycled) knit you are ready for winter and in a Nicky velour the jumper is completely seventies. It has a great fit and lots of extras. You can choose from a fitted style or a slightly looser fit. There are three neck options: round, v-neck and with a collar; 2 sleeve lengths and a sleeveless version (spencer). You can also choose from two lengths. In addition to this free tutorial, a you tube video is also available with a further hack you can try out.


Picture
Picture
Picture
Picture

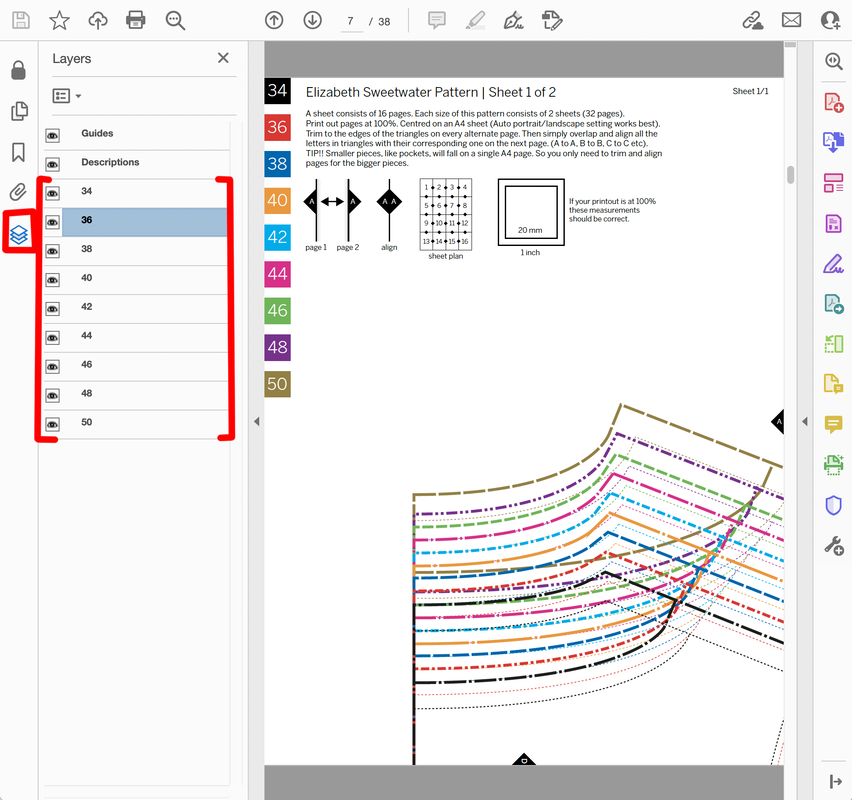
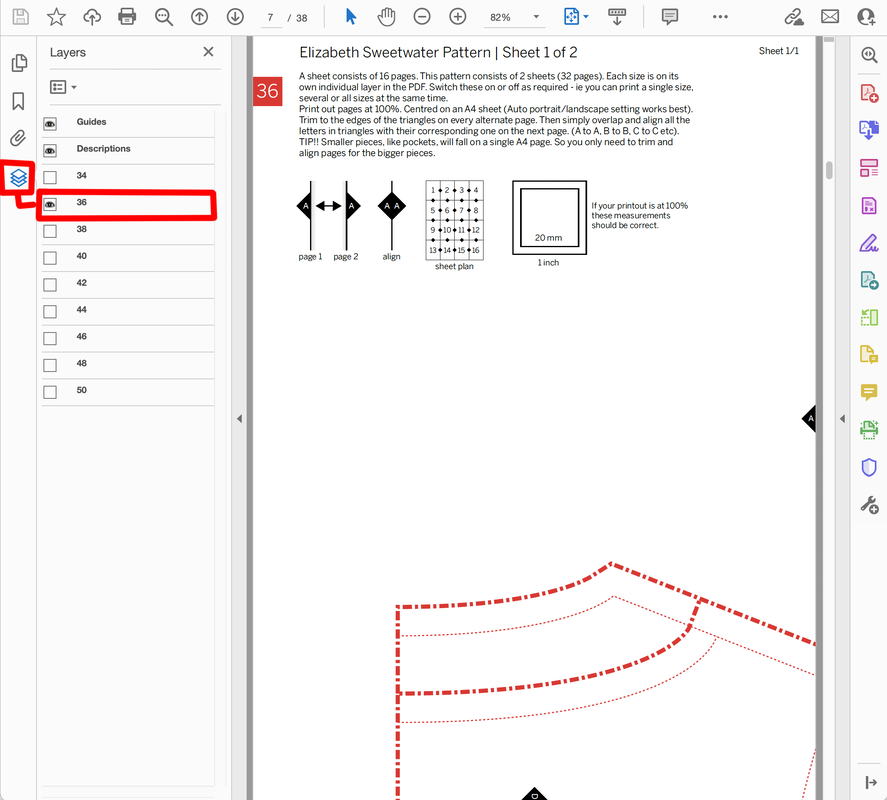
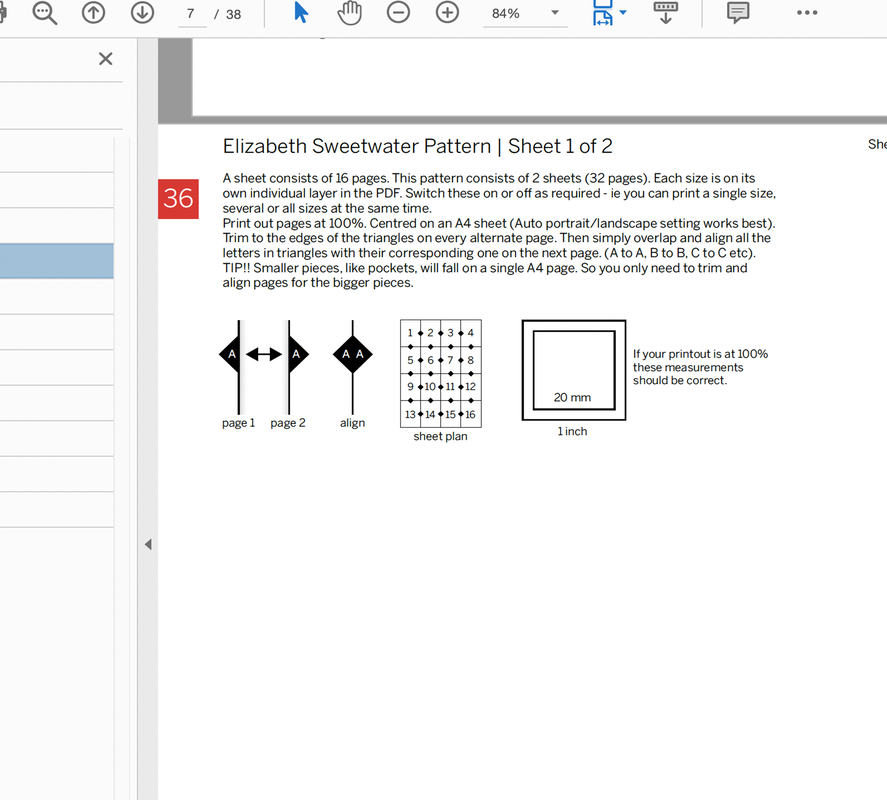
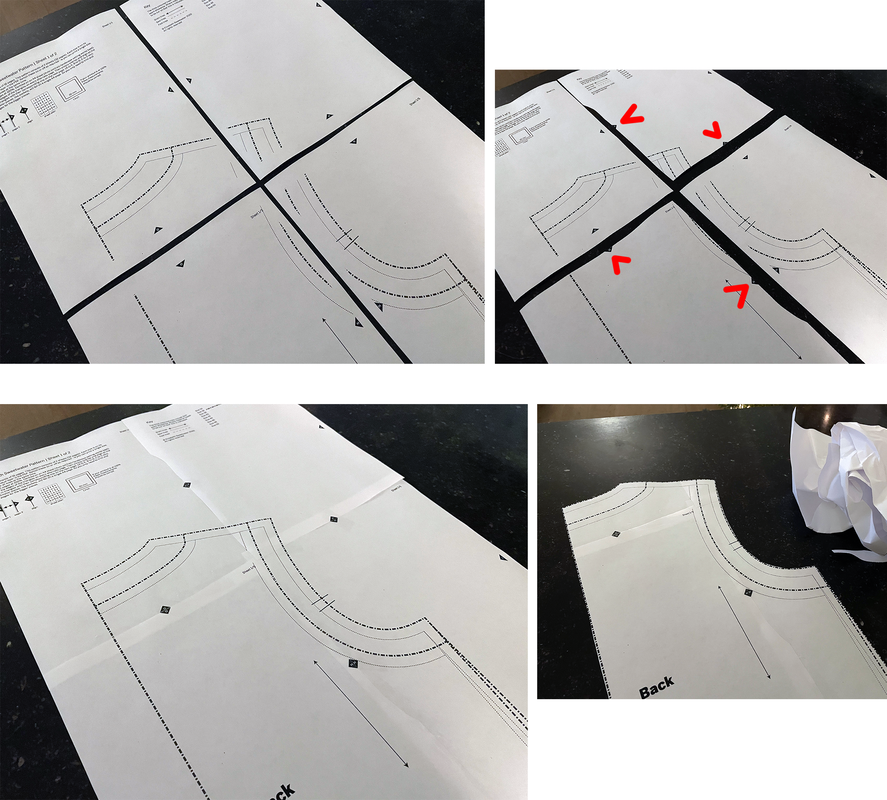
1.
Voorbereiding
Preparation

Bij aankoop van een van onze patronen ontvangt u 3 PDF-bestanden: een voor thuisprinters om op A4-papier af te drukken, een tweede voor A0-gebruikers om af te drukken in een printshop en een derde is voor mensen die een overheadprojector gebruiken. De volgende algemene introductietekst geeft een overzicht van hoe onze patroon-pdf's zijn opgezet en legt uit hoe je de A4-versie kunt afdrukken en hoe je de pagina's aan elkaar kunt plakken. A0-gebruikers kunnen bij hun printshop aangeven welke pagina's ze nodig hebben. Op de projector bestanden staan alle panden in dezelfde richting.
On purchasing any of our patterns you will receive 3 PDF files: one for home printers to print on A4 paper, a second at A0 is for printshop users and a third is for sewers who use an overhead projector. The following general introduction text provides an overview of how our pattern pdfs are set up and explains how to print out the A4 version and how to stick the pages together. A0 users should simply instruct their printshop which pages they require. Projector users will note that all pieces have the grain direction facing the same way.
Picture
1a.
Al onze patronen volgen dezelfde opzet zoals hier uitgelegd. Elk patroon begint met een voorblad, een inleiding, een lichaamsmatentabel, een ontwerptekening, een patroonchecklist en een kleurplaat. Het patroon is te vinden op de laatste lijst onder het tabblad Bladwijzers. 
All of our patterns follow the same set up as explained here. Each pattern starts with a cover page, an introduction, a body size chart, a design drawing, a pattern checklist and a colouring sheet.The pattern can be found on the last listing under the bookmarks tab.
Picture
1b.
After locating the pattern click on the layers icon. Here you can see the full range of sizes. They are all layered on top of one another. You can click on the eye icon by each individual size to turn it on or off.
After locating the pattern click on the layers icon. Here you can see the full range of sizes. They are all layered on top of one another. You can click on the eye icon by each individual size to turn it on or off.
Picture
1c.
Je kunt vervolgens de maat of maten selecteren die je wilt afdrukken.
You can then select the size or sizes you wish to print out.
Picture
1d.
Als je thuis print op een A4-printer, drukt u op het afdrukpictogram in het bovenste menu van de PDF. Uw afdrukdialoogvenster kan hiervan verschillen  (rechts in het midden weergegeven), maar ik heb een paar knoppen gemarkeerd om het te verduidelijken. Om inkt te besparen kun je instellen dat het patroon in grijstinten wordt afgedrukt. Selecteer de pagina's die je wilt afdrukken, over het algemeen vanaf pagina 7 tot de laatste pagina. Zorg ervoor dat de schaal is ingesteld op 'ware grootte' of '100%' - NOOIT op 'passend op pagina'. Het werkelijke paginaformaat van de PDF is kleiner dan A4. Stel de oriëntatie in op Auto, ik vind dat dit het beste werkt omdat het dan de pdf op een A4-blad centreert.
If printing at home on an A4 printer press the print icon in the top menu of the PDF. Your print dialogue box may vary to this one (shown middle right), but I have highlighted a few buttons to take note of. To save ink you can set to print the pattern in greyscale. Select the pages to print which will usually be from page 7 until the final page. Make sure the scale is set to 'actual size' or ‘100%' - NEVER to 'fit to page’. The actual page size of the PDF is smaller than A4. Set the orientation to Auto, I find this works best as it will then centre the pdf on an A4 sheet.
Picture
1e.
Rond elke pagina zie je kleine zwarte driehoekjes met letters erin. Met een schaar en doorzichtig plakband bij de hand, kun je vervolgens om elke pagina uitknippen tot aan de driehoeken en vervolgens de letters in de zwarte driehoeken uitlijnen met de overeenkomende op de volgende pagina (A naar A, B naar B, enz.). Vervolgens kunt u het blad aan elkaar plakken. Een vel kan uit 16 of 20 pagina's bestaan, afhankelijk van het gekochte patroon. Sommige patronen bestaan ​​uit één volledig vel (bijv. rokken met 16 pagina's), sommige uit twee vellen (bijv. jurken met 32 ​​pagina’s).
Around each page you will see small black triangles with letters inside. With scissors and clear sticky tape at hand, you can then cut out every alternate page to the triangles and then align the letters in the black triangles with the matching ones on the following page (A to A, B to B, etc). You can then proceed to stick the sheet together. One sheet can consist of 16 or 20 pages depending on the pattern purchased. Some patterns consist of one full sheet (eg. skirts with 16 pages), some of two sheets (eg. dresses with 32 pages).
Picture
1f.
Nadat je je pagina's hebt afgedrukt, leg je ze op een plat oppervlak. Knip de pagina's om en om uit tot aan de driehoekjes. Plak vervolgens met doorzichtig plakband de driehoeken met dezelfde letter aan elkaar. Knip vervolgens je patroondeel uit tot aan de stippellijnen. Deze stippellijnen bevatten de benodigde naadtoeslag voor elk stuk. De dunnere stippellijnen geven de uiteindelijke maat aan. Voor het gemak zijn alle namen van de stukken, samen met de draadrichting en handige instructies in de afzonderlijke patroondelen geplaatst, zodat u het overtollige papier veilig kunt weggooien (recycle). Let op dat sommige patronen ook een verklarend diagram kunnen bevatten op een van de pagina's die bewaard moeten worden. Als je de  patroondelen op patroonpapier wilt overtrekken, moet je er aan denken alle markeringen te kopiëren (bijv. draadrichting, knipjes etc.).
Once you have printed out your pages lay them out on a flat surface (top left). Cut out to the triangle edge on alternate pages (top right). Then with clear sticky tape connect the triangles that correspond to each other (bottom left). Then cut out your pattern piece to the dashed lines (bottom right). These dashed lines include the necessary seam allowance for each piece. The thinner dotted lines indicate the finished size. For convenience all names of pieces, along with grain direction and helpful instructions have been placed inside individual pattern pieces, so you can safely throw away (please recycle) the excess paper. Note some patterns may also include an explanatory diagram on one of the pages that should also be kept. 
To continue trace all the pattern pieces onto pattern paper, remembering to copy all the markings (eg. darts, piece to piece alignment lines etc).
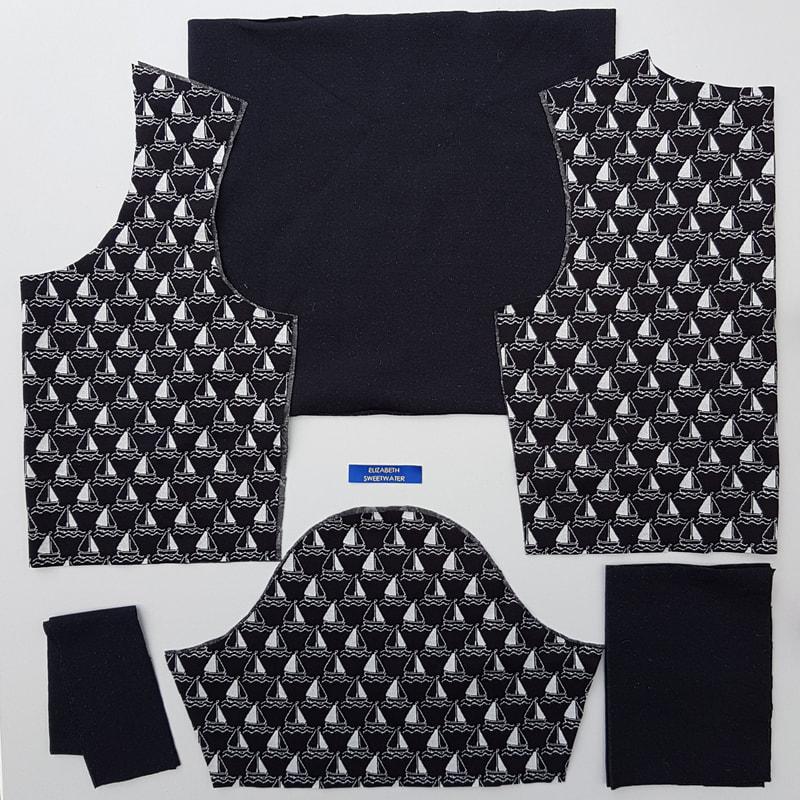
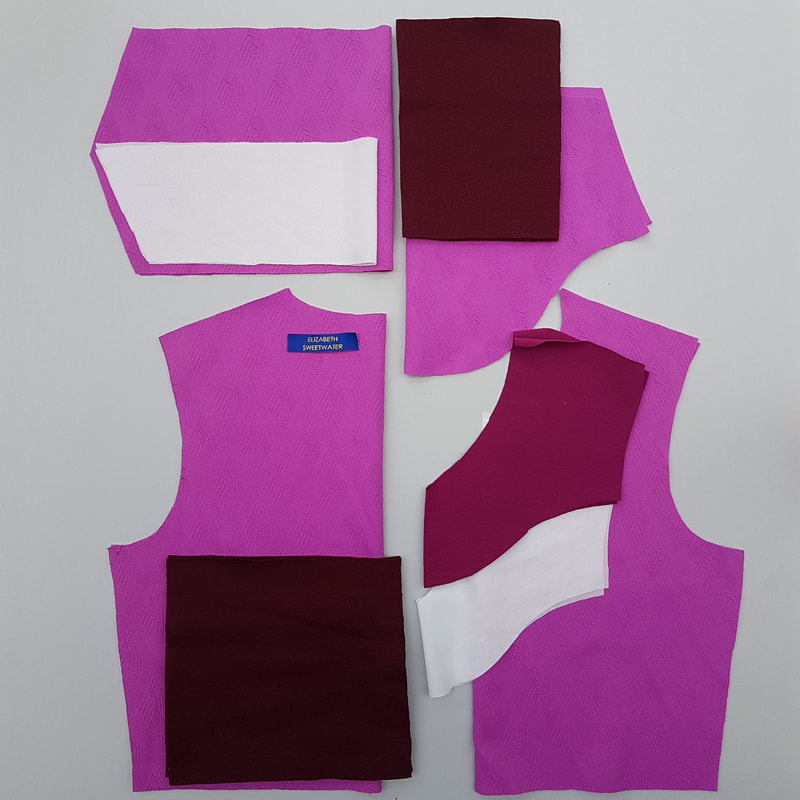
1g.
Nu je al je stukken hebt uitgeknipt raadpleeg het onderstaande overzicht om je voor te bereiden op het uitknippen van de door jou gekozen stof.
Now you have cut out all your pieces consult the overview below to prepare yourself for the next stage of cutting out the pieces from your chosen material.
Patroondelen:
- Voorpand knip 1x aan stofvouw
- Achterpand knip 1x aan stofvouw
- Tailleband deel voor knip 1x aan stofvouw (optioneel)
- Tailleband deel achter knip 1x aan stofvouw (optioneel)
- Mouw biezen of armsgat biezen knip 2x aan vouw
- Mouwen knip 2x
- Halsbies knip 1x aan stofvouw.
- Kraag knip 1x aan stofvouw.
- Eventueel een beleg deel 1x aan de stofvouw
Pattern Pieces:
- Front piece cut 1x on fabric fold
- Back piece cut 1x on fabric fold
- Waistband part for cut 1x on fabric fold (optional)
- Waistband part at the back cut 1x on fabric fold (optional)
- Sleeve bands or armhole bands cut 2x on fabric fold
- Sleeves cut 2x
- Neckband cut 1x on fabric fold.
- Collar cut 1x on fabric fold.
- Optionally a facing part 1x on fabric fold

2.
Checklijst
Checklist
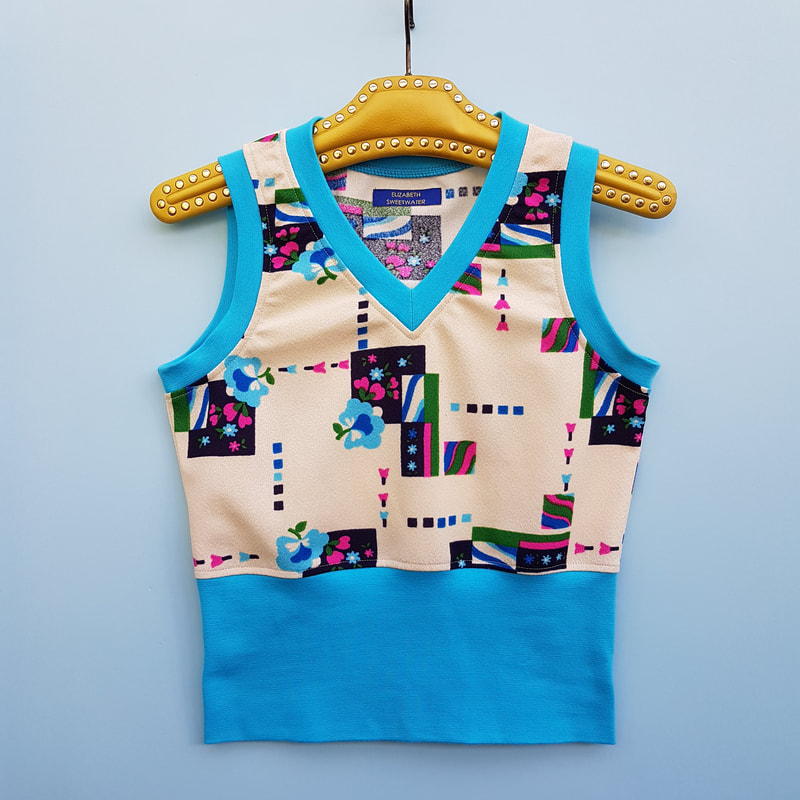
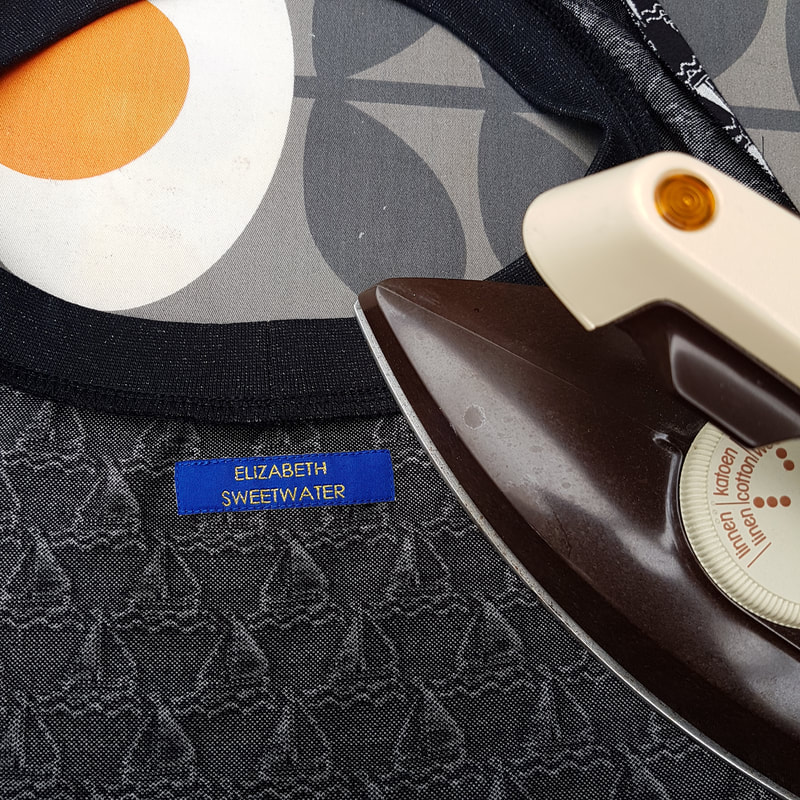
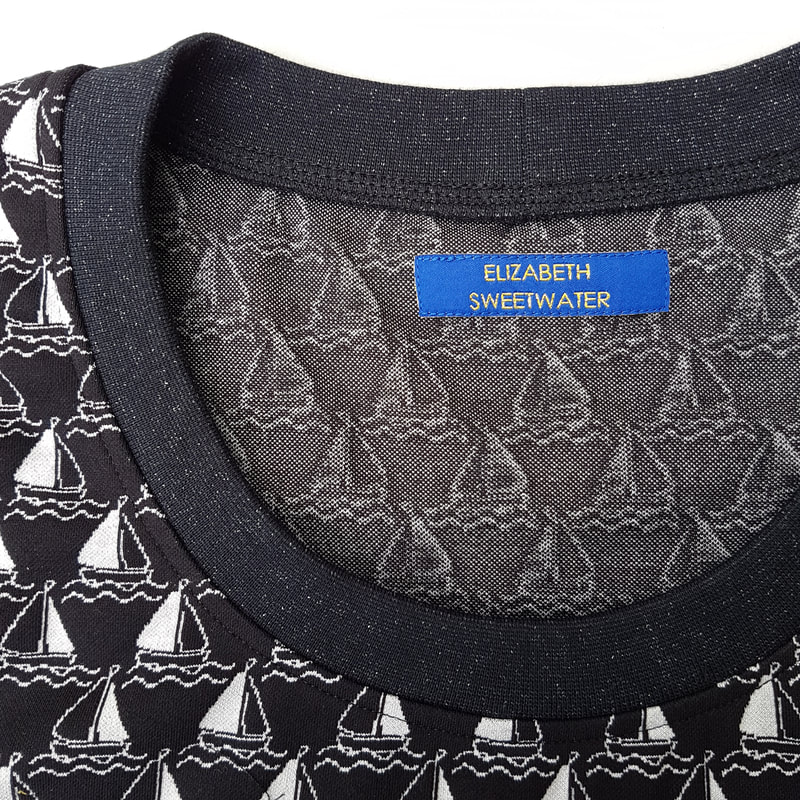
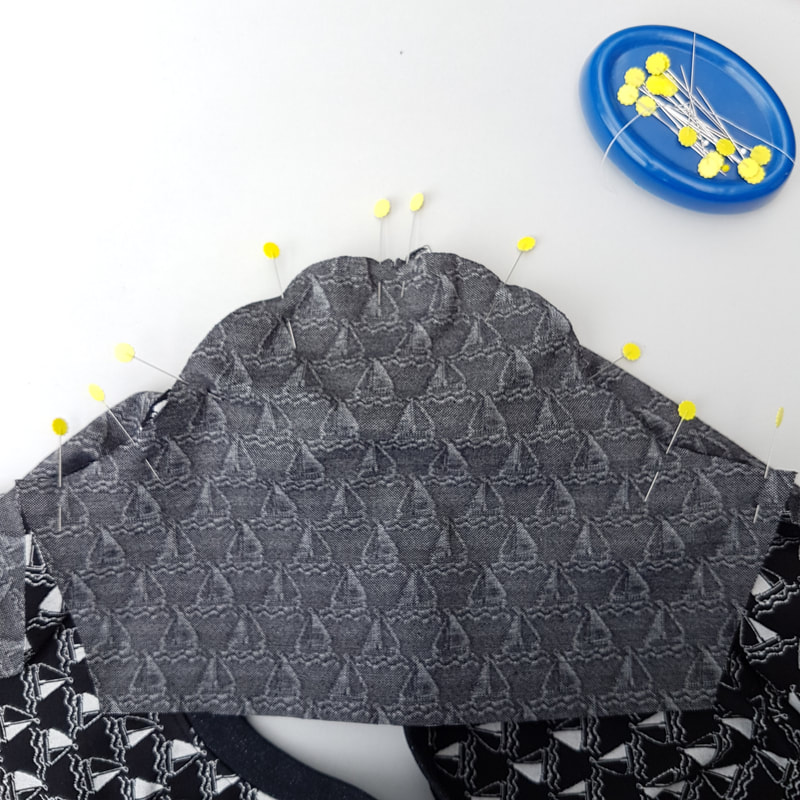
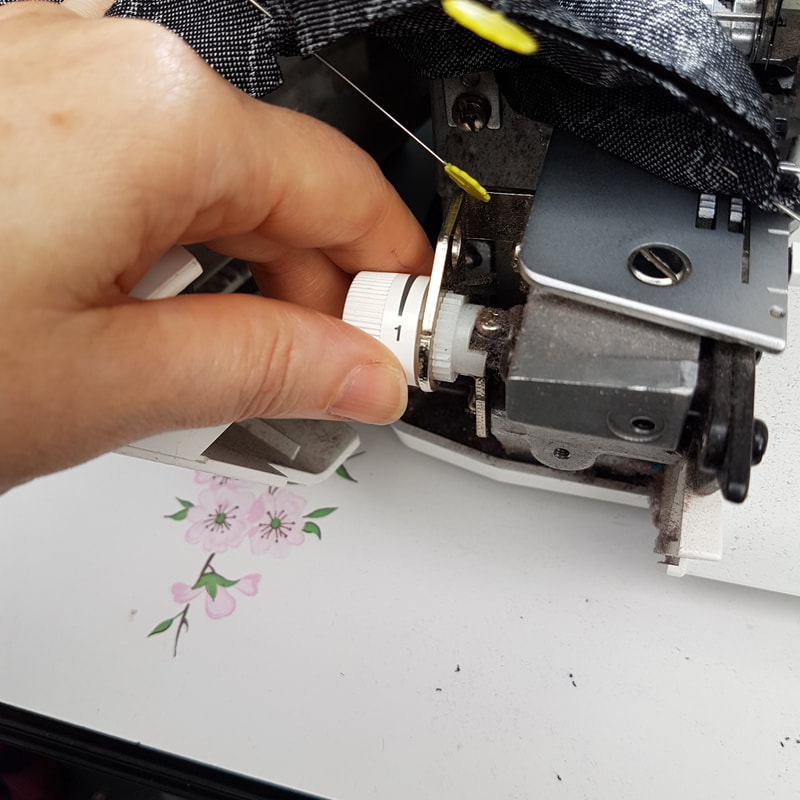
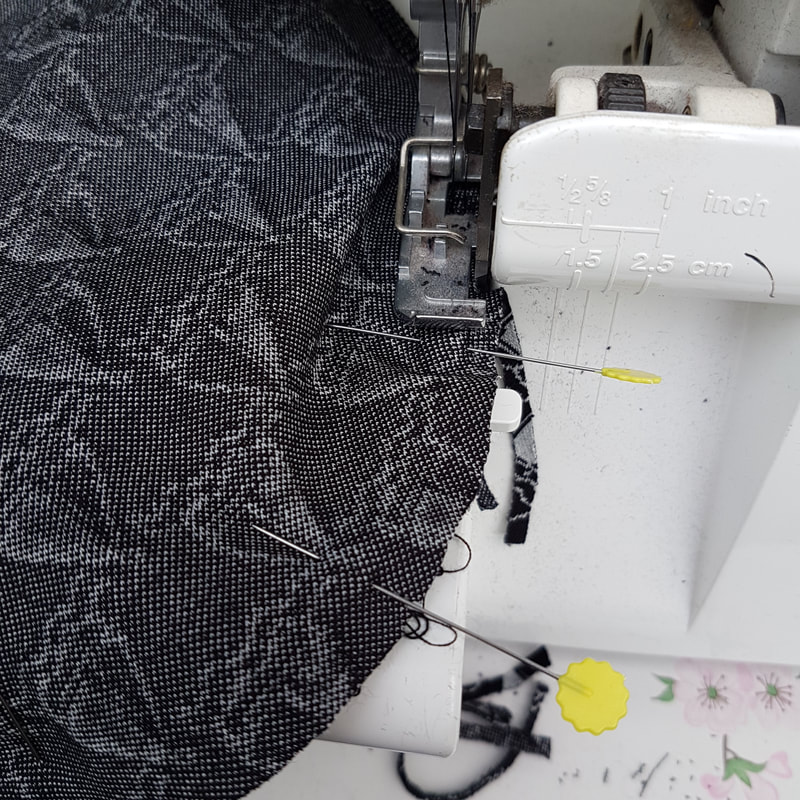
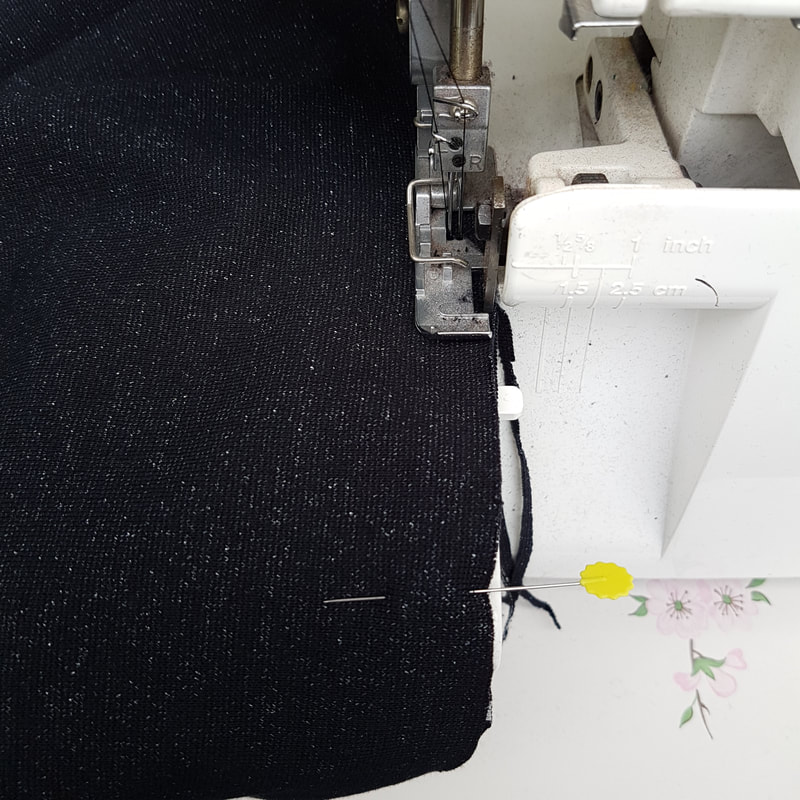
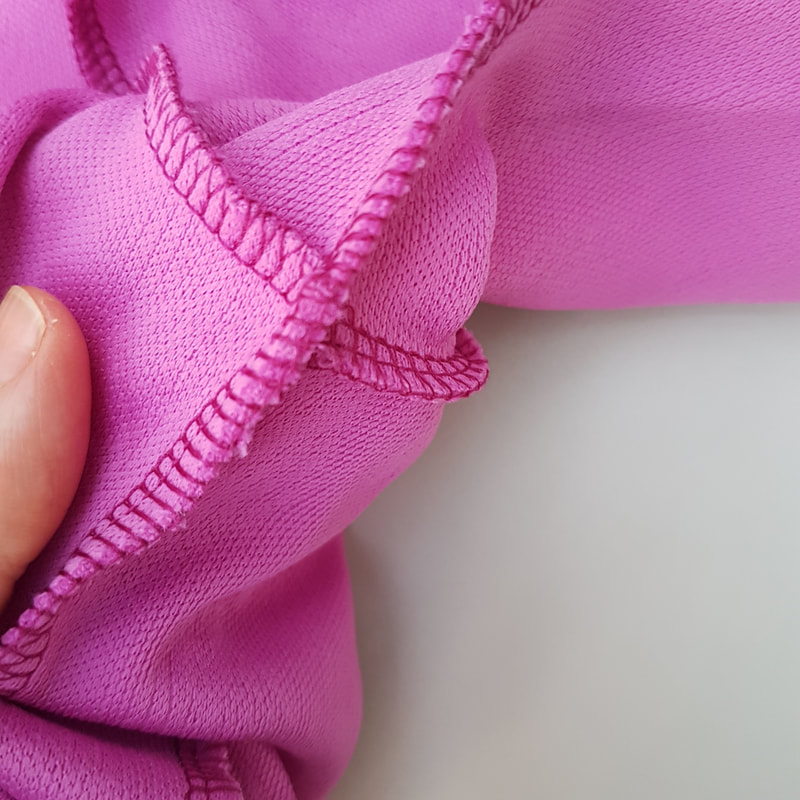
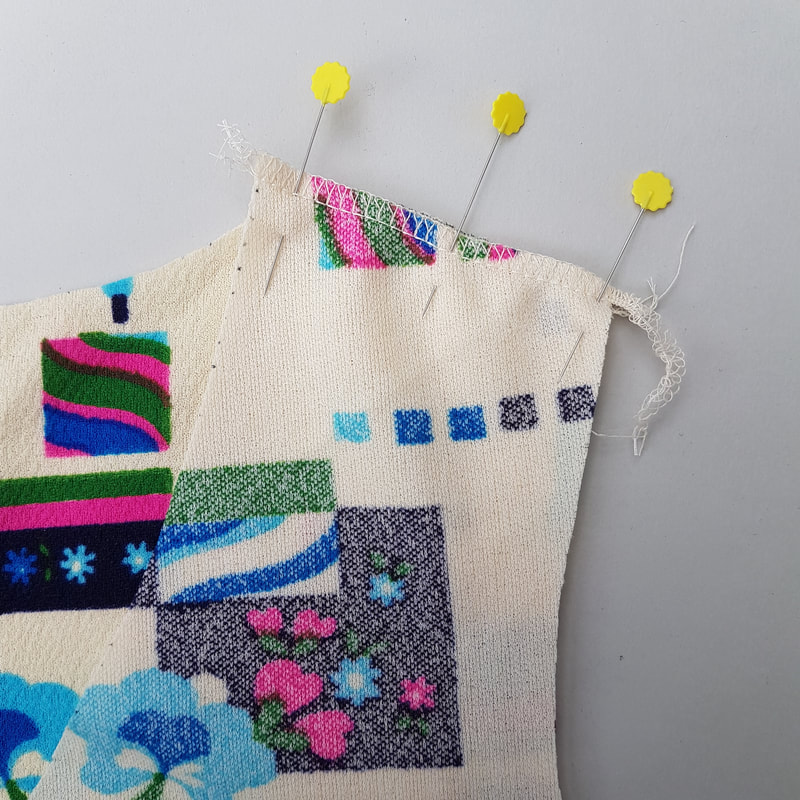
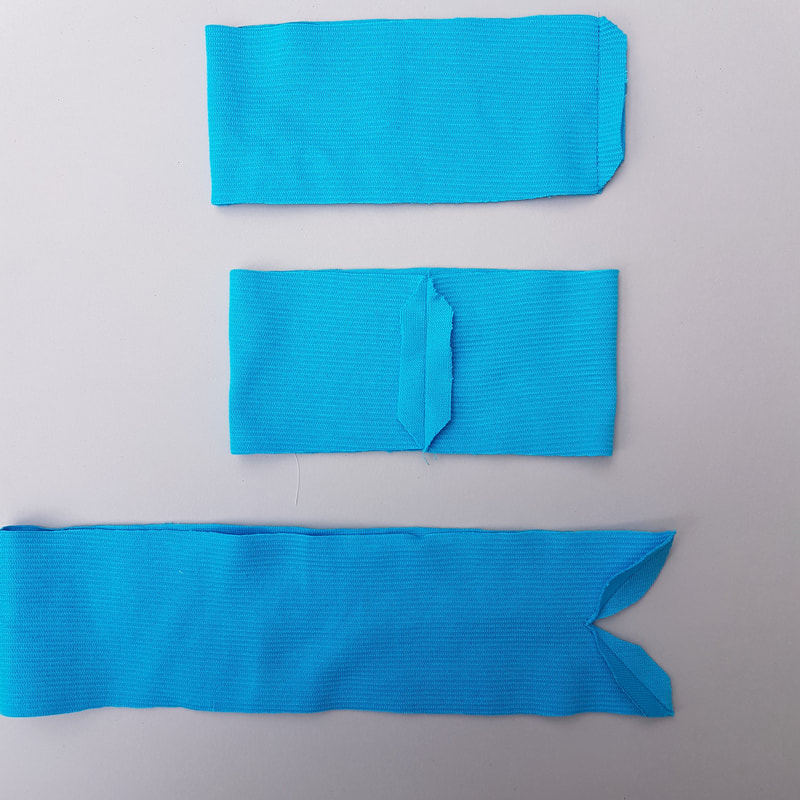
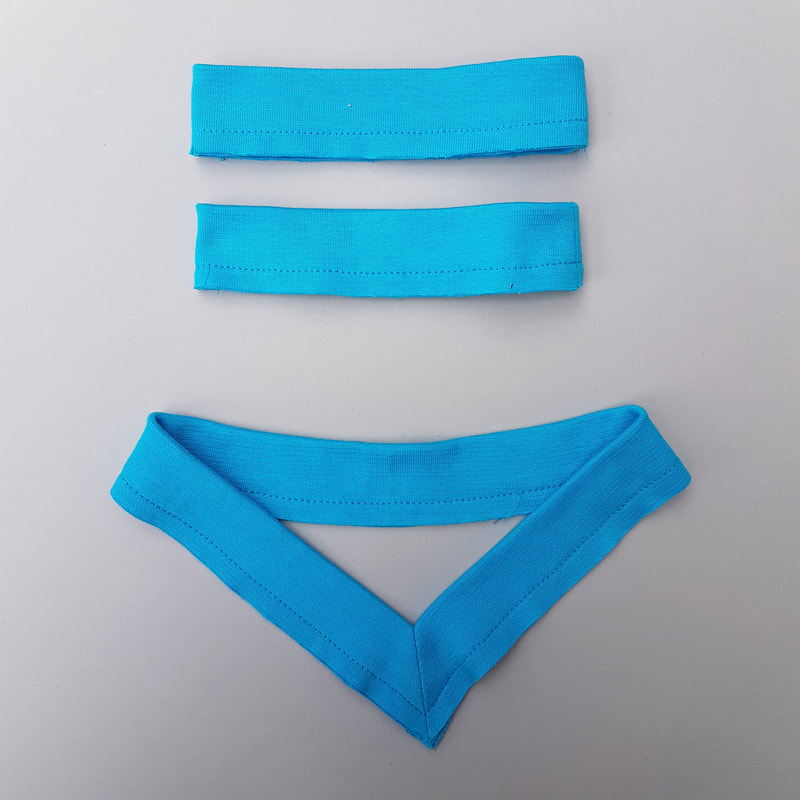
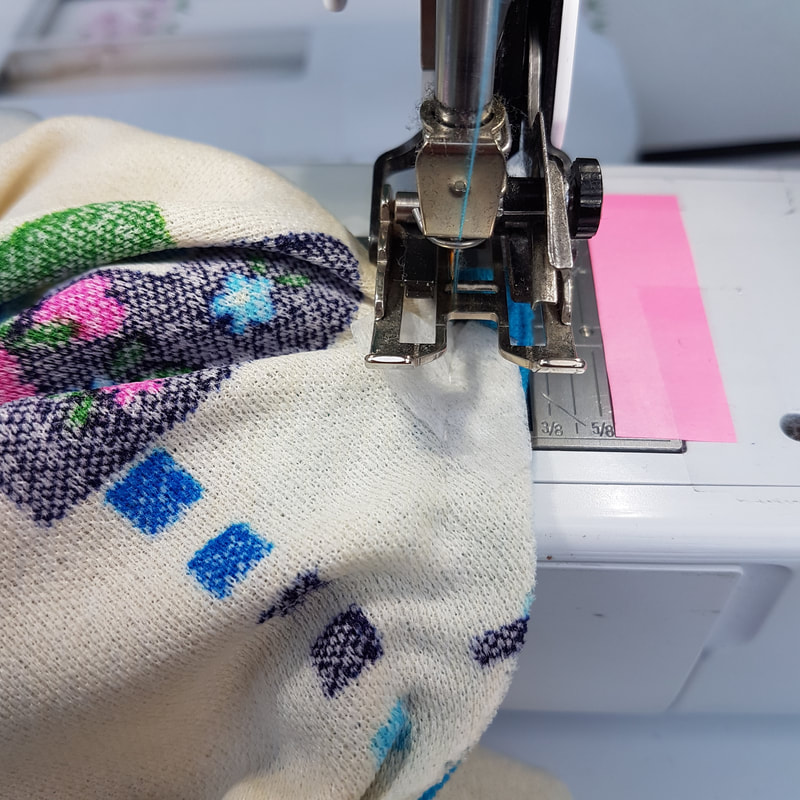
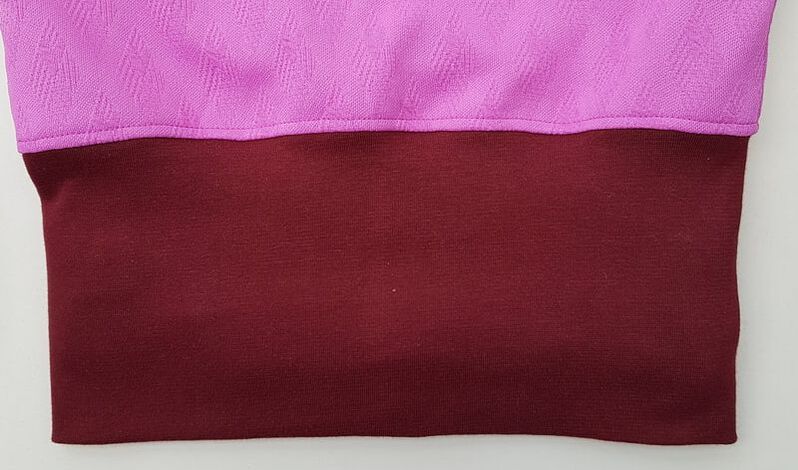
Picture
 Jumper met ronde hals
Jumper with round neck
​
Zie stap/See step 3-4


Hoofdstof/Main fabric:

Geschikte stoffen/Suitable fabrics​
French Terry, Nicky velours/badstof, gebreide stof (of een trui die je wil upcyclen), jaquard tricot.
French Terry, Nicky velour/terry towelling, knitted fabric (or a sweater to upcycle), jaquard jersey.
150cm breed/wide

Patroondelen/patternparts
Voorpand, achterpand, mouwen
Front part, back part, sleeves

Afmeting/amount
70cm t/m maat 40 en 120cm vanaf maat 42
70cm up to size 40 and 120cm from size 42


Boordstof/Ribbing:

66-70 cm rondgebreid / tubular knit

Patroondelen/patternparts
Manchetten, tailleband of heupband, halsbies
Cuffs, waistband or hipband, neckband

Afmeting/amount
50cm voor de versie met de 8cm heupband
50 cm for the 8cm hipband version
80cm voor de versie met de 15cm tailleband
80cm for the 15cm waistband version

Voor maat 34 t/m 38 kun je de tailleband uit 1 stuk knippen zonder naden, afhankelijk van de rekbaarheid van de stof. / For size 34/38 you can cut the waistband without seam so in one piece.


Fournituren/Haberdashery:

- Eventueel een geweven label
- A woven label (optional).
​
Picture
Jumper met kraag
Jumper with collar
Zie stap/See step 5-6

Hoofdstof/Main fabric:

Geschikte stoffen/Suitable fabrics:
French Terry, Nicky velours/badstof, gebreide stof (of een trui die je wil upcyclen), jaquard tricot.
French Terry, Nicky velor/terry toweling, knitted fabric (or a sweater to upcycle), jaquard jersey.
150cm breed/wide

Patroondelen/patternparts
Voorpand, achterpand, halsbeleg, kraag, mouwen
Front part, back part, neckfacing, collar sleeves

Afmeting/amount:
70cm t/m maat 40 en 120cm vanaf maat 42
70cm up to size 40 and 120cm from size 42.


Boordstof/Ribbing:

66-70 cm rondgebreid / tubular knit

Patroondelen/patternparts
Manchetten, tailleband of heupband
Cuffs, waistband or hipband

Afmeting/amount
43cm voor de versie met de 8cm heupband 43cm for the 8cm hipband version
73cm voor de versie met de 15cm tailleband
73cm for the 15cm waistband version

Voor maat 34 t/m 38 kun je de tailleband uit 1 stuk knippen zonder naden, afhankelijk van de rekbaarheid van de stof. / For size 34/38 you can cut the waistband without seam so in one piece.


Fournituren/Haberdashery:

- Een geweven label
- Stretch plakvlieseline. Knip 1 halsbeleg deel en een half kraagdeel (vouw je kraag patroondeel in de breedte doormidden) in stretch plakvlieseline.
- Woven label (optional)
​- Stretch fusable interlining. Cut 1 neckfacing part and half a collar part (fold your patternpiece widthwise for this).
Picture
Spencer met V-hals
Spencer with V-neck
​
Zie stap/See step 7-8


Hoofdstof/Main fabric:

Geschikte stoffen/Suitable fabrics
French Terry, Nicky velours/badstof, gebreide stof (of een trui die je wil upcyclen), jaquard tricot.
French Terry, Nicky velor/terry toweling, knitted fabric (or a sweater to upcycle), jaquard jersey.
150cm breed/wide

Patroondelen/patternparts:
​Voorpand, achterpand
Front part, back part

Afmeting/amount
​​45cm voor de korte versie en 60cm voor de langere versie.
45cm up for the short version and 60cm for the longer version.


Boordstof/Ribbing:

66-70 cm rondgebreid / tubular knit

Patroondelen/patternparts:
Armsgatbiezen, tailleband of heupband, halsbies
Armholebands, waistband or hipband, neckband

Afmeting/amount
50cm voor de versie met de 8cm heupband / 50 cm for the 8cm hipband version
80cm voor de versie met de 15cm tailleband / 80cm for the 15cm waistband version.

Voor maat 34 t/m 38 kun je de tailleband uit 1 stuk knippen zonder naden, afhankelijk van de rekbaarheid van de stof. / For size 34/38 you can cut the waistband without seam so in one piece.


Fournituren/Haberdashery:

-Eventueel een geweven label /Woven label (optional)
- Een klein stukje plakvlieseline/a small piece of fusable interlining.

Goed om te weten
Ik ga in deze werkbeschrijving uit van het gebruik van een overlock machine. Mocht je daar niet over beschikken dan kun je een zig-zag steek gebruiken op een gewone naaimachine. Ik raad dan wel aan om er altijd een stretch stiksel naast te plaatsen. De naadtoeslag van de patronen is 1cm. Check wat de breedte instelling van je naad is op je lockmachine is. Is het 0,7cm dan kun je tijdens het stikken 3mm wegsnijden. De stretchnaden stik je met een stretchsteek instelling op de gewone naaimachine.

​Good to know
For this tutorial an overlock machine was being used for sewing most of the garment. However, it is possible to use a regular sewing machine and sew with a zigzag stitch. I do recommend sewing an extra stretch stitch next to it to create clean lines. The seam allowance of the patterns is 1cm. Check the seam width setting of your overlock machine. If it is 0.7cm you can cut away 3mm while sewing. The stretch seams can be sewn using the stretch setting on a regular sewing machine.

3.
Ronde hals: Schoudernaalden en halsbies
Round neck: Shoulderseams and neckband

Picture
3a.
Als je je kledingstuk voorziet van een label stik deze dan op de binnenkant van het achterpand.
Werk de schoudernaden af met overlock of zigzag. Speld de schoudernaden met de goede kanten tegen elkaar.
If you add a woven label to your garment sew it on the inside back part. Finish the edges with overlock or zigzag. Pin the shoulder seams right sides together.
Picture
3b.
Stik de schoudernaden met een stretch steek en strijk de naden open.
Sew the shoulderseams with a stretch stitch and iron them open.
Picture
3c.
Geef met een speldje (of knipje) op de halsbies  het middenvoor punt en de schouderpunten aan. Stik de halsbies dicht en strijk het naadje open. Deze komt middenachter.
Mark the center front and the shoulder points with a pin (or clip) on the neckband. Close the neckband and press the seam open. This seam will be at the midback.
Picture
3d.
Sluit ook meteen de mouwbiezen en (als je deze uit 2 delen hebt geknipt) de taille-of heupband. 
Also close the sleeve bands and (if you cut it in two parts) the waist or hipband.
Picture
3e.
Vouw de halsbies in de breedte om. Stik eventueel de 2 lagen van de dubbelgevouwen halsbies op elkaar op 0.5cm van de rand. Zo kan de bies niet verschuiven. Speld de halsbies tegen de hals. Het naadje middenachter, het middenvoor knipteken tegen middenvoor en de schouder kniptekens tegen de schoudernaden.
Fold the neckband in half widthwise. Optionally, sew the 2 layers of the folded neckband together on 0.5cm from the edge. This way both layers stay in place. Pin the neckband to the neck. The seam to mid-back, the mid-front mark to mid-front and the shoulder mark to the shoulders.
Picture
3f.
Stik de halsbiezen langs de hals met een normale steek setting op je naaimachine op 1 cm van de rand. Met een naaimachine kun je veel makkelijker sturen dan de overlock machine. Terwijl je naait rek je de band wat uit.
Sew the neckbands along the neck on 1 cm from the edge with a regular stitch setting on your sewing machine. With a sewing machine it is easier to guide along the neck then an overlock machine. Stretch the band while sewing. 
Picture
3g.
Nu kun je de naden afwerken met overlock of zig-zag. Stik over het gewone stiksel heen. Stel je lock machine in op breedte 0,7cm en snijd dus 0,3cm weg.
Now you can finish the edges with overlock or zig-zag. Sew over the existing stitch line. Set the stitch width on 0,7cm. You will need to cut away 0,3cm.
Picture
3h.
Pers de halsnaad plat.
Press the neck seam.
Picture
3i.
Stik de hals door op ong.0,5cm van de naad.
Topstitch the neck on approx. 0,5cm from the seam.
Picture
3j.
De hals als deze is ingezet en doorgestikt.
The neck once sewn in and topstitched.

4.
Ronde hals: Mouwen, zijnaden en afwerking
Round neck: Sleeves, side seams and bands

Picture
4a.
Speld de mouwen in de armsgaten. Maak hierbij gebruik van de kniptekens op het patroon.
Pin the sleeves into the armholes. Use the marks on the pattern.
Picture
4b.
Pas de steekbreedte van de overlock machine aan naar 0,5cm.
Adjust the stitch width of the overlock machine to 0,5cm.
Picture
4c.
Naai de mouw in het armsgat met de overlockmachine. 
Sew the sleeve into the armhole using the overlock machine. ​
Picture
4d.
Met behulp van een mouwplankje en een vochtige doek pers je de mouwkop. De naad wijst richting de mouw.
Using a sleeve board and a damp cloth, press the sleeve head. The seam points towards the sleeve.
Picture
4e.
Zet de steekbreedte weer terug op de breedste stand. Speld en stik met een overlocksteek in één keer de onderarmnaad en zijnaad. 
Readjust the stitch width to the widest setting. Pin and sew with an overlock stitch all the way from sleeve opening to bottom.
Picture
4f.
Laat hierbij de mouwnaad van het voorpand omhoog wijzen en die van het achterpand omlaag. Zo krijg je geen naden op elkaar.
Make sure the sleeve seam of the front points upwards and of the back downwards. This way  you don't have 2 seams on top of another.
Picture
4g.
Geef met een speld het midden van de mouwbies en het midden van de mouw aan.
Mark the middle of the sleeve band and the middle of the sleeve with a pin.
Picture
4h.
Speld deze punten met de goede kanten aan elkaar. Speld daarna de naad van de bies tegen de naad van de mouw en speld dan de tussenliggende ruimte. 
Pin these points right sides together. Then pin the seam of the band to the seam of the sleeve and then pin the space in between.
Picture
4i.
Zet de mouwbiezen aan met de overlock machine.
Sew on the sleeve bands with the overlock machine.
Picture
4j.
Zet een speld in het midden van de voor en achterkant van de band. Zet ook een speld in het midden van de onderkant van het voor- en achterpand.
Place a pin in the centre of the front and back of the waistband. Also put a pin in the middle of the bottom of the front and back piece.
Picture
4k.
Speld deze punten eerst met de goede kanten op elkaar. Speld daarna de zijnaden van shirt en band tegen elkaar en vervolgens de ruimte ertussen. Eventueel eerst stikken met de naaimachine.
Pin these points right sides together first. Then pin the side seams of shirt and band together and then the space in between them. Optionally you can sew the waistband on first with the sewing machine.
Picture
4l.
Zet de band aan met de overlock machine of met een stretchsteek plus zigzag.
Sew on the band with the overlock machine or a stretch stitch plus zigzag.
Picture
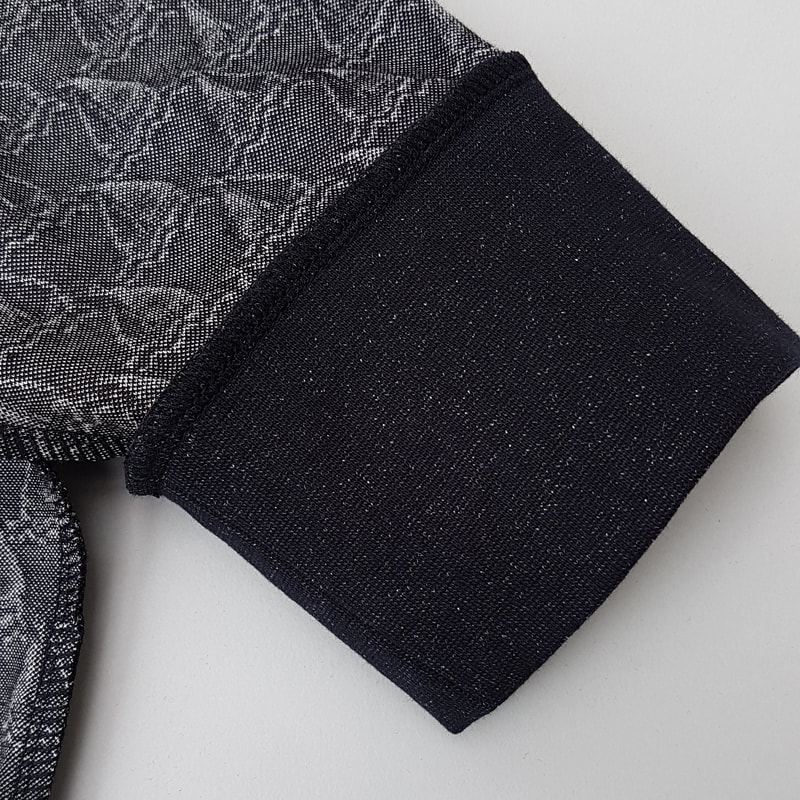
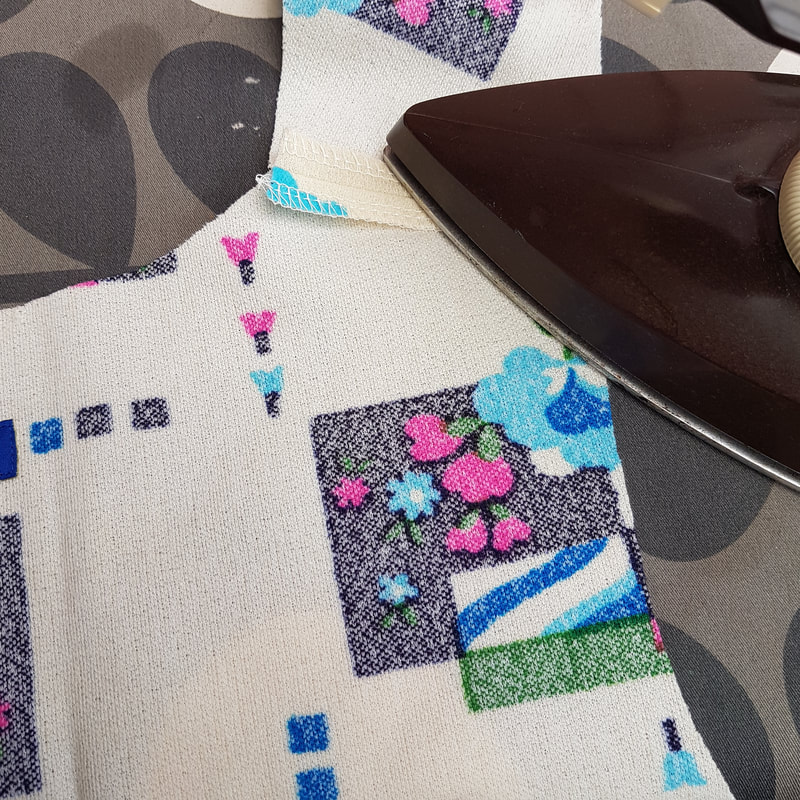
4m.
Eventueel kun je de mouw en onderrand  boven de bies doorstikken op 0,5cm langs de kant.
Optionally you can topstitch the sleeve and bottom on 0,5cm from the edge.
Picture
Picture
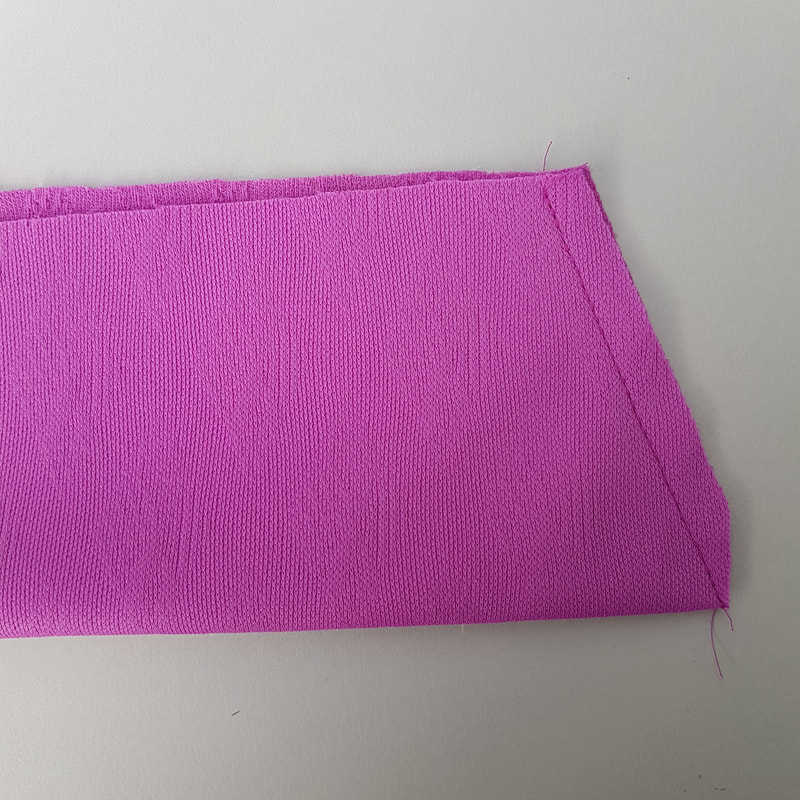
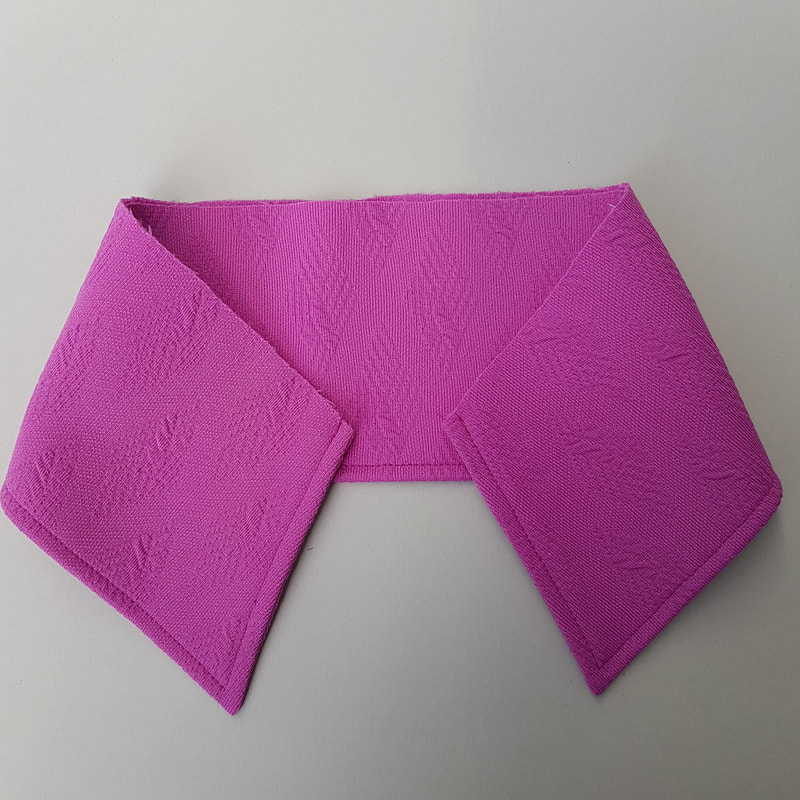
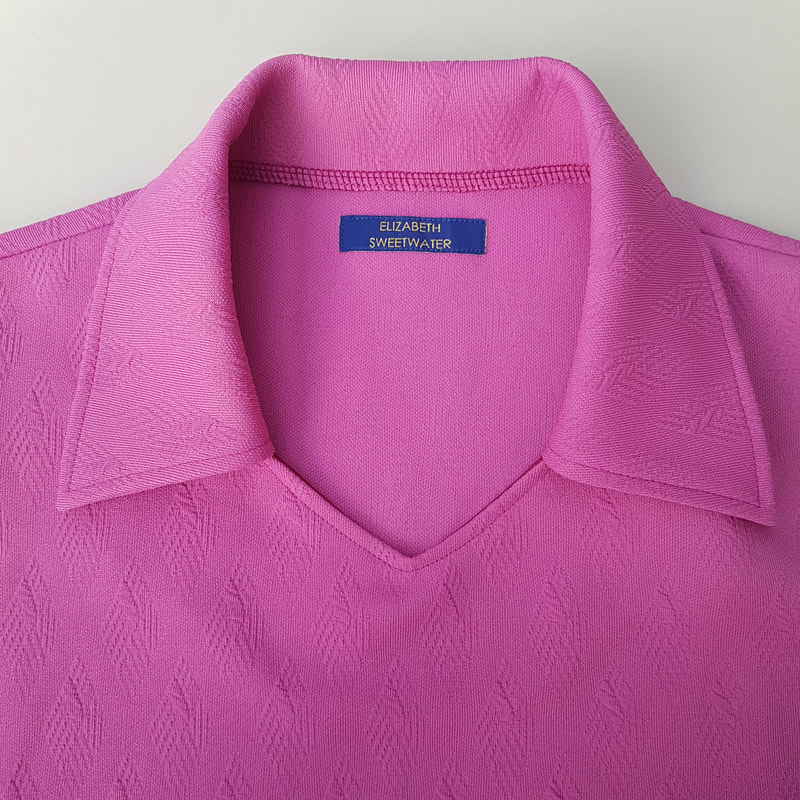
Je Jumper met een ronde hals is klaar
Your jumper with a round neck is finished!


5.
Optie met kraag: Schoudernaden en kraag
Version with collar: Shoulder seams and collar

Picture
5a.
Als je je kledingstuk voorziet van een label stik deze dan op de binnenkant van het achterpand.
Strijk de rekbare plakvlieseline op het belegdeel en op de kraag.  
If you add a woven label to your garment sew it on the inside back part. Iron on the stretch fusible interling parts on the neckfacing and collar.
Picture
5b.
Werk de schoudernaden van voor- en achterpand en het halsbeleg af met overlock of zigzag. Werk ook de onderkant van het beleg af. Speld de schoudernaden met de goede kanten tegen elkaar. Stik de schoudernaden met een stretch steek en strijk de naden open
Finish the edge of front-and back shoulders and neck facing with overlock or zigzag. Also finish the bottom of the facing. Pin the shoulder seams right sides together.
Picture
5c.
Vouw het kraagdeel in de breedte om met de goede kanten tegen elkaar. Speld en stik de kraag dicht en knip de hoek weg. 
Fold the collarpiece over widthwise right sides together. Pin and sew the collar edges and cut away the corner.
Picture
5d.
Keer de kraag en pers deze plat. Stik 'm door op 0,5cm van de kant.
Turn the collar and press it flat. Topstitch on 0,5cm from the edge.
Picture
5e.
Speld en stik de kraag tegen de hals aan en pers de naad open. Gebruik de pastekentjes op het patroon.
Pin and sew the collar to the neck and press open the seam. Use the indicators on the pattern.
Picture
5f.
Speld het beleg langs de hals met de goede kanten op elkaar. de kraag zit ertussen. Geef met een speld aan waar het midden van de hals zit.
Pin the facing with the right sides on top of the right sides of the shirt with the collar in between. Indicate with a pin the middle of the neckline.
Picture
5g.
Naai op 1cm langs de rand. Als je bij de speld bent laat je de naald in de stof zitten, til het voetje op, draai je werk zodat je weer verder kunt naaien langs de rand. Geef een knipje middenvoor. Stik ook de achterhals naad met de overlockmachine of zigzag.
Sew on1cm along the edge until you reach the pin, lift up the foot, turn and sew further along the edge. Make a notch in the midfront. Also sew the backneck seam with the overlockmachine or zigzag. 
Picture
5h.
Pers de naad open Keer het beleg om en stik de hals rondom door op 0,5cm van de kant.
Press open de seam. Turn the facing and topstitch the neck all around on 0,5cm from the edge.
Picture
5i.
Zo ziet de binnenkant er uit als de hals klaar is.
This is what the inside looks like once finished. 
Picture
5j.
Sluit de mouwbiezen en (als je deze uit 2 delen hebt geknipt) de taille-of heupband. 
Also close the sleeve bands and (if you cut it in two parts) the waist or hipband.

6.
Optie met kraag: Mouwen, zijnaden en afwerking
Version with collar: Sleeves, side seams and bands

Picture
6a.
Speld de mouwen in de armsgaten. Maak hierbij gebruik van de kniptekens op het patroon.
Pin the sleeves into the armholes. Use the marks on the pattern.
Picture
6b.
Zorg ervoor dat het halsbeleg in het armsgat meegespeld wordt.
Make sure the neck facing gets pinned in the armhole as well.
Picture
6c.
Pas de steekbreedte van de overlock machine aan naar 0,5cm. Naai de mouw in het armsgat met de overlockmachine. 
Adjust the stitch width of the overlock machine to 0,5cm. Sew the sleeve into the armhole using the overlock machine.
Picture
6d.
Met behulp van een mouwplankje en een vochtige doek pers je de mouwkop. De naad wijst richting de mouw.
Using a sleeve board and a damp cloth, press the sleeve head. The seam points towards the sleeve.
Picture
6e.
Zet de steekbreedte weer terug op de breedste stand. Speld en stik met een overlocksteek in één keer de onderarmnaad en zijnaad. 
Readjust the stitch width to the widest setting. Pin and sew with an overlock stitch all the way from sleeve opening to bottom.
Picture
6f.
Laat hierbij de mouwnaad van het voorpand omhoog wijzen en die van het achterpand omlaag. Zo krijg je geen naden op elkaar.
Make sure the sleeve seam of the front points upwards and of the back downwards. This way  you don't have 2 seams on top of another.
Picture
6g.
Geef met een speld het midden van de mouwbies en het midden van de mouw aan.
Mark the middle of the sleeve band and the middle of the sleeve with a pin.
Picture
6h.
Speld deze punten met de goede kanten aan elkaar. Speld daarna de naad van de bies tegen de naad van de mouw en speld dan de tussenliggende ruimte. 
Pin these points right sides together. Then pin the seam of the band to the seam of the sleeve and then pin the space in between.
Picture
6i.
Zet de mouwbiezen aan met de overlockmachine. Stik de onderkant van de mouw eventueel door op 0,5cm van het manchet.
Sew on the sleeve bands with the overlock machine. Topstitch the bottom of the sleeve on 0,5cm from the band.
Picture
6j.
Zet een speld in het midden van de voor en achterkant van de band. Zet ook een speld in het midden van de onderkant van het voor- en achterpand. 
Place a pin in the centre of the front and back of the waistband. Also put a pin in the middle of the bottom of the front and back piece.
Picture
6k.
Speld deze punten eerst met de goede kanten op elkaar. Speld daarna de zijnaden van shirt en band tegen elkaar en vervolgens de ruimte ertussen. Eventueel eerst stikken met de naaimachine.
Pin these points right sides together first. Then pin the side seams of shirt and band together and then the space in between them. Optionally you can sew the waistband on first with the sewing machine.
Picture
6l.
Zet de band aan met de overlockmachine of met een stretchsteek plus zigzag.
Sew on the band with the overlock machine or a stretch stitch plus zigzag.
Picture
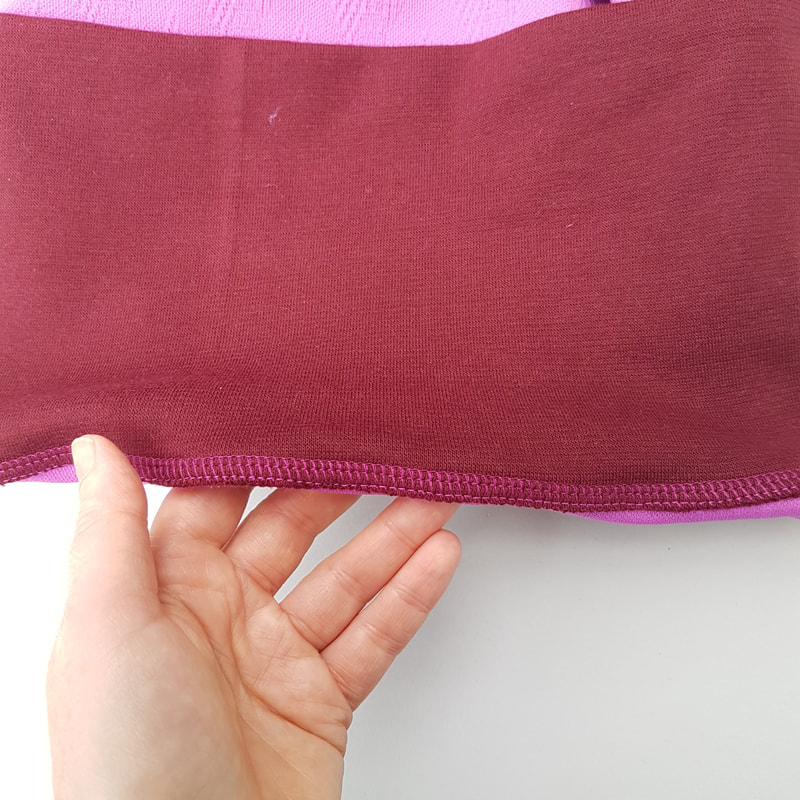
6m.
Eventueel kun je de onderrand boven de bies doorstikken op 0,5cm langs de kant.
Optionally you can topstitch the bottom on 0,5cm from the edge.
Picture
Picture
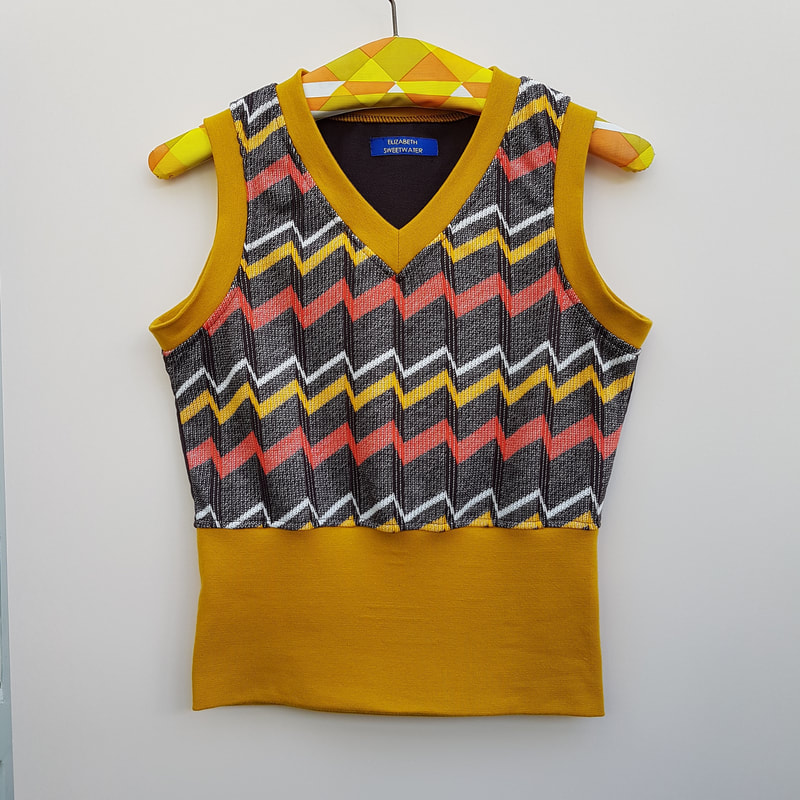
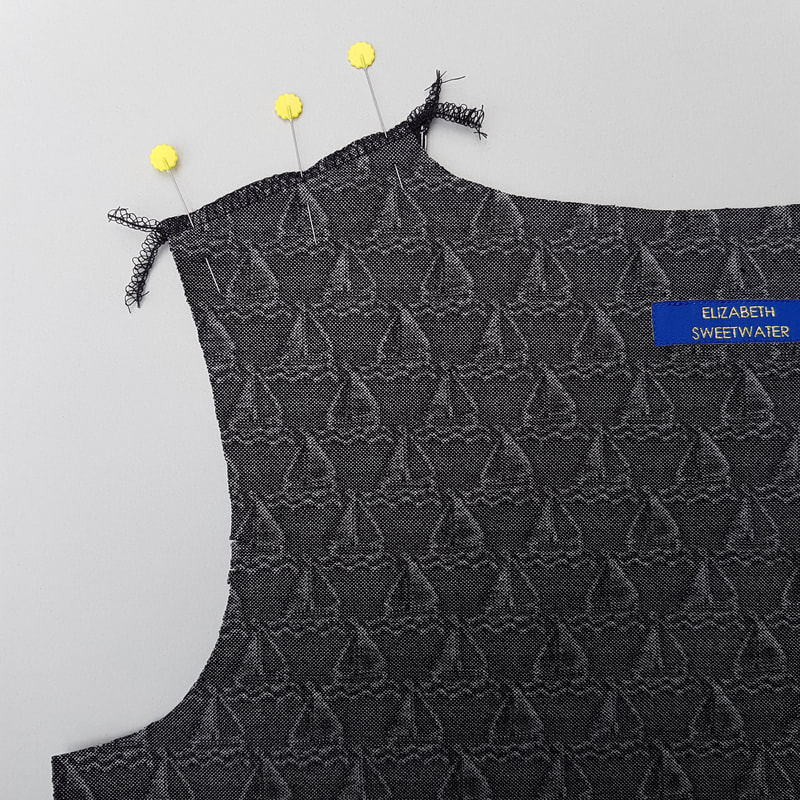
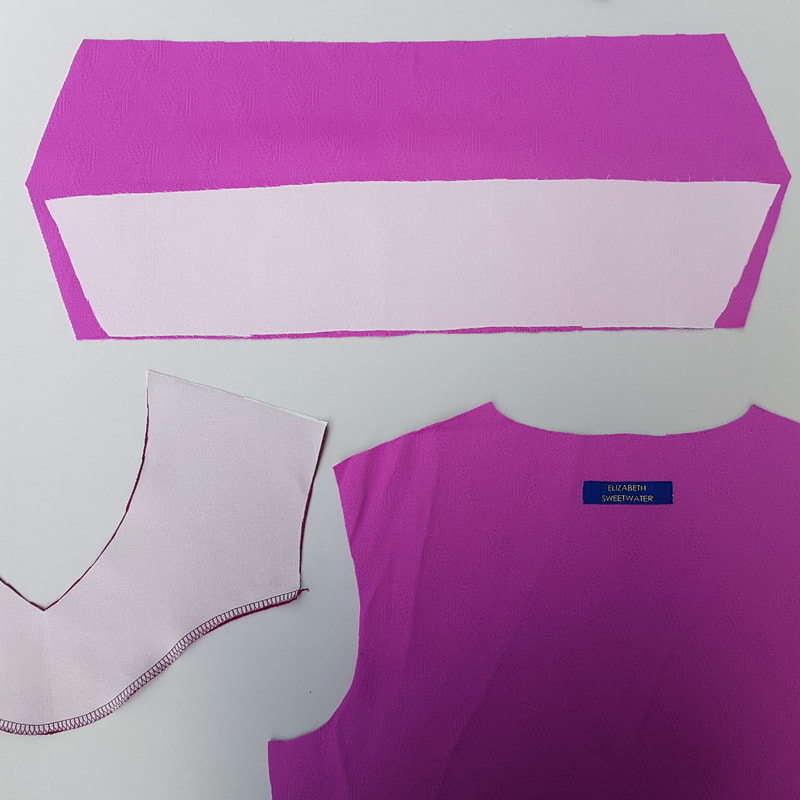
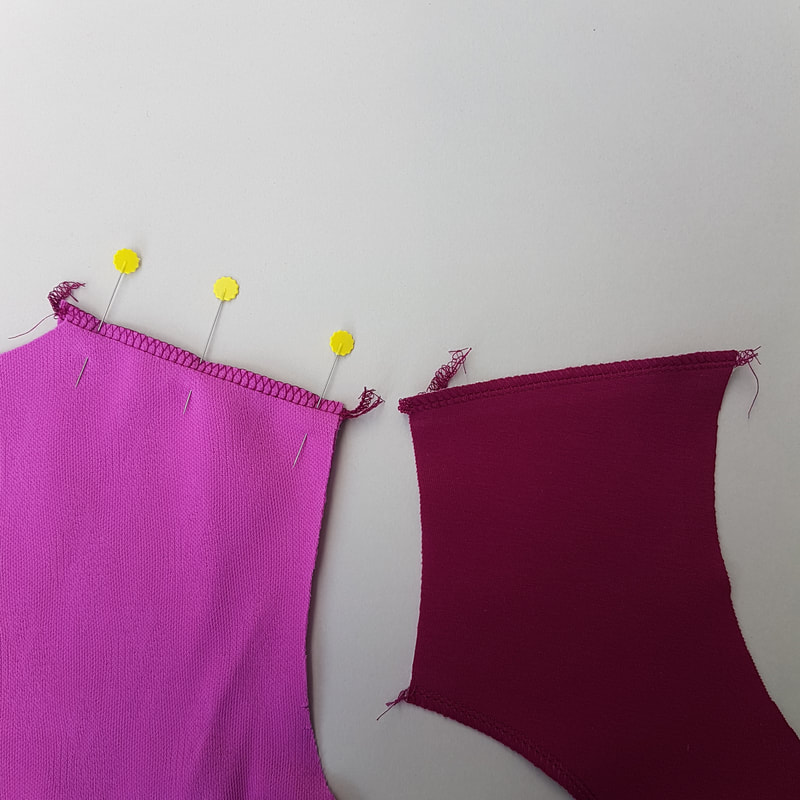
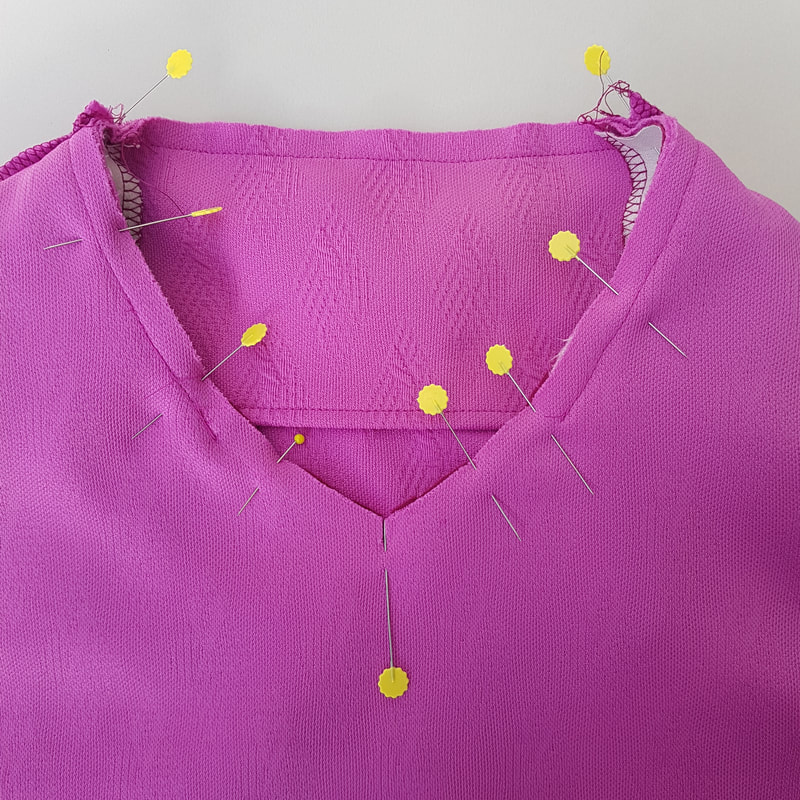
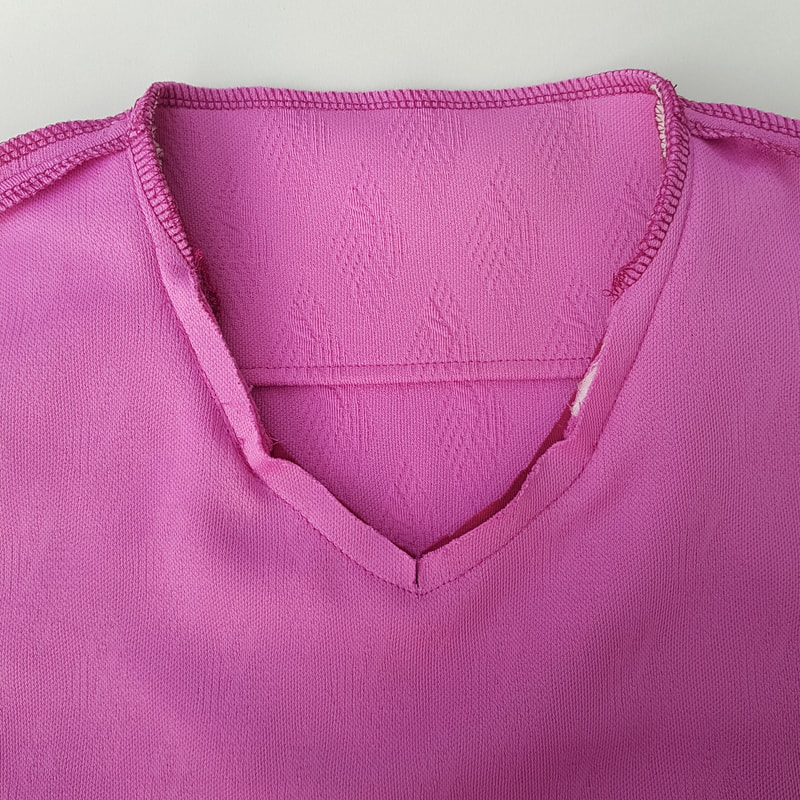
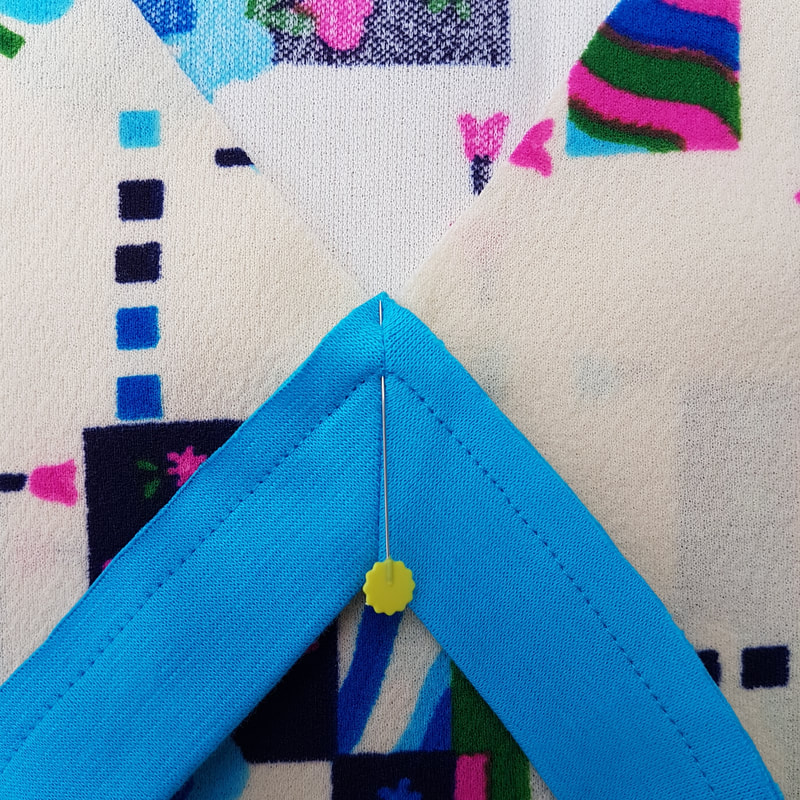
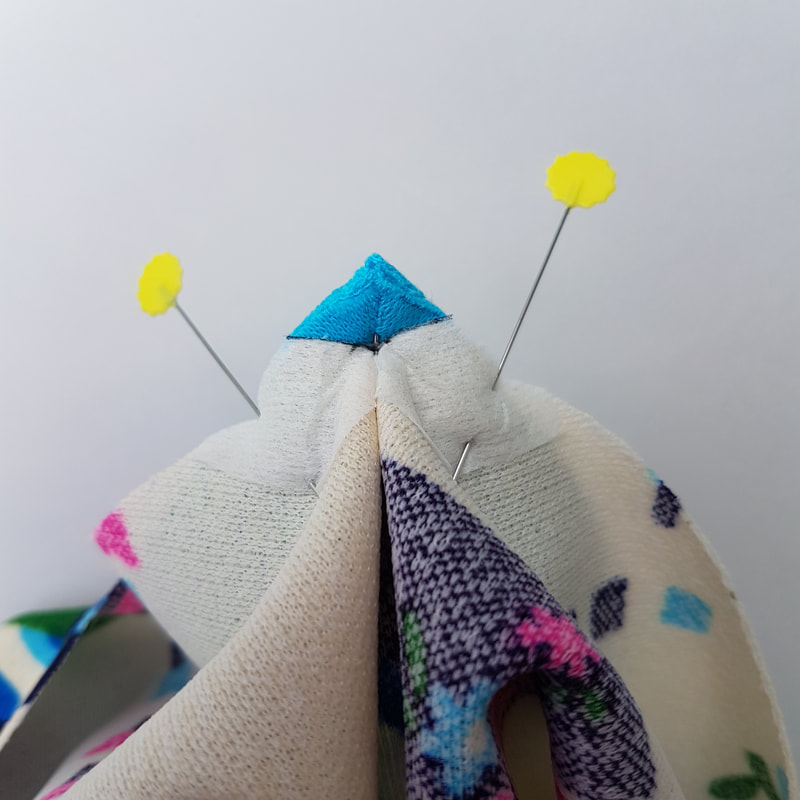
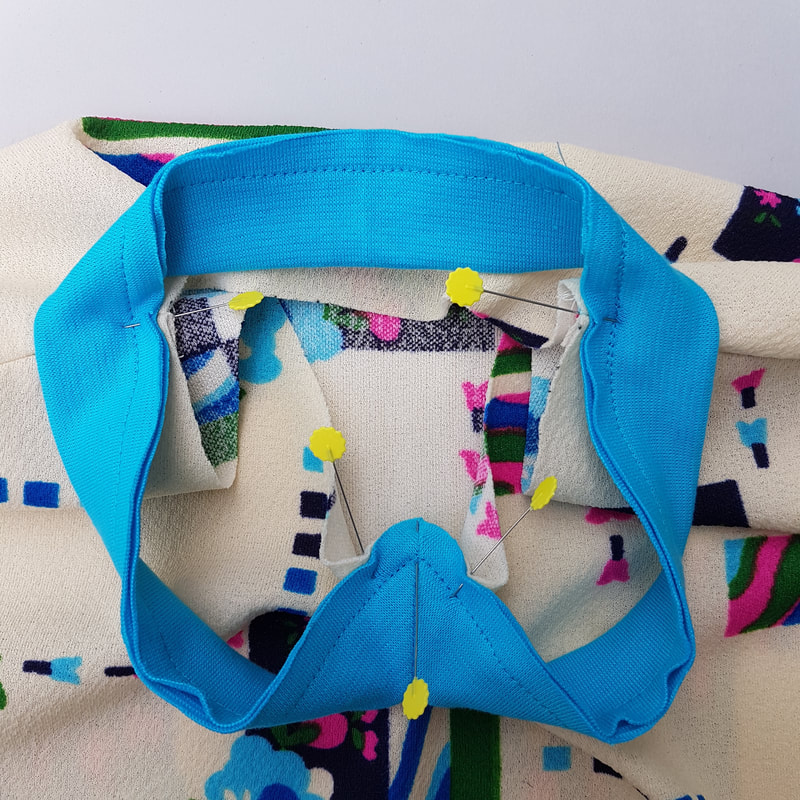
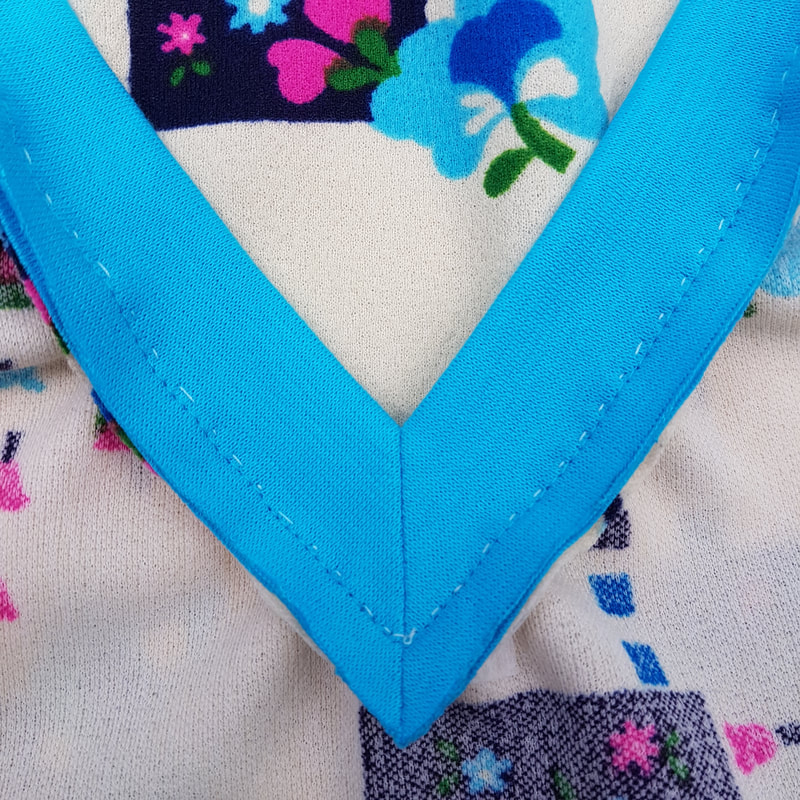
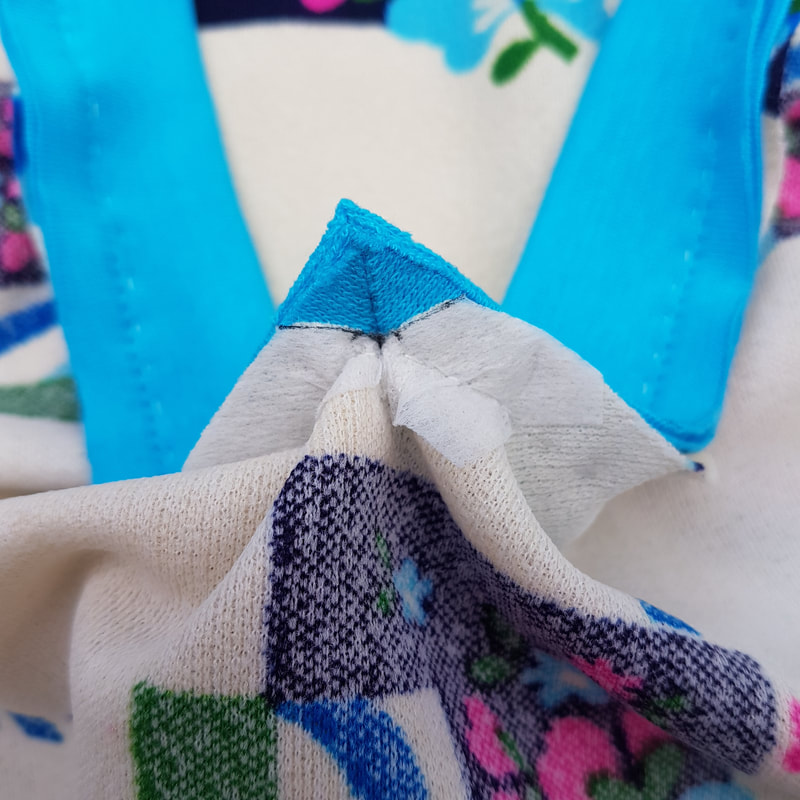
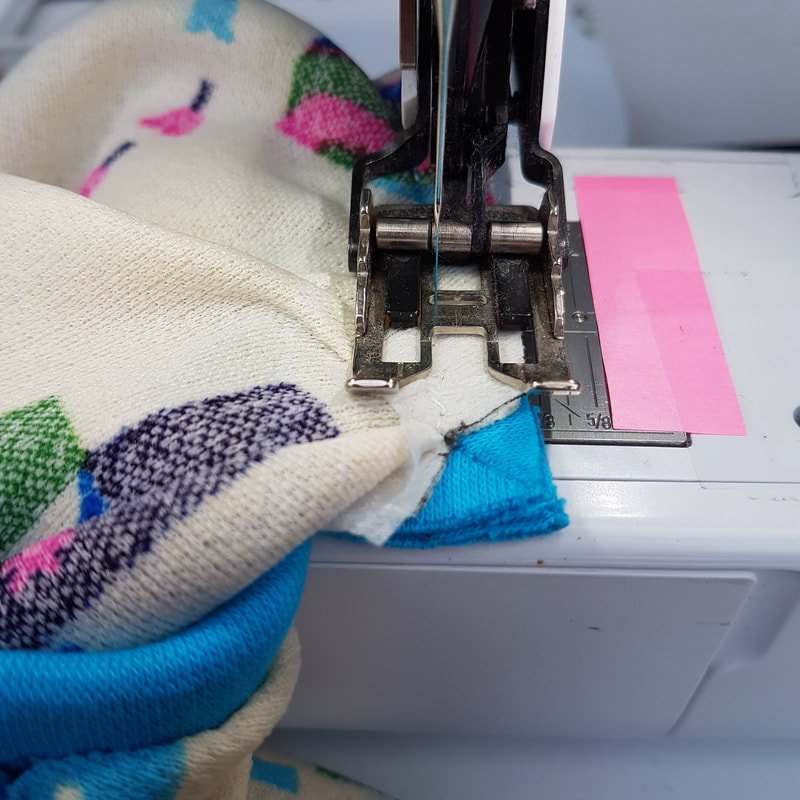
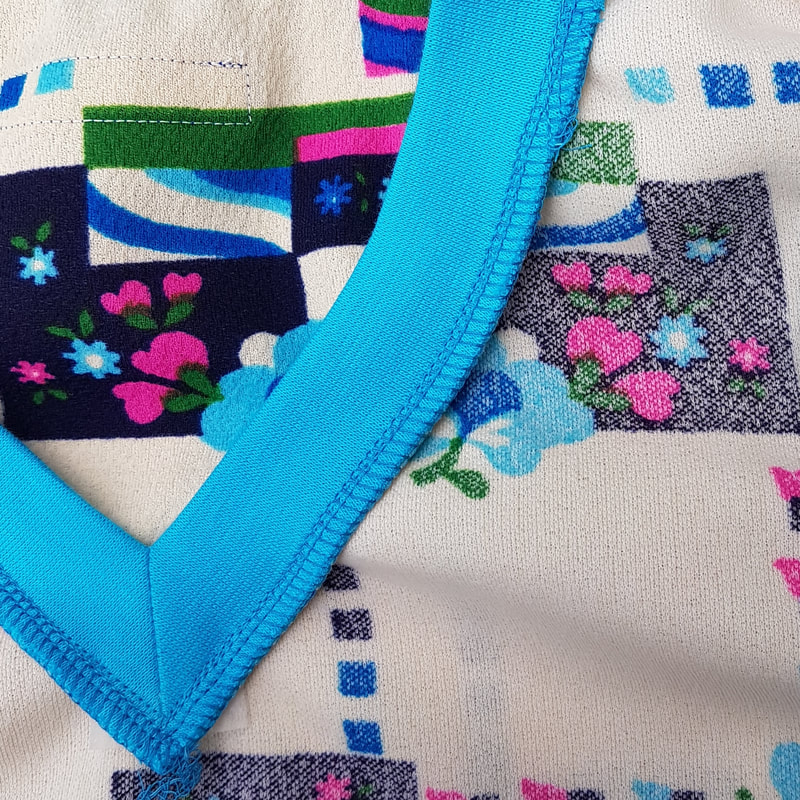
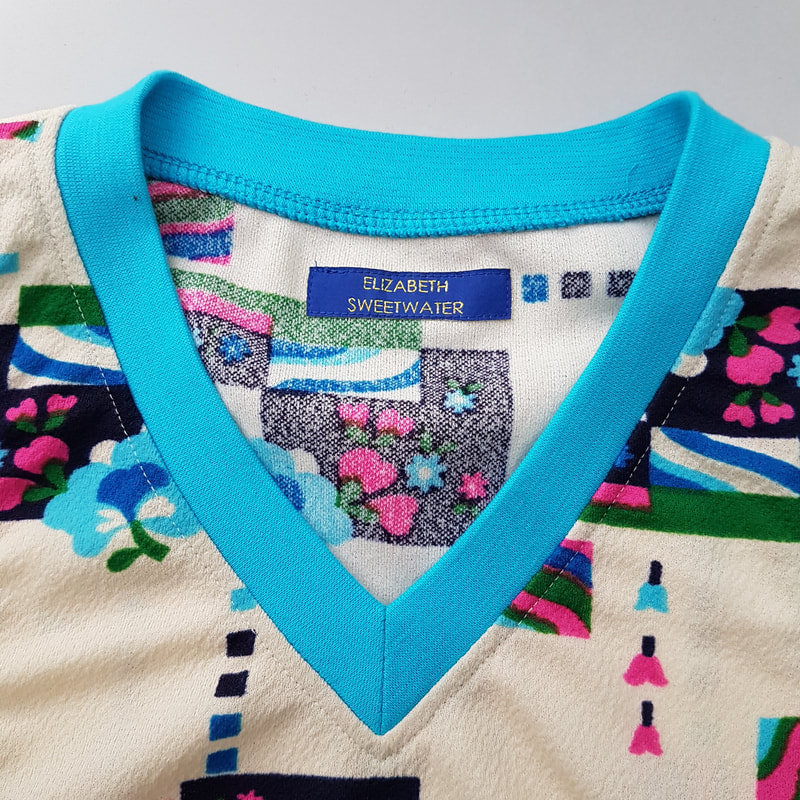
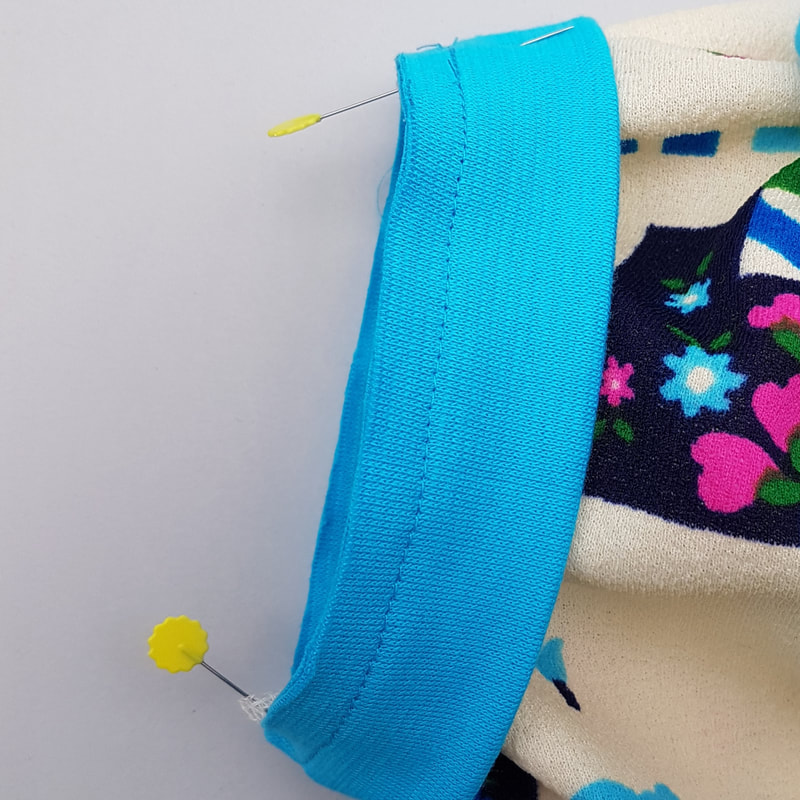
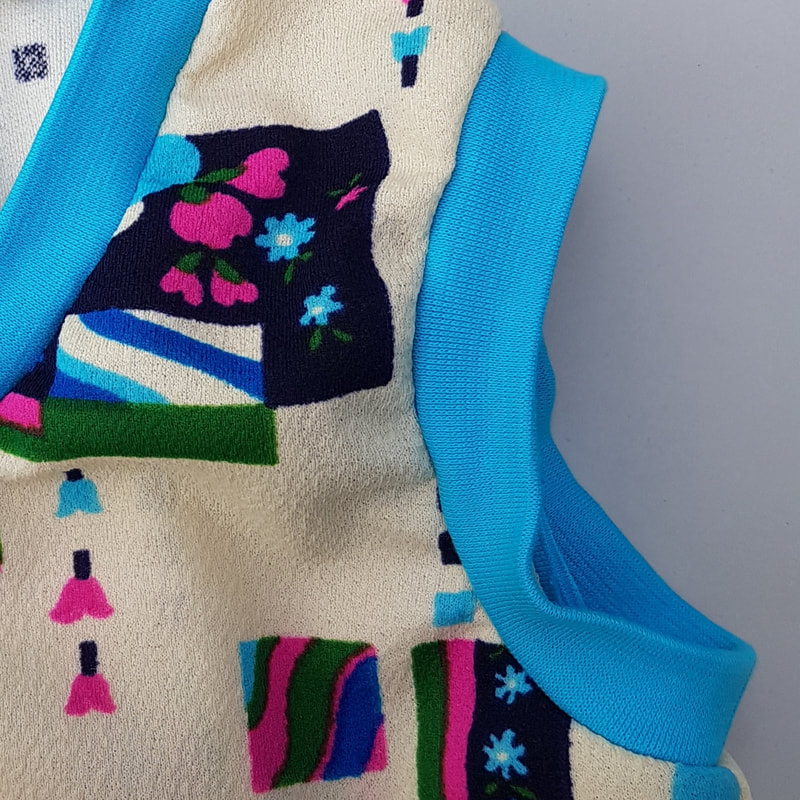
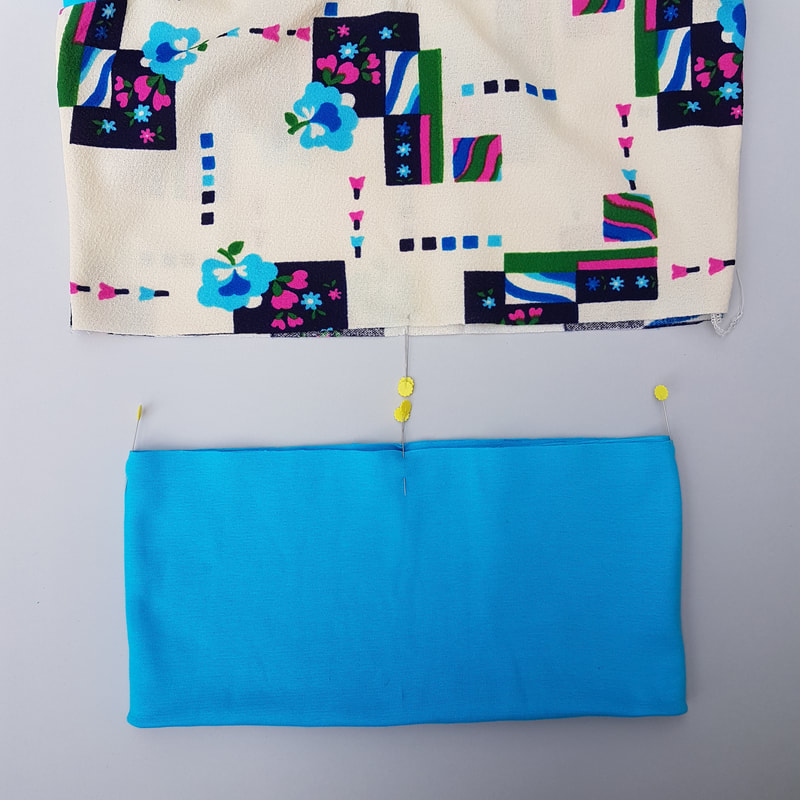
Je jumper met een kraag is nu klaar!
Your collared jumper is now complete!


7.
V-hals spencer: Schoudernaden en halsbies
V-neck spencer: Shoulder seams and neckband

Picture
7a.
Als je je kledingstuk voorziet van een label stik deze dan op de binnenkant van het achterpand. Werk de schoudernaden af met overlock of zigzag. Speld de schoudernaden met de goede kanten tegen elkaar.
If you add a woven label to your garment sew it on the inside back part. Finish the edges with overlock or zigzag. Pin the shoulder seams right sides together.
Picture
7b.
Stik de schoudernaden met een stretch steek en strijk de naden open.
Sew the shoulder seams with a stretch stitch and iron them open.
Picture
7c.
Speld de schuine kanten van het halsbies deel met de goede kanten op elkaar. Speld ook de armsgatbiezen dicht.
Pin the angled edges of the neckband right sides together. Also pin the ends of armhole bands.
Picture
7d.
Stik met een stretchsteek op 1cm van de kant tot aan het midden van de halsbies en laat de naald in de stof zitten.
Sew with a stretch stitch on 1cm from the edge up to the middle of the neckband and leave the needle in the fabric. ​
Picture
7e.
Draai de bies een slag en naai verder.
Turn the band and continue to sew.
Picture
7f.
Knip in het midden de naad van de halsbies een driehoekje weg en pers de naad open. Vouw de halsbies om in de breedte. Sluit ook meteen de armsgat biezen.
Cut away a triangle of access fabric in the middle of the seam in the neckband. Press the seam open. Fold the neckband over widthwise. Also close the armhole bands.
Picture
7g.
Stik de 2 lagen van de dubbelgevouwen halsbies en mouwbiezen op elkaar op 0.5cm van de rand. Zo kan de bies niet verschuiven.
Sew the 2 layers of the folded neckband and armhole bands together on 0.5cm from the edge. This way both layers stay in place.
Picture
7h.
Strijk een stukje plakvlieseline op de binnenkant van de punt van de V. Zet hier een vertikaal streepje op van 1 cm. 
Iron a small piece of interfacing on the inside of the tip of the V. Draw a 1 cm vertical line on the interfacing.
Picture
7i.
Geef een knipje in de punt van de V van ongeveer 8mm.
Make a cut in the tip of the V about 8mm.
Picture
7j.
Plaats de halsbies met de punt omhoog op de goede kant van de hals. Steld deze vast net onder het stiksel.
Place the neckband pointed upwards on the right side of the neck. Pin right under the stitchline.
Picture
7k.
Keer om naar de achterkant en zet links en rechts van het midden een speld. Het is makkelijker om straks de hals vast te naaien aan de bies dan andersom dus je speldt daarom de hals tegen de bies.
Turn to the back and put a pin to the left and right of the middle. It will be easier to sew the neck to the neckband later than the other way around, so that is why you need to pin the neck to the neckband.
Picture
7l.
Daarna speld je de schoudernaden tegen de schouderknipjes van de halsbies. Daarna speld je de tussenliggende delen.
Then pin the shoulder seams to the marks on the neckband. After that, pin the area in between.
Picture
7m.
Voor je de halsbies vastnaait is het een goed idee om deze eerst vast te rijgen.
Before sewing the neckband it is advisable to baste it first.
Picture
7n.
Rijg precies door het 1 cm punt wat je aan hebt gegeven op de plakvlieseline.
Baste exactly through the 1 cm point indicated on the interfacing.
Picture
7o.
Stik de halsbiezen langs de hals met een normale steek setting op je naaimachine. Met een naaimachine kun je veel makkelijker sturen en netjes de punt voor naaien. 
Sew the neckbands along the neck with a regular stitch setting on your sewing machine. With a sewing machine it is easier to guide along the neck especially the tricky area mid front.
Picture
7p.
Als je aan bent gekomen bij de V: Naai tot je precies in het punt 2mm onder het knipje bent. Laat de naald in de stof. Doe het voetje ophoog, draai je werk, voetje omlaag en naai verder.
When you have arrived at the V: Sew until you are exactly 2mm below the clip. Leave the needle in the fabric. Raise the foot, turn your work, lower the foot and continue sewing.
Picture
7q.
Nu kun je de naden afwerken met overlock of stretchsteek plus zig-zag. Stik over het gewone stiksel heen.
Now you can finish the edges with overlock or stretch stitch plus zig-zag. Sew over the existing stitchline.
Picture
7r.
Pers de hals plat en stik door op 0,5cm van de rand.
Press the neckline and topstitch on 0,5cm from the edge.

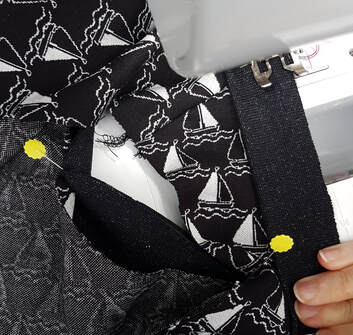
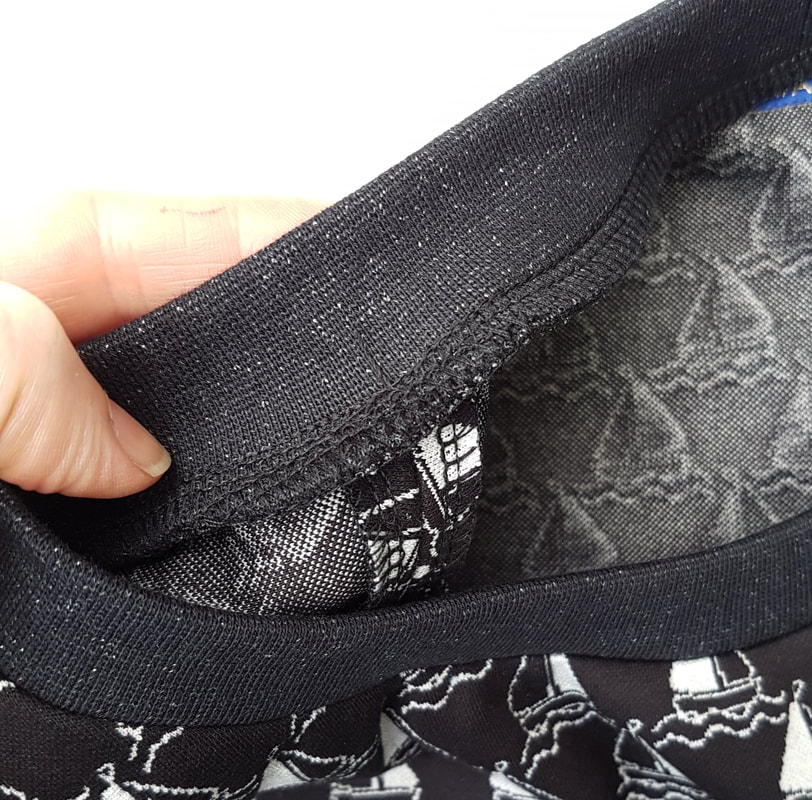
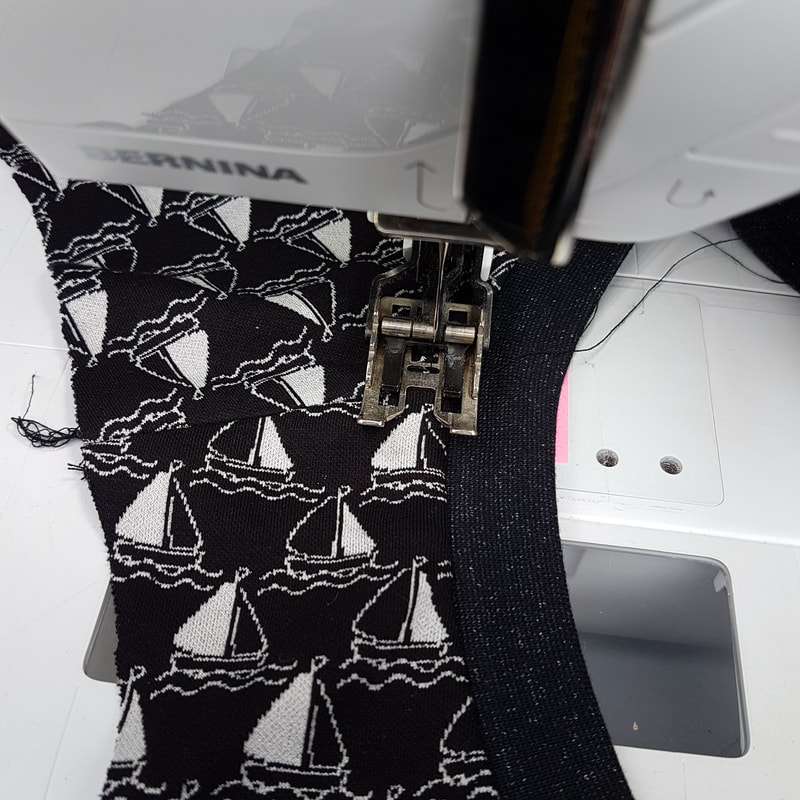
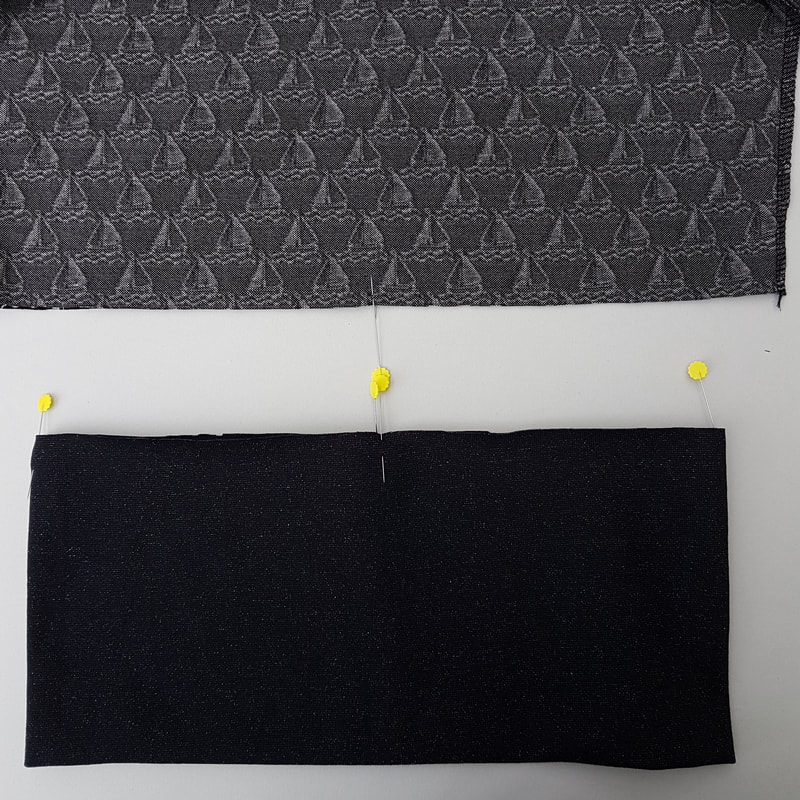
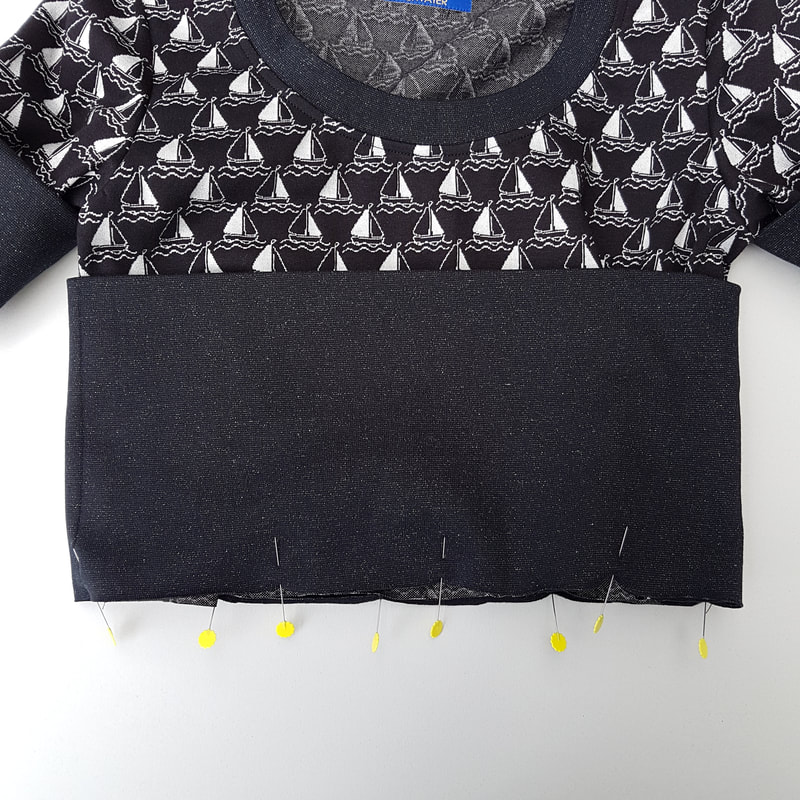
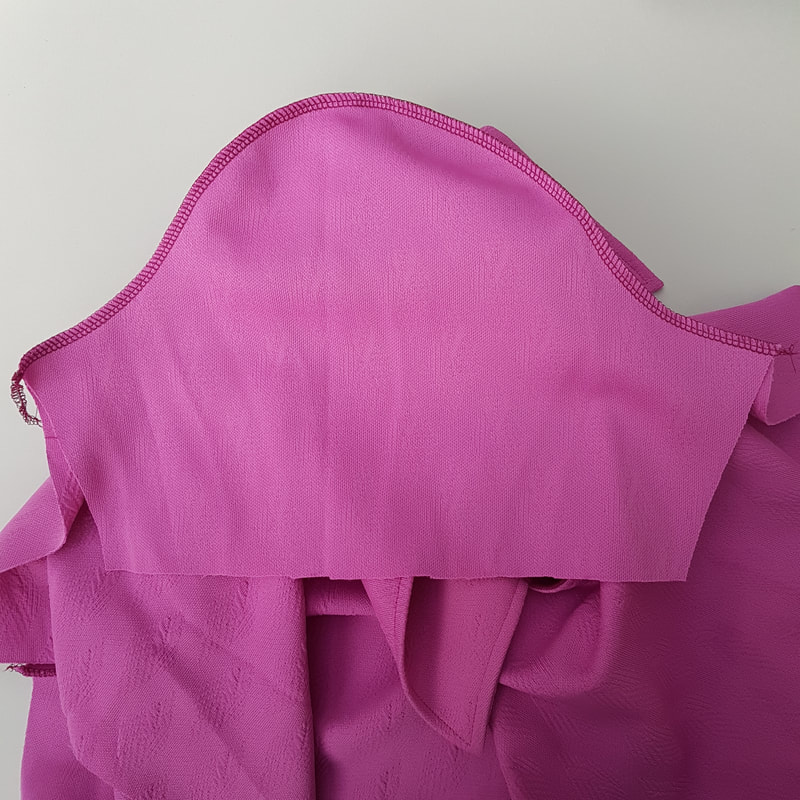
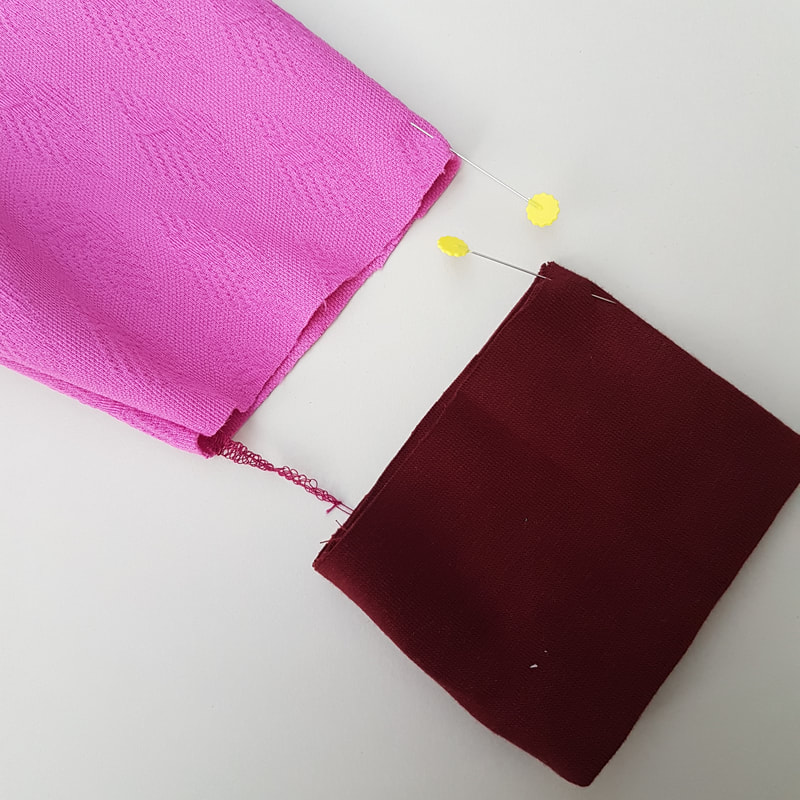
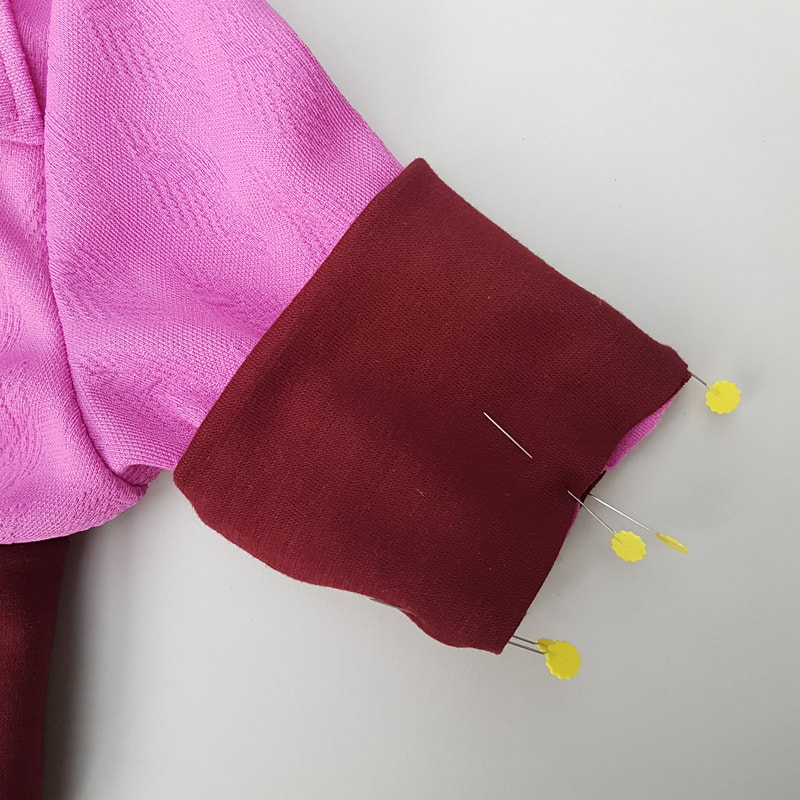
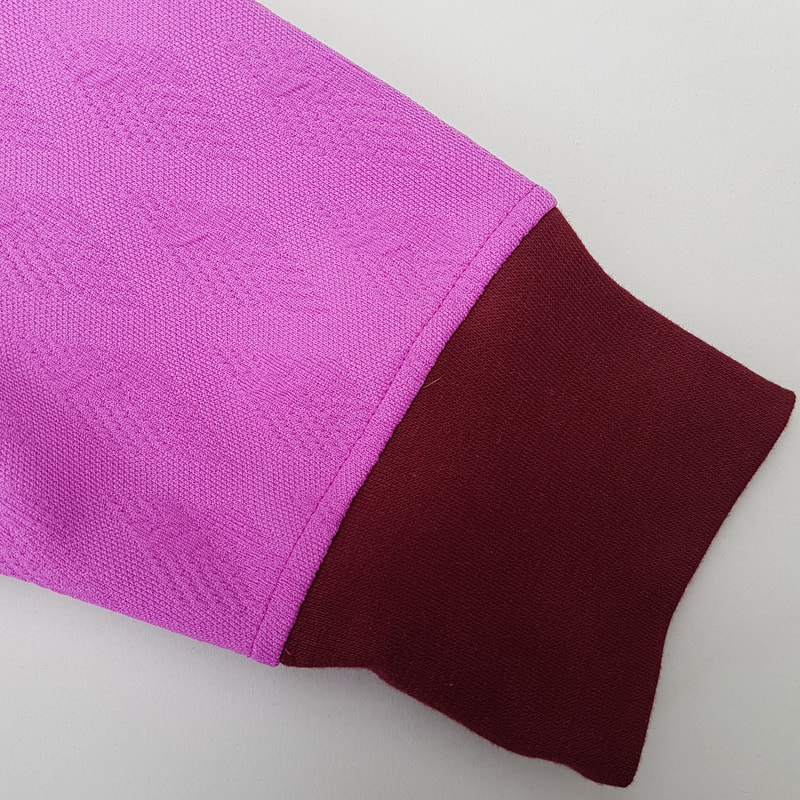
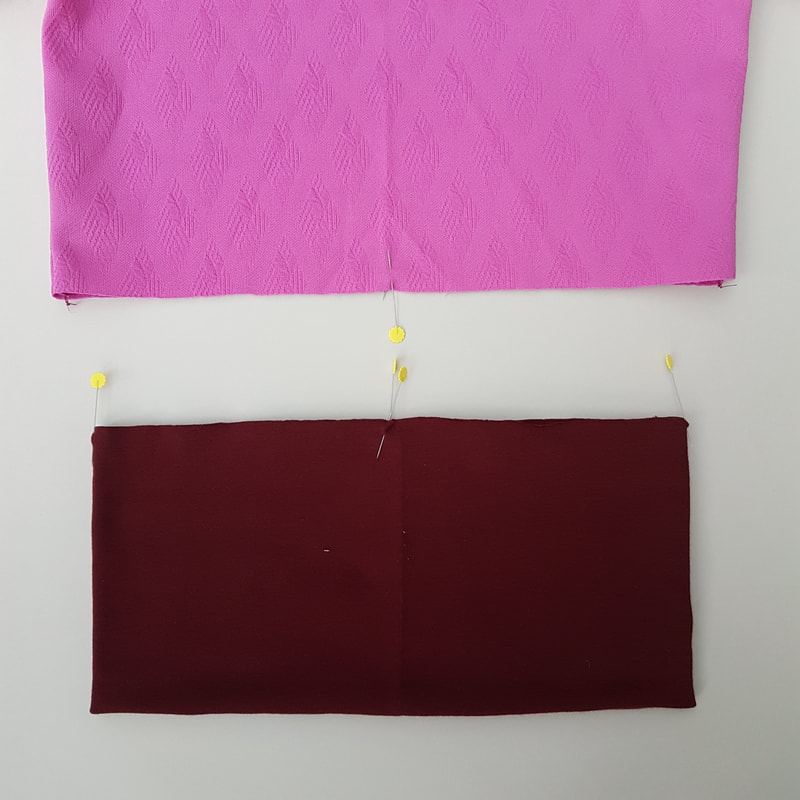
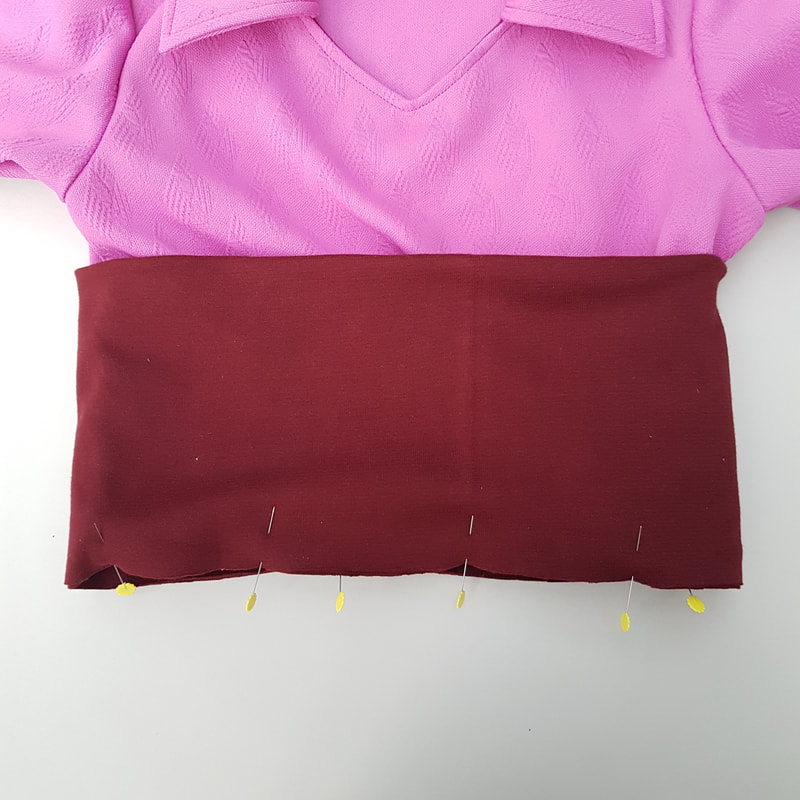
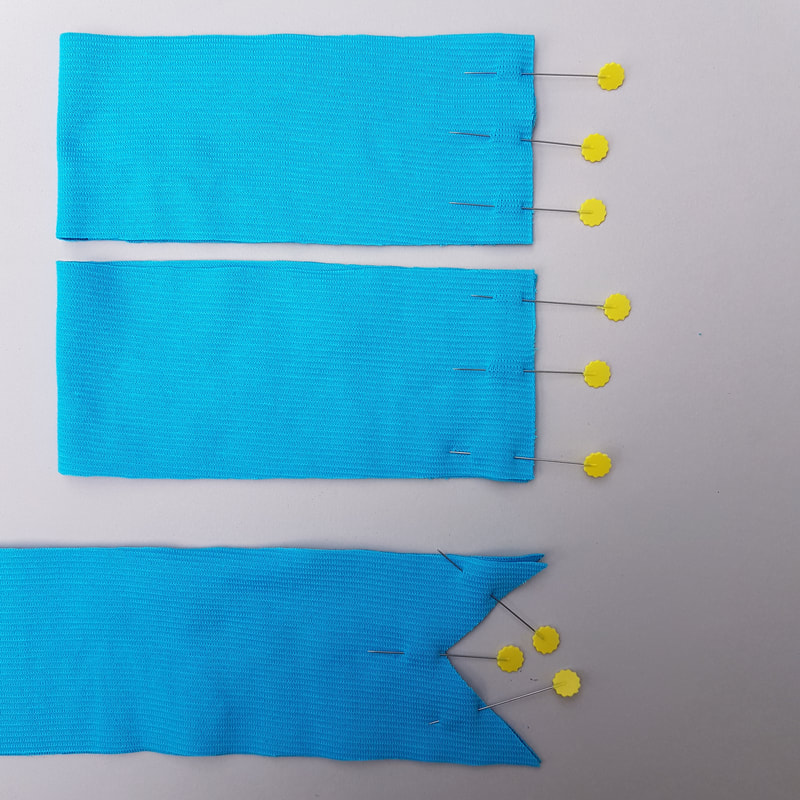
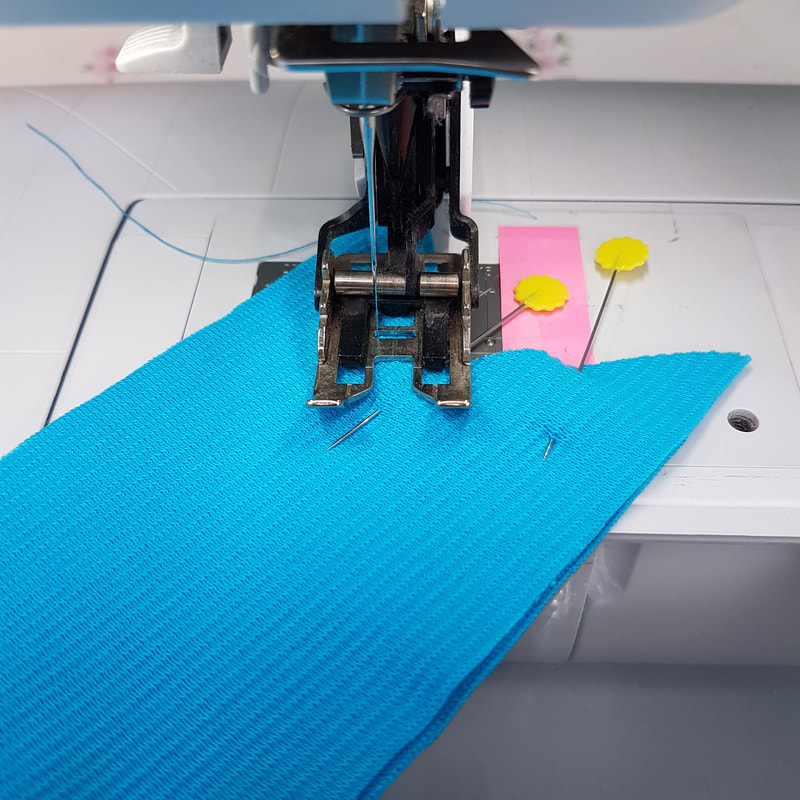
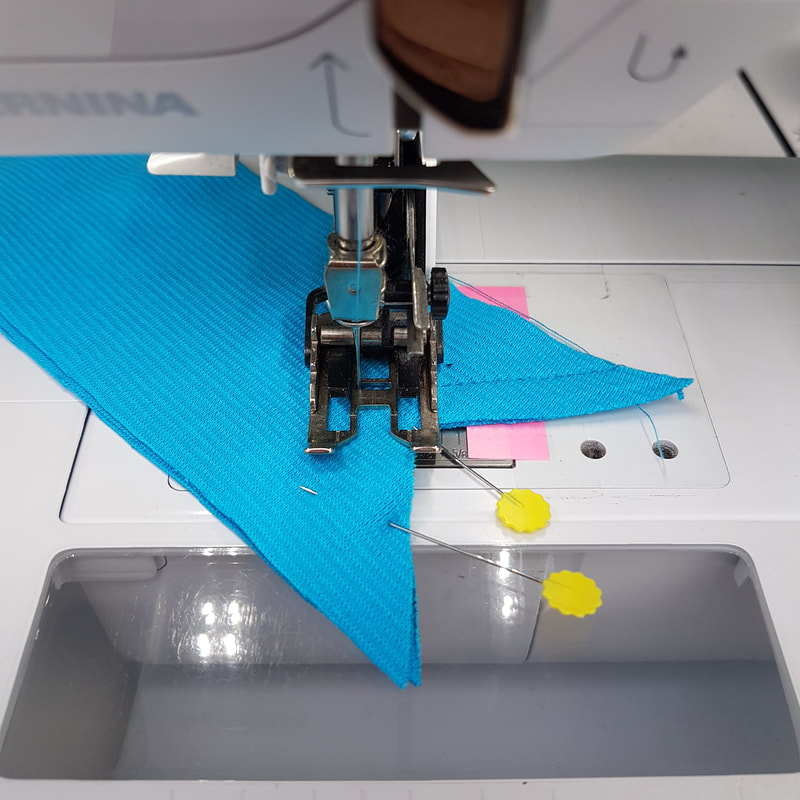
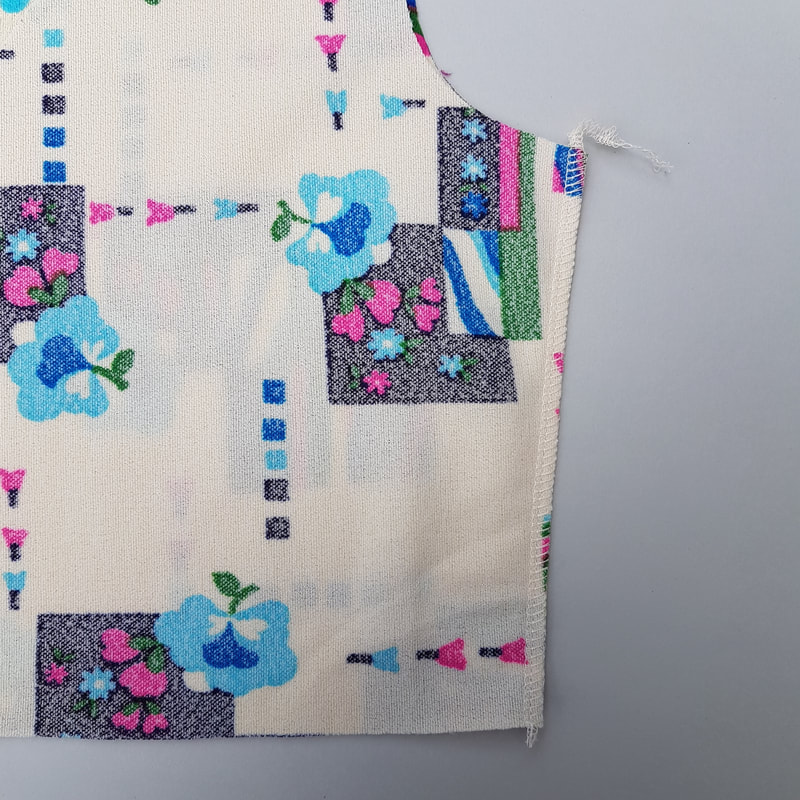
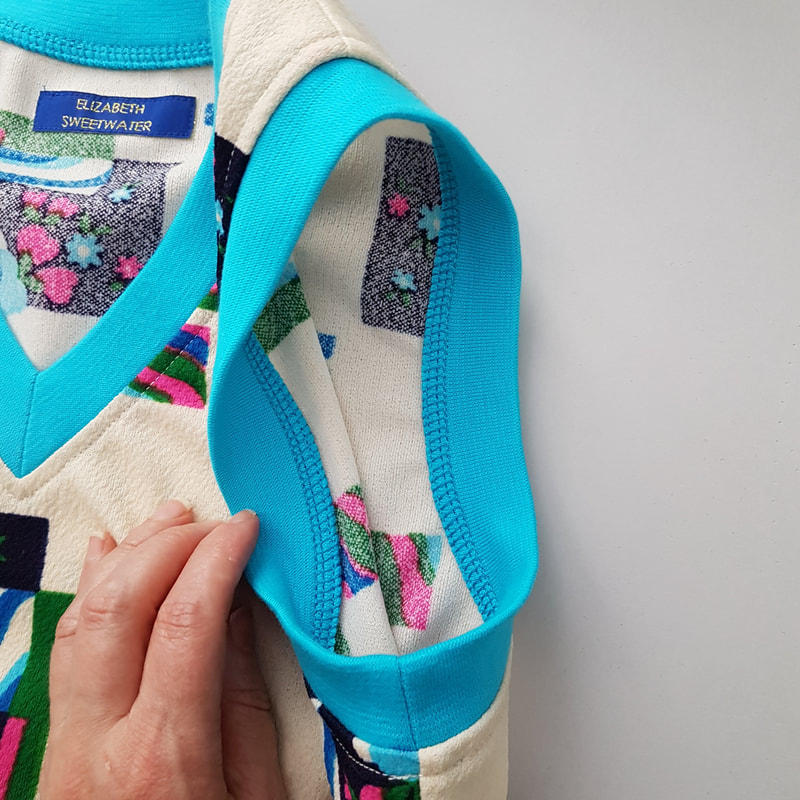
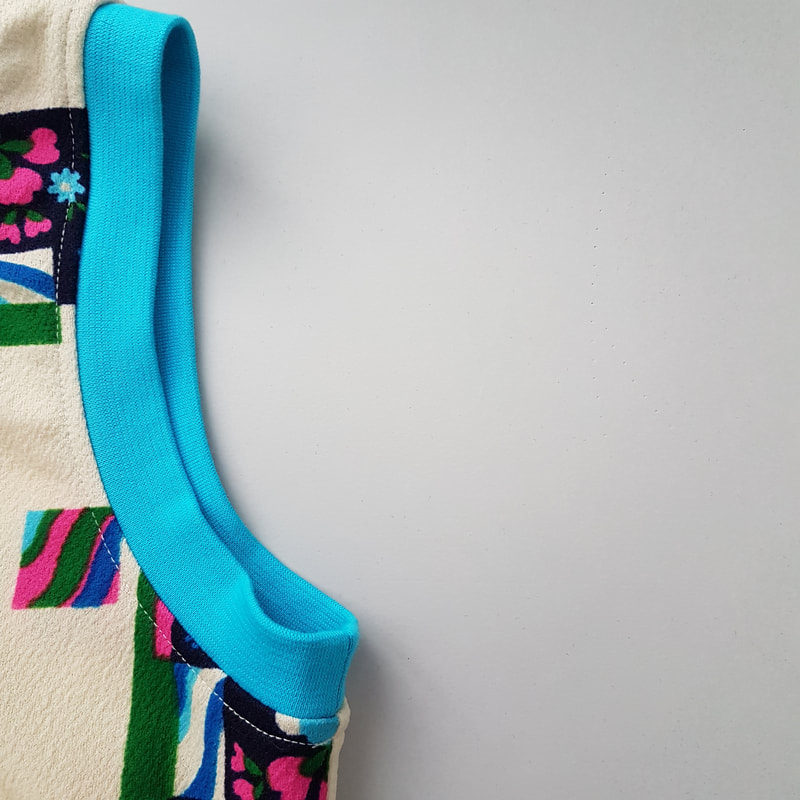
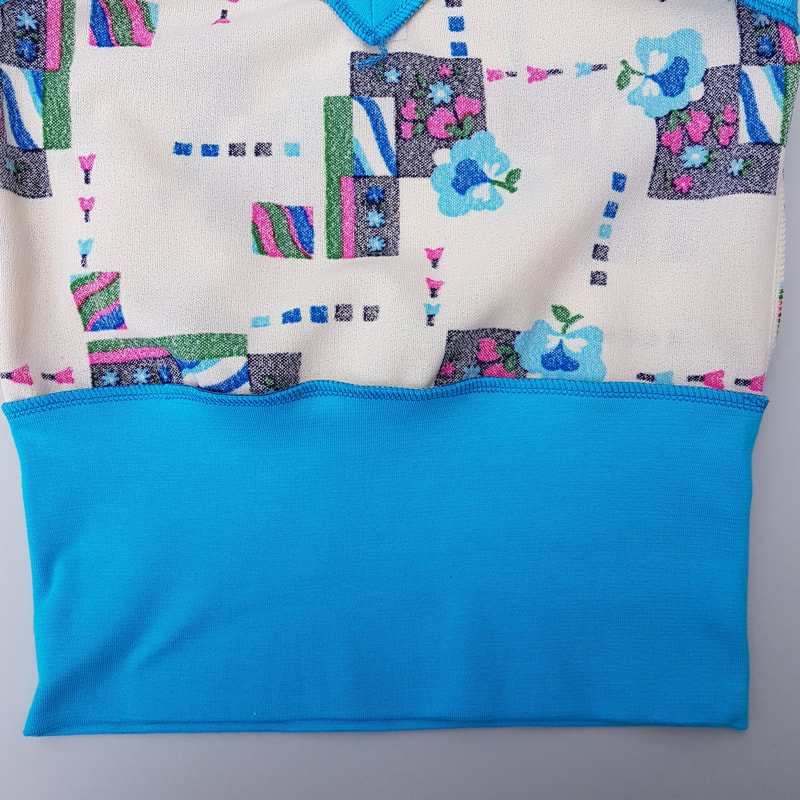
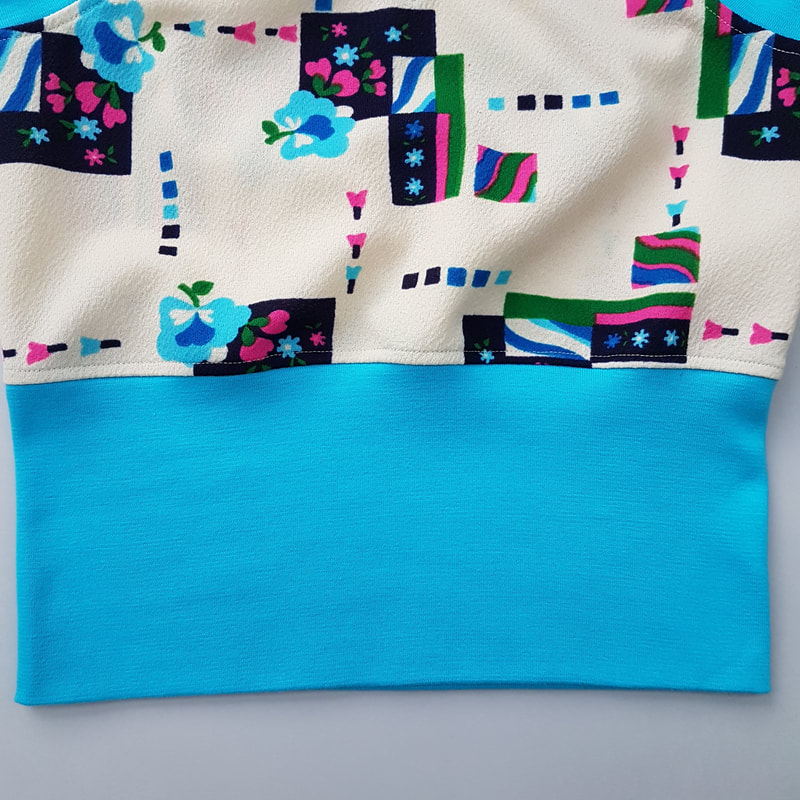
8.
V-hals spencer: Armsgat en tailleband
V-neck spencer: Armhole and waistband

Picture
8a.
Stik de zijnaden dicht met de overlockmachine.
Close the side seams with the overlock machine.
Picture
8b.
Geef met een speldje of knipje het schouderpunt aan op de armsgat bies. Speld dit punt tegen de schoudernaad. Speld dan het naadje van de band tegen de zijnaad. Speld daarna de ruimtes ertussen.
Mark the shoulder point on the armhole band with a pin or clip. Pin this point to the shoulder seam. Then pin the seam of the band to the side seam. Then pin the spaces between them.
Picture
8c.
Stik eventueel eerst de armsgat bies tegen het armsgat met de naaimachine.
Optionally sew in the armhole band first to the armhole with the sewing machine.
Picture
8d.
Stik vervolgens over dit stiksel heen met de overlockmachine.
Then sew over the stitch line with the overlock machine.
Picture
8e.
Pers het armsgat en stik door op 0,5cm van de rand.
Press the armhole and topstitch on 0,5cm from the edge.
Picture
8f.
Zet een speld in het midden van de voor en achterkant van de band. Zet ook een speld in het midden van de onderkant van het voor- en achterpand. Speld deze punten eerst met de goede kanten op elkaar. Speld daarna de zijnaden van shirt en band tegen elkaar en vervolgens de ruimte ertussen. Eventueel eerst stikken met de naaimachine.
Place a pin in the centre of the front and back of the waistband. Also put a pin in the middle of the bottom of the front and back piece. Pin these points right sides together. Pin these points right sides together first. Then pin the side seams of shirt and band together and then the space in between them. Optionally you can sew the waistband on first with the sewing machine.
Picture
8g.
Zet de band aan met de overlockmachine of met een stretchsteek plus zigzag.
Sew on the band with the overlock machine or a stretch stitch plus zigzag.
Picture
8h.
Eventueel kun je de onderrand boven de bies doorstikken op 0,5cm langs de kant.
Optionally you can topstitch the bottom on 0,5cm from the edge.
Picture
Picture
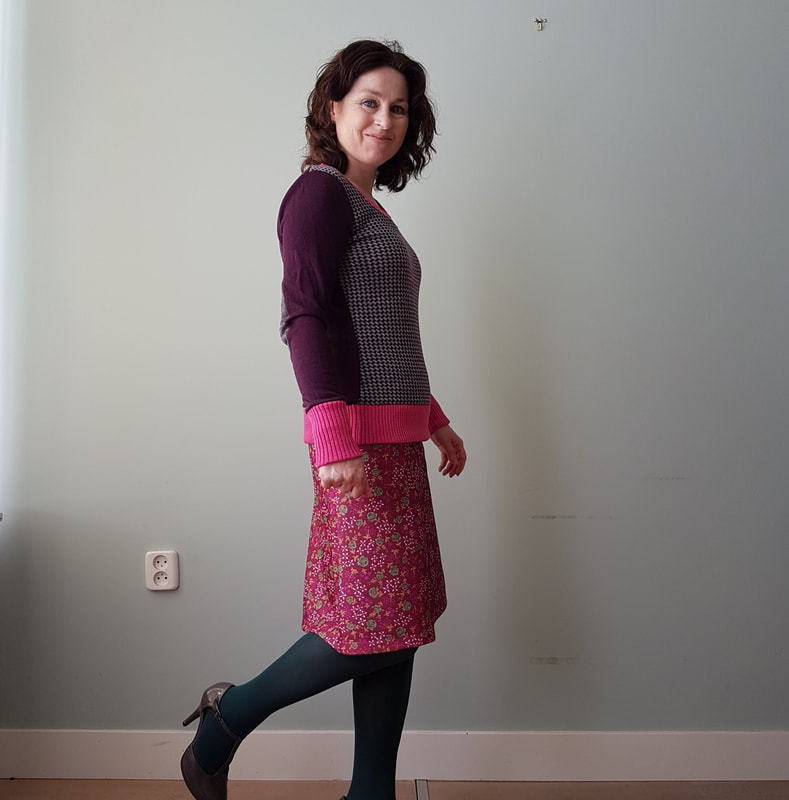
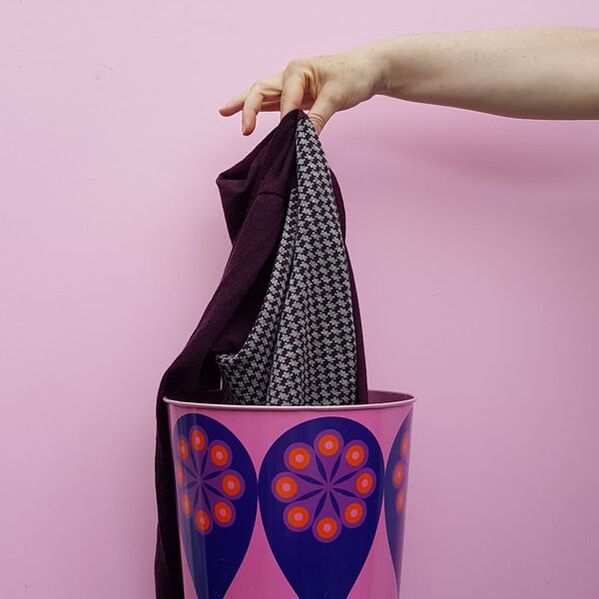
Je spencer is klaar!
Your spencer is finished!


9.
Upcycle een oude trui
Upcycle and old jumper

Een oude trui weggooien? Wacht, misschien kun je 'm upcyclen met dit jumperpatroon!
Throwing away an old sweater? Wait, maybe you can upcycle it with this jumper pattern!
Picture
Picture
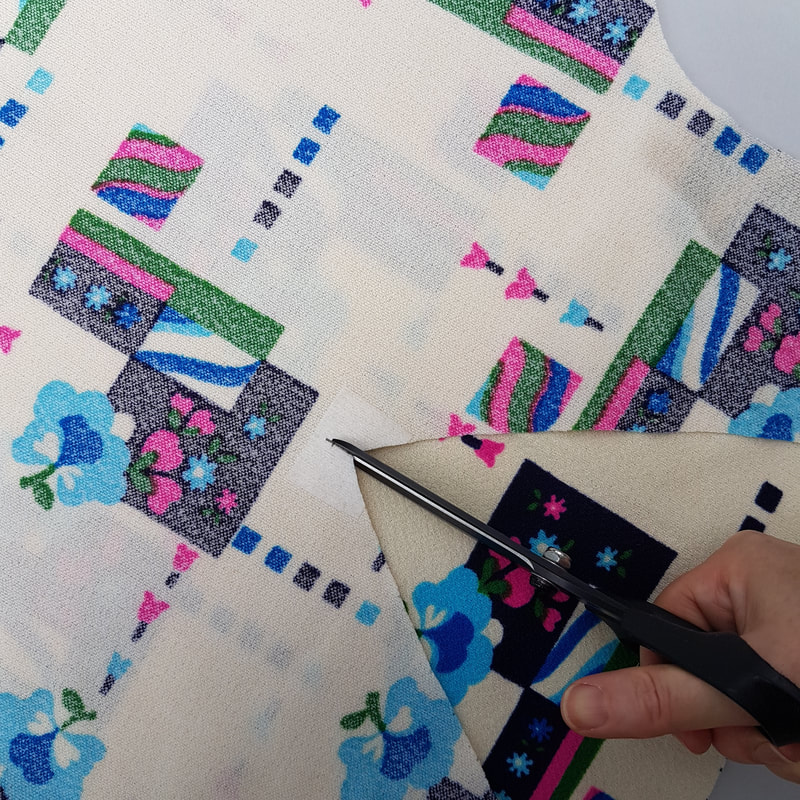
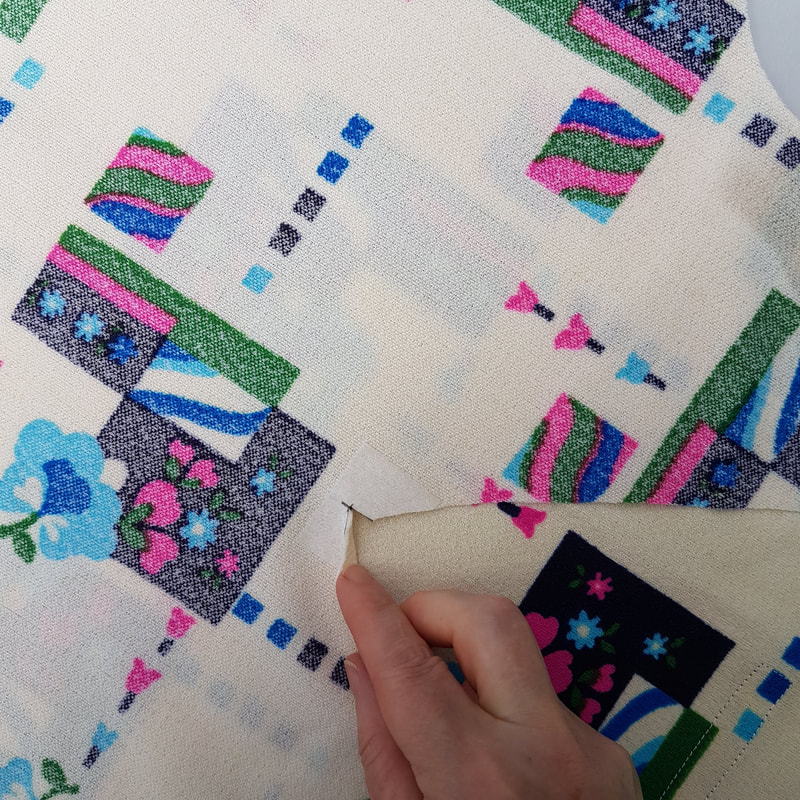
1a.
Je hebt daarvoor een trui nodig in een niet te dik breisel. Zorg ervoor dat deze trui groot genoeg is om er de patroondelen uit te knippen. Haal de trui uit elkaar tot je een voor- en een achterpand hebt en 2 mouwen. Hier knip je de patroondelen uit. Voor de halsafwerking gebruik je boordstof of eventueel de boorden van de trui (of een andere trui in contrastkleur). Je kun ook kant en klaar (streep) boord kopen aan de meter. Deze hoef je niet dubbel te verwerken. Volg verder de stappen van de werkbeschrijving van het model naar keuze.
You need a sweater in a not too thick knit for this. Make sure that the sweater is large enough to cut out the pieces from it. Take the sweater apart until you have a front and a back piece and 2 sleeves. Then use the fabric to cut out the pattern pieces. For the neckline, use ribbing or possibly the cuffs and bands of the sweater (or another sweater in a contrasting colour). You can also buy ready-made (stripe) ribbing. When you use this you don't have to fold it over. Follow the steps in the tutorial of the style of your choice.
Picture

    Picture

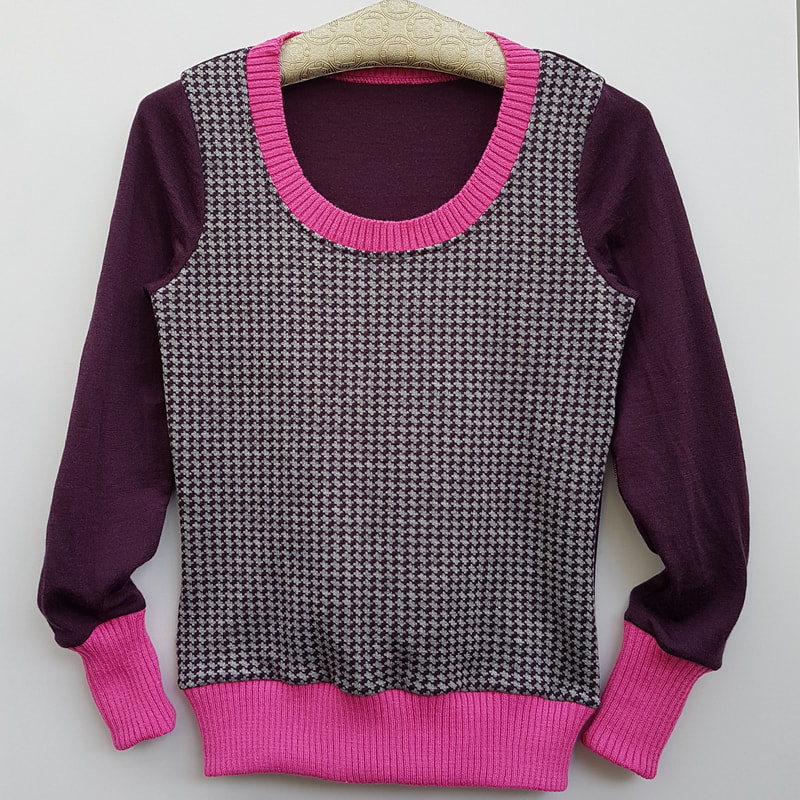
    For all the latest patterns to buy visit my online shop today.

Powered by Create your own unique website with customizable templates.
  • Tutorials
  • Movies
  • Happy Sewers
  • About