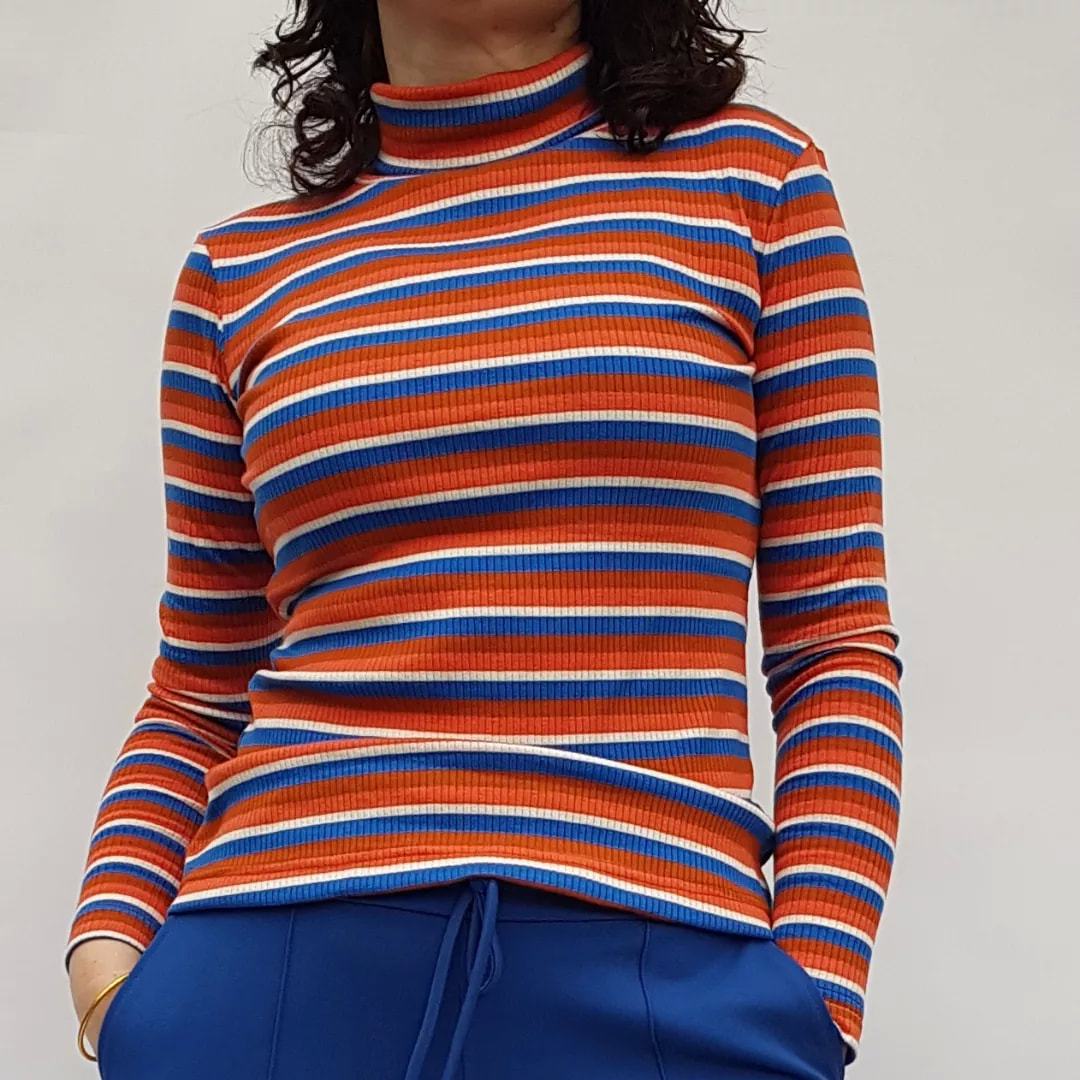
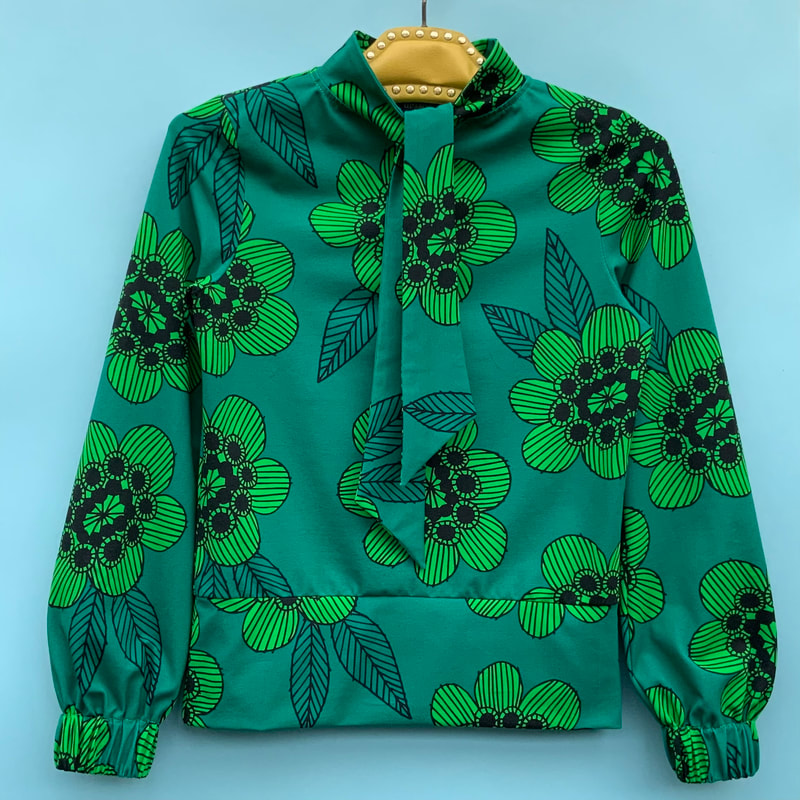
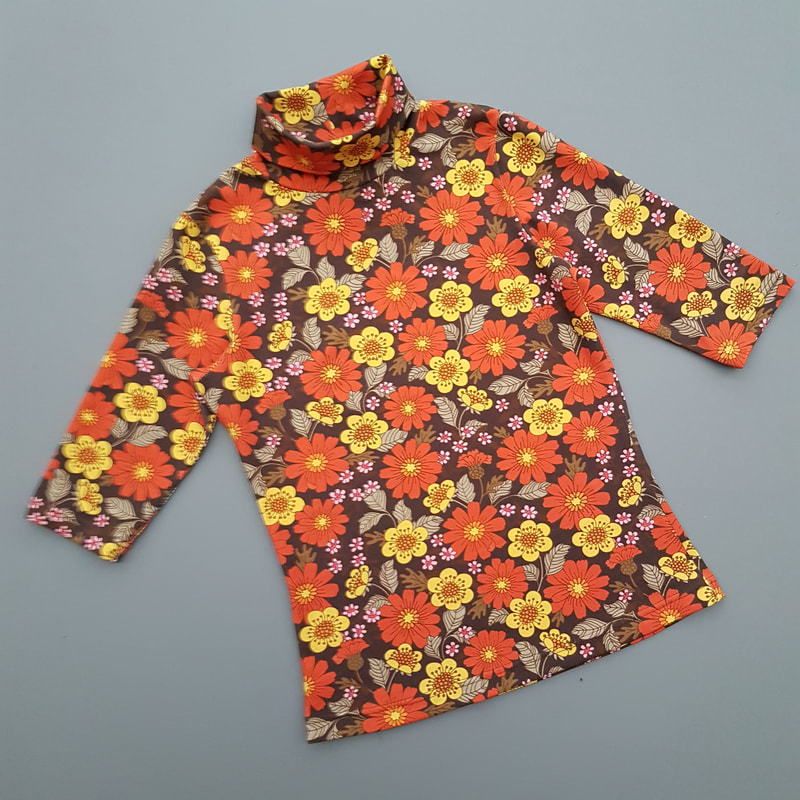
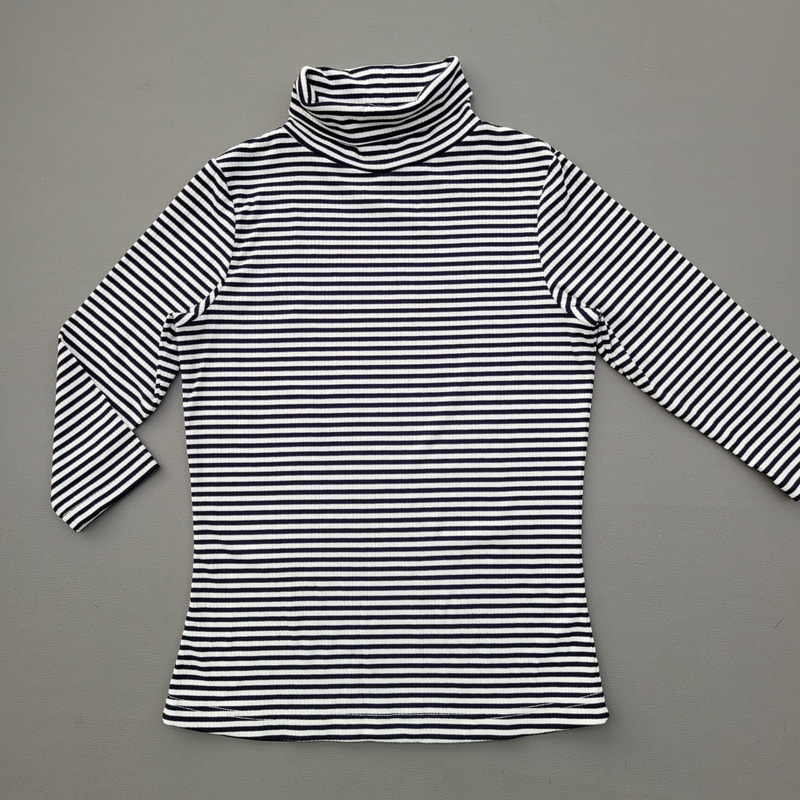
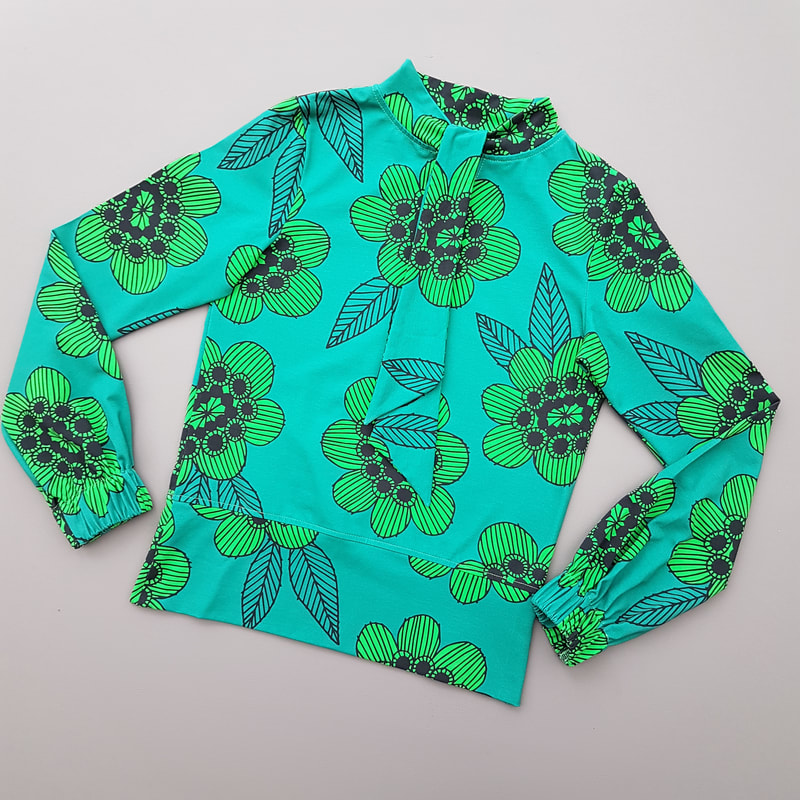
Elizabeth Sweetwater
  • Tutorials
  • Movies
  • Happy Sewers
  • About

Roll/turtle neck or bow

2/8/2022

 
Col/turtle hals of strik
Picture
Introductie
In elke retro winter garderobe hoort natuurlijk een shirt met col, strik of turtle neck. Heerlijk om ergens onder te dragen voor extra warmte of een kleuraccent. Zoals al onze t-shirts heeft dit model een fijne pasvorm en heel veel extra's. Je kunt kiezen uit een aangsloten model of een iets lossere fit. Er zijn drie halsopties, een pof-of een gewone mouw en je kunt behalve een zoom ook kiezen voor een korte lengte afgewerkt met een band (voor als je geen lang shirt in broek of rok wilt dragen). Gebruik voor dit t-shirt een katoen /elasthane single jersey of een rib tricot.

Introduction
Of course, every retro winter wardrobe should have a turtle-roll neck or bow top. Lovely to wear underneath a garment for extra warmth or a for a colour accent. Like all our t-shirts it has a great fit and lots of extras. You can choose from a fitted style or a slightly looser fit. There are three neck options, 3 sleeve lengths and in addition to a hem, you can also opt for a short length finished with a band (for when you don't want to wear a long shirt in trousers or a skirt). Use a cotton / elasthane single jersey or rib fabric for this t-shirt.
Picture
Picture
Picture
Picture
Picture
Picture
Picture
Picture
Picture

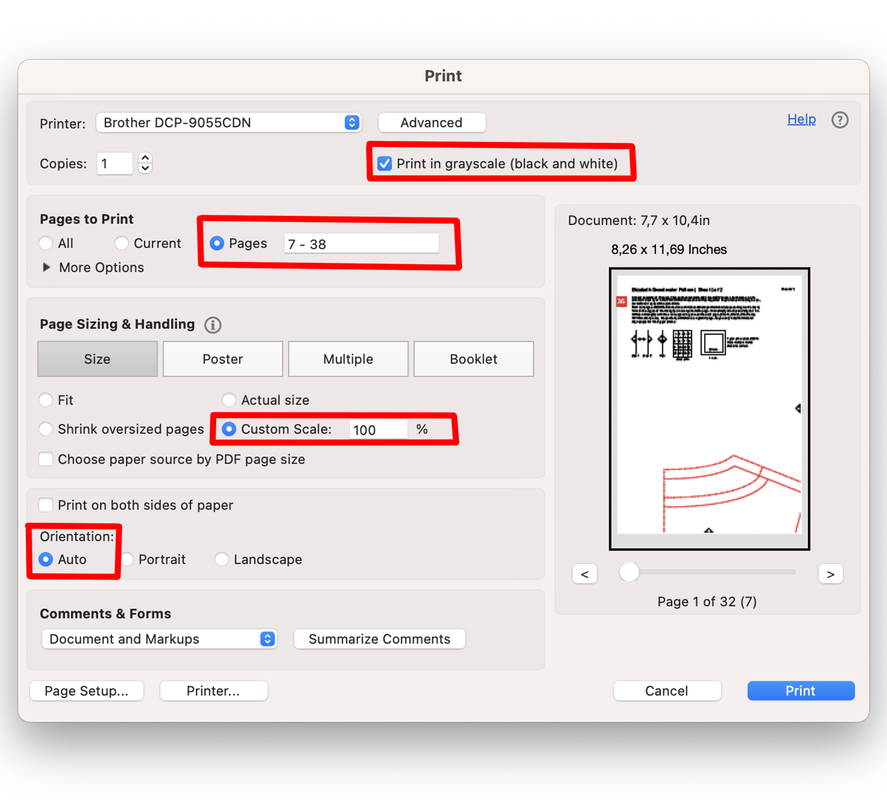
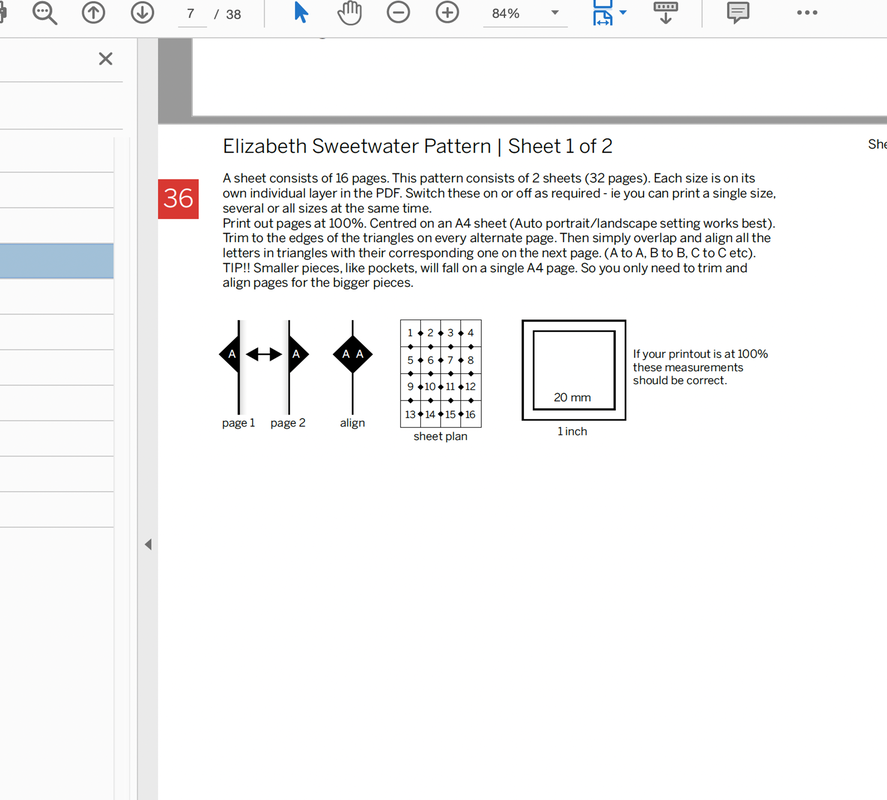
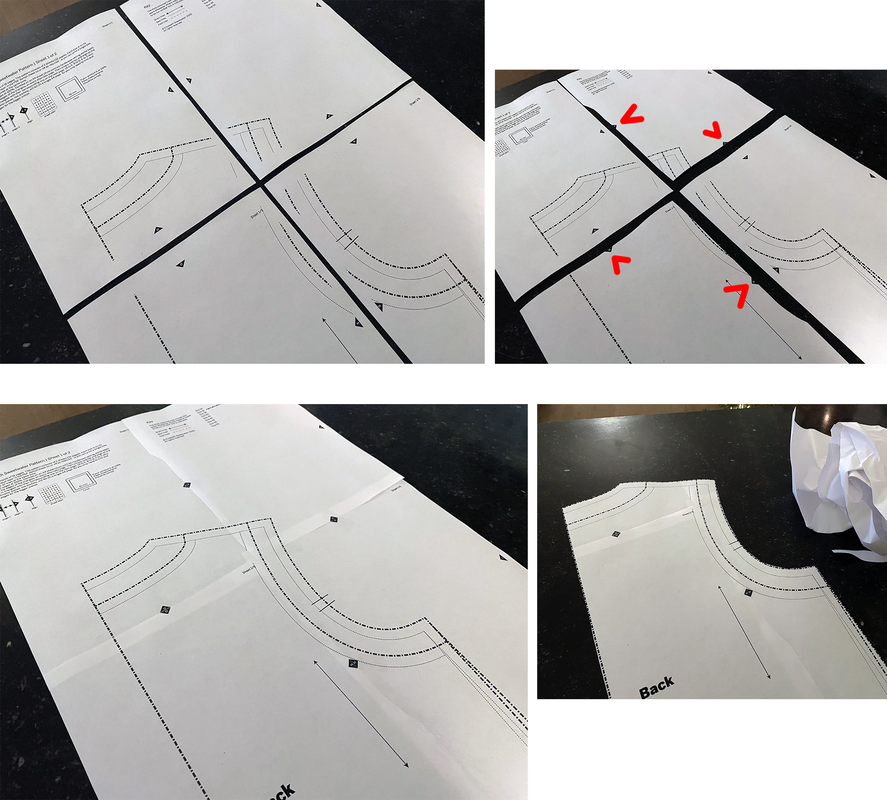
1.
Voorbereiding
Preparation

Bij aankoop van een van onze patronen ontvangt u 3 PDF-bestanden: een voor thuisprinters om op A4-papier af te drukken, een tweede voor A0-gebruikers om af te drukken in een printshop en een derde is voor mensen die een overheadprojector gebruiken. De volgende algemene introductietekst geeft een overzicht van hoe onze patroon-pdf's zijn opgezet en legt uit hoe je de A4-versie kunt afdrukken en hoe je de pagina's aan elkaar kunt plakken. A0-gebruikers kunnen bij hun printshop aangeven welke pagina's ze nodig hebben. Op de projector bestanden staan alle panden in dezelfde richting.
On purchasing any of our patterns you will receive 3 PDF files: one for home printers to print on A4 paper, a second at A0 is for printshop users and a third is for sewers who use an overhead projector. The following general introduction text provides an overview of how our pattern pdfs are set up and explains how to print out the A4 version and how to stick the pages together. A0 users should simply instruct their printshop which pages they require. Projector users will note that all pieces have the grain direction facing the same way.
Picture
1a.
Al onze patronen volgen dezelfde opzet zoals hier uitgelegd. Elk patroon begint met een voorblad, een inleiding, een lichaamsmatentabel, een ontwerptekening, een patroonchecklist en een kleurplaat. Het patroon is te vinden op de laatste lijst onder het tabblad Bladwijzers. 
All of our patterns follow the same set up as explained here. Each pattern starts with a cover page, an introduction, a body size chart, a design drawing, a pattern checklist and a colouring sheet.The pattern can be found on the last listing under the bookmarks tab.
Picture
1b.
Nadat je het patroon hebt gevonden, klik je op het lagenpictogram. Hier zie je het volledige assortiment maten in lagen. U kunt bij elke afzonderlijke maat op het oogpictogram klikken om het in of uit te schakelen.
After locating the pattern click on the layers icon. Here you can see the full range of sizes. They are all layered on top of one another. You can click on the eye icon by each individual size to turn it on or off.
Picture
1c.
Je kunt vervolgens de maat of maten selecteren die je wilt afdrukken.
You can then select the size or sizes you wish to print out.
Picture
1d.
Als je thuis print op een A4-printer, drukt u op het afdrukpictogram in het bovenste menu van de PDF. Uw afdrukdialoogvenster kan hiervan verschillen  (rechts in het midden weergegeven), maar ik heb een paar knoppen gemarkeerd om het te verduidelijken. Om inkt te besparen kun je instellen dat het patroon in grijstinten wordt afgedrukt. Selecteer de pagina's die je wilt afdrukken, over het algemeen vanaf pagina 7 tot de laatste pagina. Zorg ervoor dat de schaal is ingesteld op 'ware grootte' of '100%' - NOOIT op 'passend op pagina'. Het werkelijke paginaformaat van de PDF is kleiner dan A4. Stel de oriëntatie in op Auto, ik vind dat dit het beste werkt omdat het dan de pdf op een A4-blad centreert.
If printing at home on an A4 printer press the print icon in the top menu of the PDF. Your print dialogue box may vary to this one (shown middle right), but I have highlighted a few buttons to take note of. To save ink you can set to print the pattern in greyscale. Select the pages to print which will usually be from page 7 until the final page. Make sure the scale is set to 'actual size' or ‘100%' - NEVER to 'fit to page’. The actual page size of the PDF is smaller than A4. Set the orientation to Auto, I find this works best as it will then centre the pdf on an A4 sheet.
Picture
1e.
Rond elke pagina zie je kleine zwarte driehoekjes met letters erin. Met een schaar en doorzichtig plakband bij de hand, kun je vervolgens om elke pagina uitknippen tot aan de driehoeken en vervolgens de letters in de zwarte driehoeken uitlijnen met de overeenkomende op de volgende pagina (A naar A, B naar B, enz.). Vervolgens kunt u het blad aan elkaar plakken. Een vel kan uit 16 of 20 pagina's bestaan, afhankelijk van het gekochte patroon. Sommige patronen bestaan ​​uit één volledig vel (bijv. rokken met 16 pagina's), sommige uit twee vellen (bijv. jurken met 32 ​​pagina’s).
Around each page you will see small black triangles with letters inside. With scissors and clear sticky tape at hand, you can then cut out every alternate page to the triangles and then align the letters in the black triangles with the matching ones on the following page (A to A, B to B, etc). You can then proceed to stick the sheet together. One sheet can consist of 16 or 20 pages depending on the pattern purchased. Some patterns consist of one full sheet (eg. skirts with 16 pages), some of two sheets (eg. dresses with 32 pages).
Picture
1f.
Nadat je je pagina's hebt afgedrukt, leg je ze op een plat oppervlak. Knip de pagina's om en om uit tot aan de driehoekjes. Plak vervolgens met doorzichtig plakband de driehoeken met dezelfde letter aan elkaar. Knip vervolgens je patroondeel uit tot aan de stippellijnen. Deze stippellijnen bevatten de benodigde naadtoeslag voor elk stuk. De dunnere stippellijnen geven de uiteindelijke maat aan. Voor het gemak zijn alle namen van de stukken, samen met de draadrichting en handige instructies in de afzonderlijke patroondelen geplaatst, zodat u het overtollige papier veilig kunt weggooien (recycle). Let op dat sommige patronen ook een verklarend diagram kunnen bevatten op een van de pagina's die bewaard moeten worden. Als je de  patroondelen op patroonpapier wilt overtrekken, moet je er aan denken alle markeringen te kopiëren (bijv. draadrichting, knipjes etc.).
Once you have printed out your pages lay them out on a flat surface (top left). Cut out to the triangle edge on alternate pages (top right). Then with clear sticky tape connect the triangles that correspond to each other (bottom left). Then cut out your pattern piece to the dashed lines (bottom right). These dashed lines include the necessary seam allowance for each piece. The thinner dotted lines indicate the finished size. For convenience all names of pieces, along with grain direction and helpful instructions have been placed inside individual pattern pieces, so you can safely throw away (please recycle) the excess paper. Note some patterns may also include an explanatory diagram on one of the pages that should also be kept. 
To continue trace all the pattern pieces onto pattern paper, remembering to copy all the markings (eg. darts, piece to piece alignment lines etc).
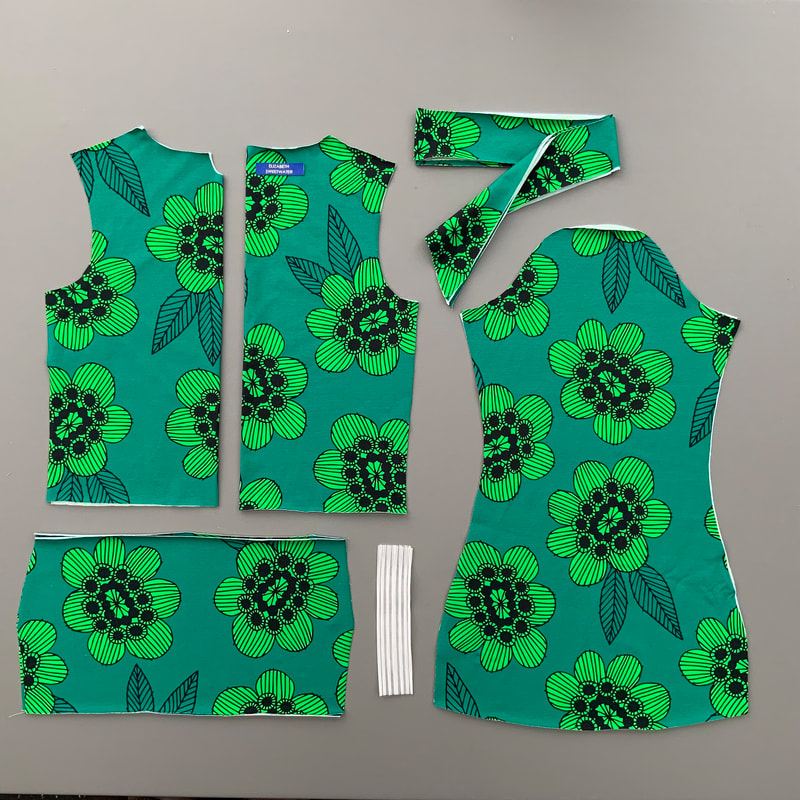
1g.
Nu je al je stukken hebt uitgeknipt raadpleeg het onderstaande overzicht om je voor te bereiden op het uitknippen van de door jou gekozen stof.
Now you have cut out all your pieces consult the overview below to prepare yourself for the next stage of cutting out the pieces from your chosen material.
Patroondelen:
- Voorpand knip 1x aan stofvouw
- Achterpand knip 1x aan stofvouw
- Mouw knip 2x
- Turtle neck of col knip 1x aan stofvouw of:
- Strik bies knip 2x aan stofvouw
optioneel:
- Heupband deel voor knip 1x en deel achter knip 1x aan stofvouw
Pattern pieces:
- Front piece cut 1x on fold
- Back piece cut 1x on fold
- Sleeve cut 2x
- Turtle neck or polo neck 1x on fold or:
- Bow tie 2x on fold
optional:
- Waistband front cut 1x and
back cut 1x on fold

2.
Checklijst
Checklist
Picture
Picture
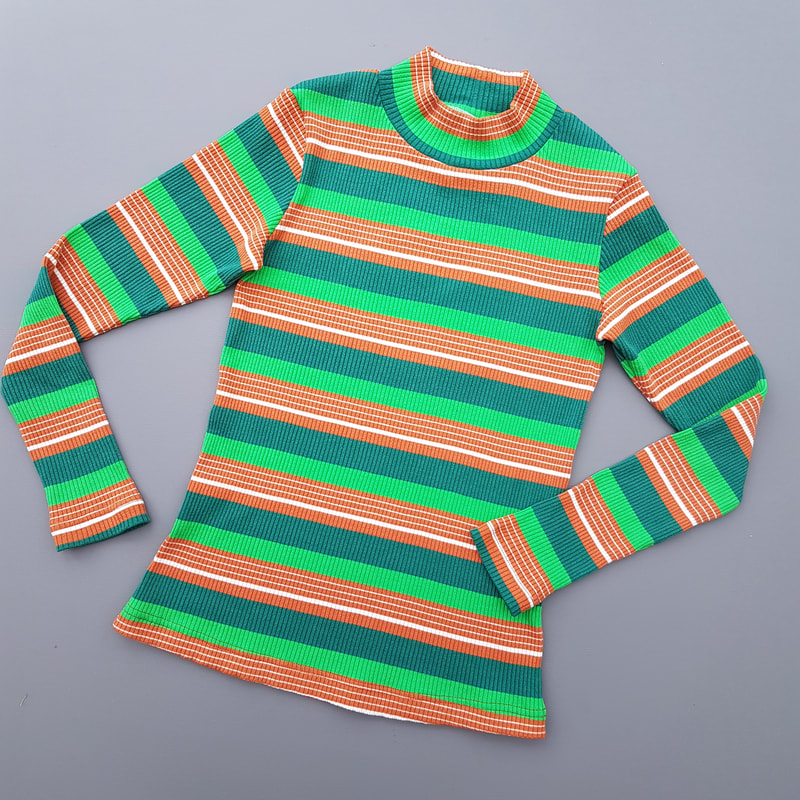
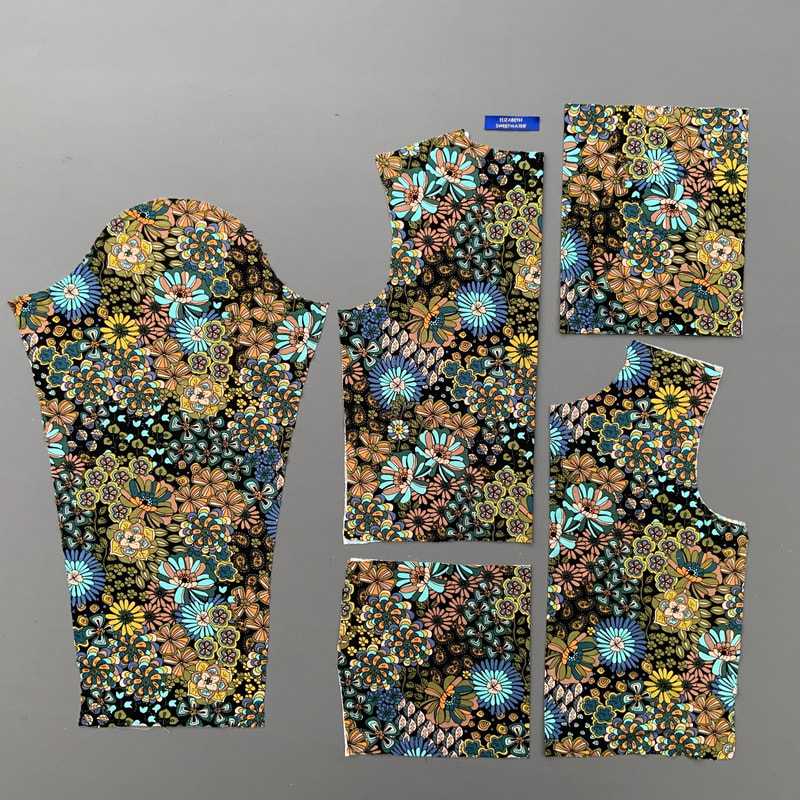
Turtle-/col neck gewone mouw - zie stap3
Turtle/roll neck with regular sleeve - see step 3

Single jersey katoen/elasthan of rib tricot*
Single jersey cotton/elasthane or rib jersey**

150cm breed/wide

*Sommige ribtricots zijn zeer smal. Let hierop bij aankoop, je zult waarschijnlijk de mouwen onder de panden moeten inleggen dus heb je meer stof nodig. Is de ribtricot zeer rekbaar, dan kun je het shirt maken zonder naad toeslag aan de zijnaden of kiezen voor een maat kleiner.
**Some rib fabrics can be very narrow. Be aware of this with purchasing your fabric, you might need to buy extra fabric. If the rib jersey is really stretchy you can make the shirt without seam allowance on the sideseams or choose one size smaller.

Patroon delen /patternparts:
Voorpand, achterpand, mouwen, turtle/col hals, eventueel tailleband delen*
Frontpart, backpart, sleeves, turtle/roll neck, Waistband parts (optional)**


*BELANGRIJK
De turtle heeft 2 wijdtes: 75 en 80% van de halswijdte.
Houd als richtlijn aan dat 75% het meest geschikt is voor zeer rekbare ribtricots en de 80% voor single jersey/elasthane.
De col heeft 2 wijdtes: 80 en 85% van de halswijdte.
Houd als richtlijn aan dat 80%het meest geschikt is voor zeer rekbare ribtricots en de 85%voor single jersey/elasthane.

**IMPORTANT
The turtle neck has 2 widths: 75 and 80% of the neck width.
As a guideline, keep 75% best for high stretch rib knitwear and 80% for single jersey/elastane.
The roll neck has 2 widths: 80 and 85% of the neck width.
As a guideline, keep 80% best for high stretch rib knitwear and 85% for single jersey/elastane.

Afmeting/amount:
Maat/size 34 t/m 42 ongeveer/ approx 75cm
Maat/size 44t/m 50 ongeveer/approx 95cm

Dit is een inschatting. het beste print je eerst de patroon delen uit en legt ze in op een breedte van 75cm (dubbelgevouwen 150cm). Meet dan op hoeveel je nodig hebt en bestel dan de stof.
This is an estimate. it is best to first print out the pattern parts and place them at a width of 75 cm (folded in half 150 cm). Then measure how much you need and order the fabric.

Fournituren/Haberdashery:
- Eventueel een geweven label/woven label (optional)
Picture
Picture
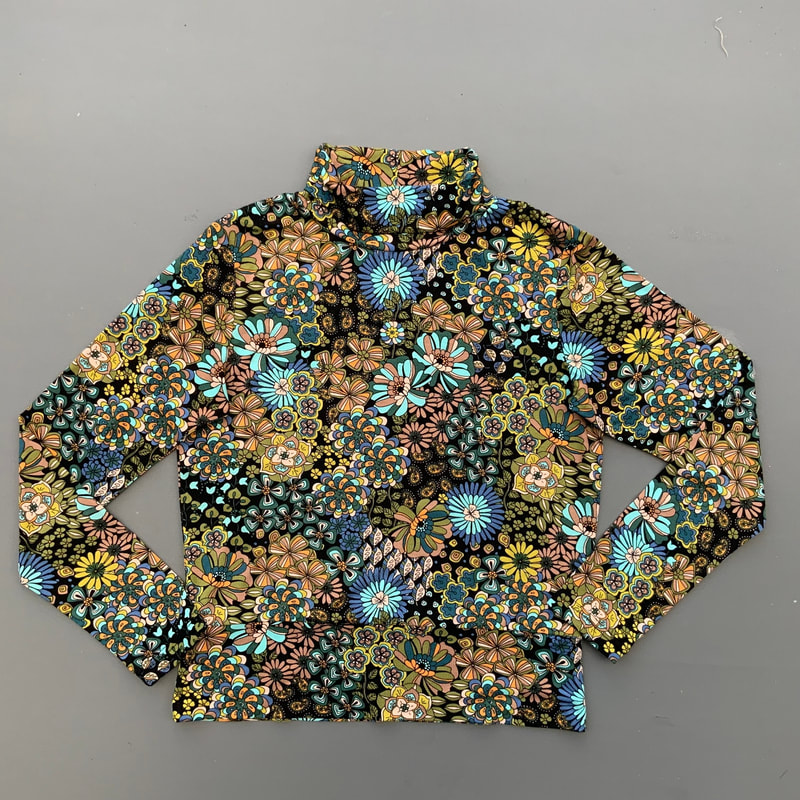
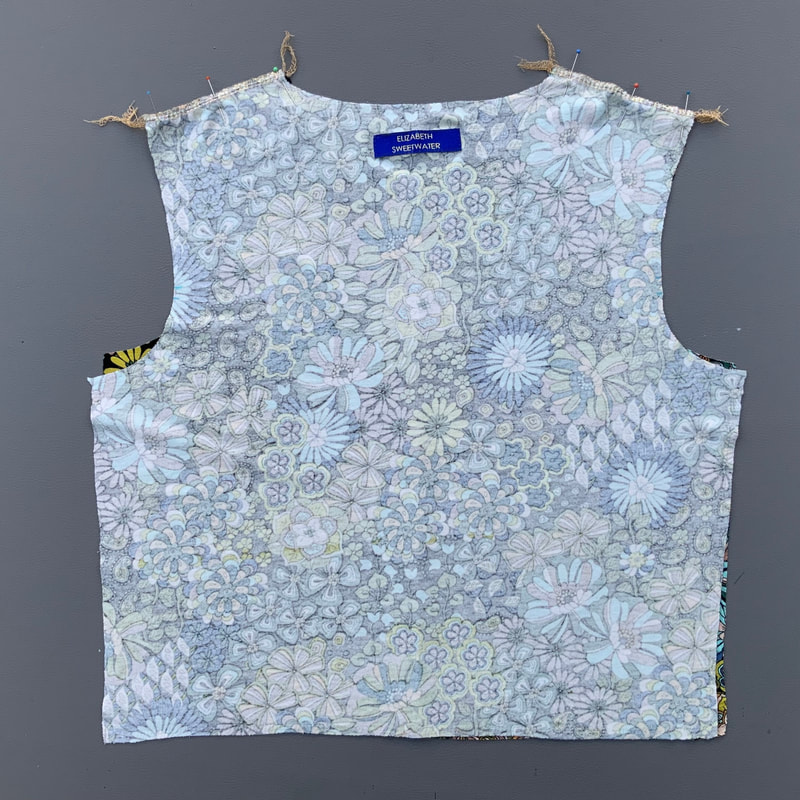
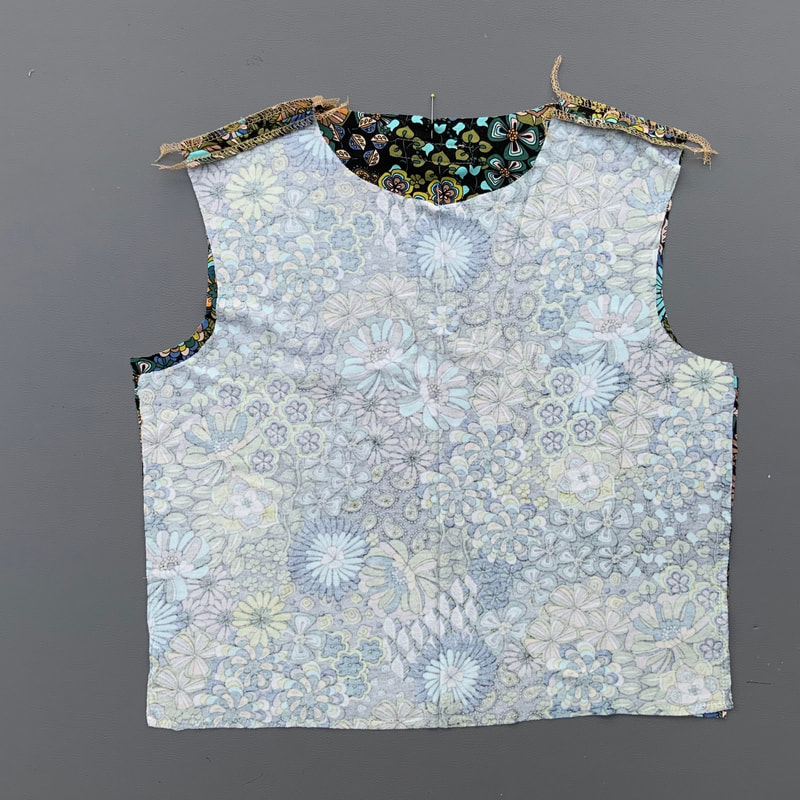
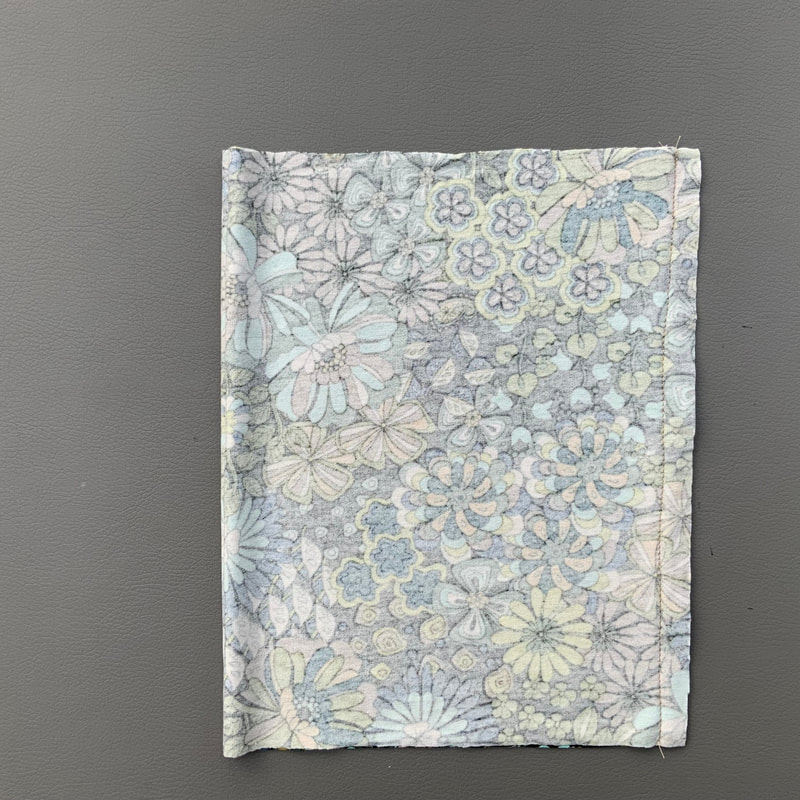
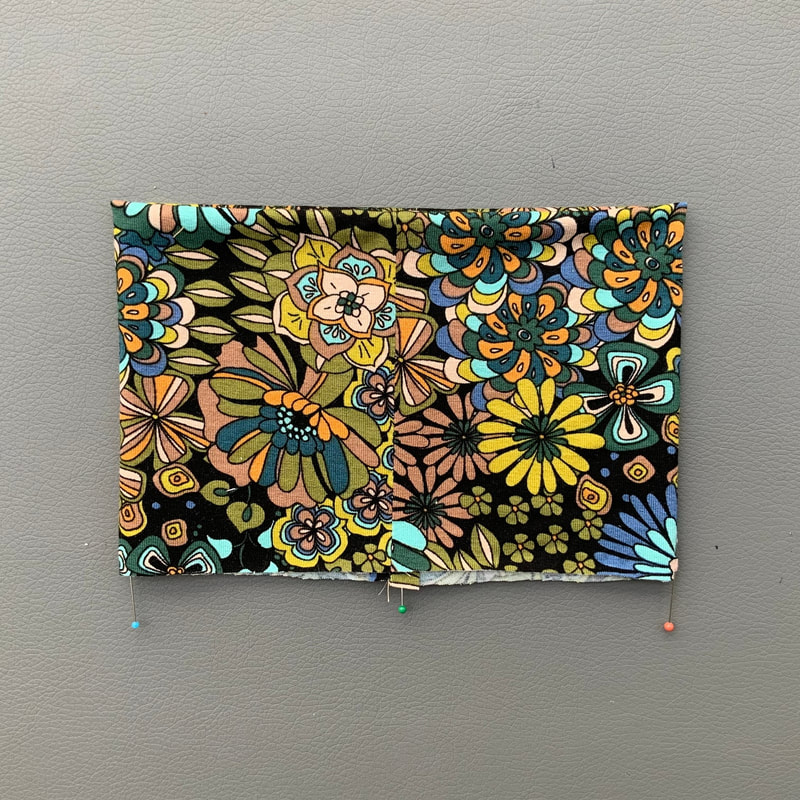
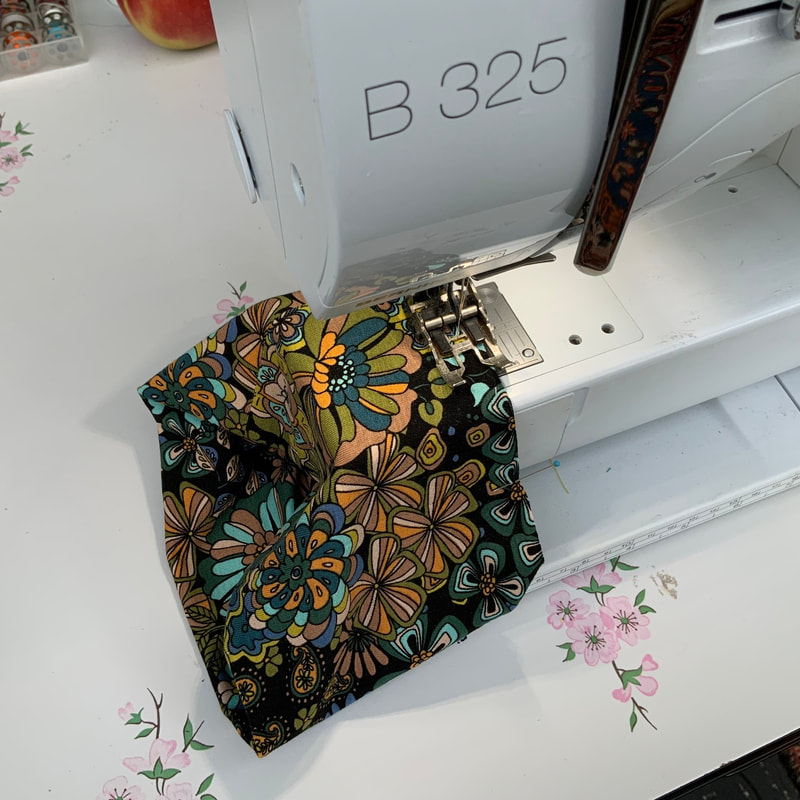
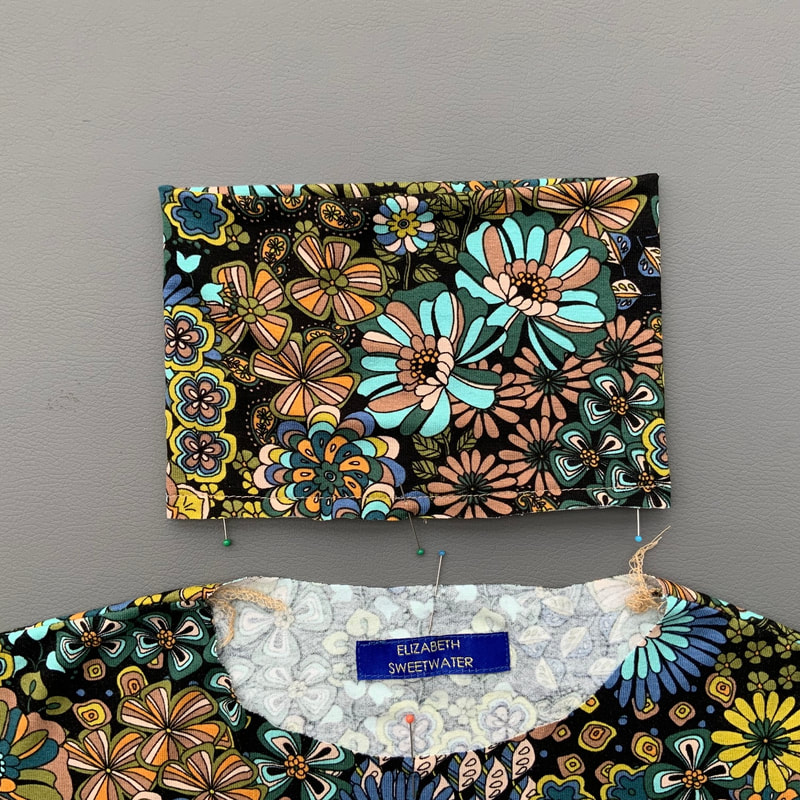
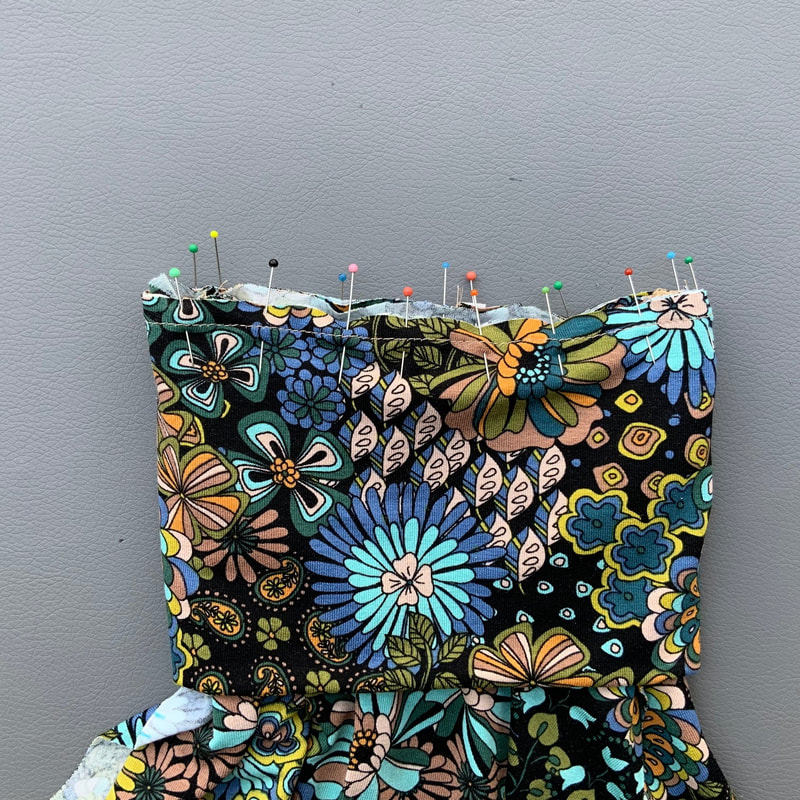
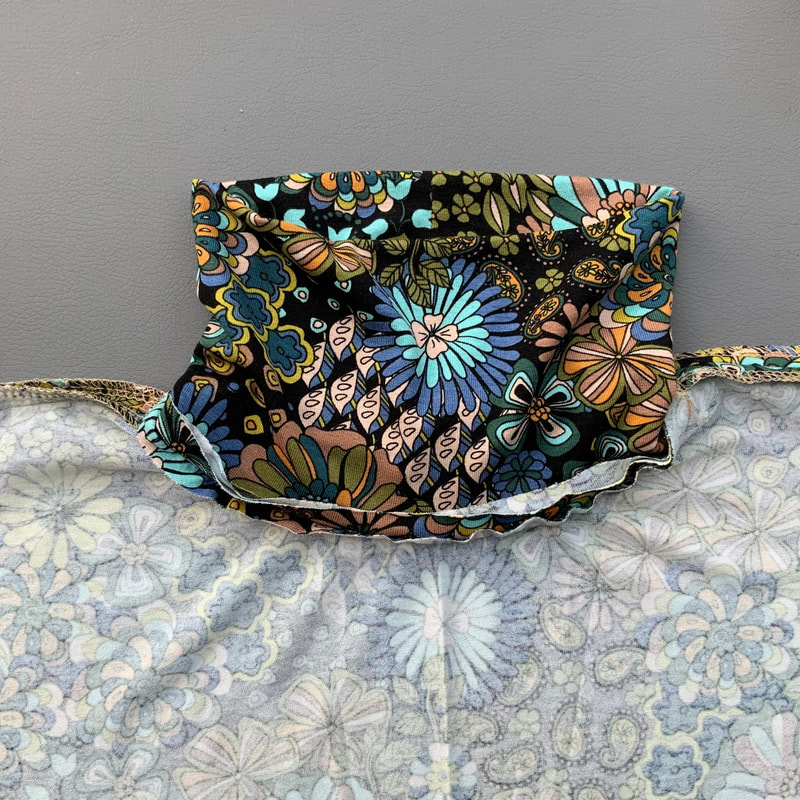
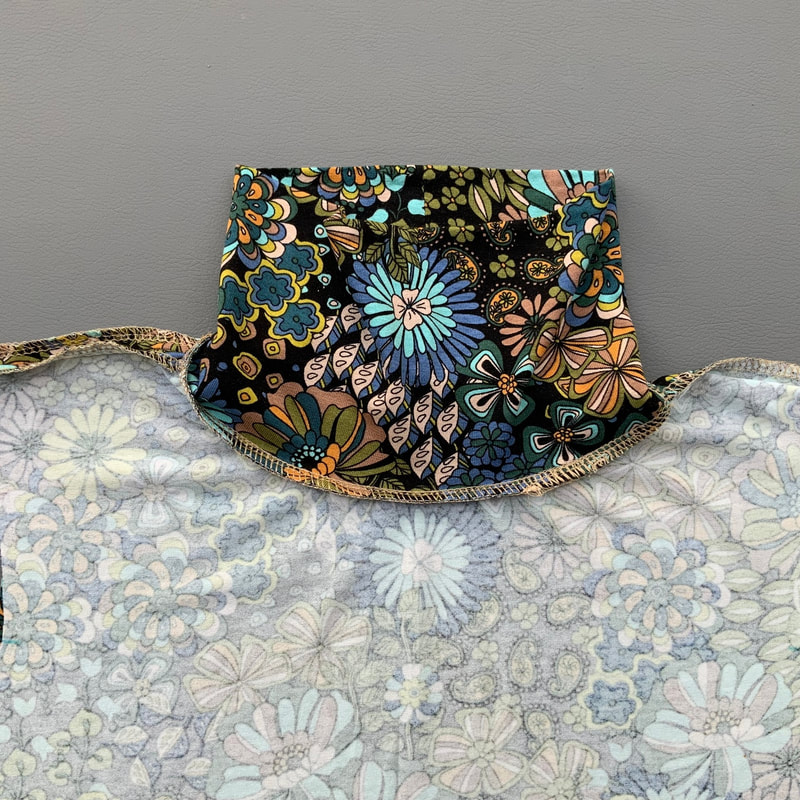
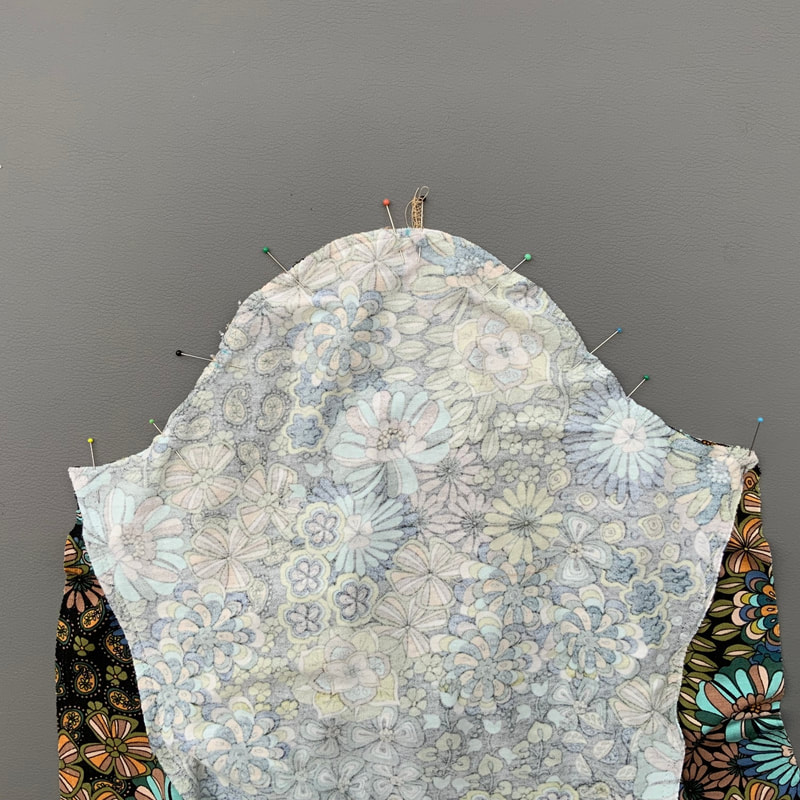
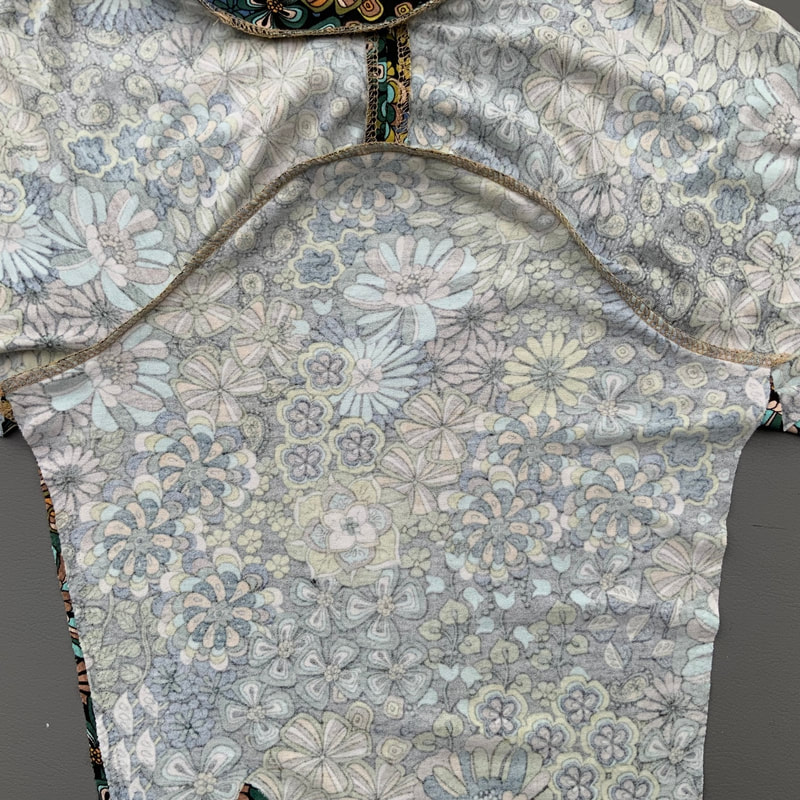
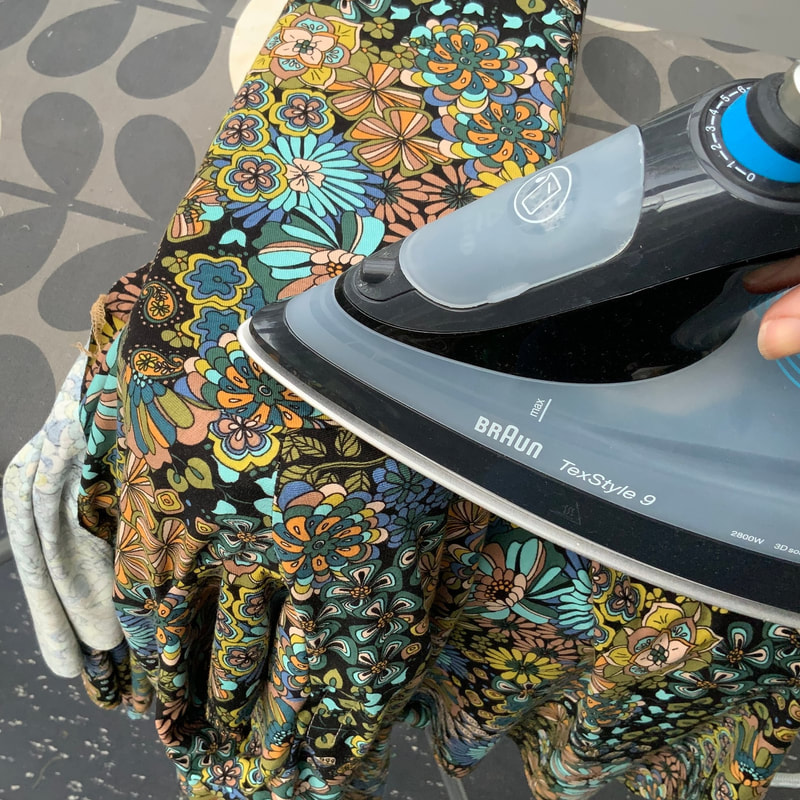
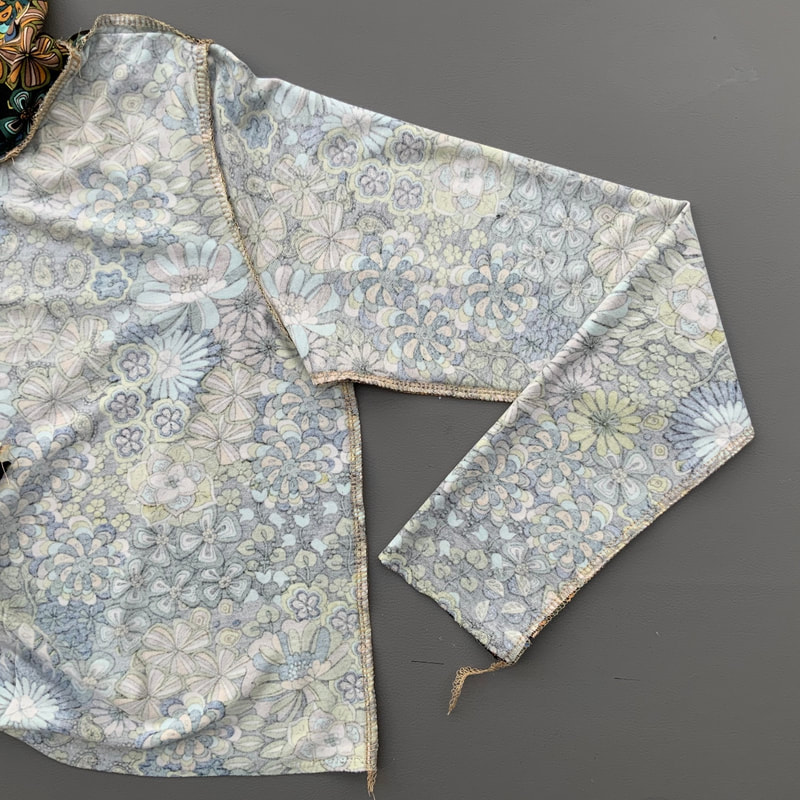
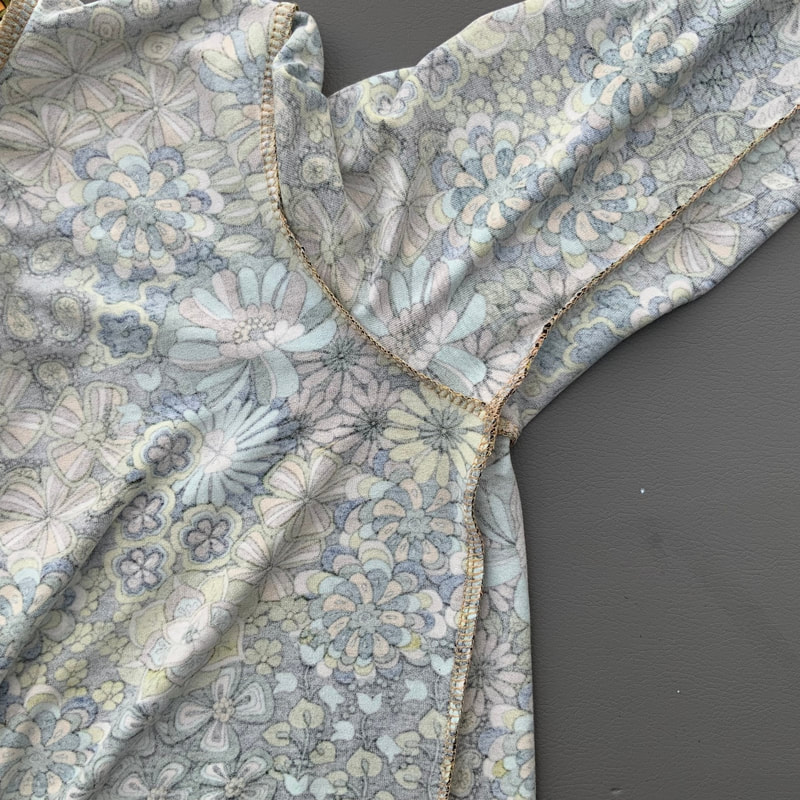
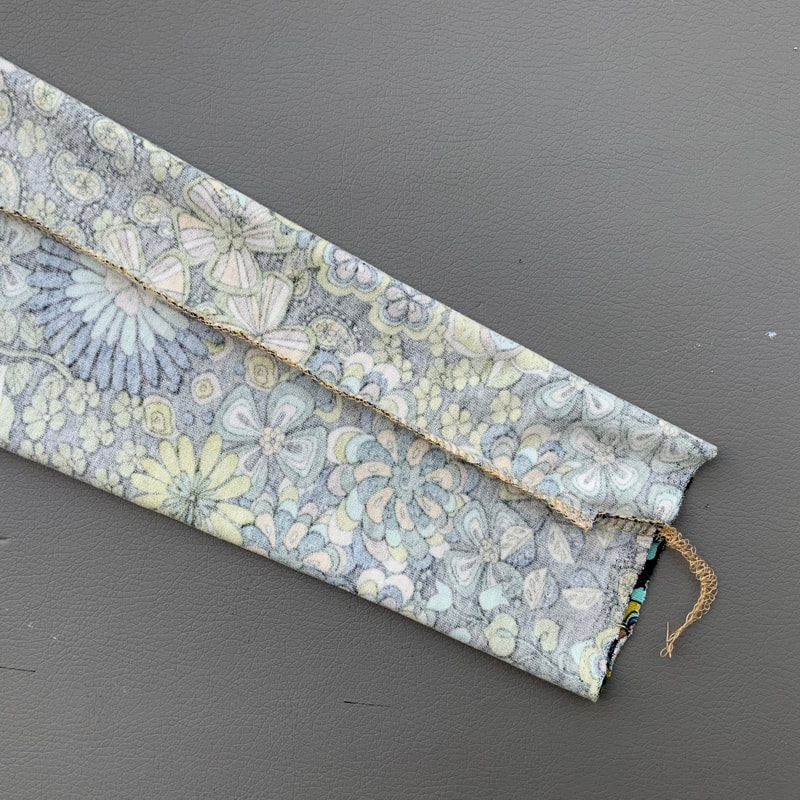
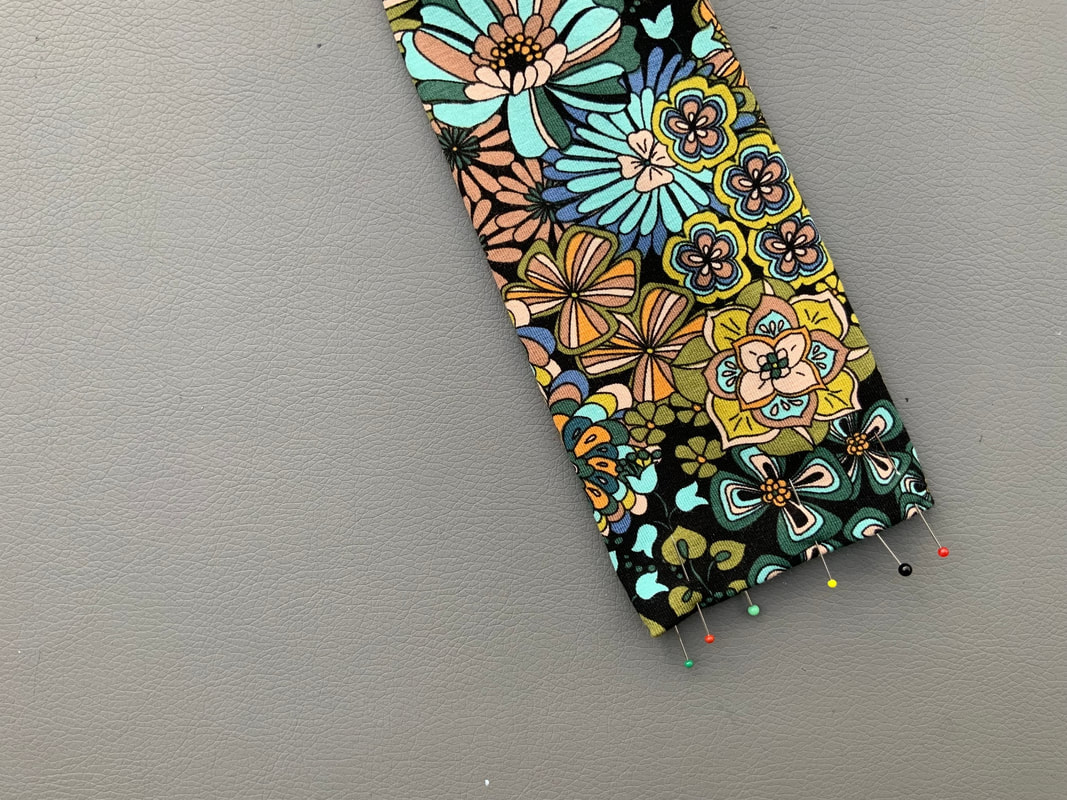
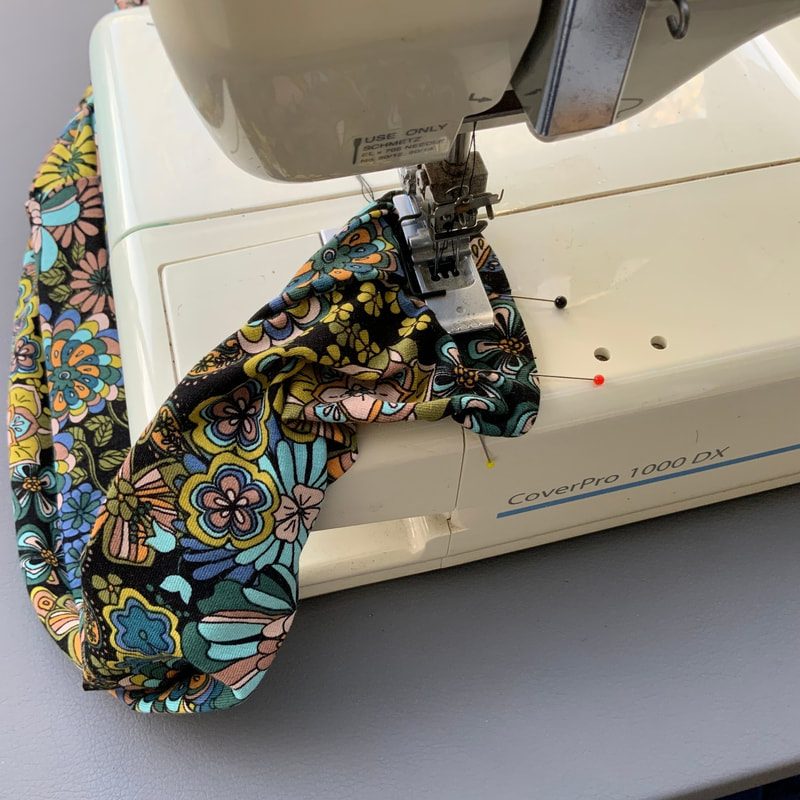
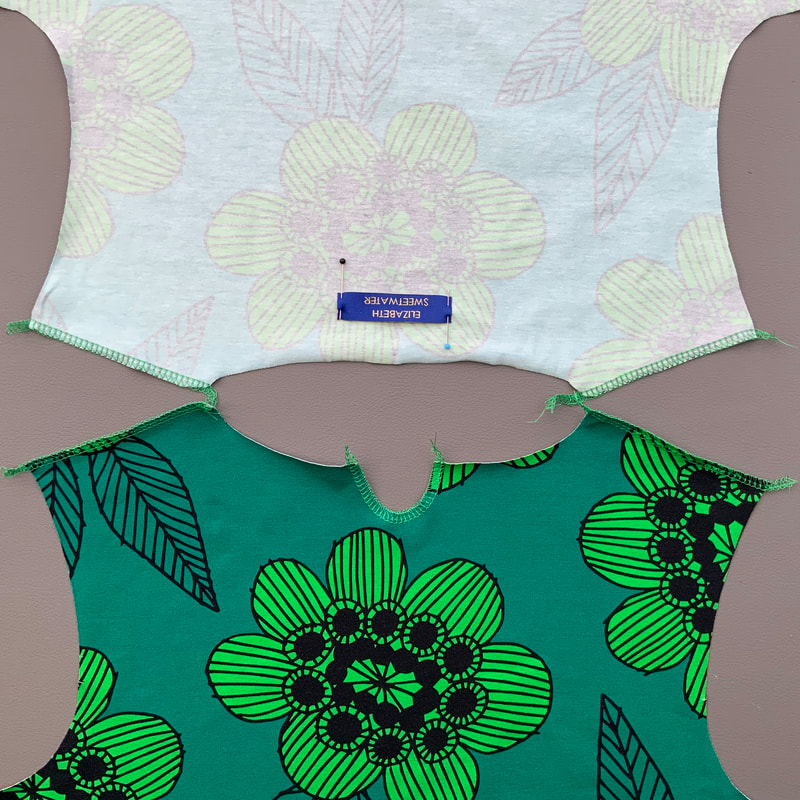
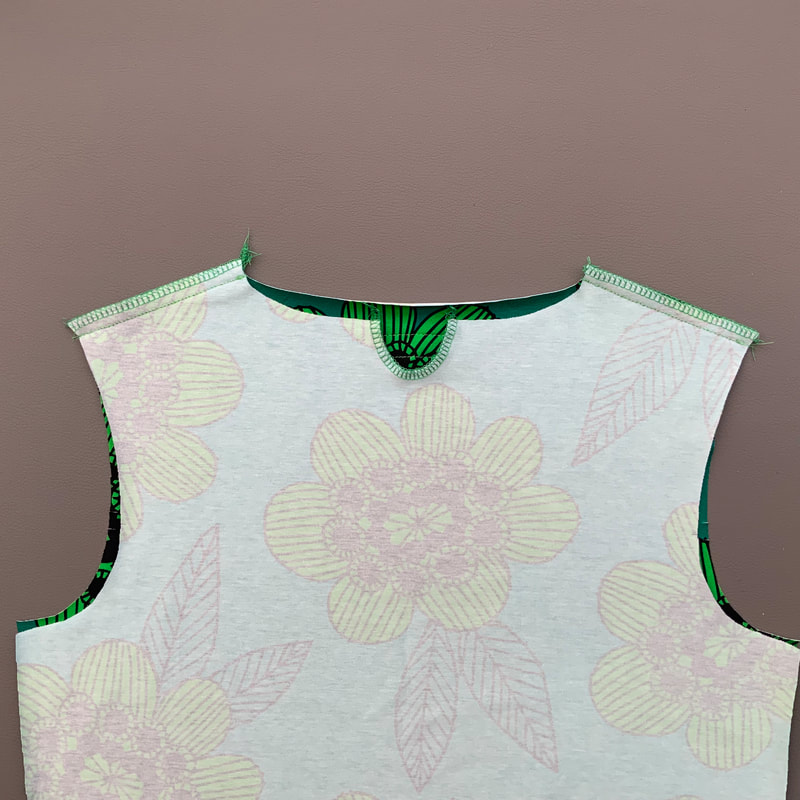
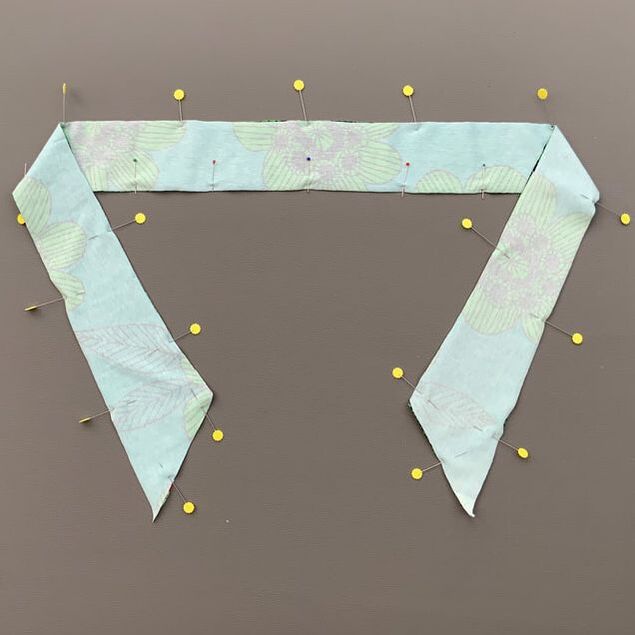
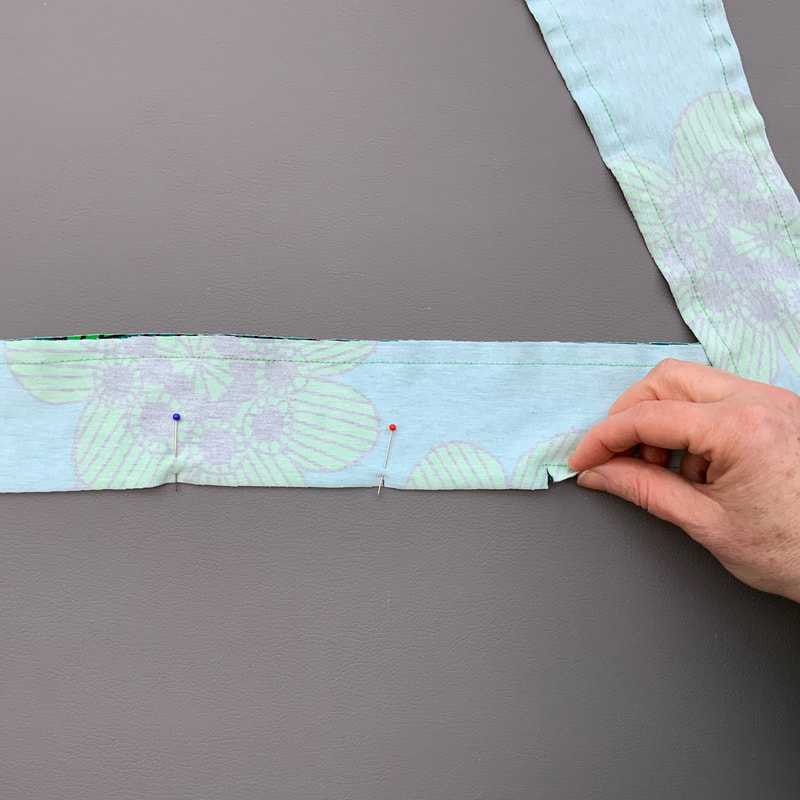
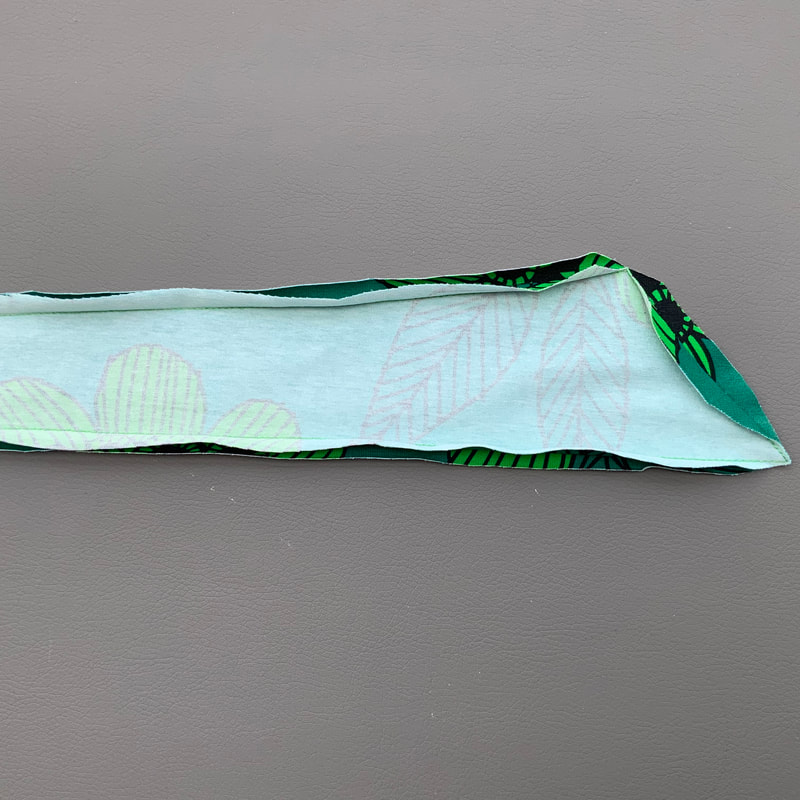
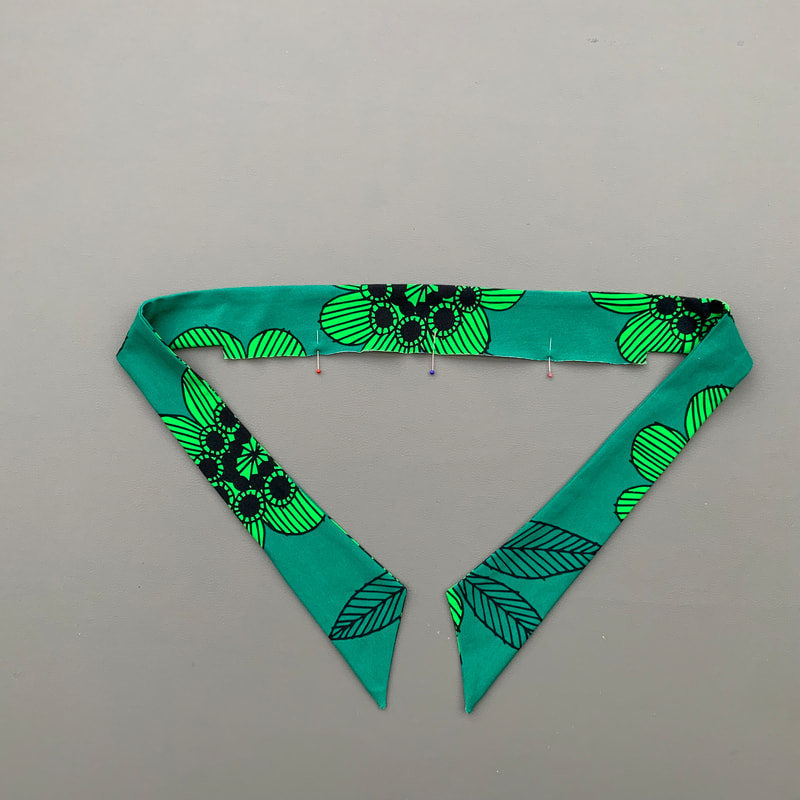
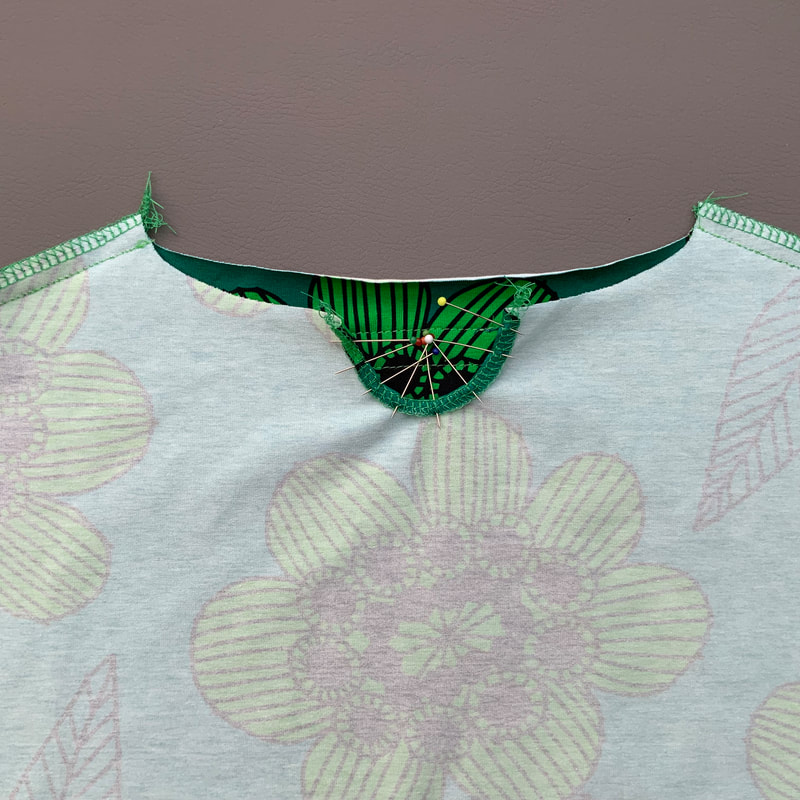
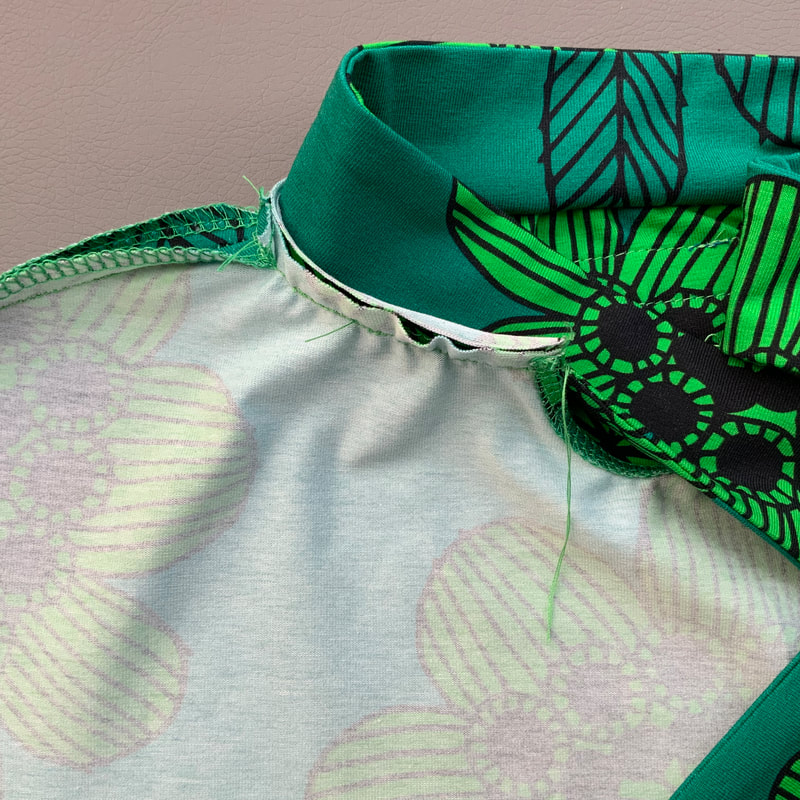
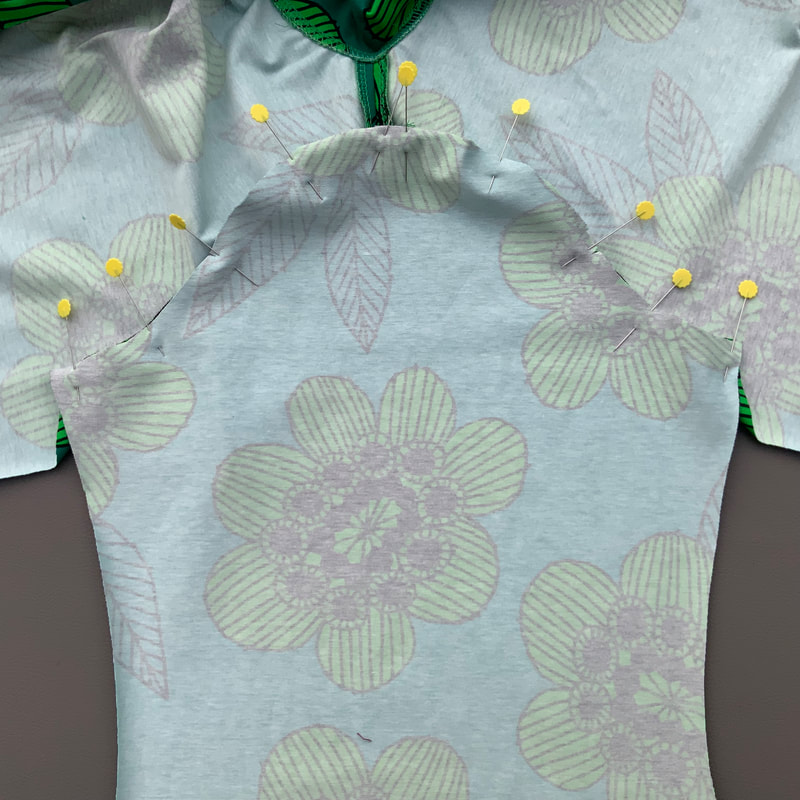
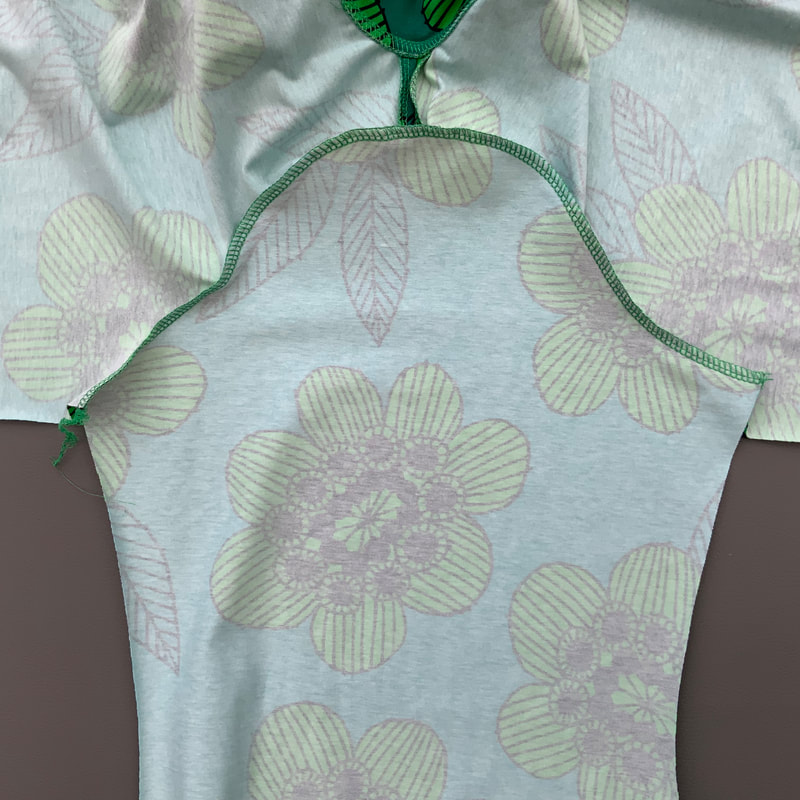
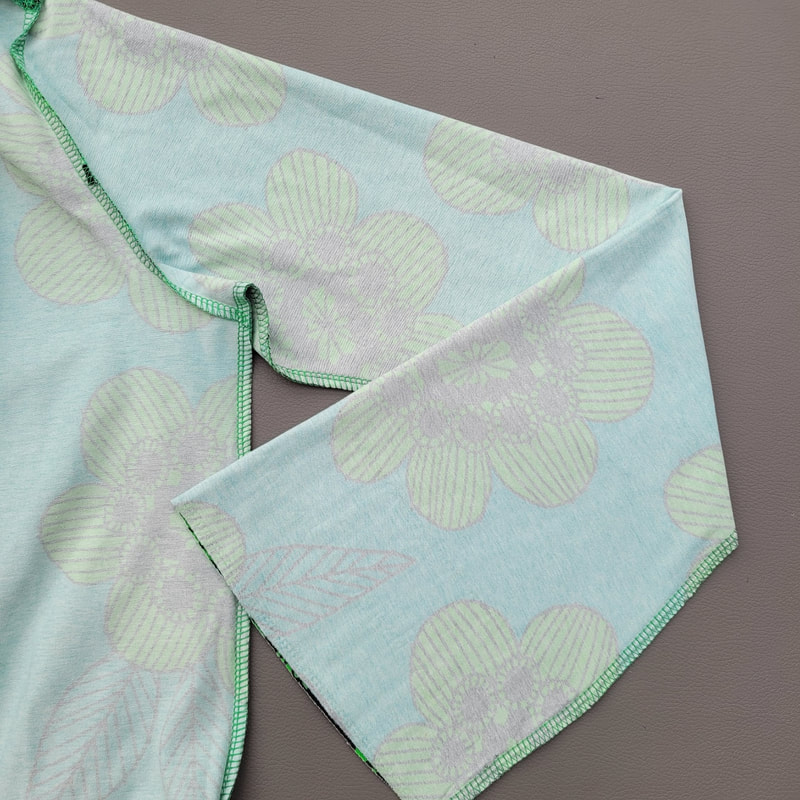
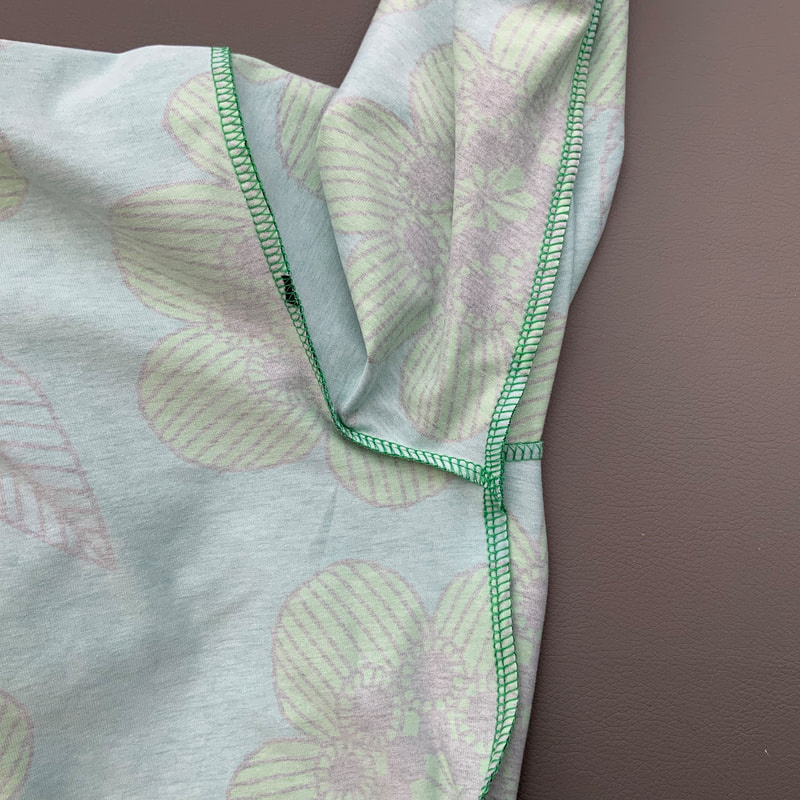
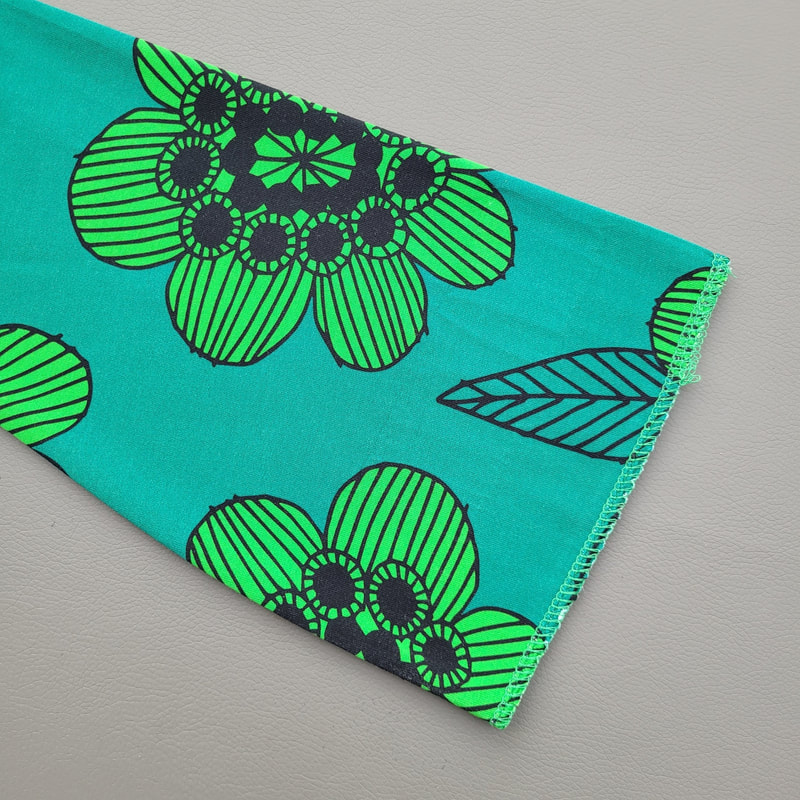
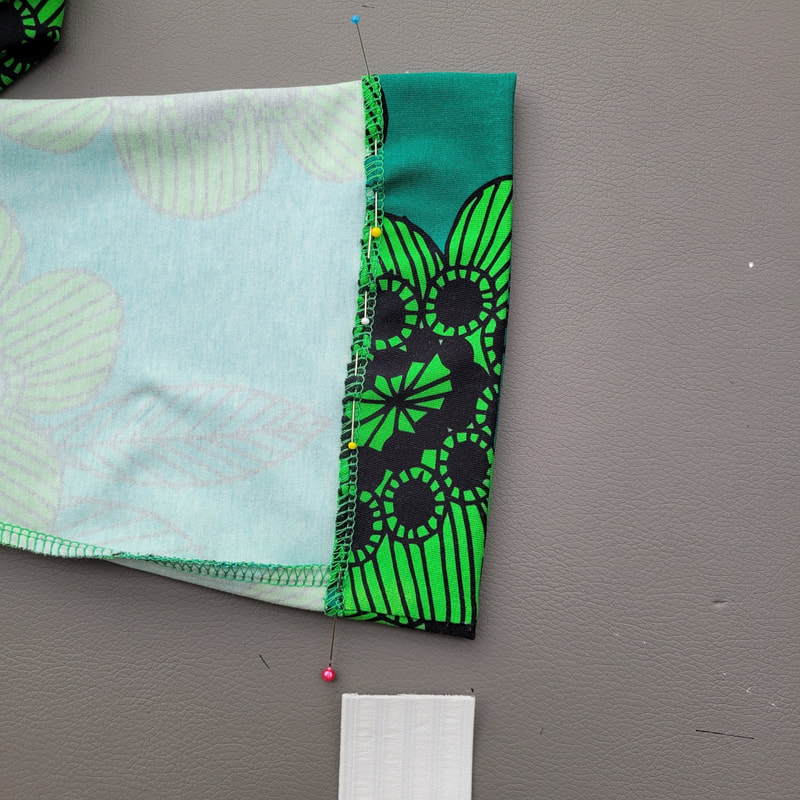
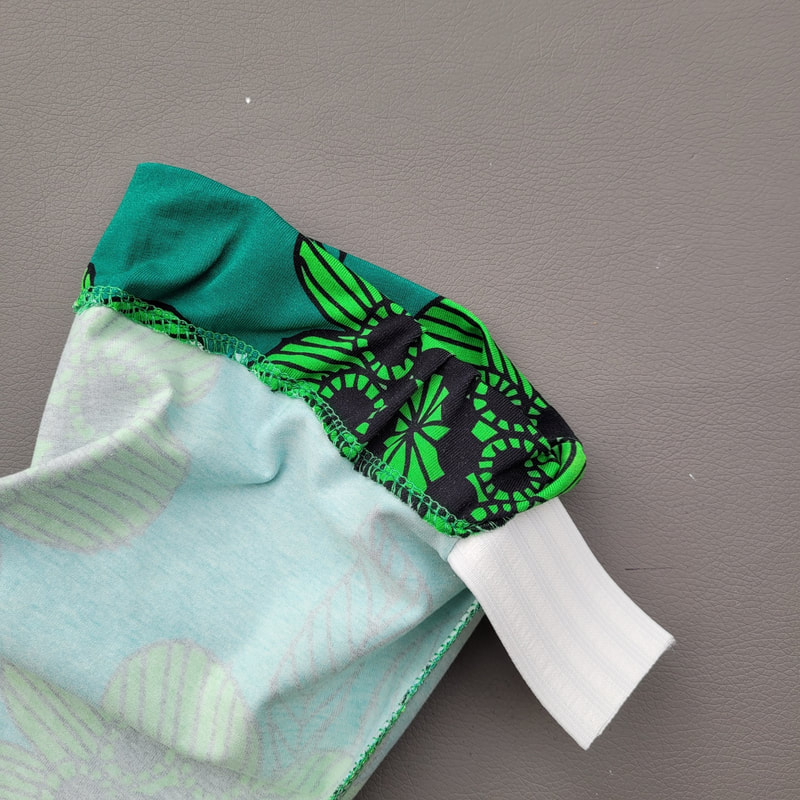
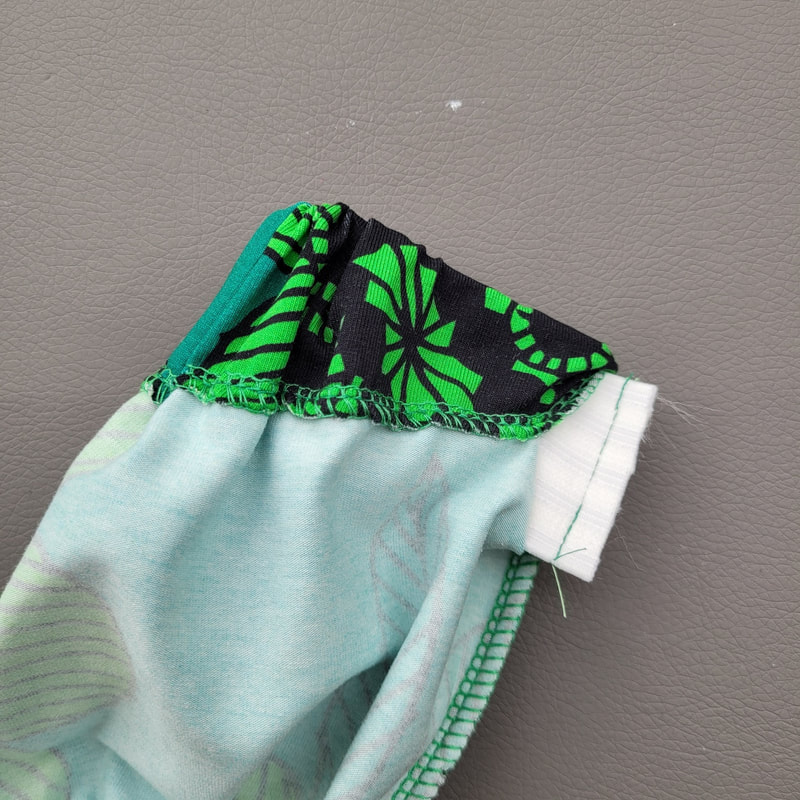
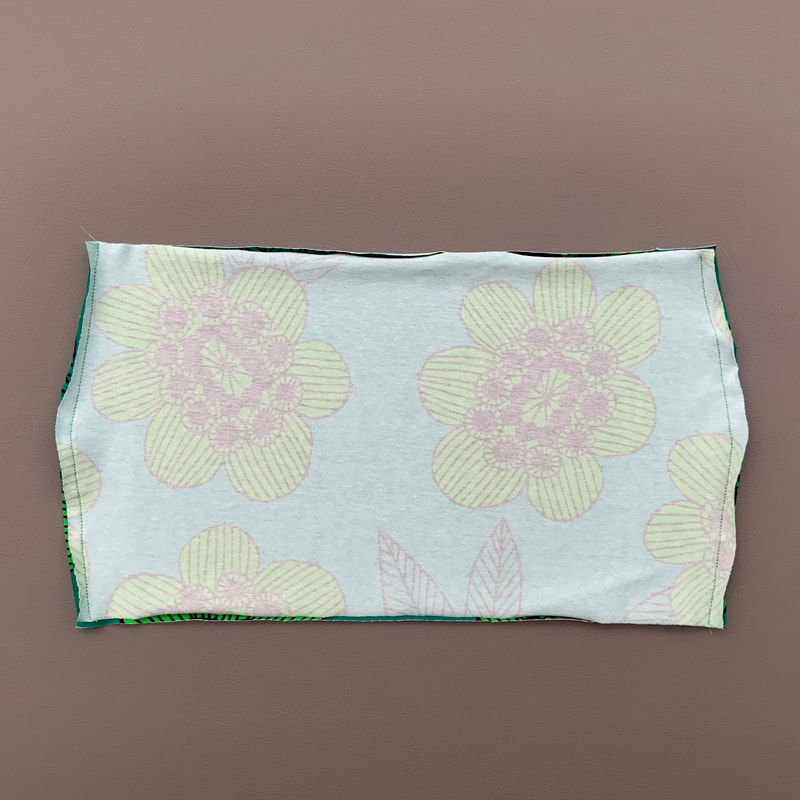
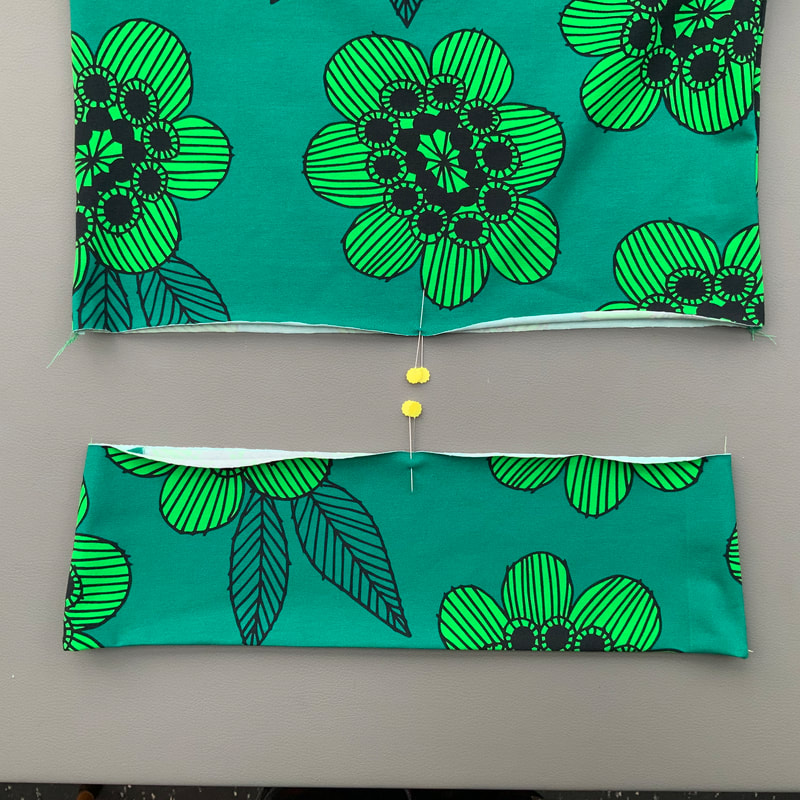
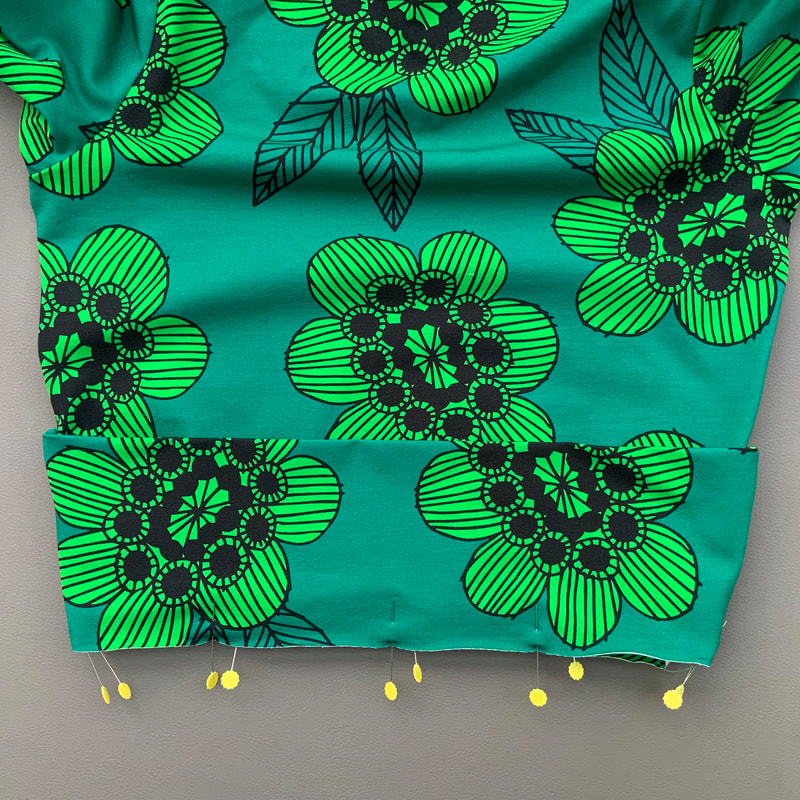
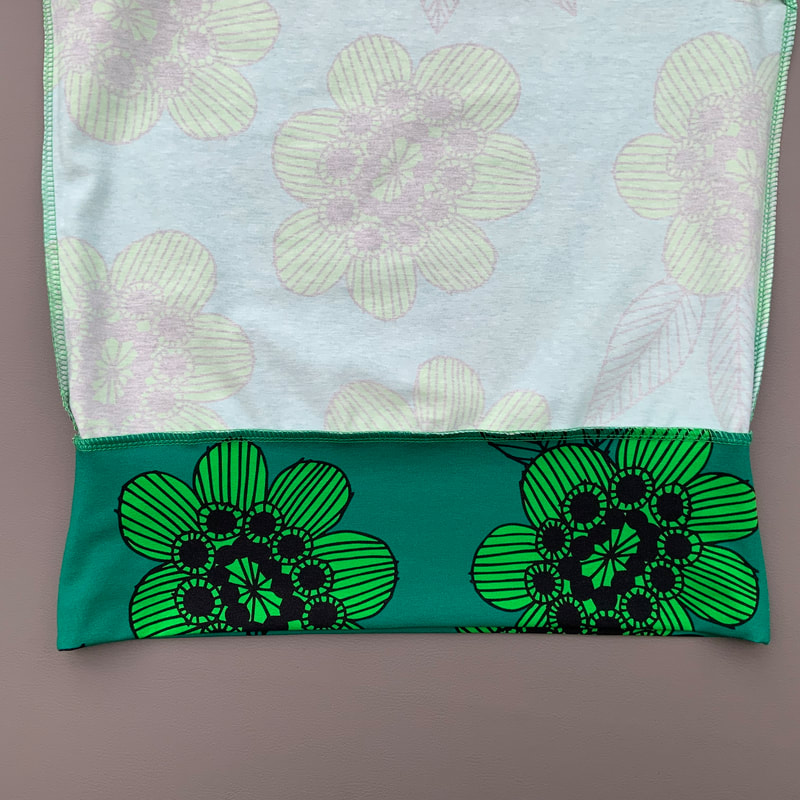
Classic Tee Bow + tailleband en pofmouw - zie stap 4
Classic Tee Bow + waistband and puff sleeve - see step 4

Single jersey katoen/elasthan
Single jersey cotton/elasthane

150cm breed/wide

Patroondelen/patternparts:
Voorpand, achterpand, mouwen, tailleband delen, strik delen.
Frontpart, backpart, sleeves, waistband parts, bow parts

Afmeting/amount:
Maat/size 34 t/m 42 ongeveer/approx. 100cm
Maat/size 44t/m 50 ongeveer/approx 120cm

Dit is een inschatting. het beste print je eerst de patroon delen uit en legt ze in op een breedte van 75 cm (dubbelgevouwen 150cm). Meet dan op hoeveel je nodig hebt en bestel dan de stof.
This is an estimate. it is best to first print out the pattern parts and place them at a width of 75 cm (folded in half 150 cm). Then measure how much you need and order the fabric.

Fournituren/Haberdashery:
- Eventueel een geweven label/ woven label (optional)
-Twee stukjes elastiek (op de foto zie je smock elastiek maar het mag gewoon elastiek zijn) 4 cm breed die met wat rek om de pols past/ two pieces of elastic 4 cm wide that fits around the wrist with a bit of stretch.

Goed om te weten
Ik ga in deze werkbeschrijving uit van het gebruik van een overlock machine. Mocht je daar niet over beschikken dan kun je een zig-zag steek gebruiken op een gewone naaimachine. Ik raad dan wel aan om er altijd een stretch stiksel naast te plaatsen. De naadtoeslag van de patronen is 1cm. Check wat de breedte instelling van je naad is op je lockmachine is. Is het 0,7cm dan kun je tijdens het stikken 3mm wegsnijden. De stretchnaden stik je met een stretchsteek instelling op de gewone naaimachine.


​Good to know
For this tutorial an overlock machine was being used for sewing most of the garment. However, it is possible to use a regular sewing machine and sew with a zigzag stitch. I do recommend sewing an extra stretch stitch next to it to create clean lines. The seam allowance of the patterns is 1cm. Check the seam width setting of your overlock machine. Is it less than 1cm? Then you can cut away a little while sewing. The stretch seams can be sewn using the stretch setting on a regular sewing machine.


3.
Classic tee turtle neck/col gewone mouw
Classic tee turtle neck/roll neck regular sleeve

Picture
3a.
Stik eventueel het geweven label op de binnenkant van het achterpand. Werk de schouders af met overlock of zigzag. Speld de schoudernaad met de goede kanten tegen elkaar.
Optionally sew the woven label on the inside of the back. Finish the edges with overlock or zigzag. Pin the shoulders right sides together.
Picture
3b.
Stik de schoudernaden met een stretch steek en strijk de naden open.
Sew the shoulderseams with a stretch stitch and iron them open.
Picture
3c.
Speld de turtle neck of col dicht met de goede kanten op elkaar.
Pin the turtle or roll neck right sides together.
Picture
3d.
Stik met stretch steek of stretch garen op 1cm van de kant de turtle neck of col dicht.
Close the turtle- or roll neck with a stretch stitch or stretch yarn on 1cm from the edge.
Picture
3e.
Strijk de naad open en vouw de turtle of col in de breedte om. Pas deze eerst door. Past het over je hoofd/ is het aansluitend genoeg? Indien nodig aanpassen.
Iron open the seam and fold the turtle or rollneck over width wise. Before proceeding, test it first. Does it go over your head/ is it tight enough? Adjust if necessary.
Picture
3f.
Stik de 2 lagen van de dubbelgevouwen col op elkaar op 0.5cm van de rand. Zo kunnen de lagen niet verschuiven. Dit is een hulpstiksel, je kunt deze later weer verwijderen.
Sew the 2 layers of the folded neckband together on 0.5cm from the edge. This way both layers stay in place.This is a temporary stitch which you can remove later.
Picture
3g.
Plaats een speld in het midden van de voor-en achter hals en in het midden van de col.
Place a pin in the middle of the front and back neck and one in the middle of the turtle/roll neck.
Picture
3h.
Speld het naadje van de col tegen het midden van de achterhals, het midden van de col tegen het midden van de voor hals en de knip tekentjes tegen de schouders.
Pin the seam of the turtle/roll neck to the middle of the back neck, the middle of the turtle/roll neck to the middel of the front neck and the notches to the shoulders.
Picture
3i.
Stik de dubbelgevouwen col langs de hals met een normale steek setting op je naaimachine. Met een naaimachine kun je veel makkelijker sturen. Eventueel het eerder genaaide hulpstiksel verwijderen.
Sew the folded turtle neck/ roll neck along the neck with a regular stitch setting on your sewing machine. With a sewingmachine it is easier to guide along the neck. Optionally remove the temporary stitch.
Picture
3j.
Nu kun je de naden afwerken met de overlockmachine. Stik over het gewone stiksel heen, deze rekt namelijk niet (Tenzij je stretch garen hebt gebruikt). Met behulp van een mouw plankje kun je de naad van de col aan de binnenkant naar beneden strijken.
Now you can finish the edges with the overlock machine. Sew over the stitchline since this is a non-stretch stitch (Unless you use stretch yarn). With the help of a sleeve board you can iron the overlock seam downwards.
Picture
3k.
Speld de mouwen in de armsgaten. Maak hierbij gebruik van de kniptekens op het patroon.
Pin the sleeves into the armholes. Using the marks on the paper pattern.
Picture
3l.
Pas de steek breedte van de overlockmachine aan naar de smalste setting (0,5cm) Stik de mouwen in de armsgaten (je snijdt hierbij dus 0,5cm weg)
Adapt the stitch width from the overlockmachine to its narrowest setting (0,5cm). Sew the sleeves into the armholes (cutting away 0,5cm).
Picture
3m.
Met behulp van een mouwplankje en een vochtige doek pers je de mouwkop. De naad wijst richting de mouw.
Using a sleeve board and a damp cloth, press the sleeve head. The seam points towards the sleeve.
Picture
3n.
Zet de steekbreedte weer terug op de breedste stand. Speld en stik met een overlocksteek in één keer de onderarmnaad en zijnaad.
Adjust the stitch width to the widest setting. Pin and sew with an overlock stitch all the way from sleeve opening to bottom.
Picture
3o.
Laat hierbij de naad van het voorpand naar boven wijzen, en van het achterpand naar onder. Zo krijg je niet 2 naden op elkaar.
Make sure the seam of the front points upwards, the seam of the back points downwards. This way you don’t get 2 seams on top of each other.
Picture
3p.
Als je een shirt maakt met een zoom (lange lengte): Zet op 2cm een knipje in de zijnaad. Vouw één helft van de naad naar binnen en éen naar buiten. Doe hetzelfde met de onderkant van de mouwen.
When you make a shirt with a hem (longer length): Cut in the sideseam 2cm from the bottom. Fold one half to the inside and one half to the back
Do the same with the bottom of the sleeves.
Picture
3q.
Speld 2cm zoom af. Spelden aan de buitenkant.
Pin a 2cm hem. Pins go on the outside.
Picture
3r.
Naai de zomen met een coverlock of tweelingnaald in je naaimachine aan de buitenkant van het shirt.
Sew the hems with a coverlock stitch or a twin needle on your sewing machine on the outside of your shirt.
Picture
Picture
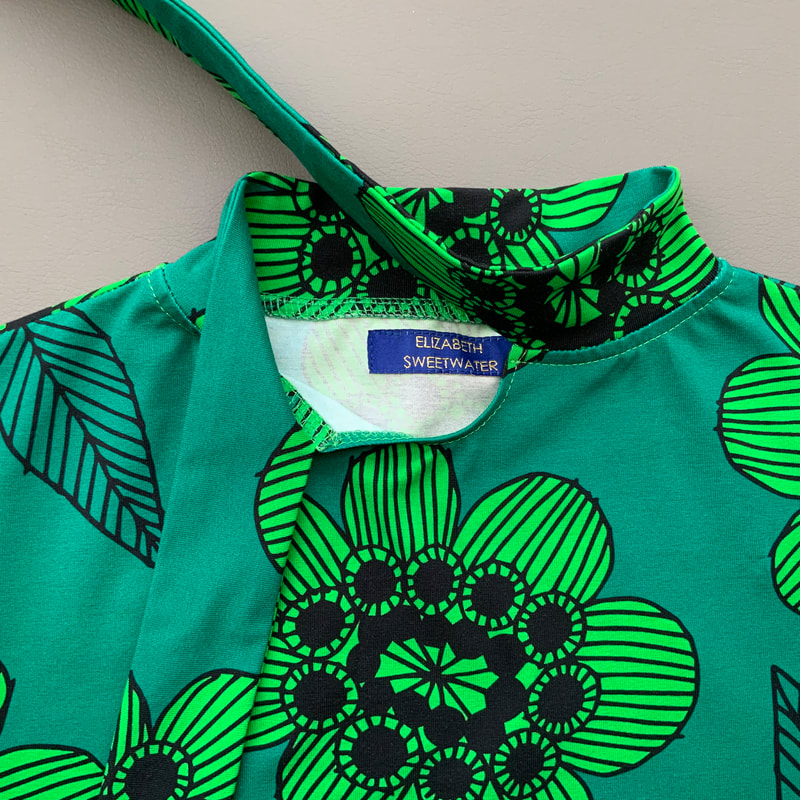
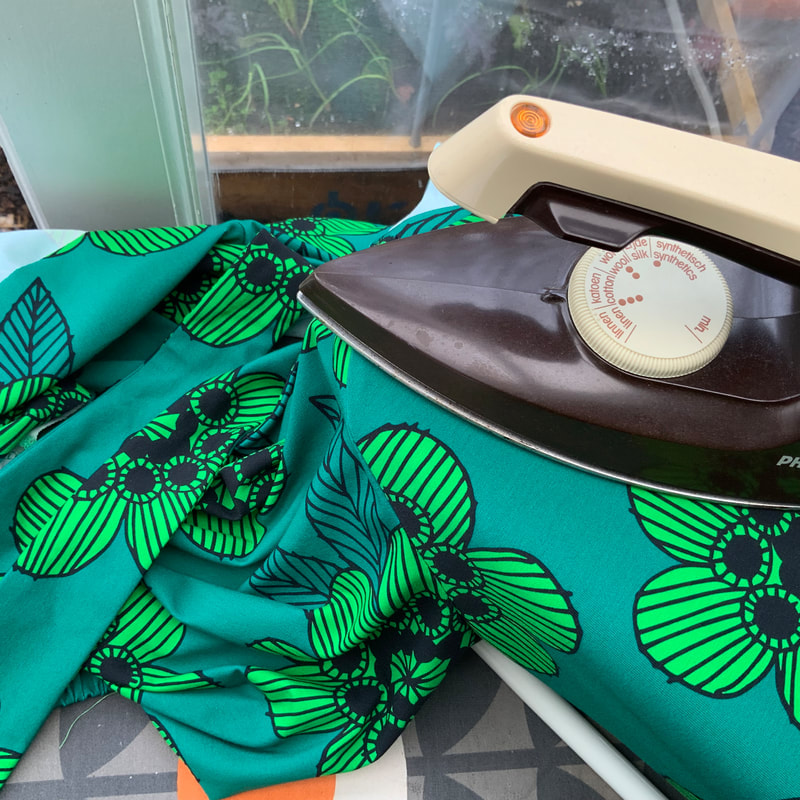
3s.
Nog een laatste keer strijken en je turtle neck/col is klaar. Dragen maar!
A final press and your turtle neck/roll neck is finished. Time to wear it!
Picture
Picture

4.
Classic tee strik + pofmouw/tailleband
Classic tee bow + puff sleeve/waistband

Picture
4a.
Stik eventueel het geweven label op de binnenkant van het achterpand. Werk de schoudernaden af met overlock of zigzag. Speld de schoudernaad met de goede kanten tegen elkaar. Werk ook alvast de middenvoor hals opening af met overlock.
Optionally sew the woven label on the inside of the back. Finish the edges with overlock or zigzag. Pin the shoulder seams right sides together. Also finish the mid front keyhole with an overlock stitch.
Picture
4b.
Stik de schoudernaden met een stretch steek en strijk de naden open.
Sew the shoulderseams with a stretch stitch and iron them open.
Picture
4c.
Speld de strik bies delen met de goede kanten op elkaar. Laat het deel wat aan de hals wordt gezet open (van knipje tot knipje, op de foto aangegeven met een groen speldje). De rode speldjes zijn de schouder punten en het blauwe speldje geeft middenachter aan.
Pin the neck band pieces right sides together. Leave the part that will be attached to the neck open (from notch to notch, indicated on the photo by a green pin). The red pins are shoulder points, the blue pin indicates the back point.
Picture
4d.
Stik op 1cm van de kant de strik bies rondom van knipje tot knipje. Het knipje moet precies tot het stiksel gezet worden.
Sew the neckband on 1cm from the edge all around from notch to notch. The notch must be cut exactly where the stitch line ends.
Picture
4e.
Strijk de naad open dun de punt uit. Keer de strik bies om.
Iron open the seam and thin out the point. Turn the neckband.
Picture
4f.
Strijk de strik bies plat. Stik de 2 lagen van het hals deel op elkaar op 0.5cm van de rand. Zo kunnen de lagen niet verschuiven. Je hoeft dit stiksel niet af te hechten, je kunt het straks weer verwijderen.
Iron the neckband flat. Sew the 2 layers of the neck part together on 0.5cm from the edge. This way both layers stay in place. You can remove this stitching later.
Picture
4g.
Speld en stik een smal zoompje van 0,5cm langs de hals`opening.
Pin and sew a narrow hem of 0,5cm along the keyhole.
Picture
4h.
Speld het middenachter punt van het hals deel tegen het midden van de achterhals, de uiteinden van het hals deel aan de hals opening en de knip tekentjes tegen de schouders.
Pin the center back of the neck piece to the center of the back neck, the outer ends of the neck piece to the keyhole and the shoulder notches to the shoulders.
Picture
4i.
Stik het hals deel langs de hals met een normale steek setting op je naaimachine. Met een naaimachine kun je veel makkelijker sturen dan de overlock machine.
Sew the neckband along the neck with a regular stitch setting on your sewing machine. With a sewingmachine it is easier to guide along the neck.
Picture
4j.
Nu kun je de naden afwerken met de overlockmachine. Stik over het gewone stiksel heen, deze rekt namelijk niet. Vouw het overlock draadje onder de hals naad en stik deze op ongeveer 0,5cm door met een gewone steek.
Now you can finish the edges with the overlock machine. Sew over the stitchline since this is a non-stretch stitch. Tuck the overlock thread under the seam and top stitch on 0,5cm from the edge.
Picture
4k.
Speld de mouwen in de armsgaten. Maak hierbij gebruik van de kniptekens op het patroon.
Pin the sleeves into the armholes. Using the marks on the paper.
Picture
4l.
Pas de steek breedte van de overlockmachine aan naar de smalste setting (0,5cm) Stik de mouwen in de armsgaten (je snijdt hierbij dus 0,5cm weg)
Adapt the stitch width from the overlockmachine to its narrowest setting (0,5cm). Sew the sleeves into the armholes (cutting away 0,5cm).
Picture
4m.
Met behulp van een mouwplankje en een vochtige doek pers je de mouwkop. De naad wijst richting de mouw.
Using a sleeve board and a damp cloth, press the sleeve head. The seam points towards the sleeve.
Picture
4n.
Zet de steekbreedte van de overlockmachine weer terug op de breedste stand. Speld en stik met een overlocksteek in één keer de onderarmnaad en zijnaad.
Adjust the stitch width to the widest setting. Pin and sew with an overlock stitch all the way from sleeve opening to bottom.
Picture
4o.
Laat hierbij de naad van het voorpand naar boven wijzen, en van het achterpand naar onder. Zo krijg je niet 2 naden op elkaar.
Make sure the seam of the front points upwards, the seam of the back points downwards. This way you don’t get 2 seams on top of each other.
Picture
4p.
Werk de onderkant van de mouw af met de overlockmachine.
Finish the bottom of the sleeve with the overlockmachine.
Picture
4q.
Speld en stik een zoom in de onderkant van de mouw. Zorg ervoor dat van het stiksel tot de onderkant dezelfde breedte heeft als het elastiek. Laat een klein stukje open om het elastiek door te kunnen rijgen.
Pin and sew a hem in the bottom of the sleeve. Make sure that the distance from stitchline to the bottom of the sleeve has the same with as the elastic. Leave a small opening for feeding in the elastic later.
Picture
4r.
Bevestig een veiligheidspeld aan het uiteinde van het elastiek en rijg deze door de zoom.
Attach a safely pin to the elastic and feed it through the hem of the sleeve.
Picture
4s.
Stik de uiteinden van het elastiek stevig vast.
Sluit de opening met een paar handsteekjes. Heb je een vrij grote opening, stik dan met de machine nog even het stukje zoom door, na het vastzetten met de hand.
Sew the ends of the elastic together firmly. Close the opening with a few handstitches. Is the opening quite big, sew the the bit of hem with the sewingmachine after closing the opening by hand.
Picture
4t.
Speld en stik de zijnaden van de tailleband goede kanten tegen elkaar.
Pin and sew the side seams of the waistband right sides together.
Picture
4u.
Strijk de naden open en vouw de band in de breedte doormidden. Strijk de band plat. Zet een speldje middenvoor en middenachter van zowel de band als het shirt.
Iron open the side seams of the waistband and fold the band over width wise. Iron the waist band flat. Stick a pin mid front and midback of both band and top.
Picture
4v.
Speld het middenvoor punt van de dubbelgevouwen band tegen het middenvoor punt van het shirt en het middenachter punt van de band tegen het middenachter punt van het shirt. Speld daarna de zijnaden van de band tegen de zijnaden van het shirt. Daarna speld je de tussenliggende ruimte.
Pin the center front point of the folded band to the center front point of the shirt and the center back point of the band to the center back point of the shirt. Then pin the side seams of the band against the side seams of the shirt. Then pin the space in between.
Picture
4w.
Zet de band aan met de overlockmachine. Als je een shirt maakt met een zoom (lange lengte) volg dan stap 3p t/m 3r.
Attach the band with the overlockmachine. When you make a shirt with a hem (longer length) follow step 3p up to 3r.
Picture
4x.
Nog een laatste keer strijken en je turtle neck/col is klaar. Dragen maar!
A final press and your turtle neck/roll neck is finished. Time to wear it!
Picture
Picture

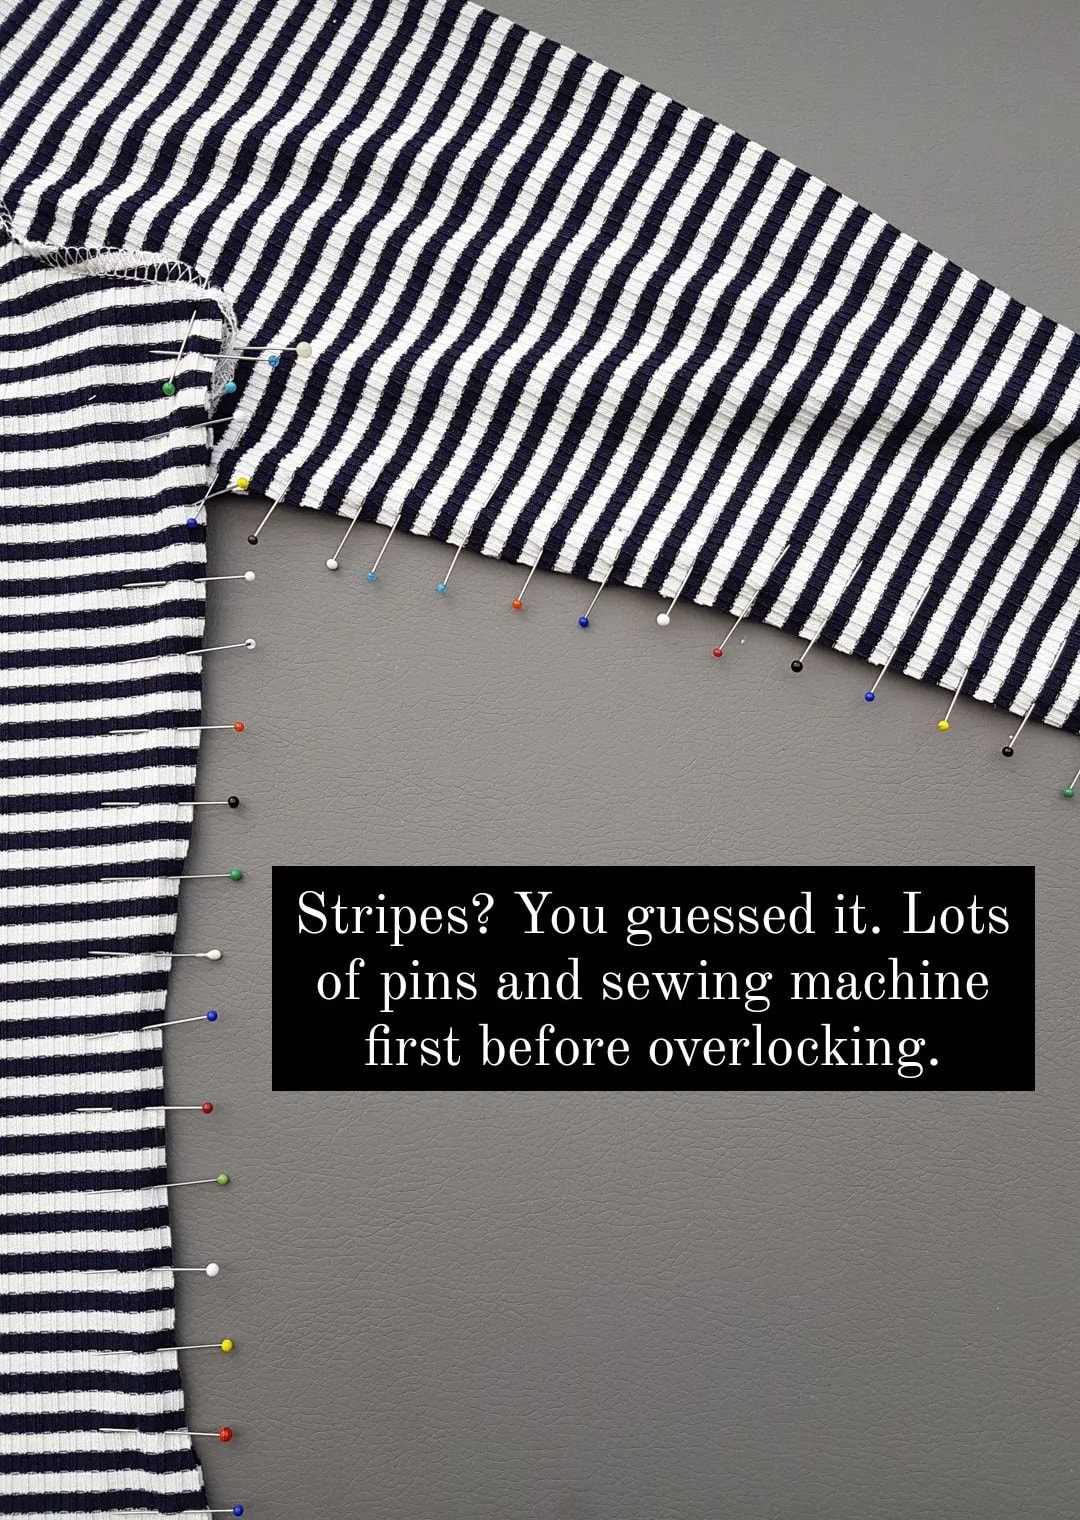
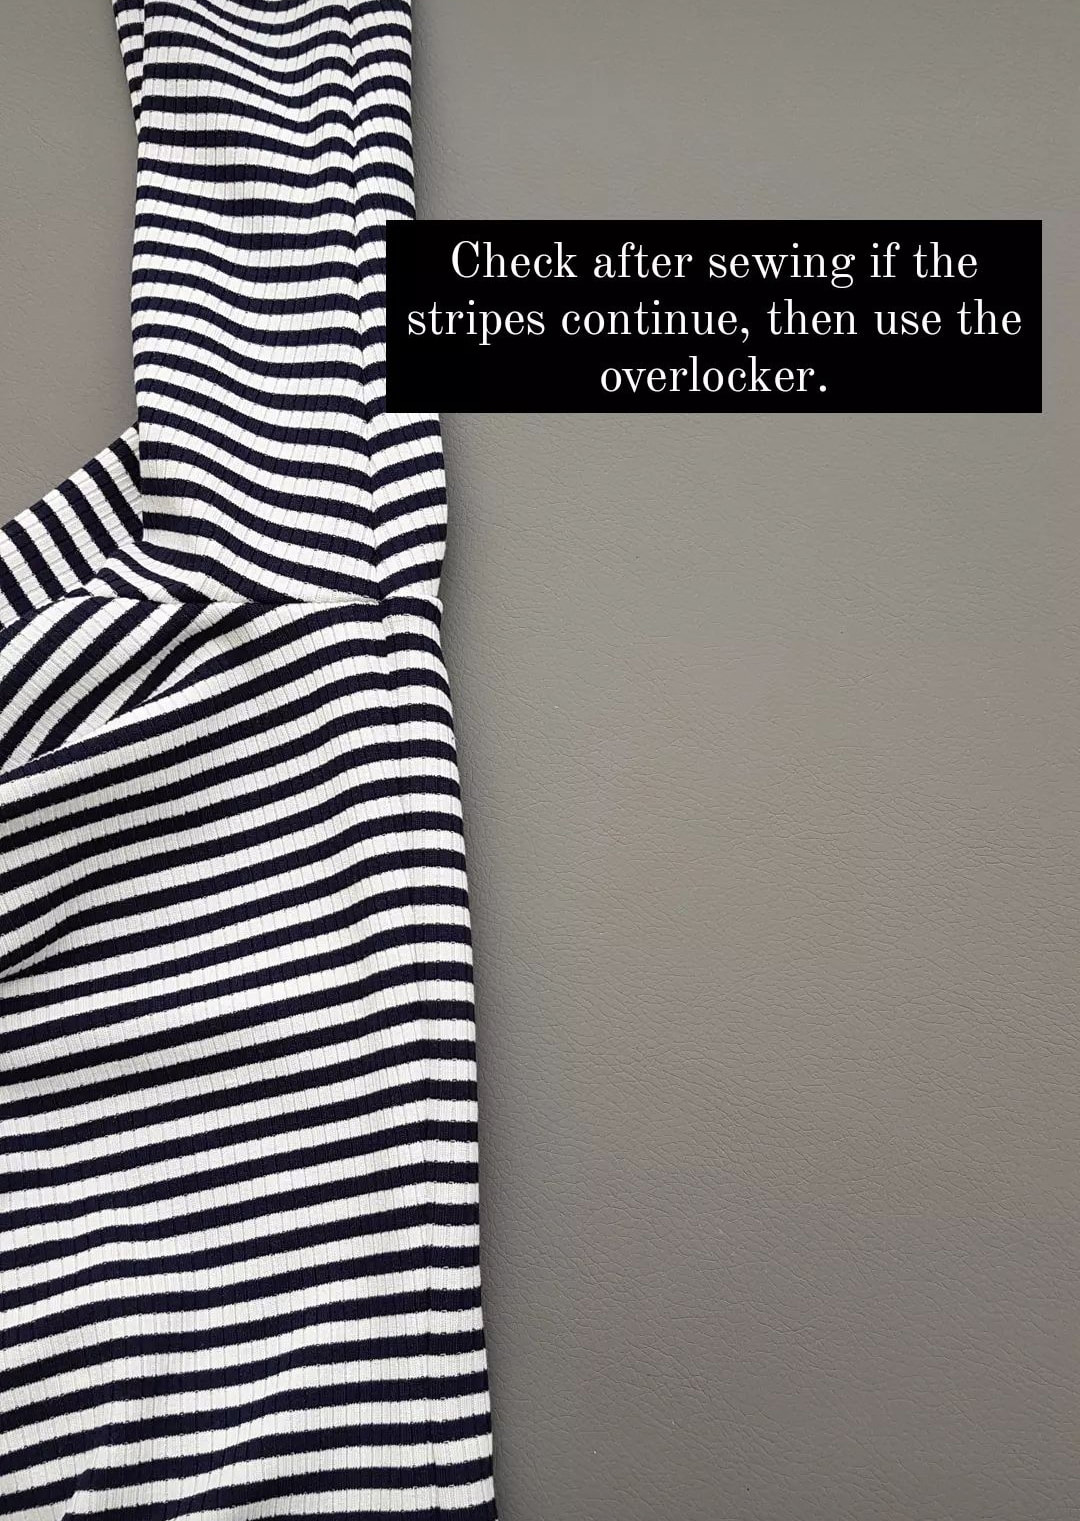
5.
Tips voor strepen en ribtricots
Tips for stripes and ribbed jerseys

Picture
5a.
Strepen/stripes.
Als je strepen netjes door wilt laten lopen in de zijnaden dan knip je de panden zodanig dat de lijnen voor en achter gelijk lopen.
If you want stripes to continue neatly into the side seams, cut the pieces in such a way that the lines are the same at the front and back.

5b.
Voordat je de zijnaden gaat stikken met de overlockmachine speld je eerst de strepen precies op elkaar.
Before sewing the sideseams with the overlockmachine first pin them precisely together.
Picture
5c.
Naai de zijnaden dicht met een gewone stiksteek op de naaimachine.
Close the sideseams with a regular stitch on the sewing machine.

5d.
Check of de strepen mooi doorlopen.
Check if the stripes continue neatly.

5e.
Stik de zijnaden met de overlock machine. Naai hierbij over de stiklijn, deze is niet rekbaar.
Sew the side seams with the overlock machine. Sew over the stitch line, this stitching does not stretch.

5f.
Ook als je een ribtricot gebruikt is het aan te raden eerst de naden te stikken met een gewone stiksteek met boventransport voet of deze te rijgen. Hiermee verklein je de kans dat de stof heel erg uitrekt. Met overlocken eventueel het differentieel transport aanpassen tegen het uitrekken.
Even if you are using a rib knit, it is recommended to sew the seams first with a regular sewing stitch with a walking foot or to baste it. This reduces the chance that the fabric will stretch very much. If necessary, adjust the differential transport against stretching by overlocking.


Comments are closed.
    Picture

    For all the latest patterns to buy visit my online shop today.

Powered by Create your own unique website with customizable templates.
  • Tutorials
  • Movies
  • Happy Sewers
  • About