|
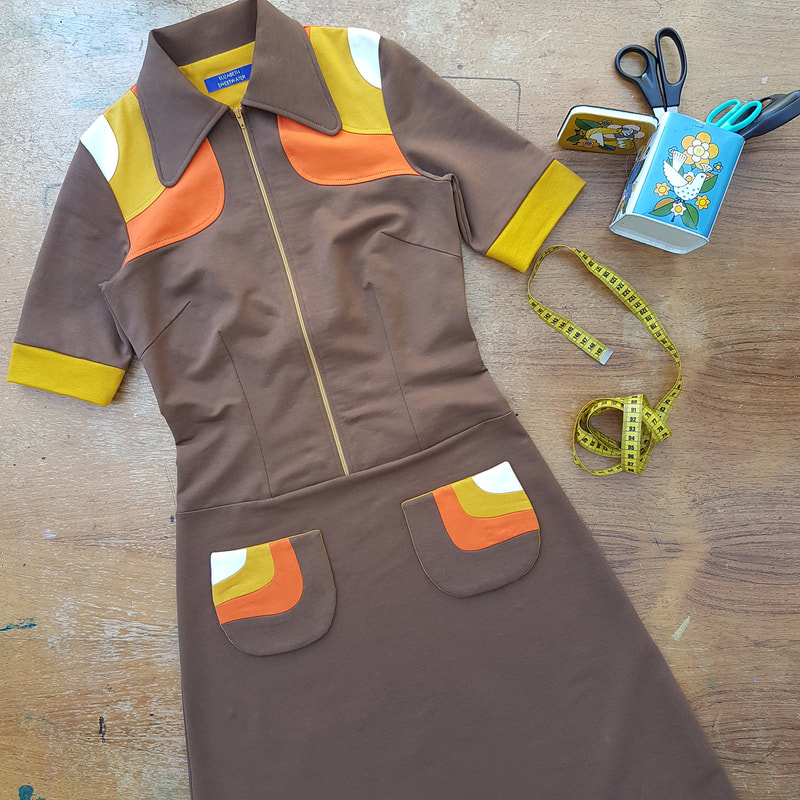
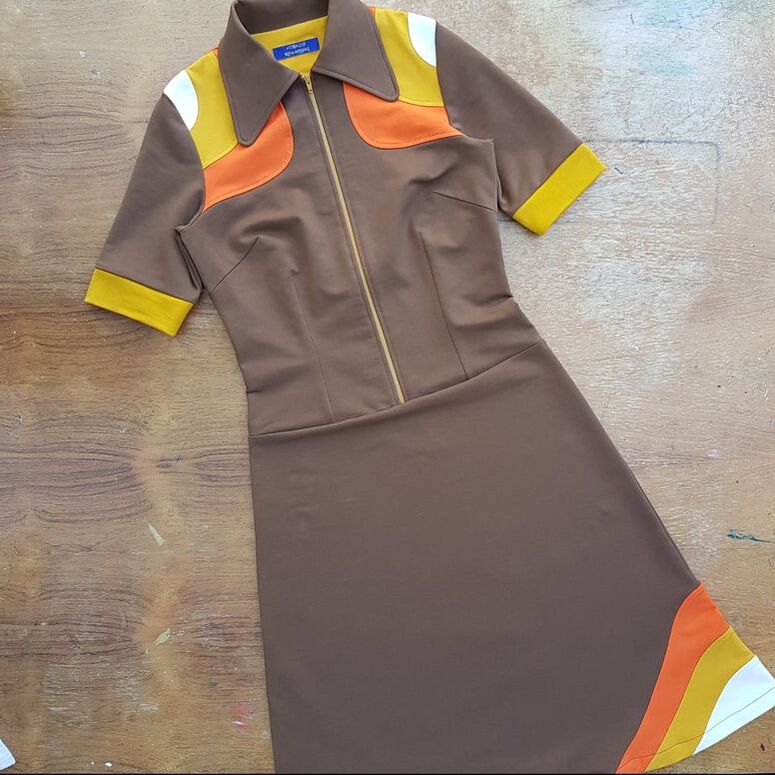
Wave Jurk 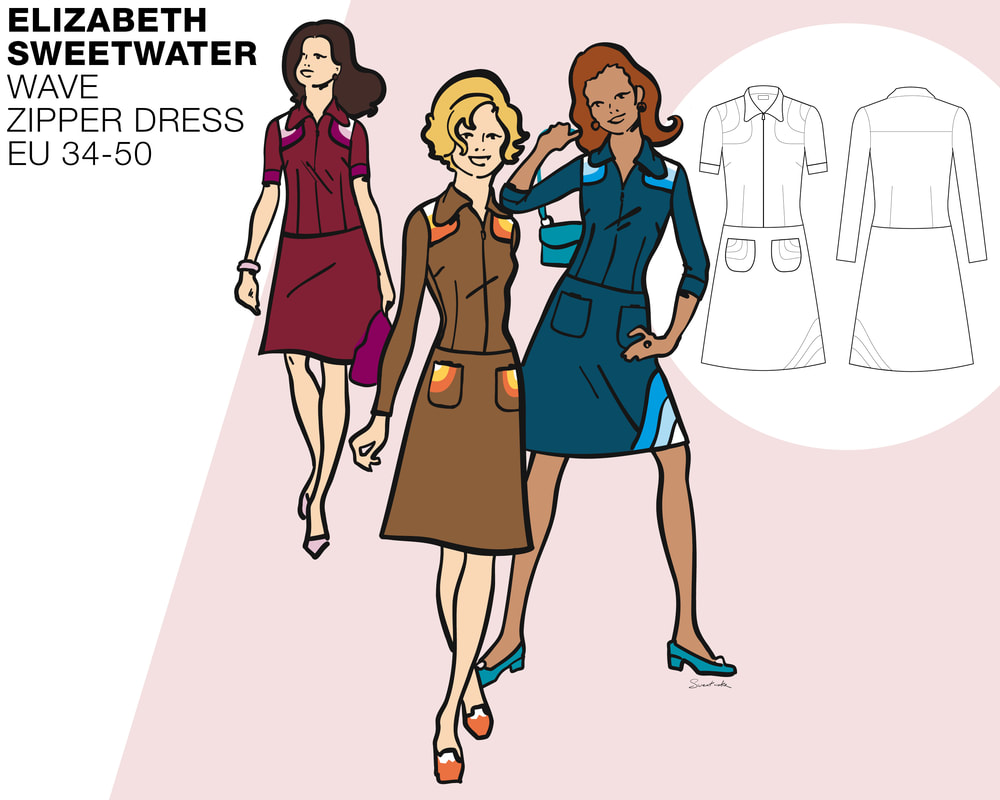 Introductie: Helemaal retro dit rits colourblock jurkje met een prachtig multi colour schouderdetail. Door de coupenaden in de body van de jurk creëer je een mooie aangesloten pasvorm. Maak ‘m zo kleurrijk als je wilt door gekleurde banen aan de rok toe te voegen of kies voor zakjes met golf effect. Het patroon bevat drie mouwlengtes. Draag met sneakers voor een sportieve look of met hoge laarzen voor een gave vintage inspired outfit. Het materiaal gebruikt voor deze jurk is French terry maar ze is ook leuk in een stevige tricot als een punta di Roma. Introduction: Cool and versatile retro zipper color block dress with beautiful multi coloured shoulder detail. Because of the added darts to the body it fits beautifuly. Create a top as colourful as you like by adding a wave to your skirt or colour block pockets. The pattern contains three sleeve lengths. Wear with sneakers for a sporty look or with high boots for an awesome vintage inspired outfit. I have used French terry for the purpose of this tutorial. A heavy knit like a punta di Roma also works well. 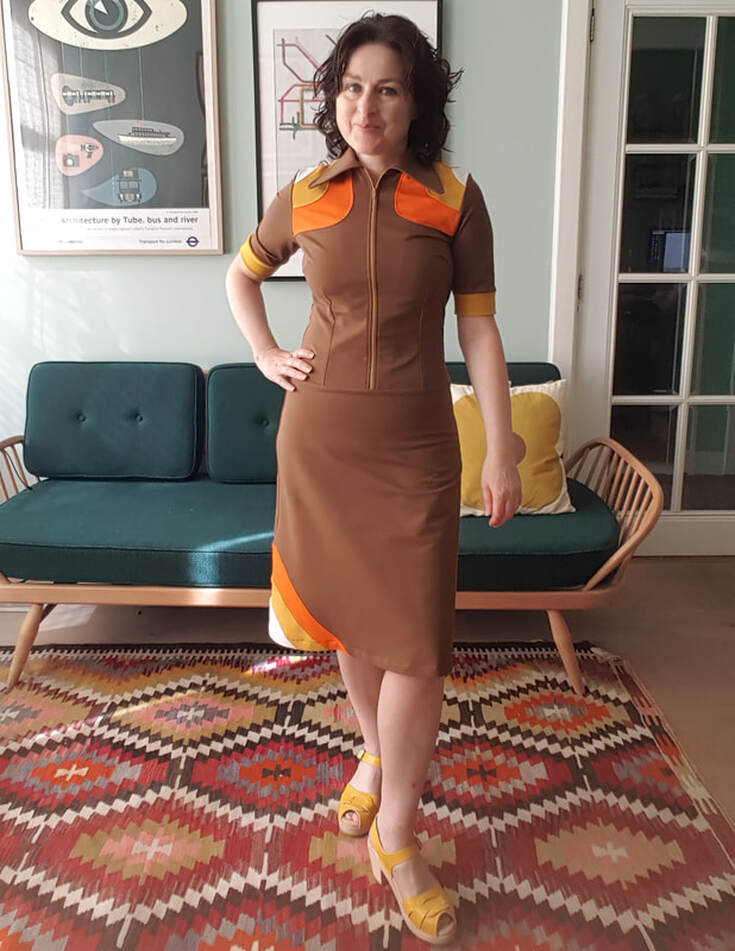
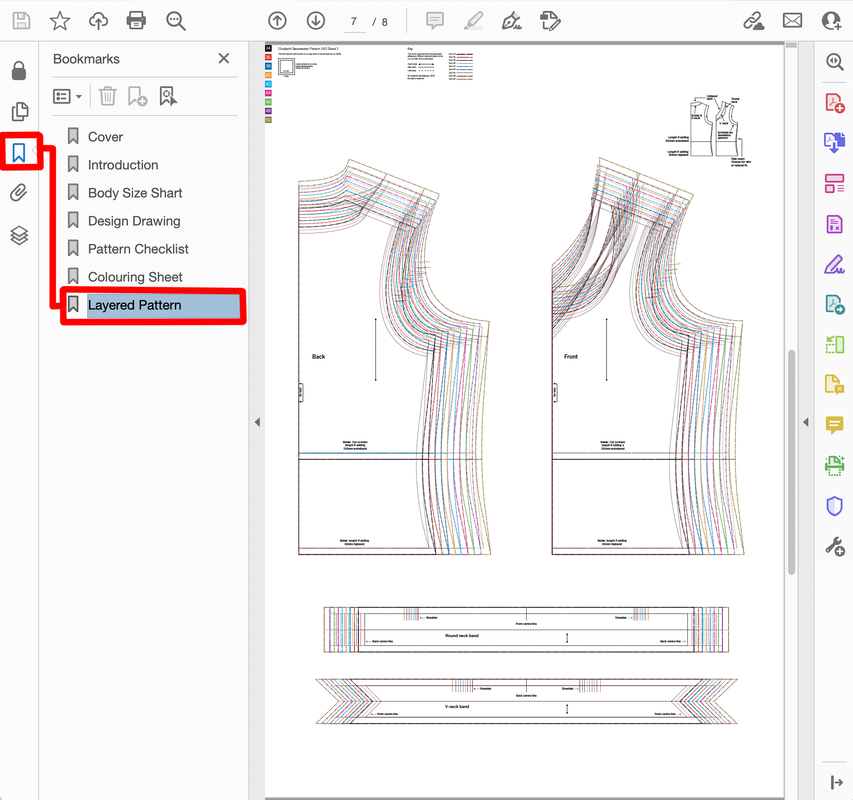
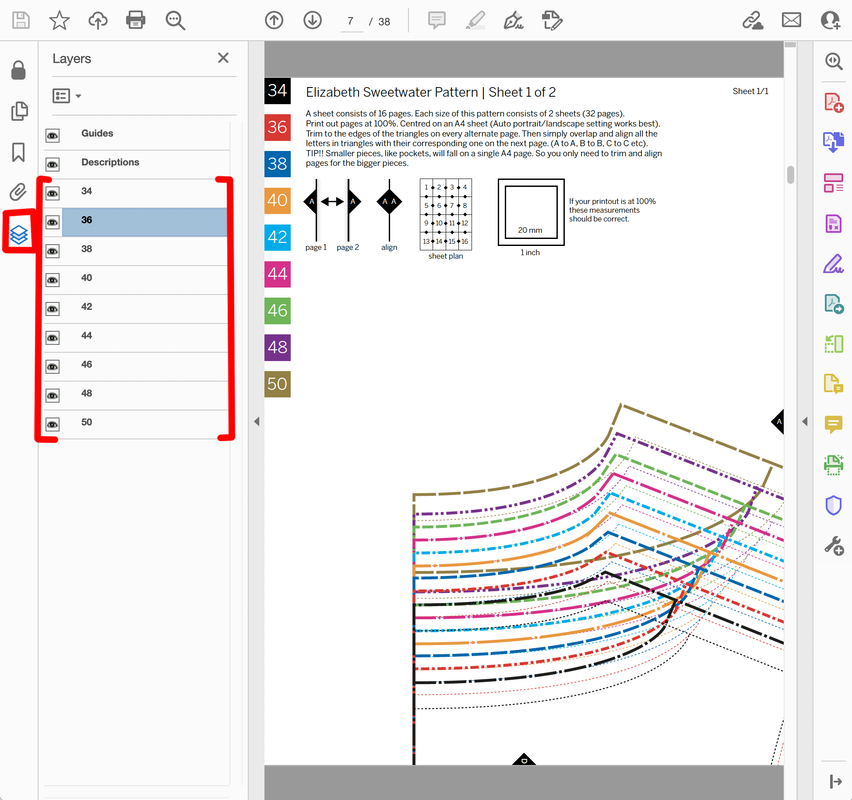
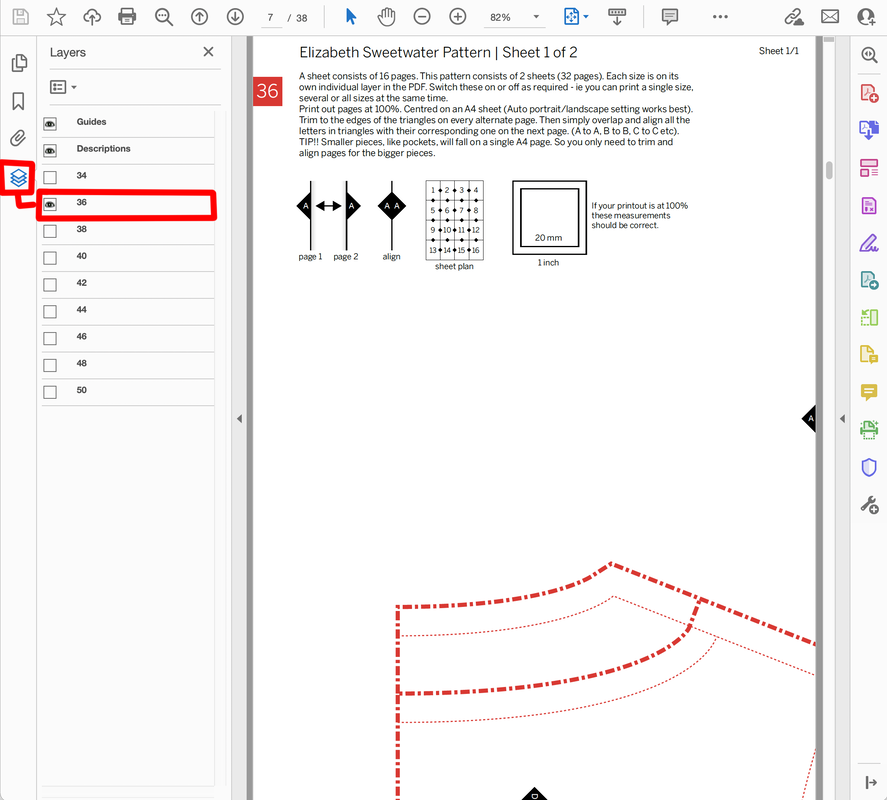
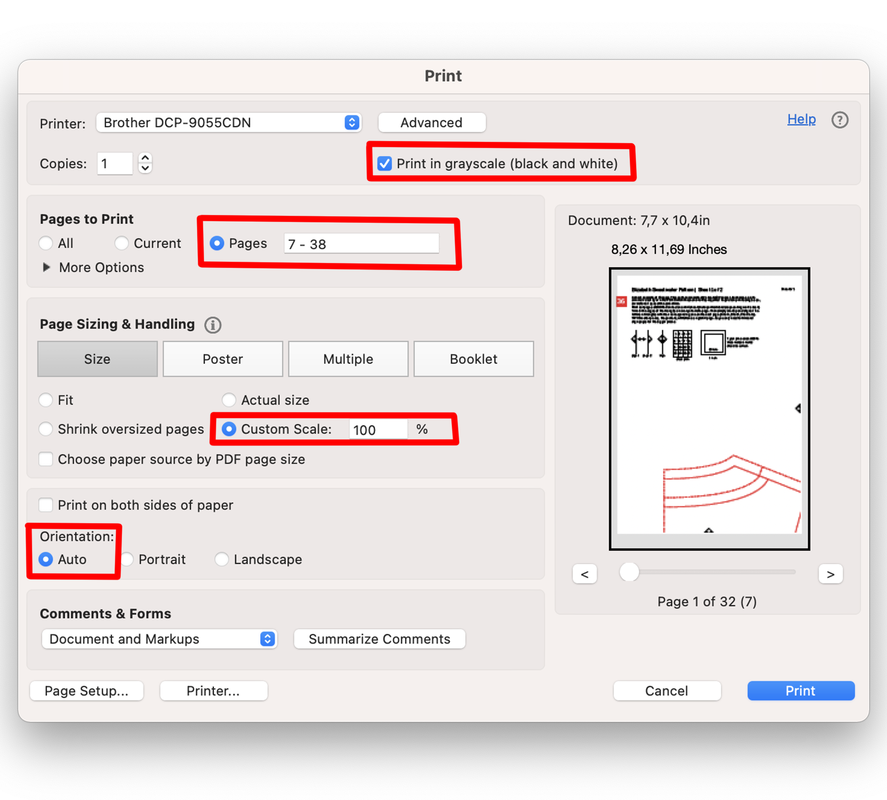
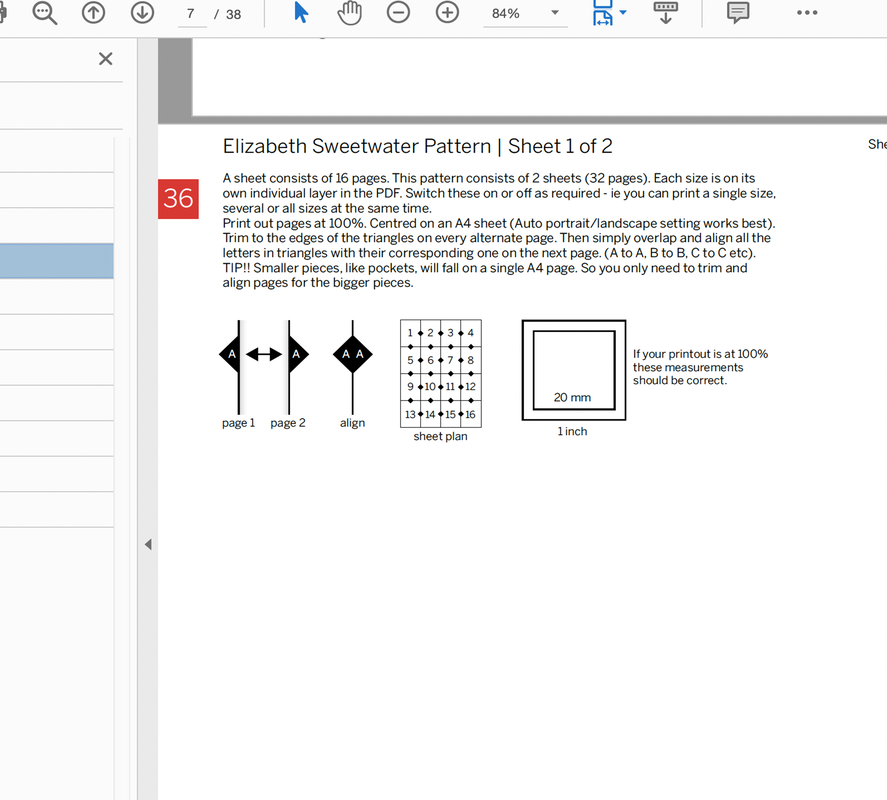
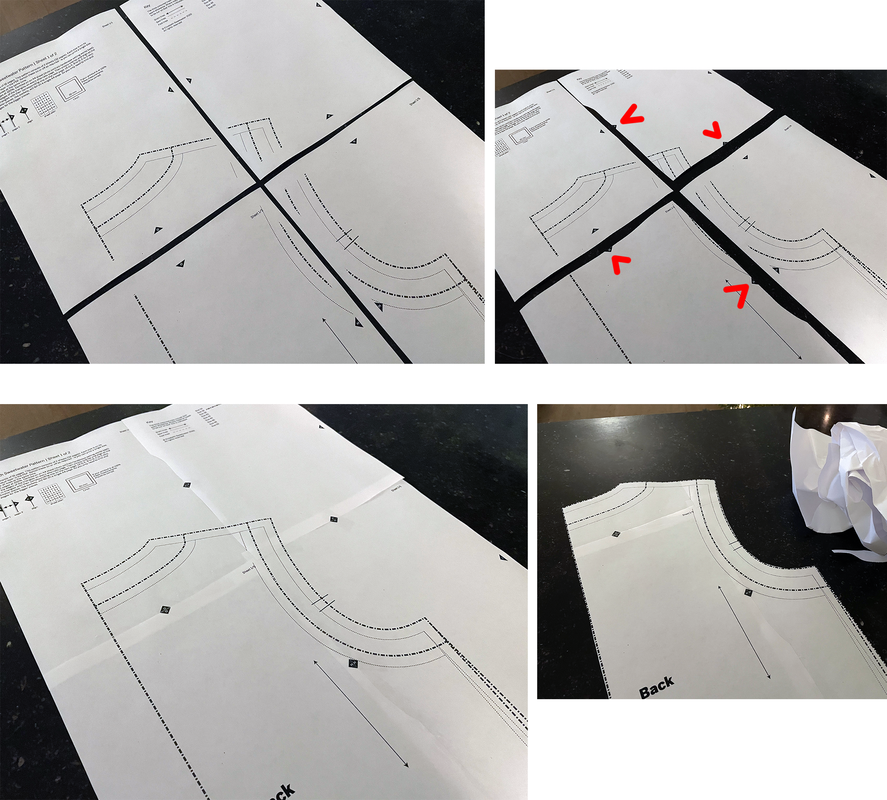
1. De voorbereiding Getting prepared Bij aankoop van een van onze patronen ontvangt u 3 PDF-bestanden: een voor thuisprinters om op A4-papier af te drukken, een tweede voor A0-gebruikers om af te drukken in een printshop en een derde is voor mensen die een overheadprojector gebruiken. De volgende algemene introductietekst geeft een overzicht van hoe onze patroon-pdf's zijn opgezet en legt uit hoe je de A4-versie kunt afdrukken en hoe je de pagina's aan elkaar kunt plakken. A0-gebruikers kunnen bij hun printshop aangeven welke pagina's ze nodig hebben. Op de projector bestanden staan alle panden in dezelfde richting. On purchasing any of our patterns you will receive 3 PDF files: one for home printers to print on A4 paper, a second at A0 is for printshop users and a third is for sewers who use an overhead projector. The following general introduction text provides an overview of how our pattern pdfs are set up and explains how to print out the A4 version and how to stick the pages together. A0 users should simply instruct their printshop which pages they require. Projector users will note that all pieces have the grain direction facing the same way.
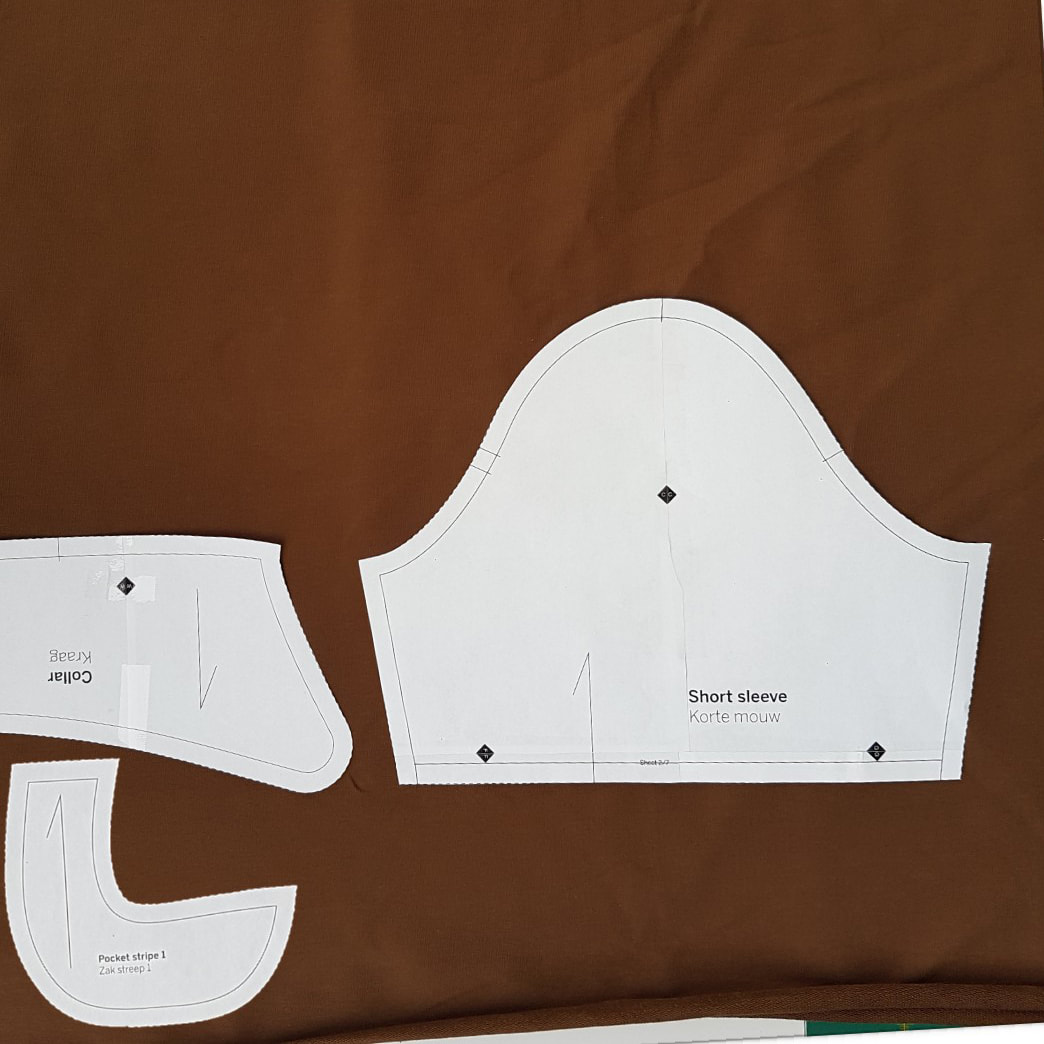
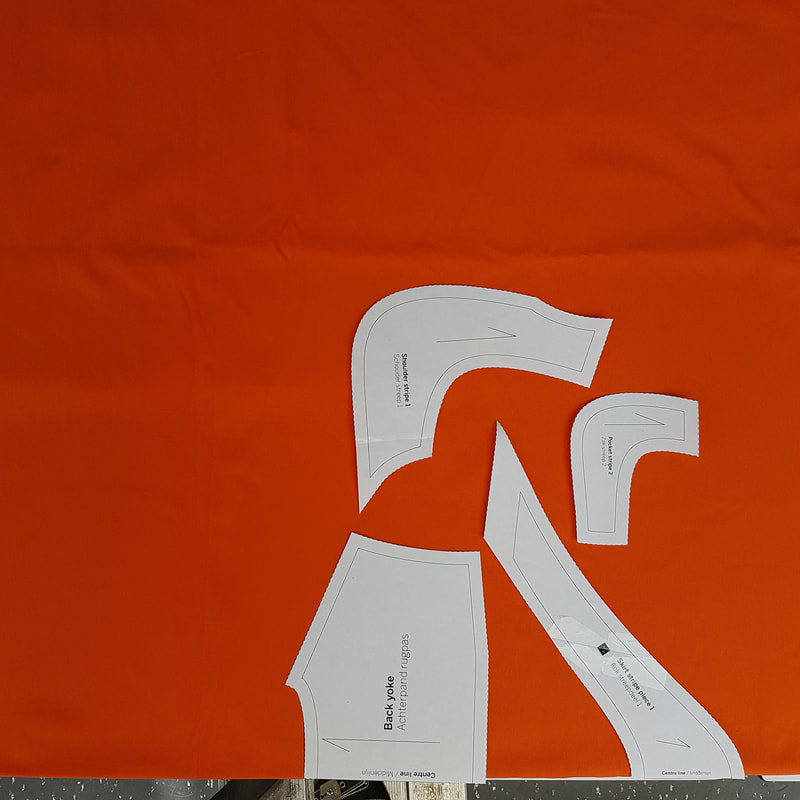
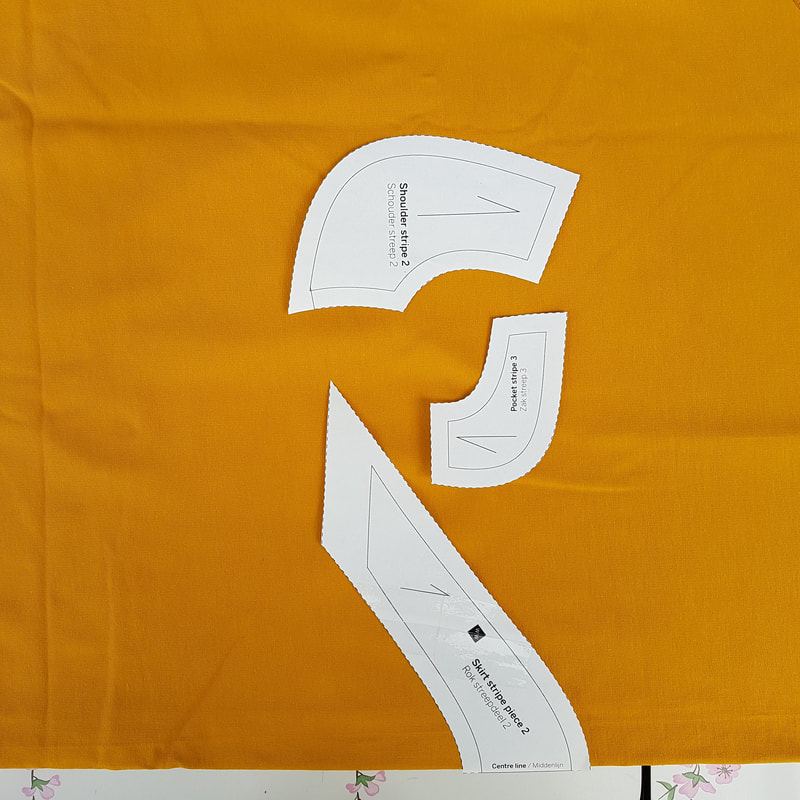
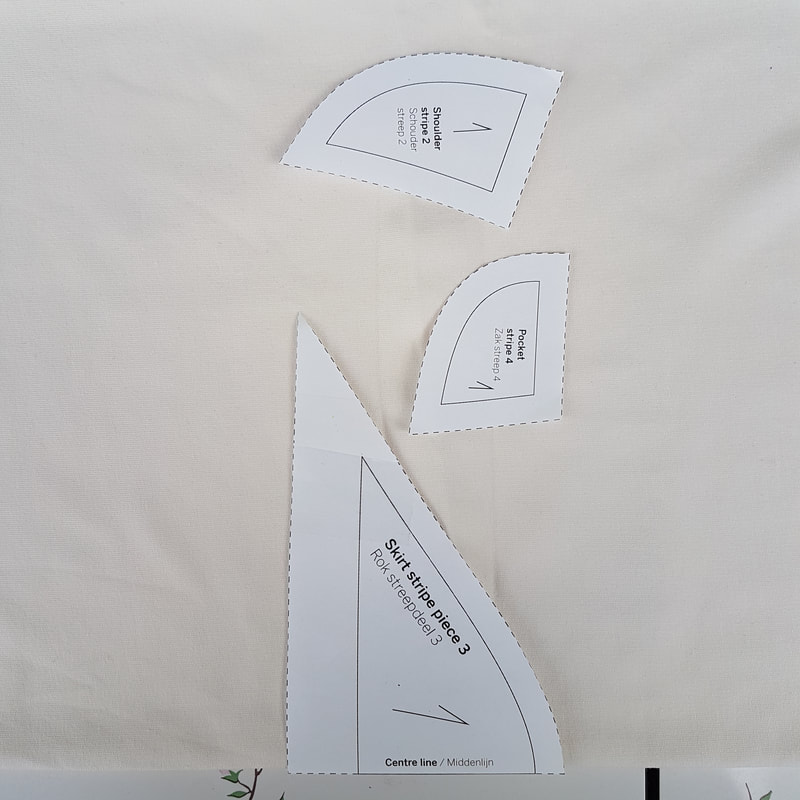
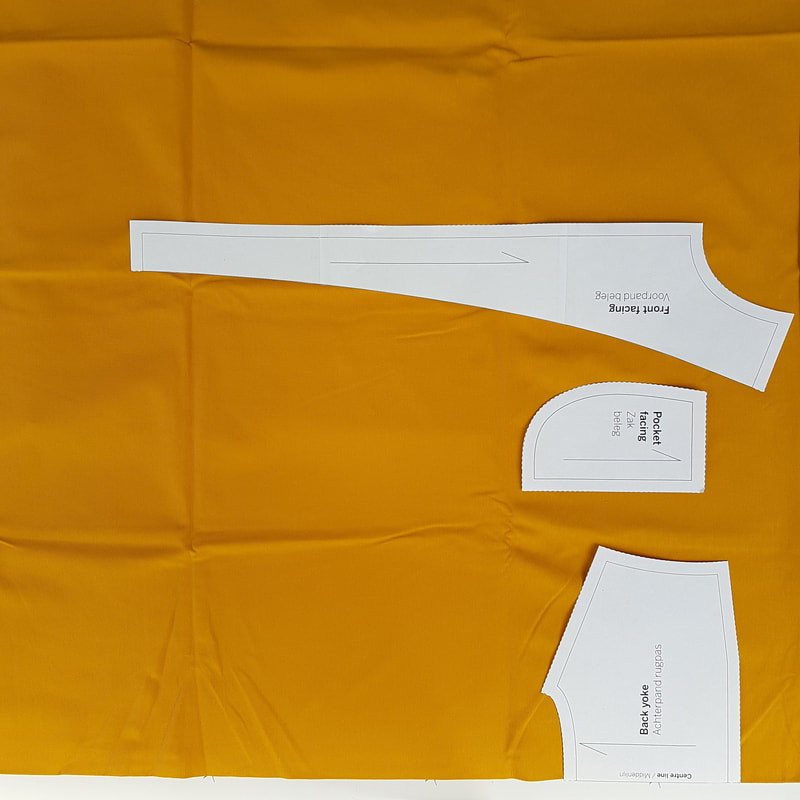
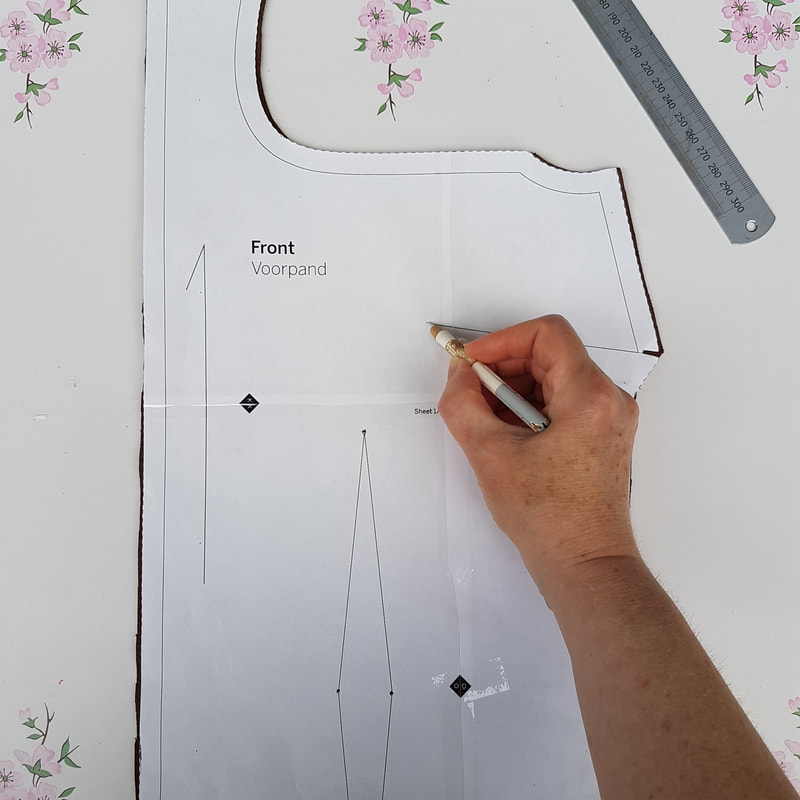
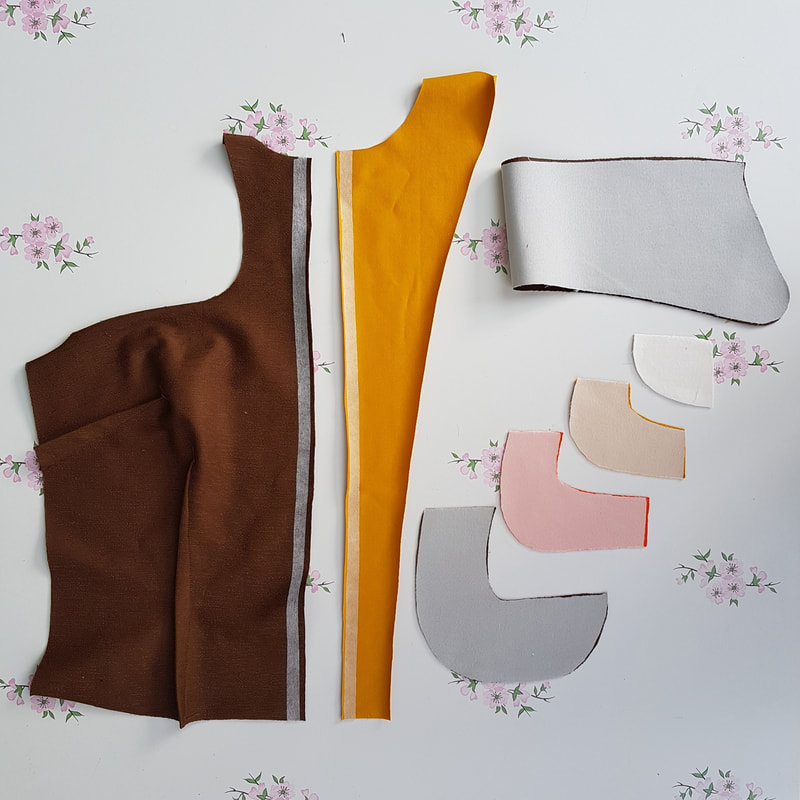
1g. Nu je al je stukken hebt uitgeknipt raadpleeg het onderstaande overzicht om je voor te bereiden op het uitknippen van de door jou gekozen stof. Now you have cut out all your pieces consult the overview below to prepare yourself for the next stage of cutting out the pieces from your chosen material.
2. De voorbereiding Getting prepared 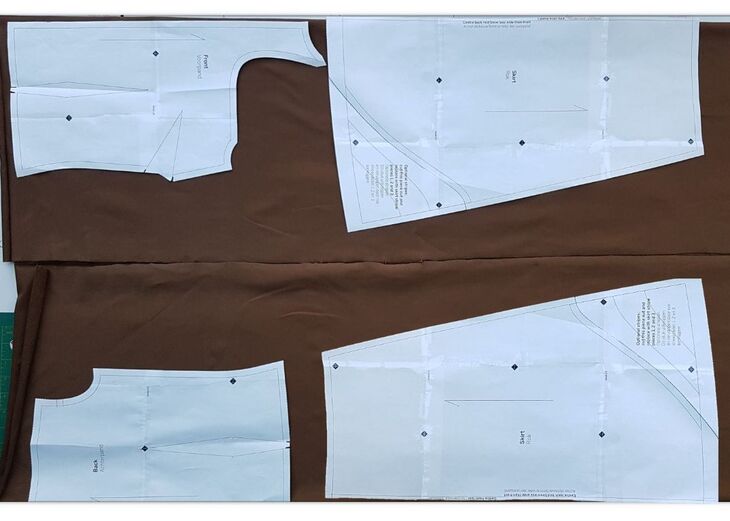 2a. Zo leg je de delen op de stof. Voorpand, achterpand, en 2 rokdelen aan beide kanten aan een vouw. Het rokdeel heeft maar is één patroondeel met één midden voorlijn en één midden achter lijn. Vanaf maat 42 zul je de rokdelen waarschijnlijk niet meer naast elkaar kunnen leggen en leg je één van de rokdelen aan een enkele vouw. Kies je voor de rok zonder detail dan helemaal knippen, wil je deze wel maken dan knip je de vorm die op je patroon staat aan een kant weg. (als de stof plat ligt de linker kant). This is how you lay the pieces out on the fabric. Front, back and 2 skirt parts on both sides on fold. The skirtpart has only one pattern piece with one midfront line and one midback line. From size 42 on you will probably not be able to lay them next to each other, so you will have to lay one of the skirt parts on a single fold. Cut the skirt piece completely if you choose the variation without the wave detail. If you make the skirt option with the detail, cut it out on one side following the line on the pattern. Left side when the fabric is flat in front of you.)
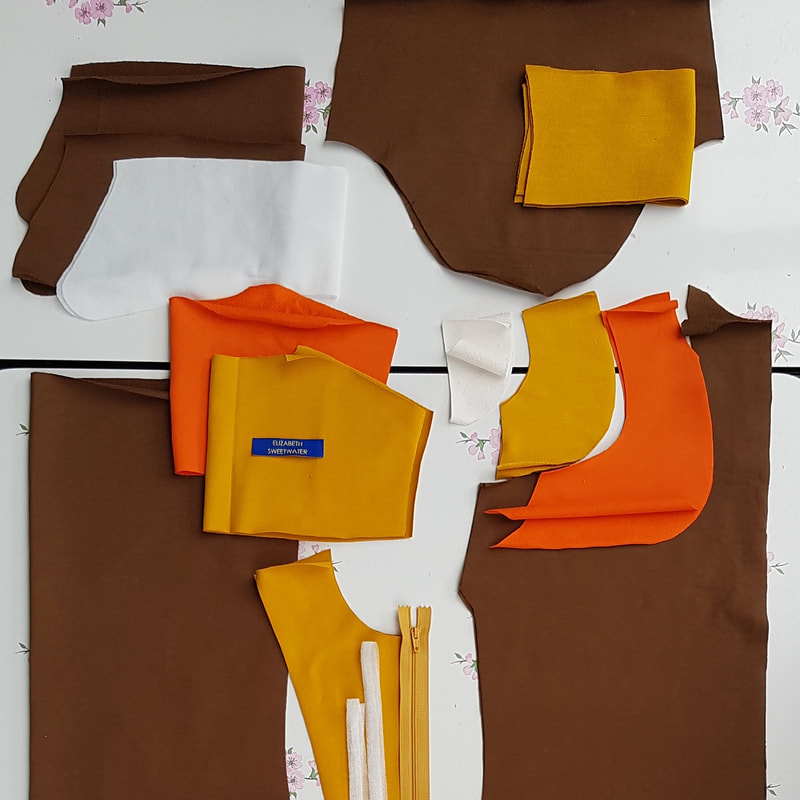
3. Checklijst Checklist
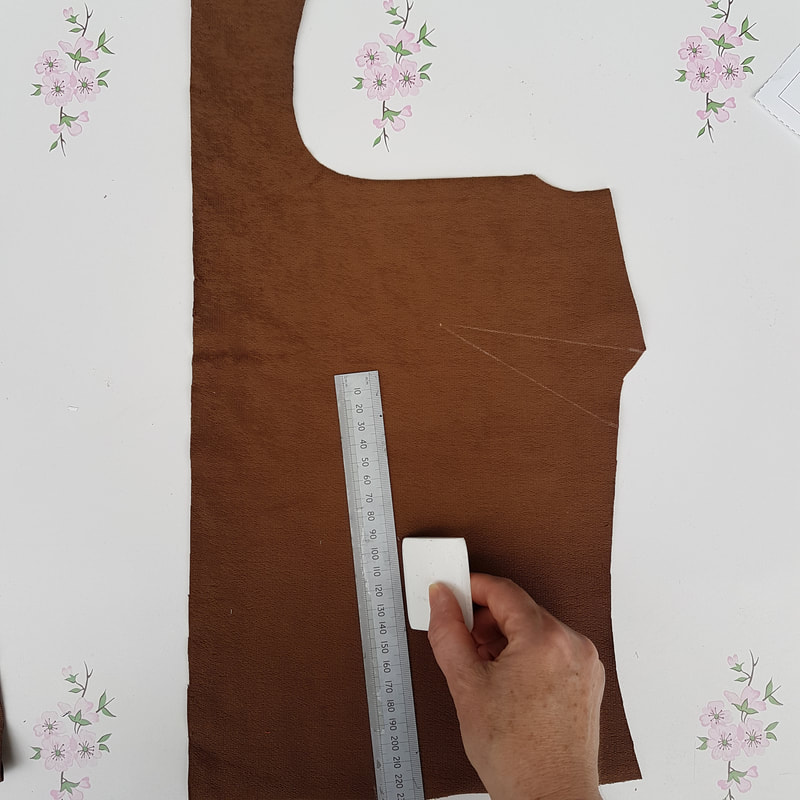
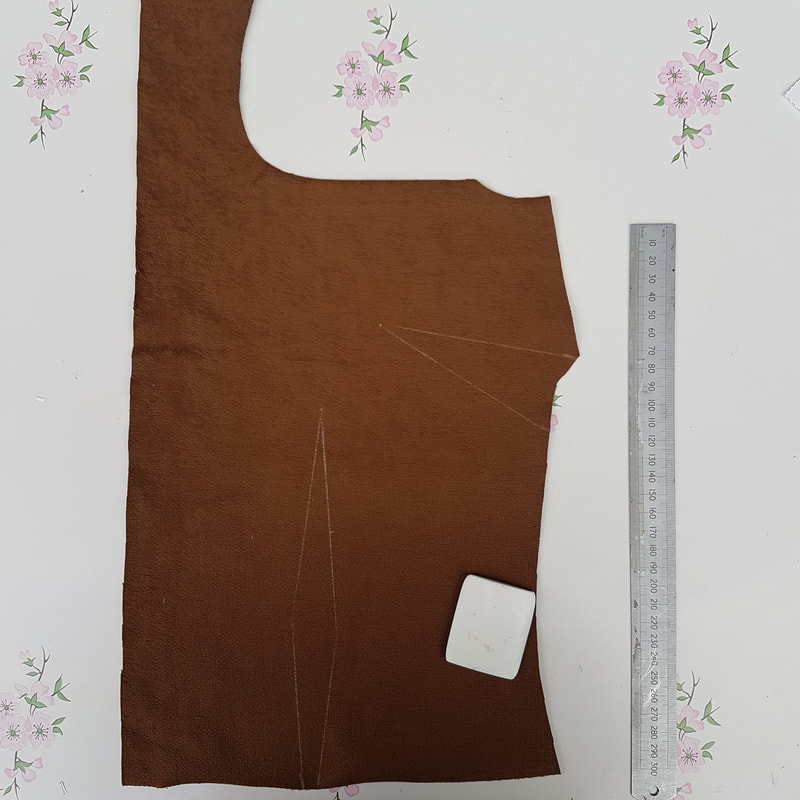
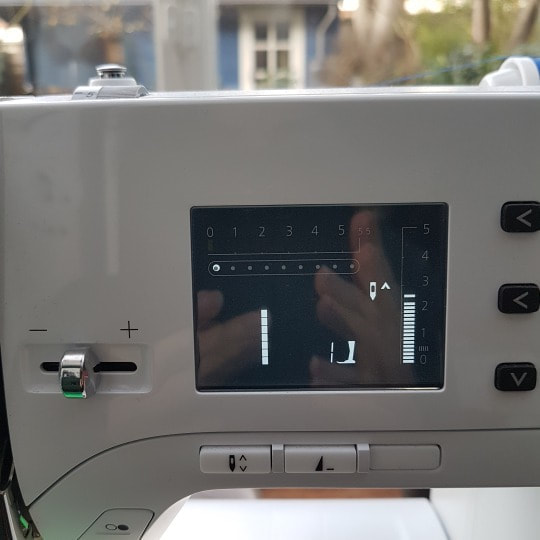
Goed om te weten Ik ga in deze werkbeschrijving uit van het gebruik van een overlock machine. Mocht je daar niet over beschikken dan kun je een zig-zag steek gebruiken op een gewone naaimachine. Ik raad dan wel aan om er altijd een stretch stiksel naast te plaatsen. De naadtoeslag van de patronen is 1cm. Check wat de breedte instelling van je naad is op je lockmachine is. Is het 0,7cm dan kun je tijdens het stikken 3mm wegsnijden. De stretchnaden stik je met een stretchsteek instelling op de gewone naaimachine. Good to know For this tutorial an overlock machine was being used for sewing most of the garment. However, it is possible to use a regular sewing machine and sew with a zigzag stitch. I do recommend sewing an extra stretch stitch next to it to create clean lines. The seam allowance of the patterns is 10mm. Check the seam width setting of your overlock machine. Is it less than 7mm? Then you can cut away a little while sewing. The stretch seams can be sewn using the stretch setting on a regular sewing machine. 4. Markering, opstrijken van band en afwerken van randen Marking pieces, ironing on facing tape and finishing edges
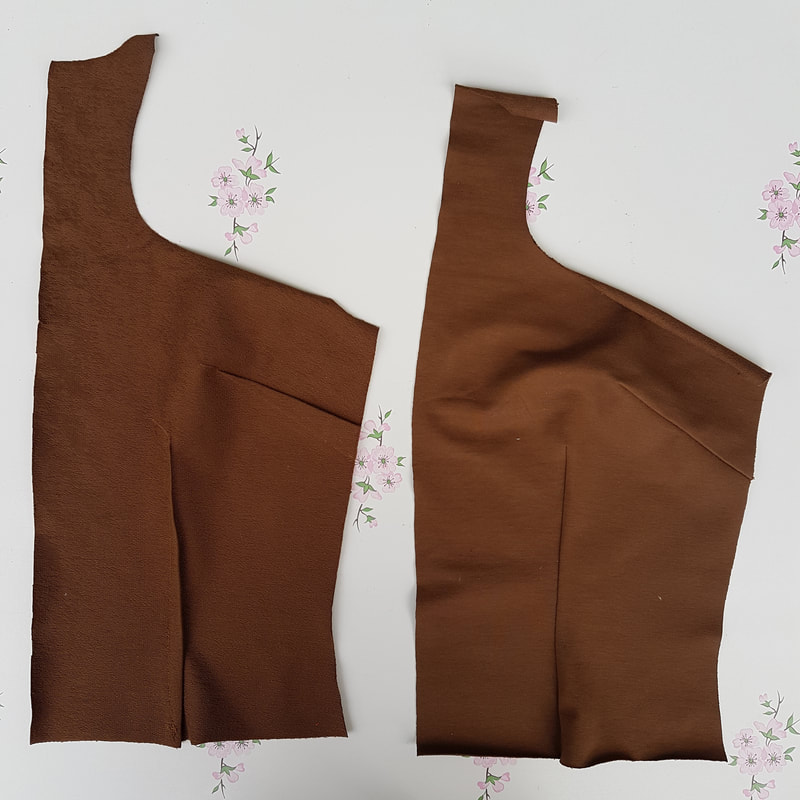
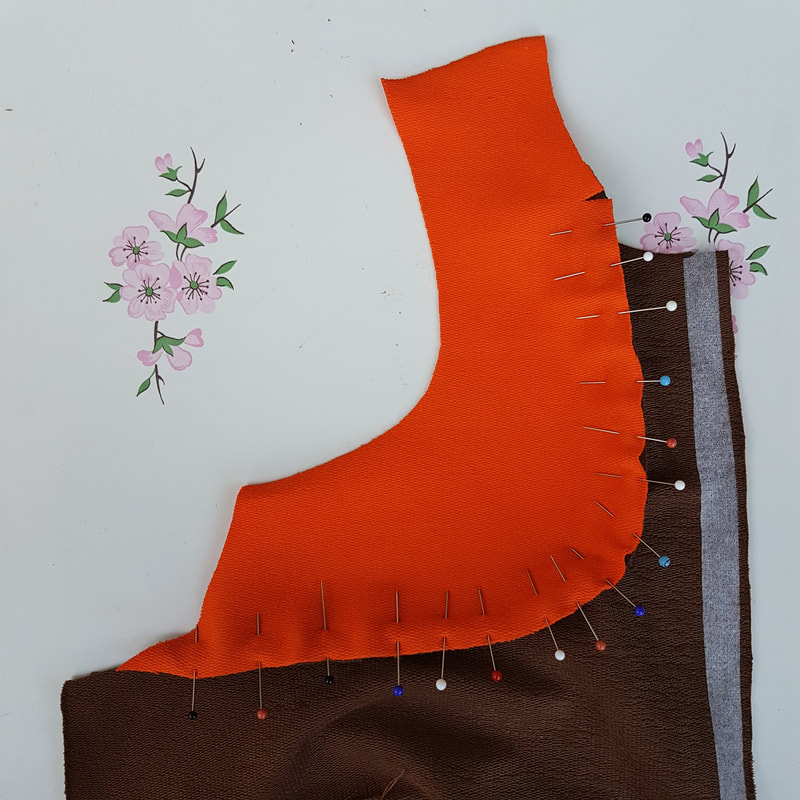
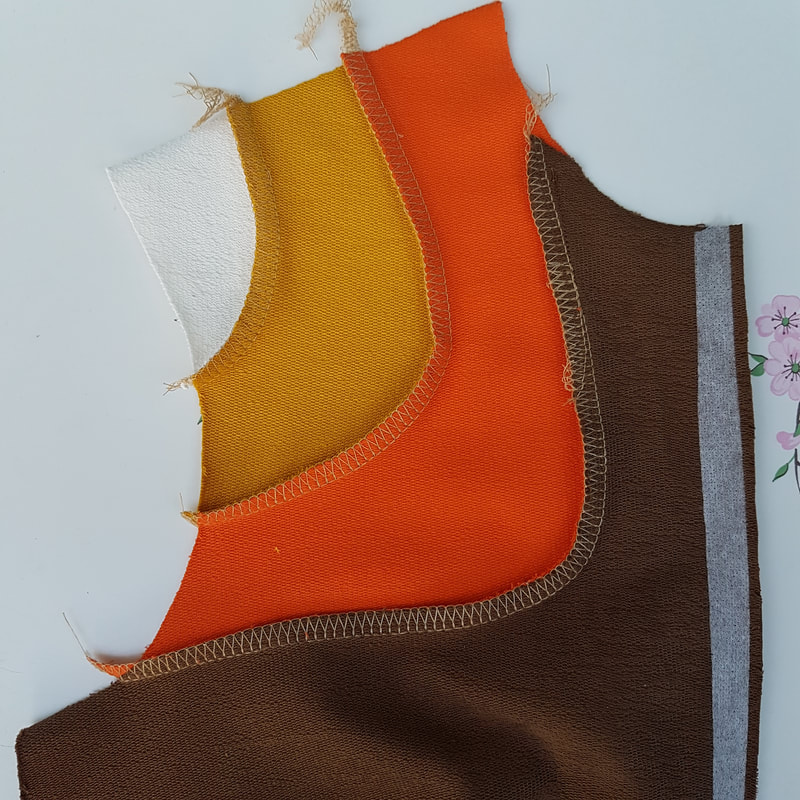
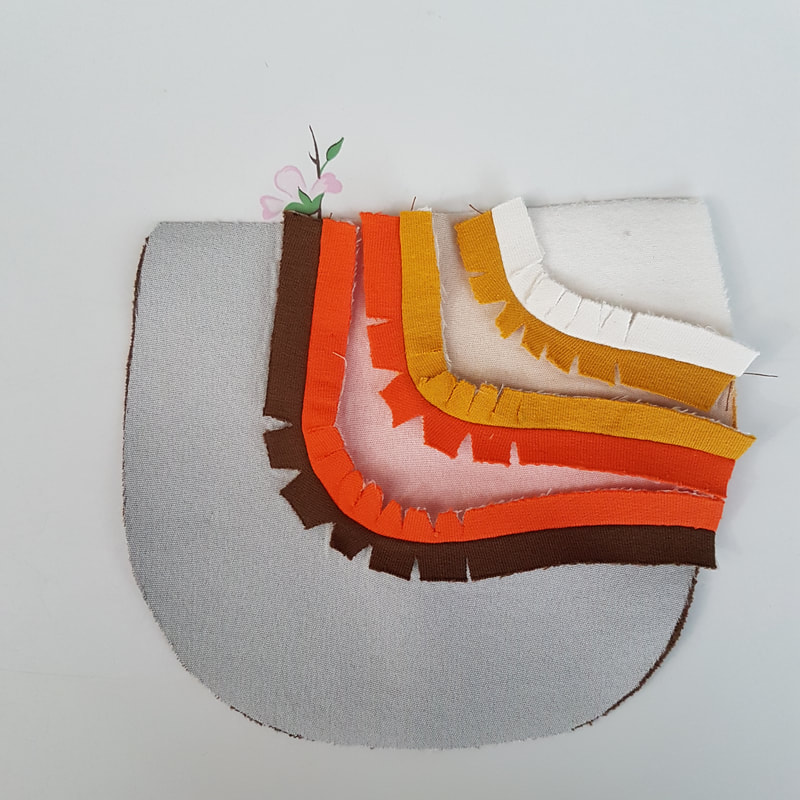
5. Schouder detail Shoulder detail
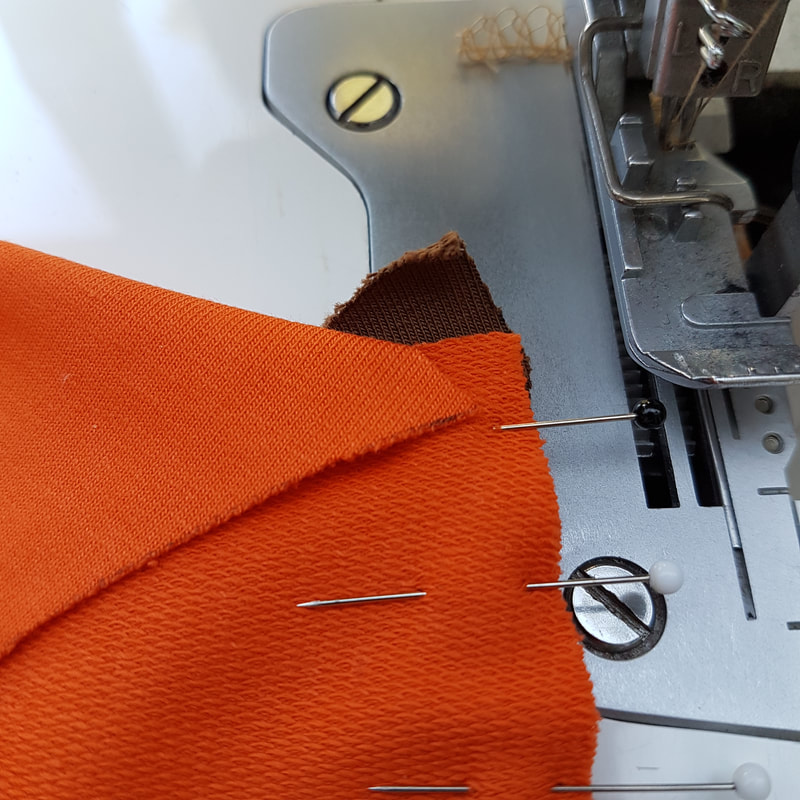
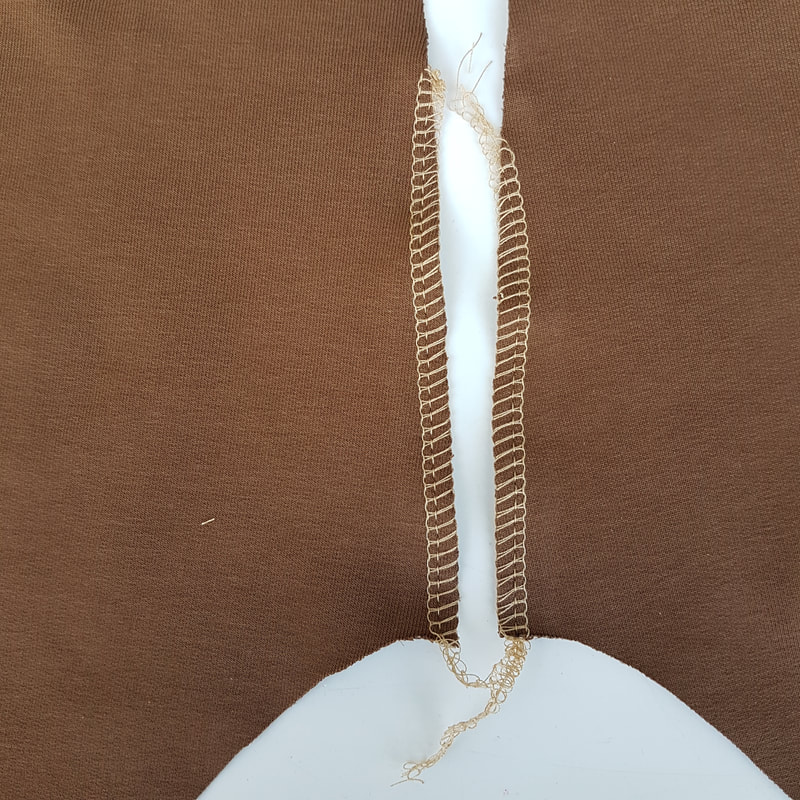
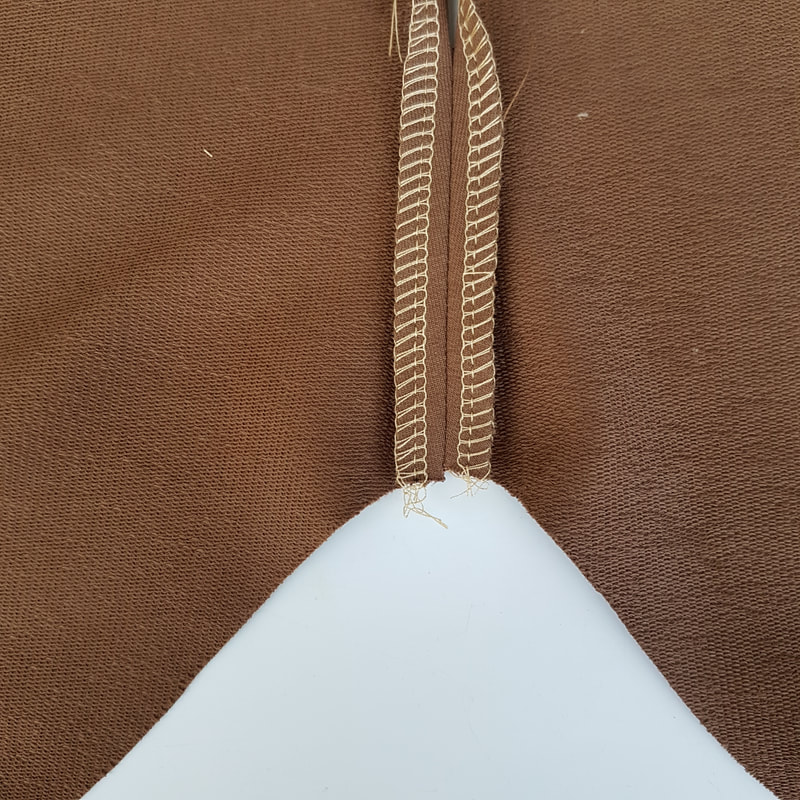
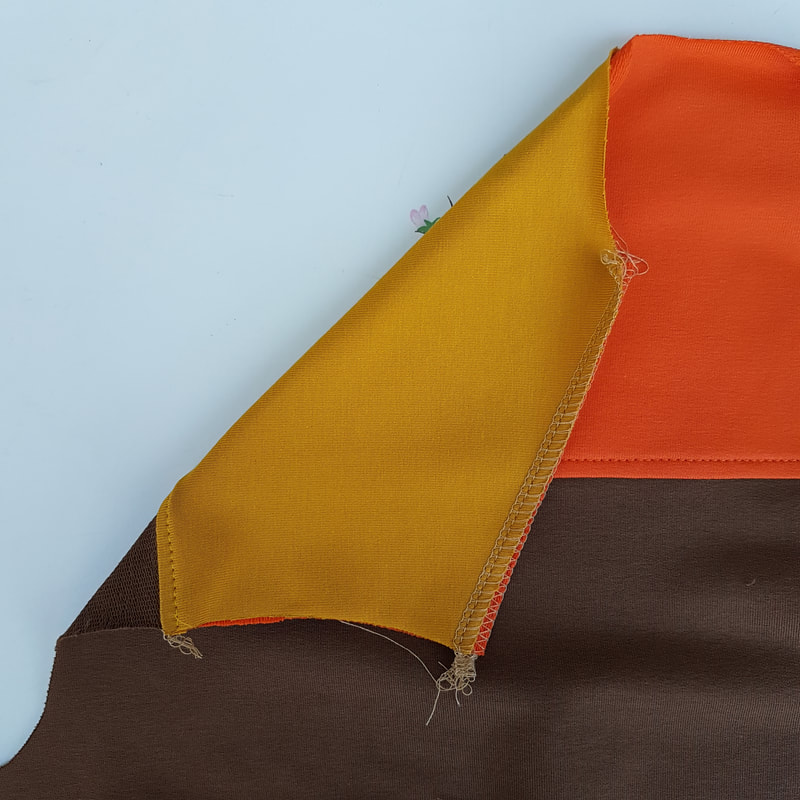
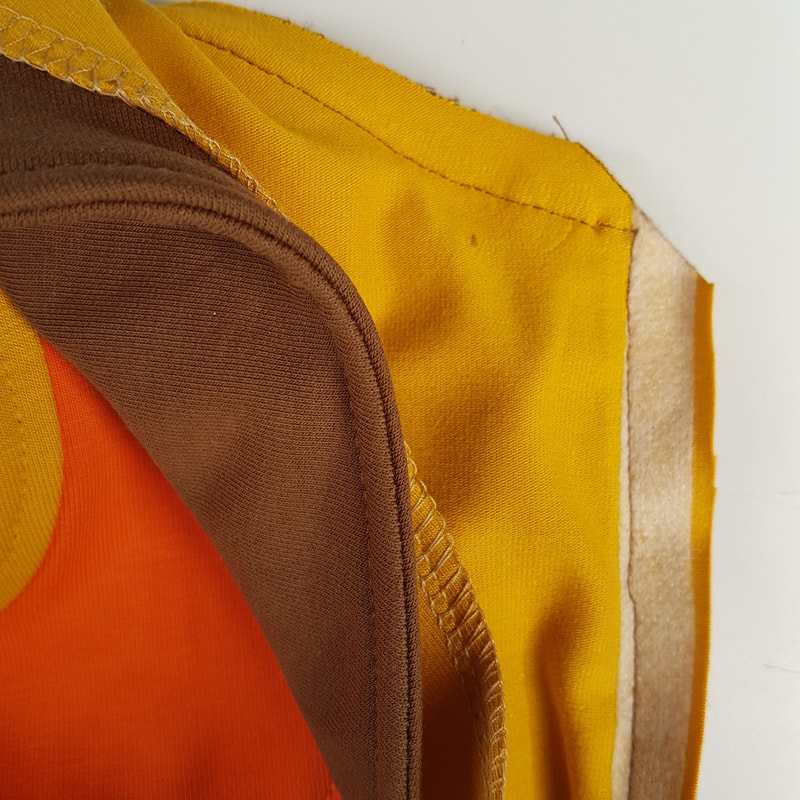
5c. Vouw het stuk wat je niet naait even om zodat je makkelijker bij het te naaien stukje komt. Naai met je overlock machine de eerste naad. Fold over the piece you don't sew for better access. Sew with the overlocker the first seam. 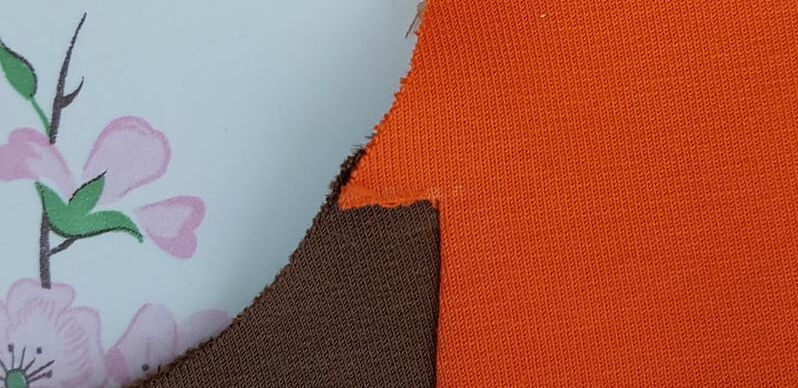 5d. Het niet genaaide stukje vouw je naar voren en de naad naar achter. Pers de naad plat. The piece that is not sewn goes to the front, the seam goes to the back. Press the seam flat.
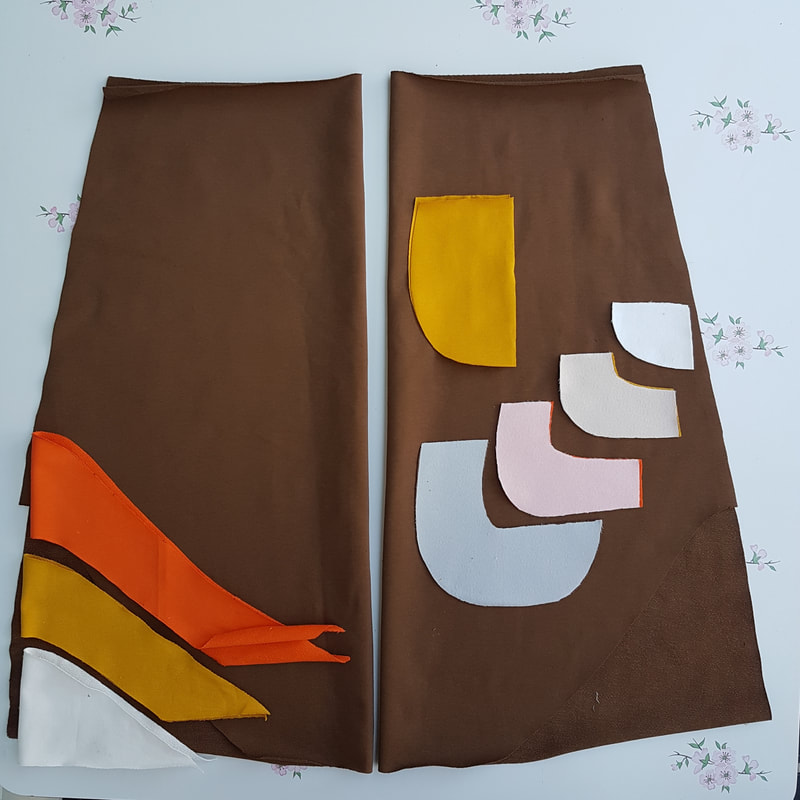
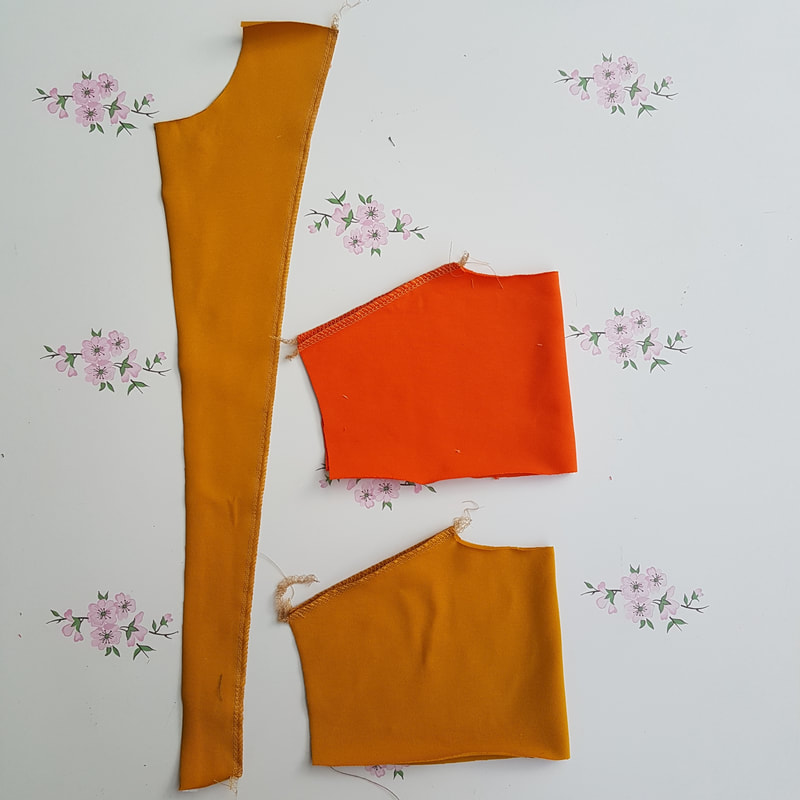
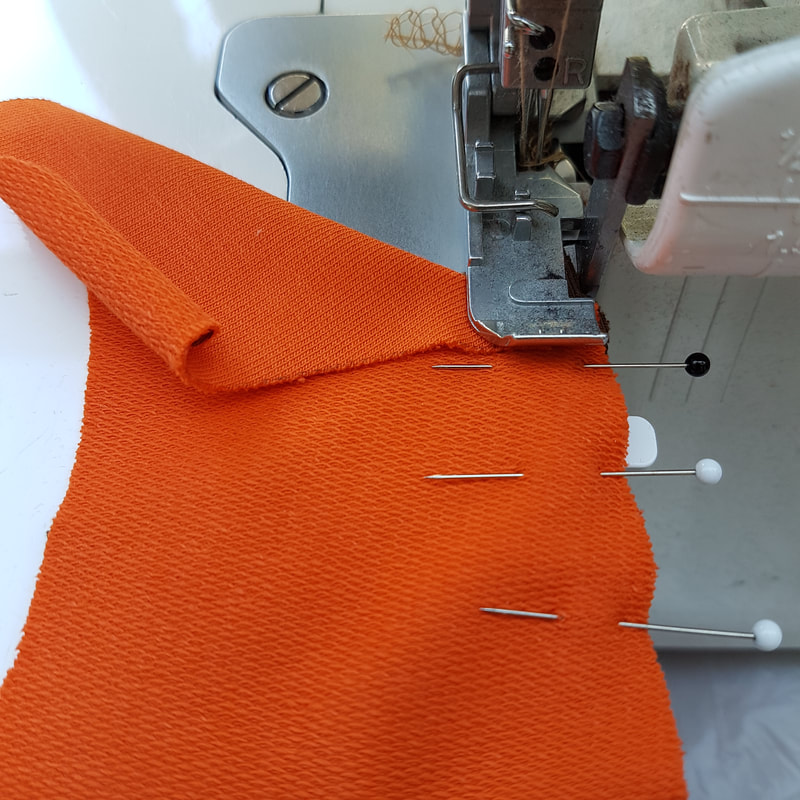
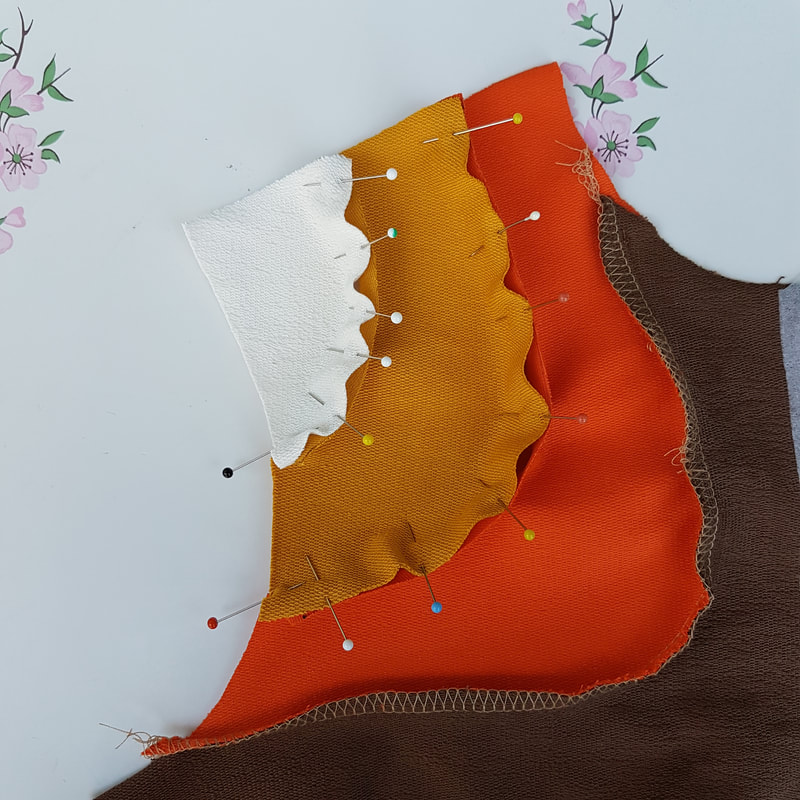
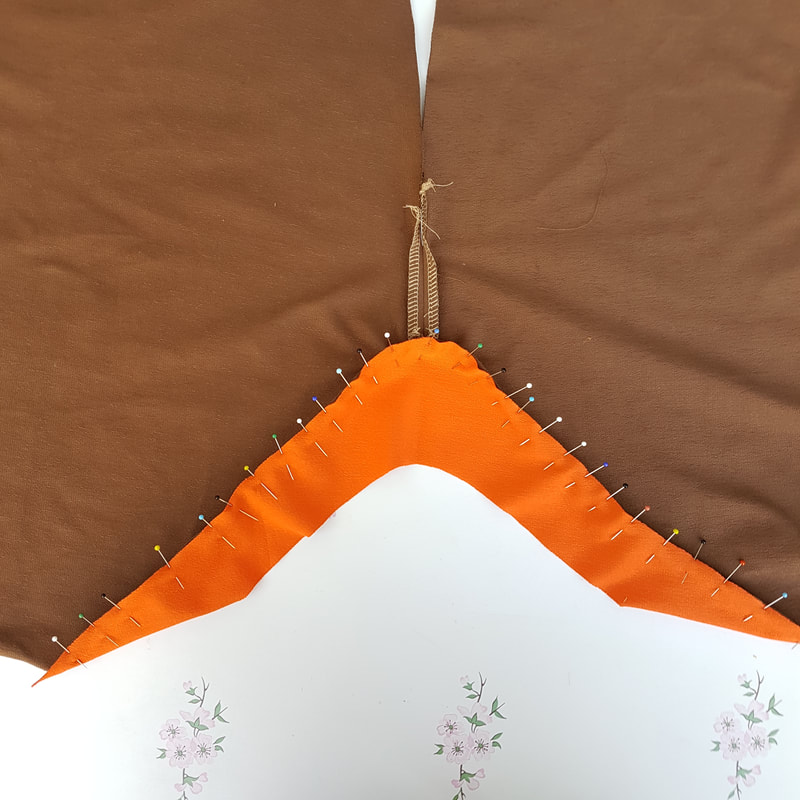
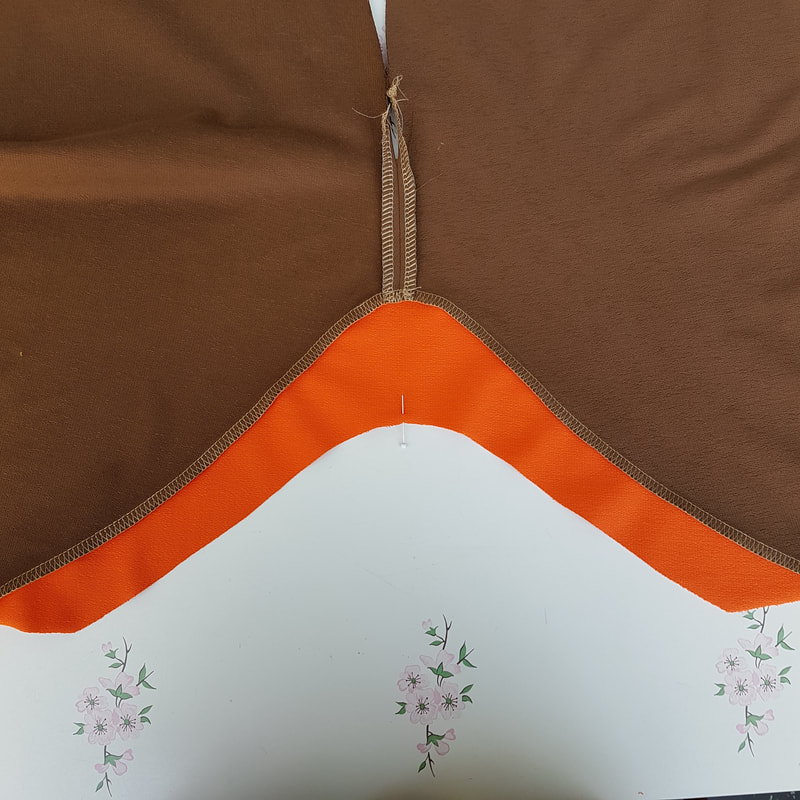
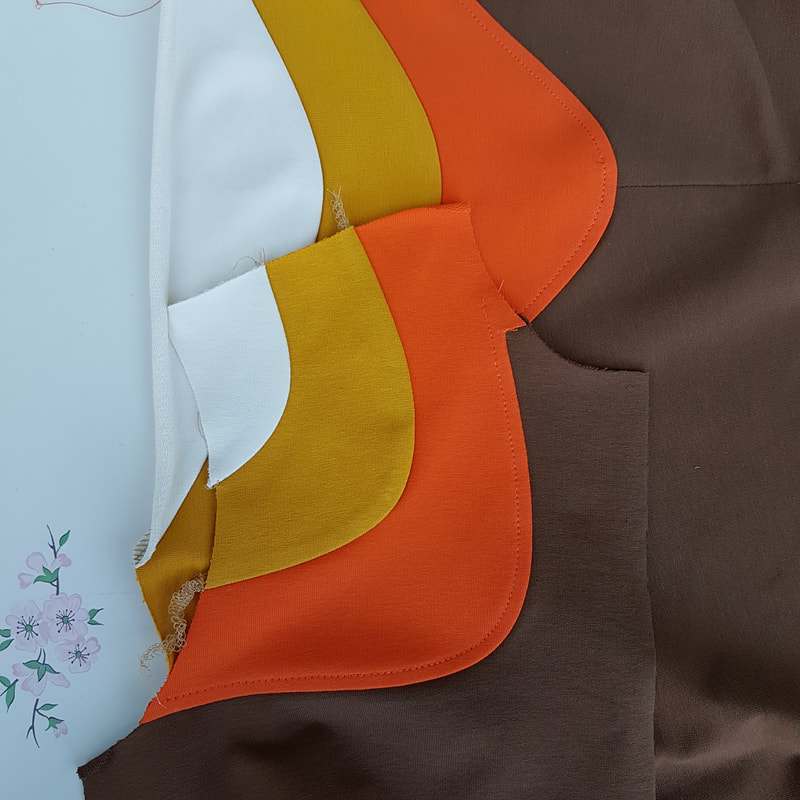
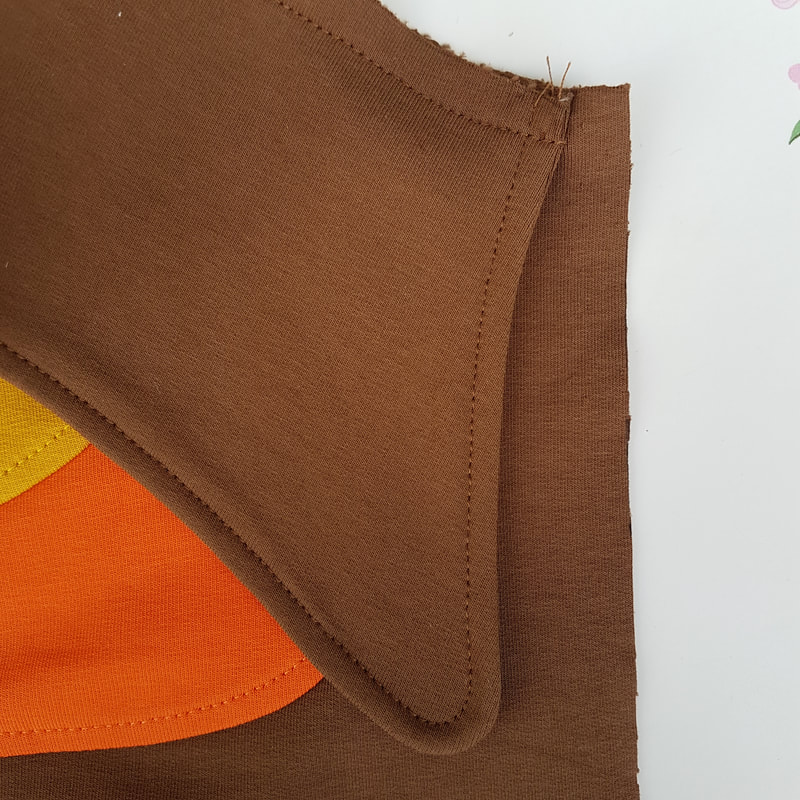
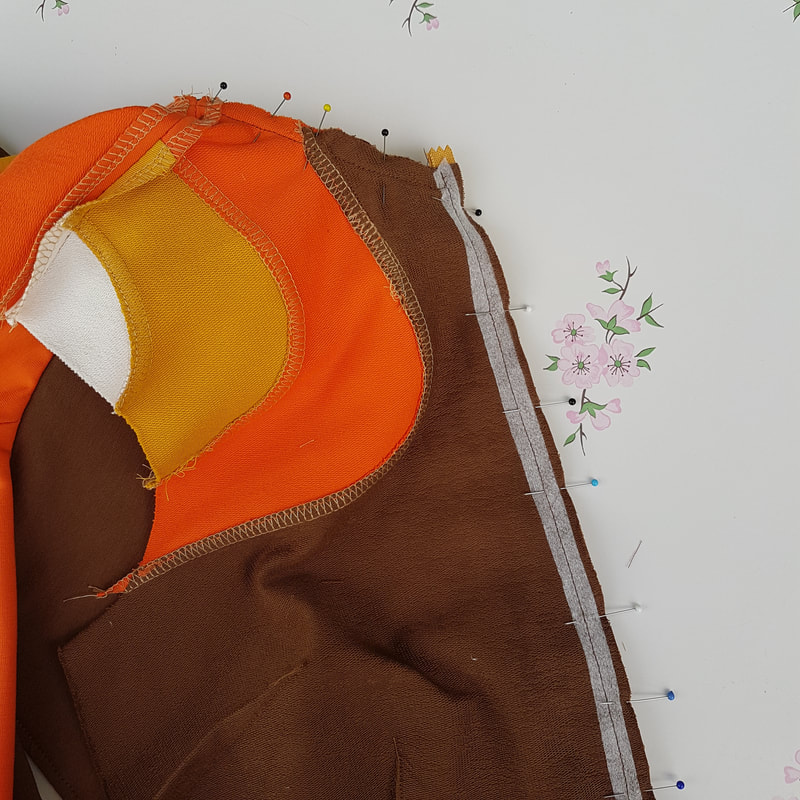
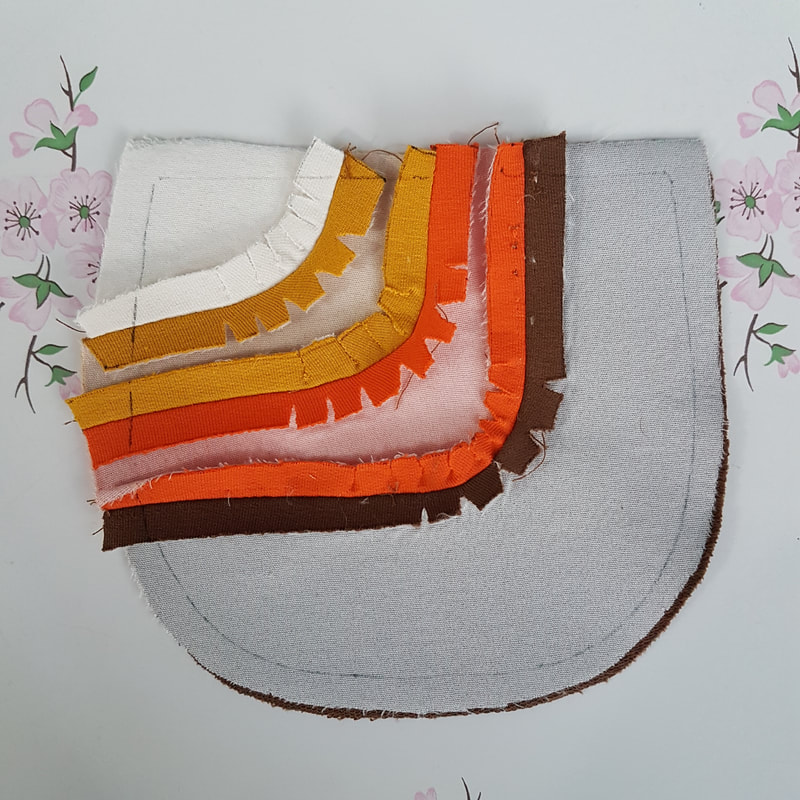
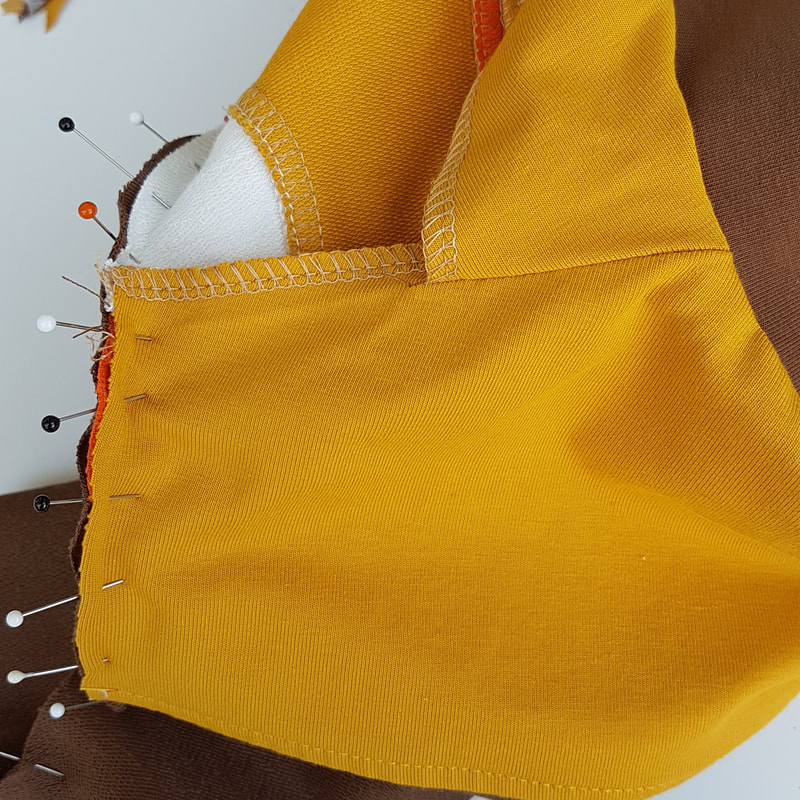
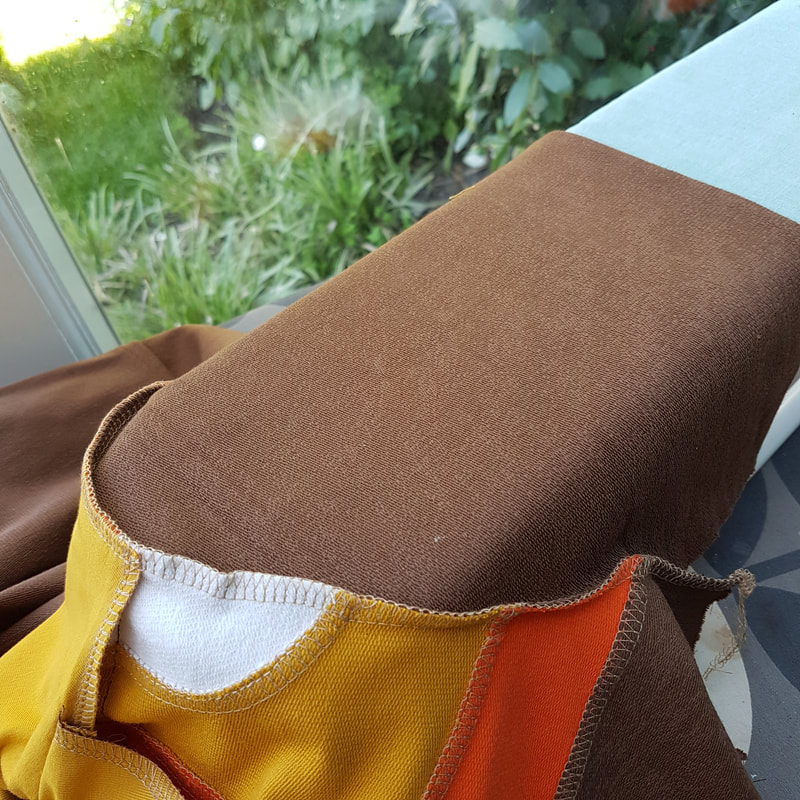
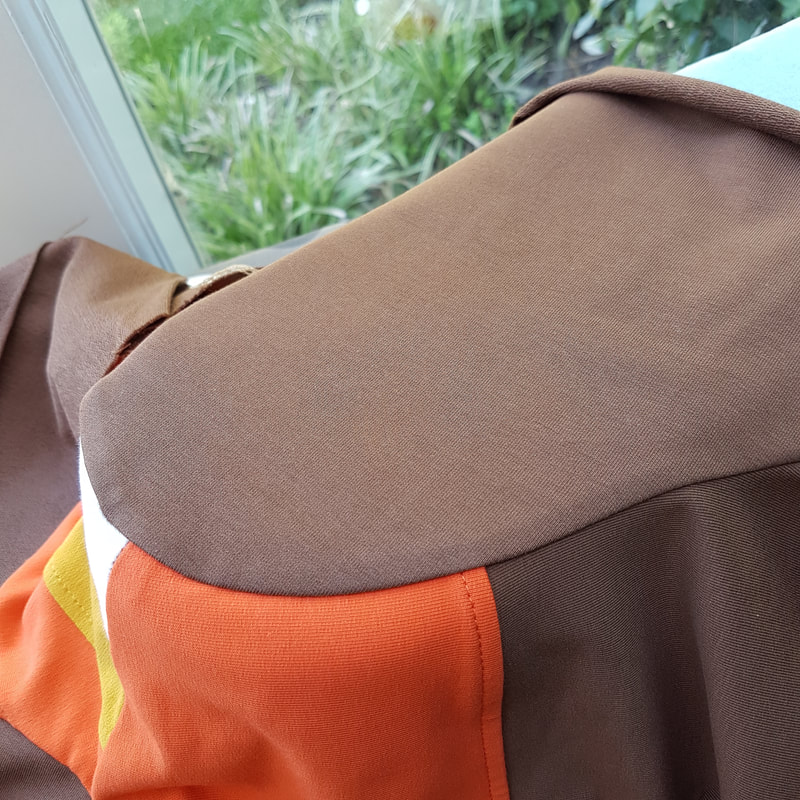
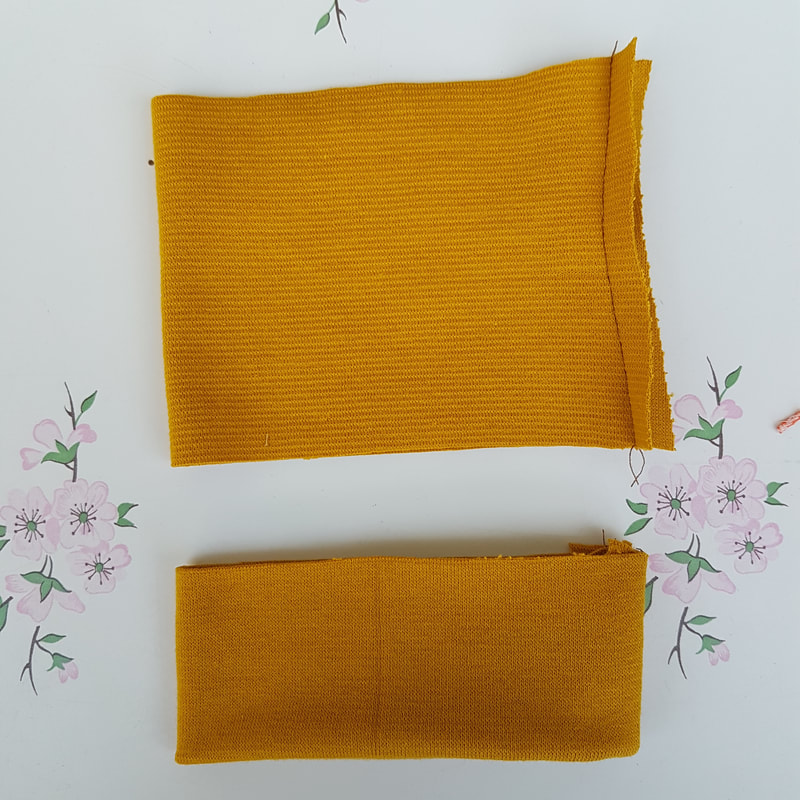
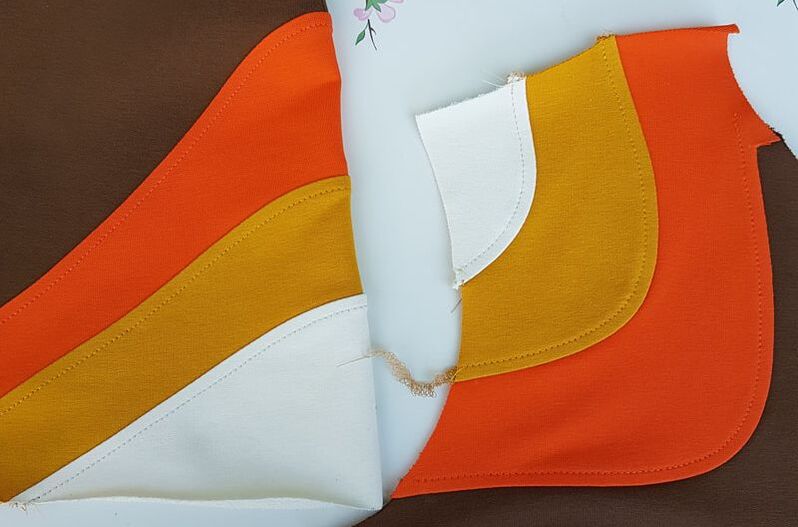
5e. Speld en stik nu deel 2 tegen deel 1 en deel 3 tegen deel 2. Pers plat. Werk nu de schouderrand af. Pin and sew part 2 to part 1 and part 3 to part 2. Press flat. Finish the edge of the shoulder. 6. Rok detail Skirt detail
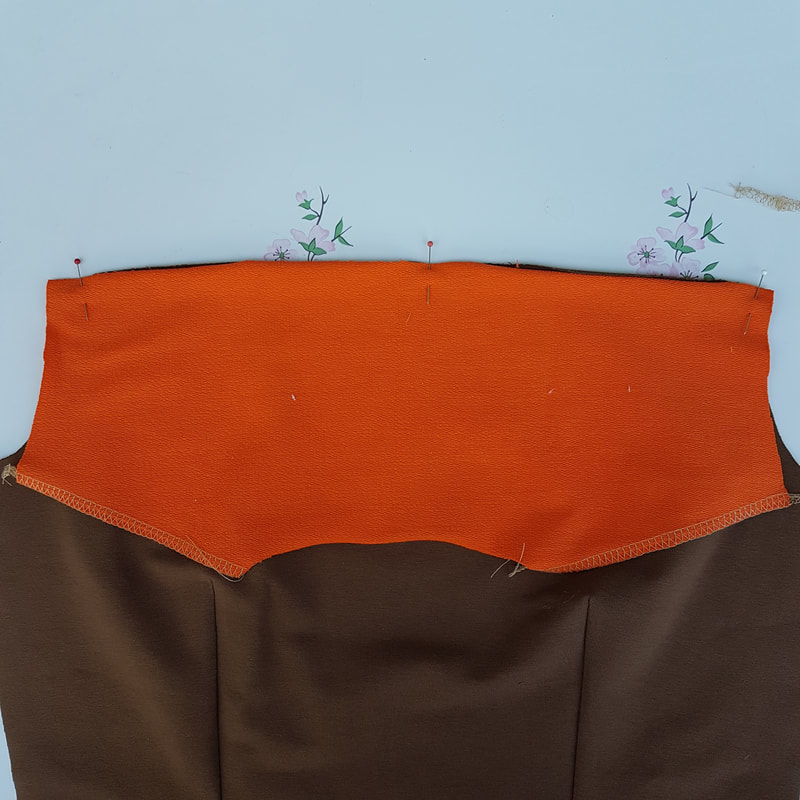
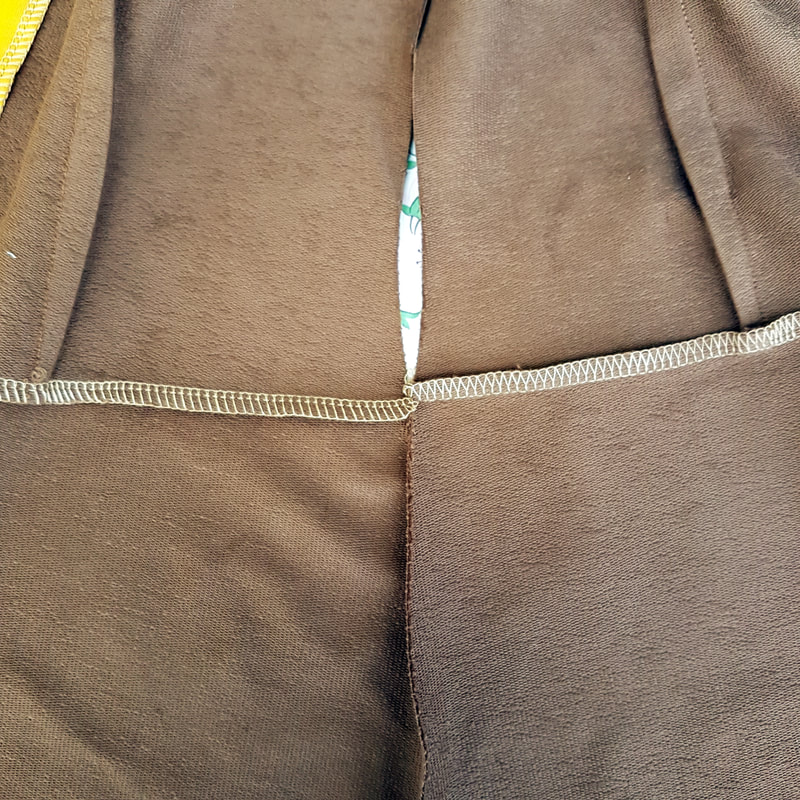
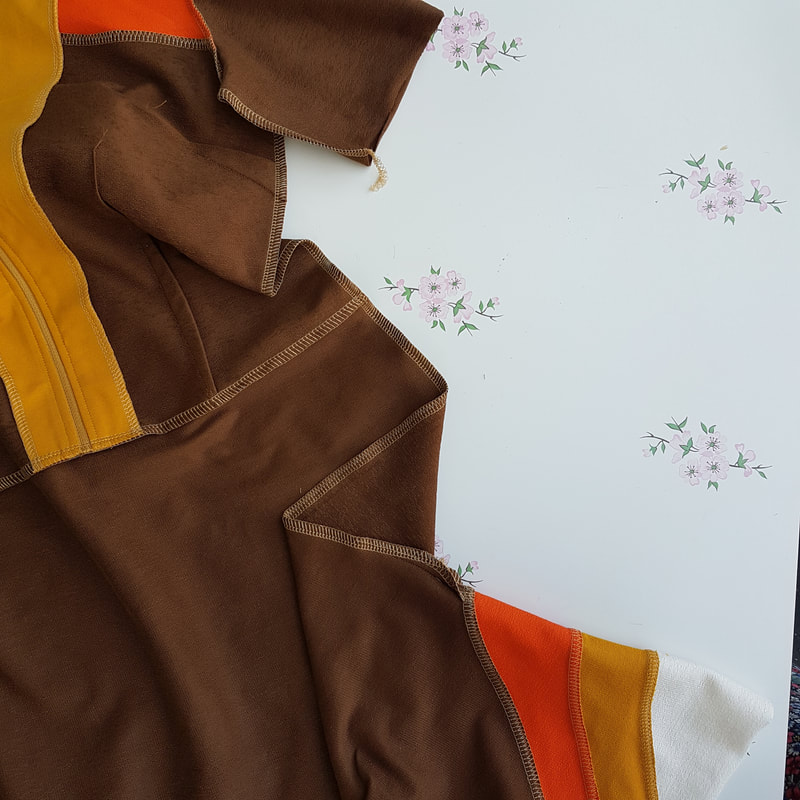
 6e. Speld en stik nu deel 2 tegen deel 1 en deel 3 tegen deel 2. Pin and sew part 2 to part 1 and part 3 to part 2. 7. De rugpas en doorstikken van de details. De back yoke and topstitching the details
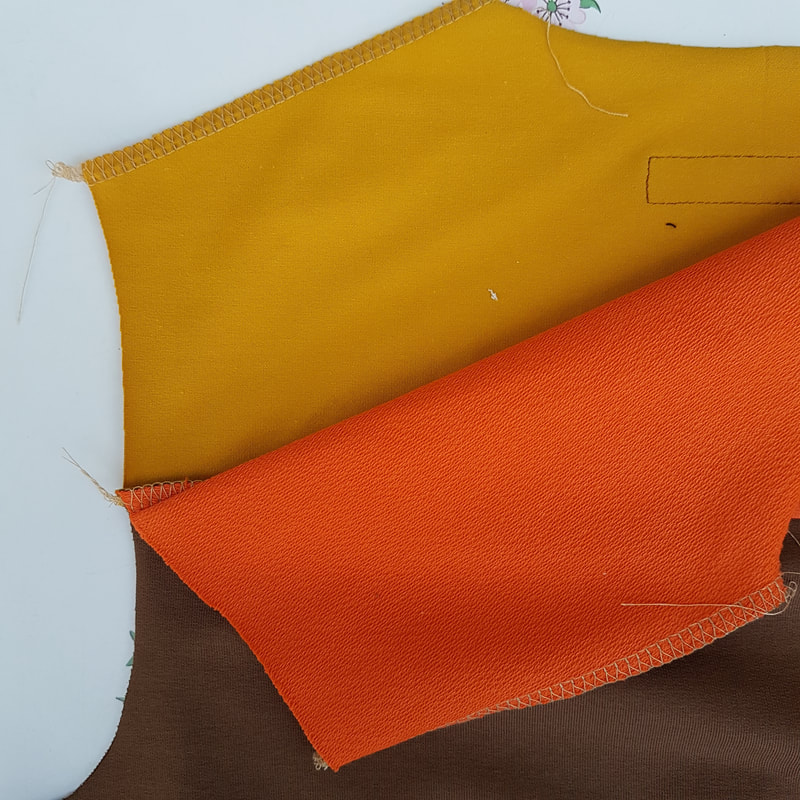
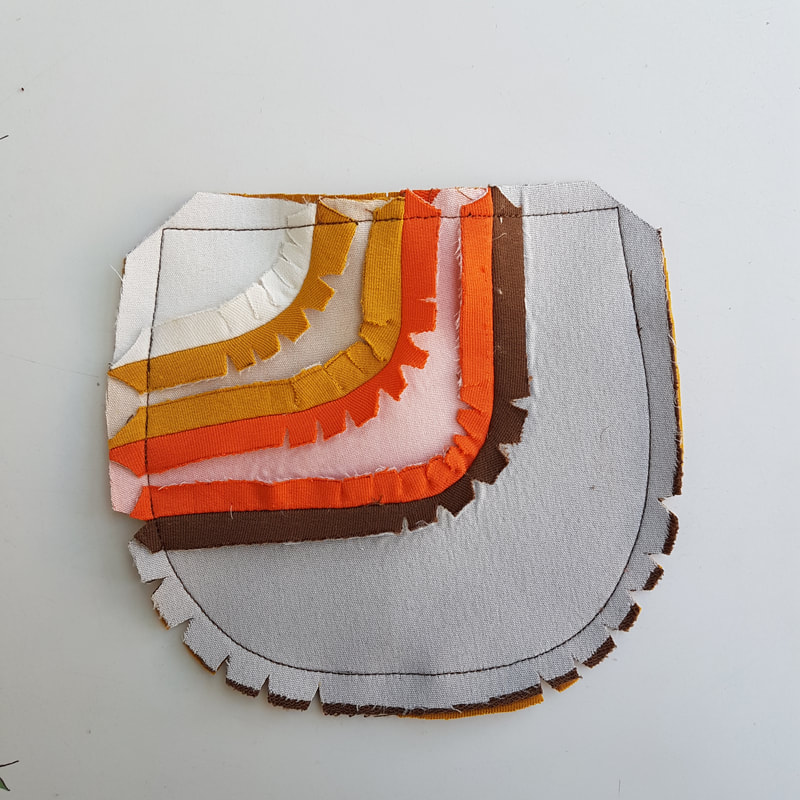
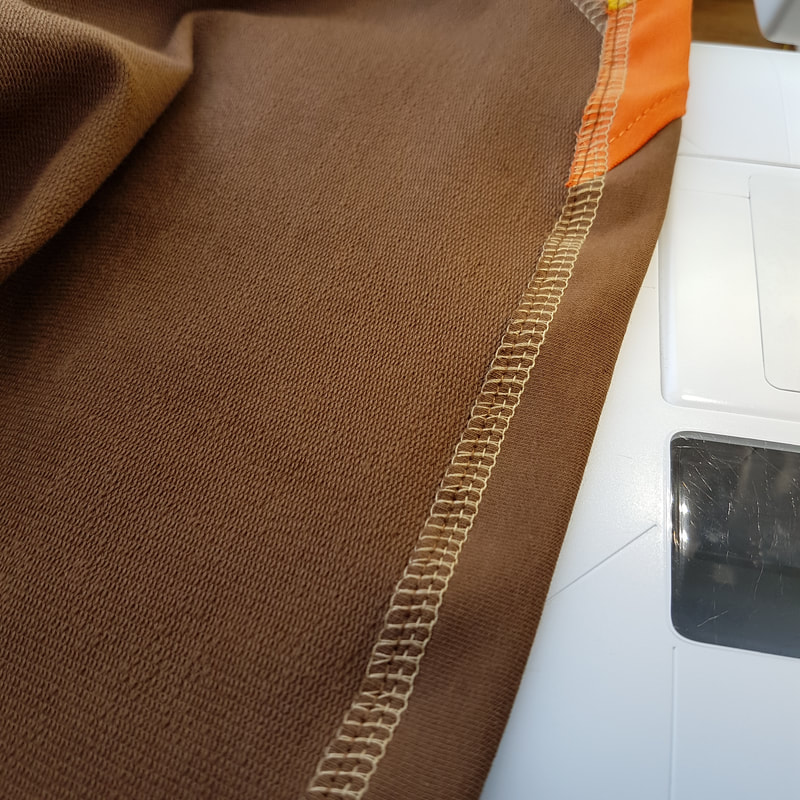
 7e. Verwissel de garenkleur opnieuw, stik deel 2 van beide details door en als laatste deel 3. Swap the yarncolour again, topstitch part 2 of both details and finally part 3.
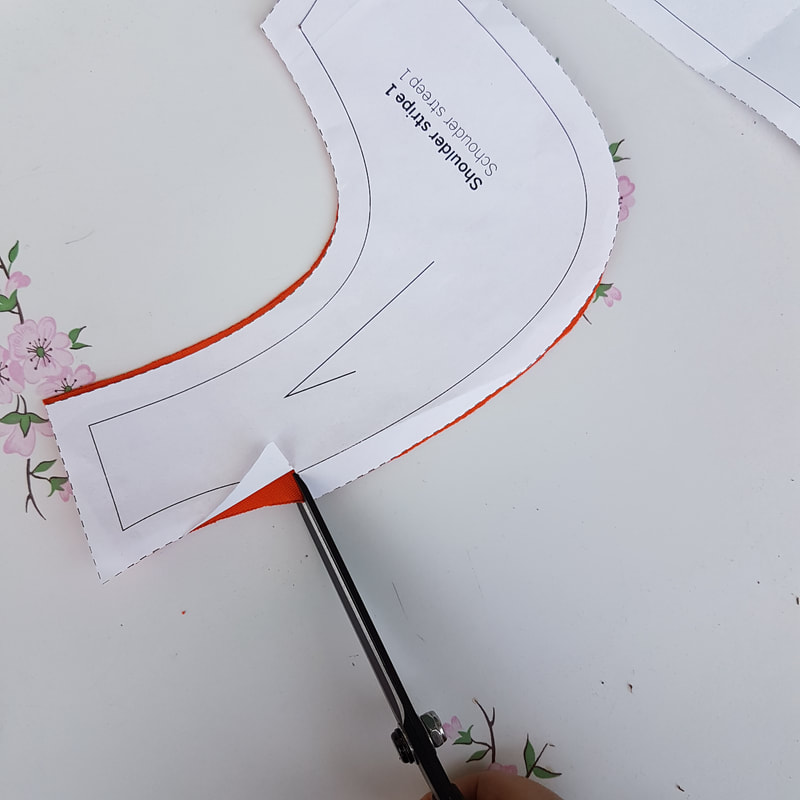
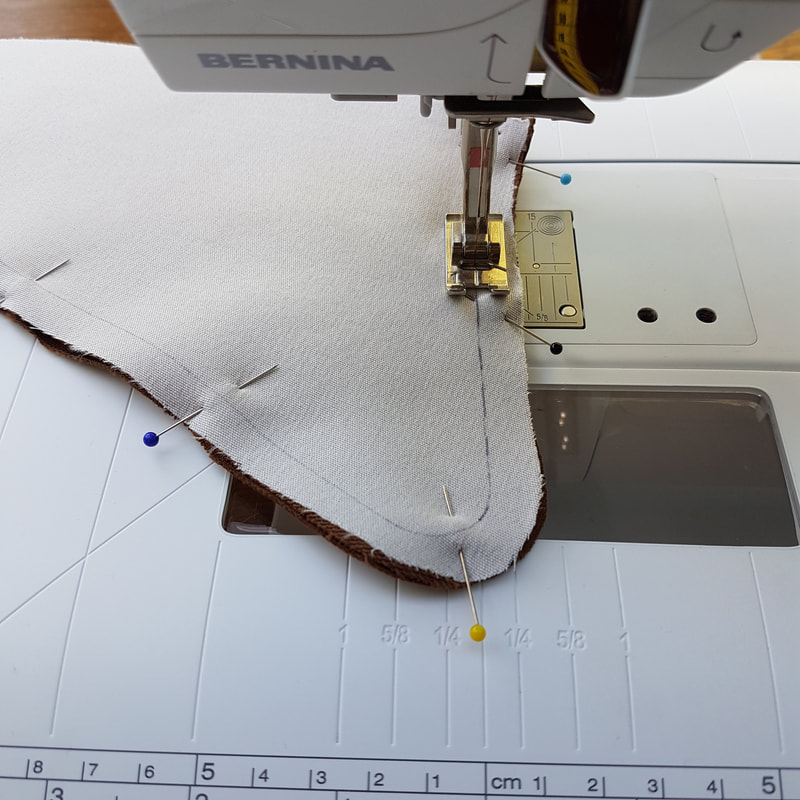
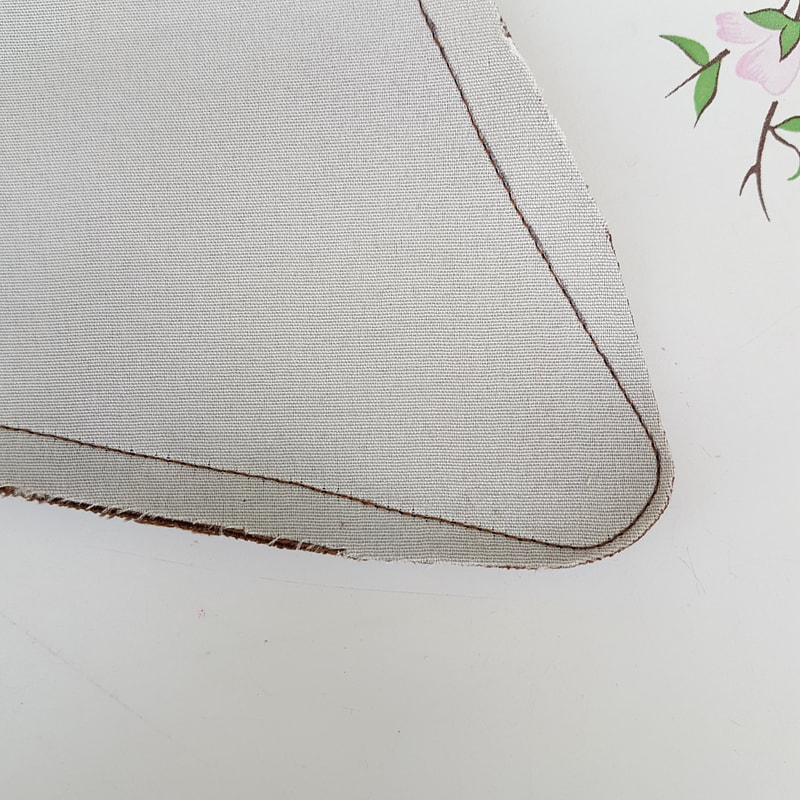
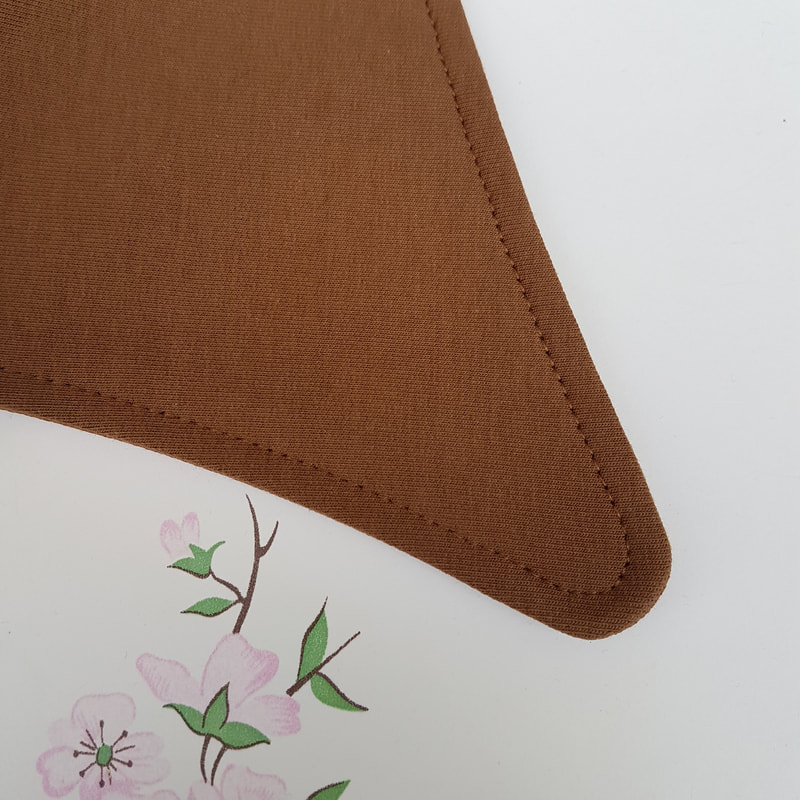
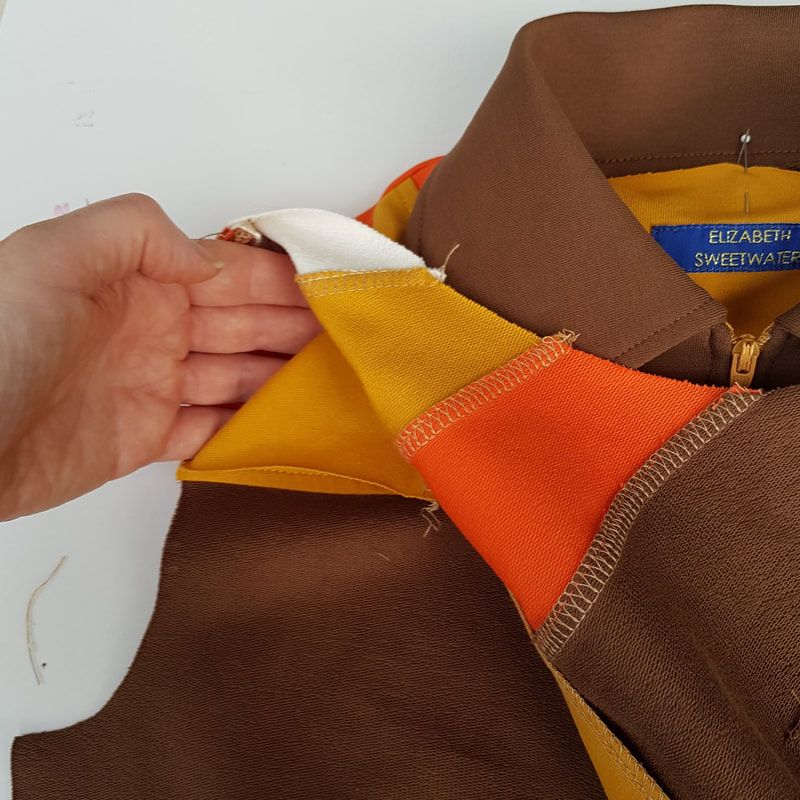
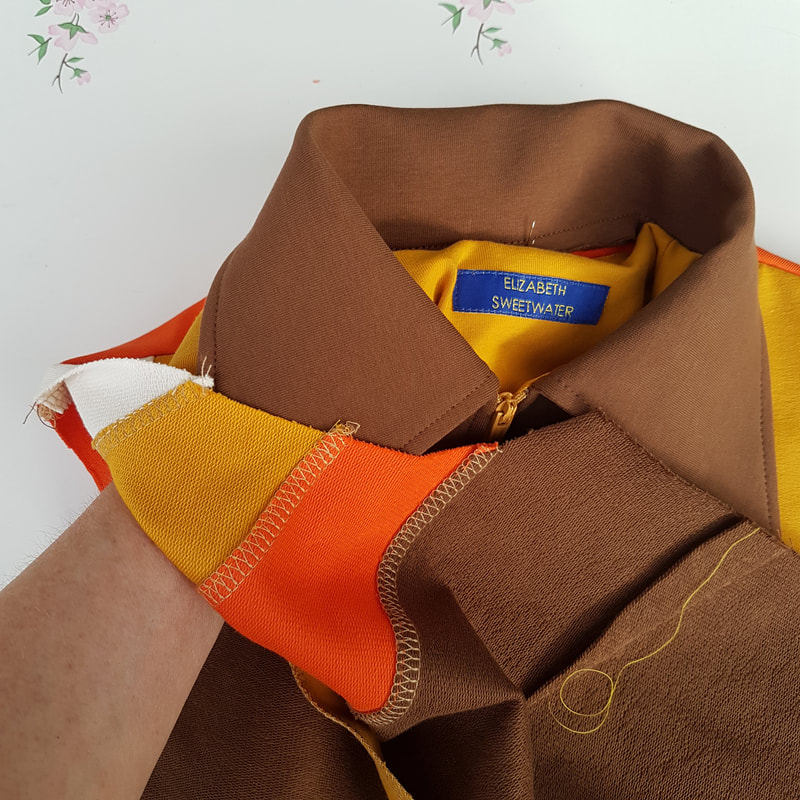
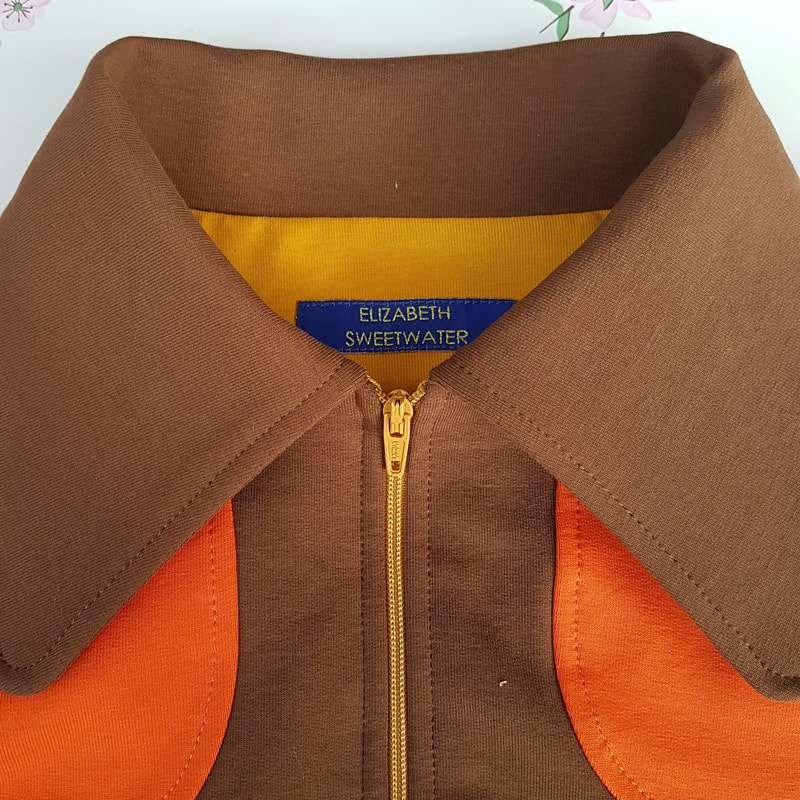
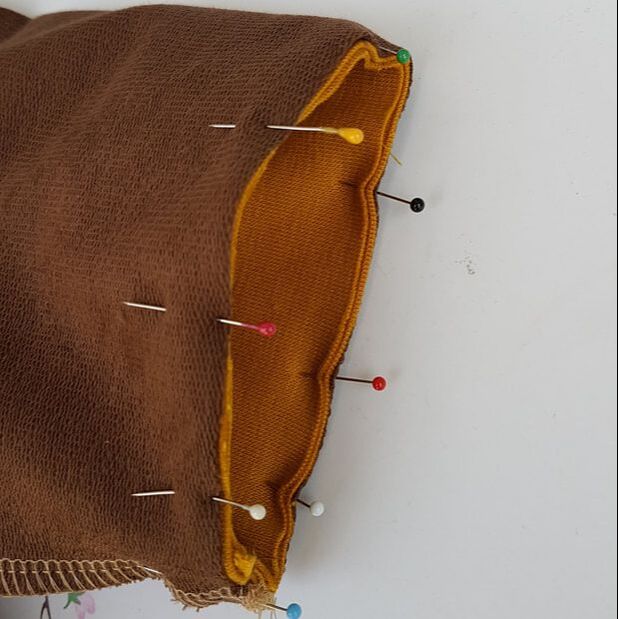
8. Het aanzetten van de kraag Attaching the collar 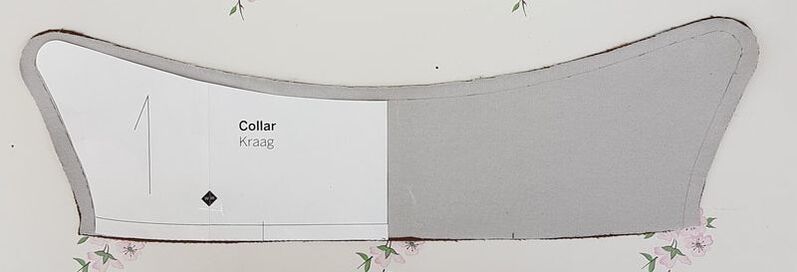 8a. Maak een kopie van het kraag patroon deel zonder de naadwaarde. Dit is een handig sjabloon om de kraagvorm over te trekken op de vlieseline. Zo kun je heel precies de vorm stikken. Copy the patternpiece without the seam allowance. This makes a handy template to trace on the interlining part of the collar. This way you can sew the shape of the collar very precisely.
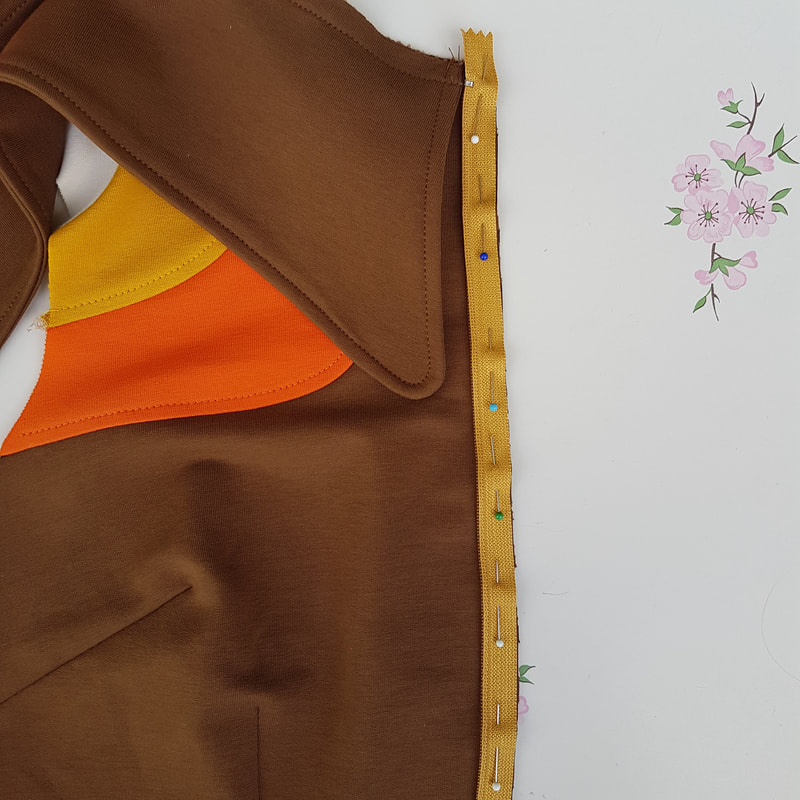
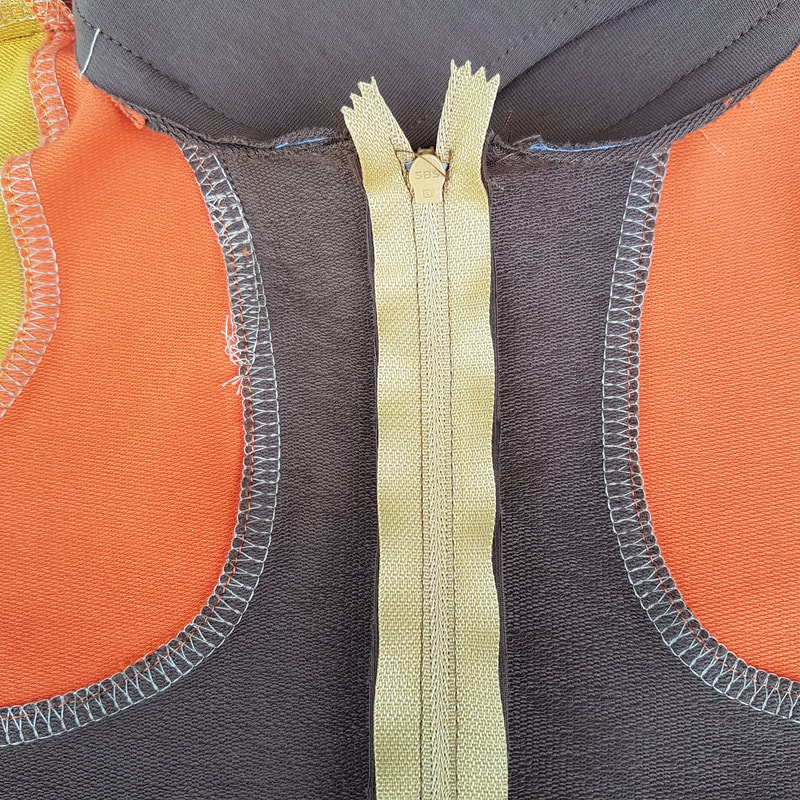
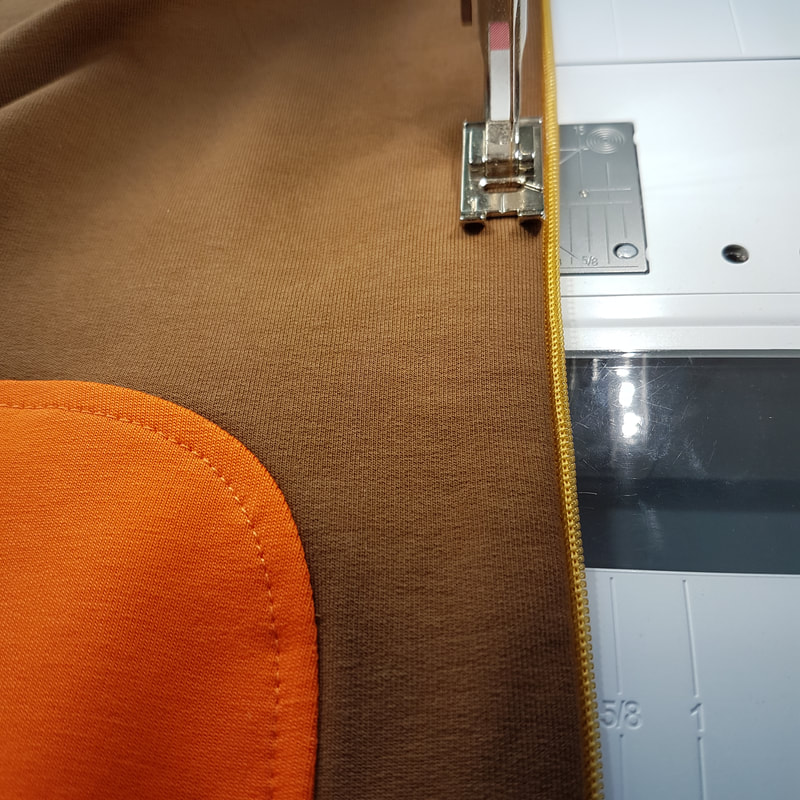
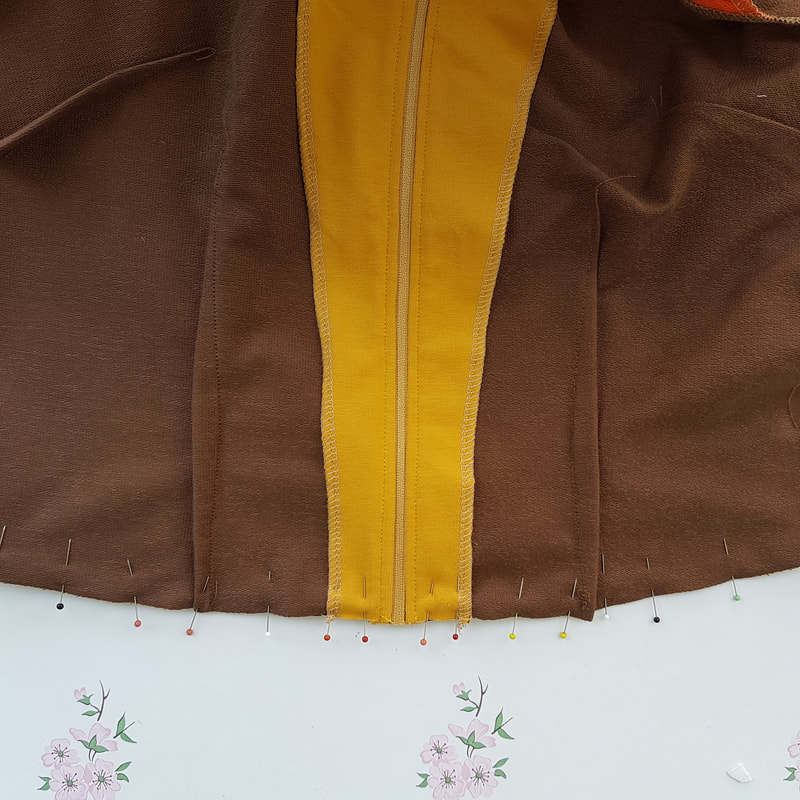
9. De rits inzetten Attaching the zipper
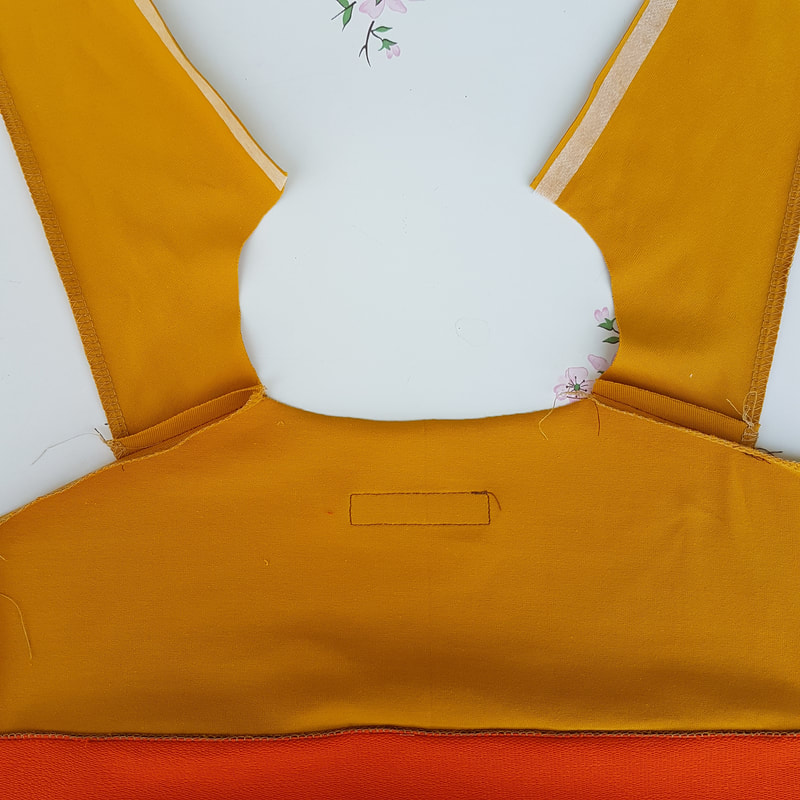
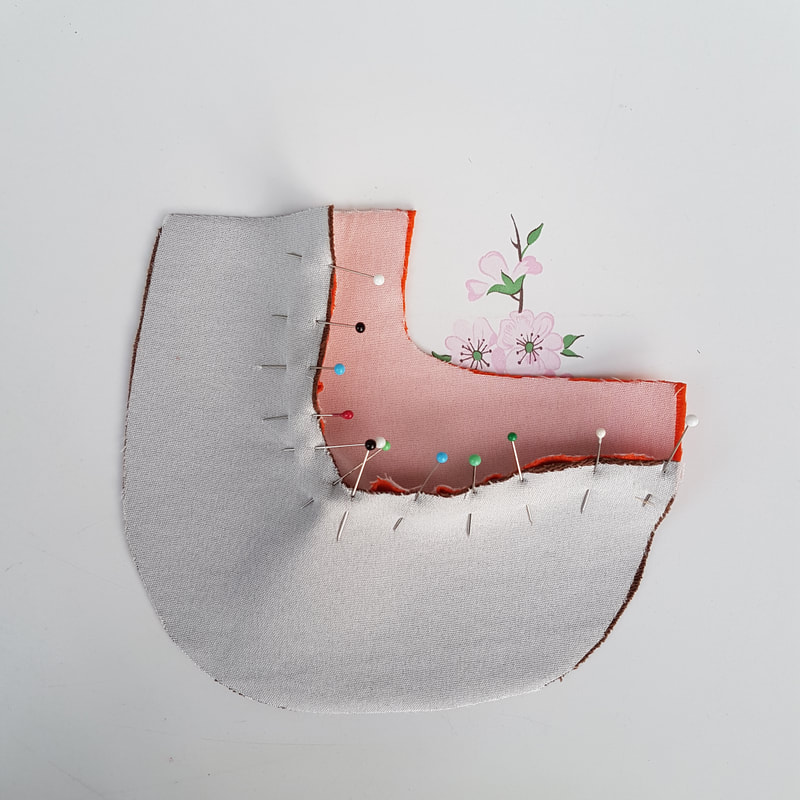
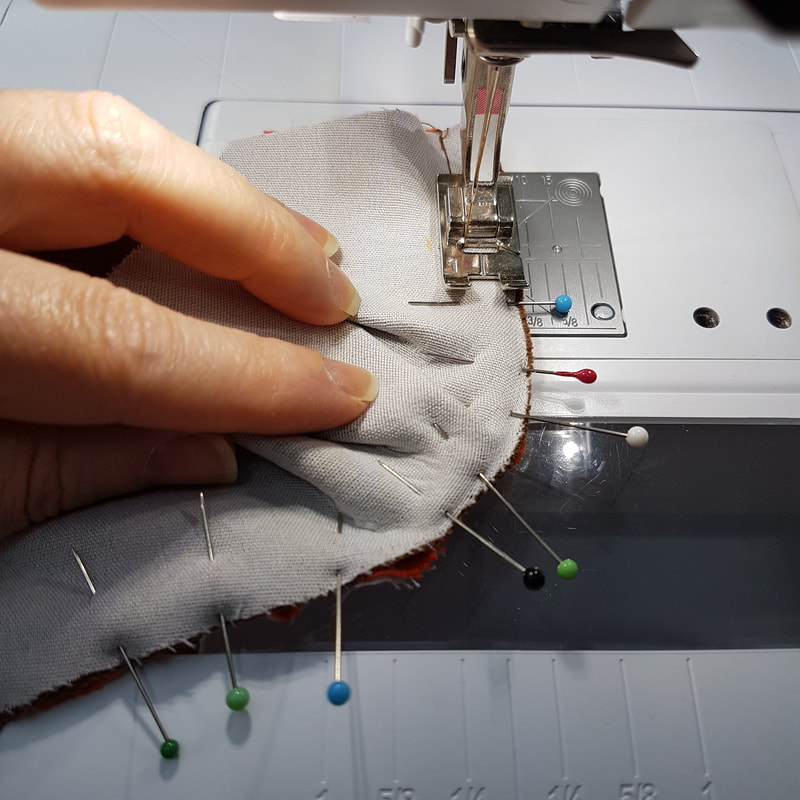
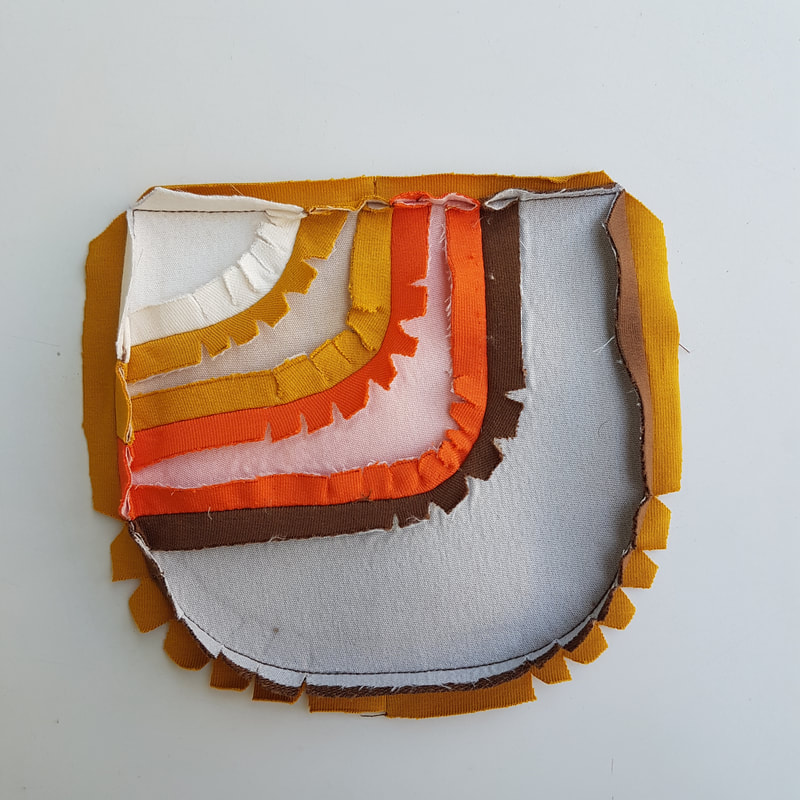
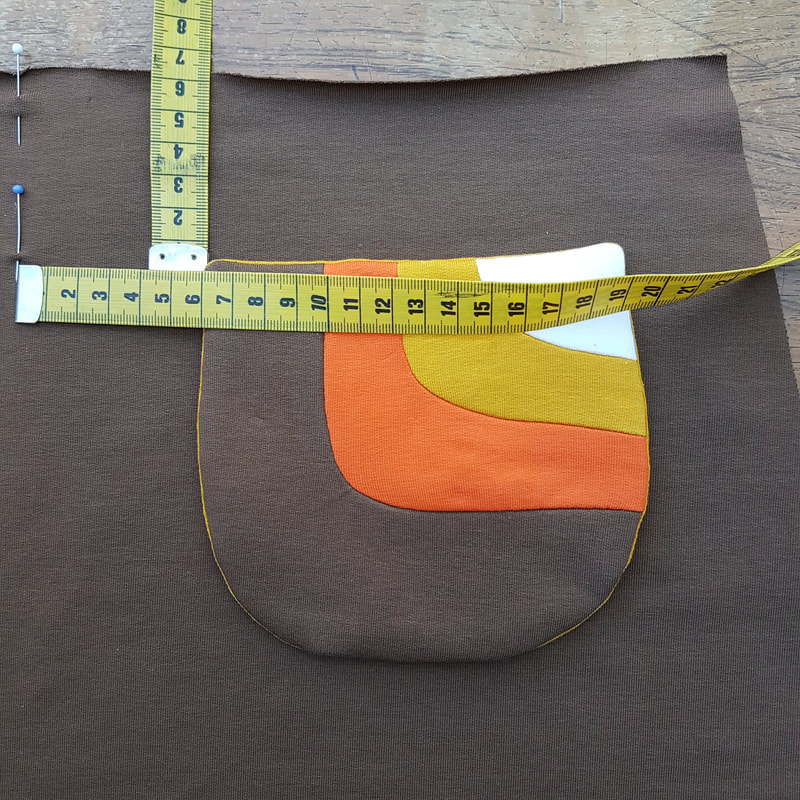
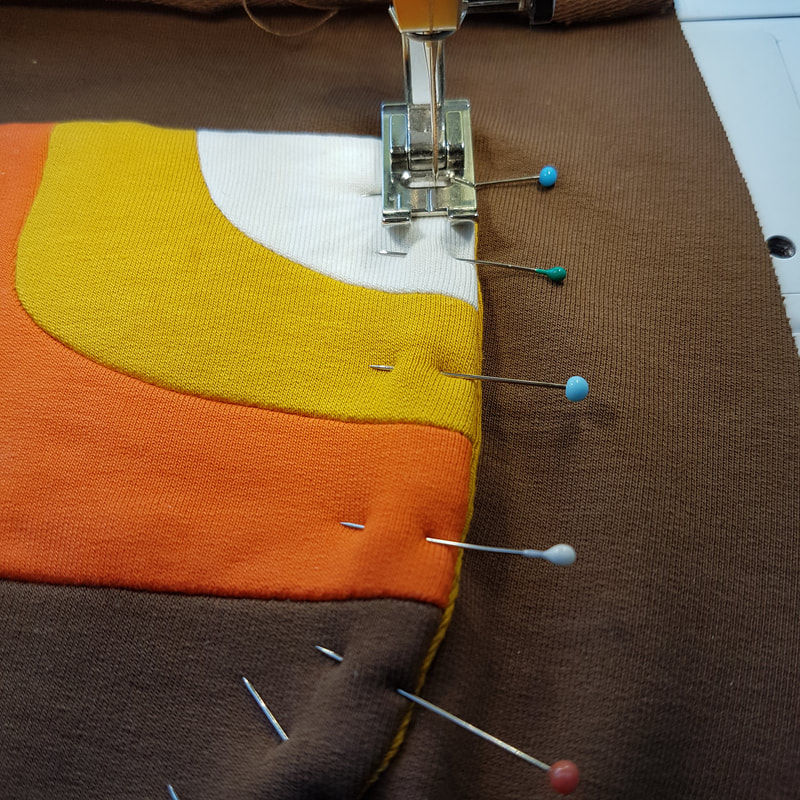
10. De zakken The pockets
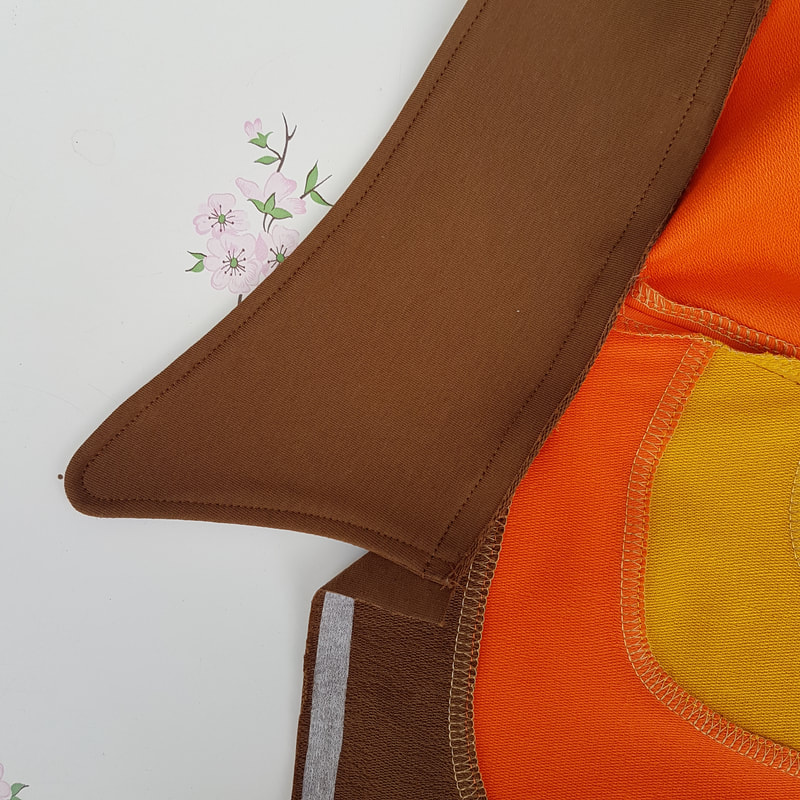
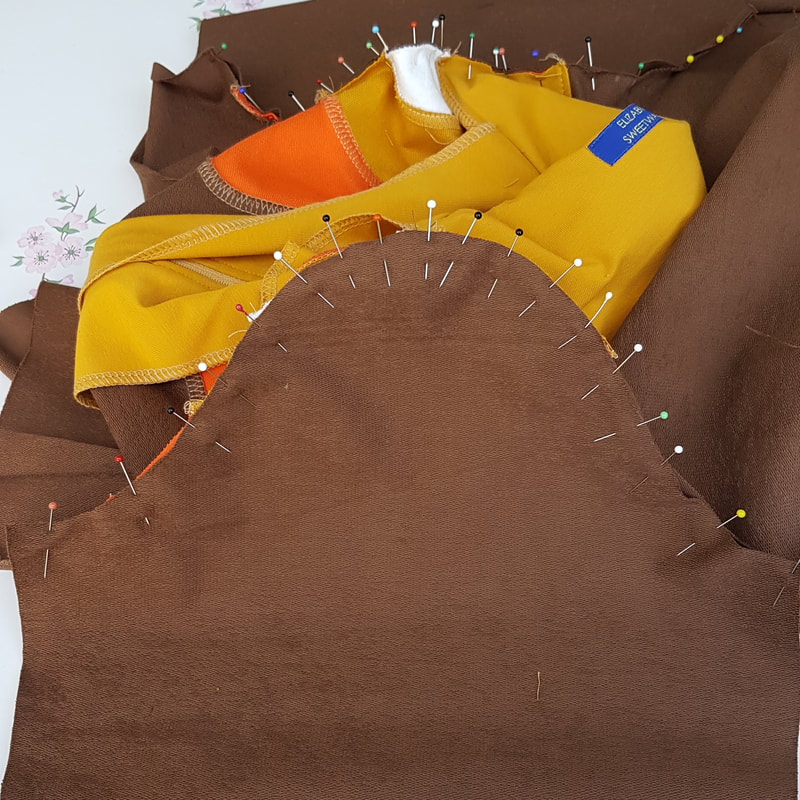
10L. Speld en naai de zak op de rok op 5mm vanaf de rand. Voor de positionering zie hierboven - ong. 60mm vanaf middenvoor en 60mm vanaf bovenkant. Pin and topstitch the pocket 5mm from the edge. Position the pocket approx 60mm down and 60mm from the centreline. 11. Het rokdeel aanzetten en de mouwen inzetten Attaching skirt and sleeves
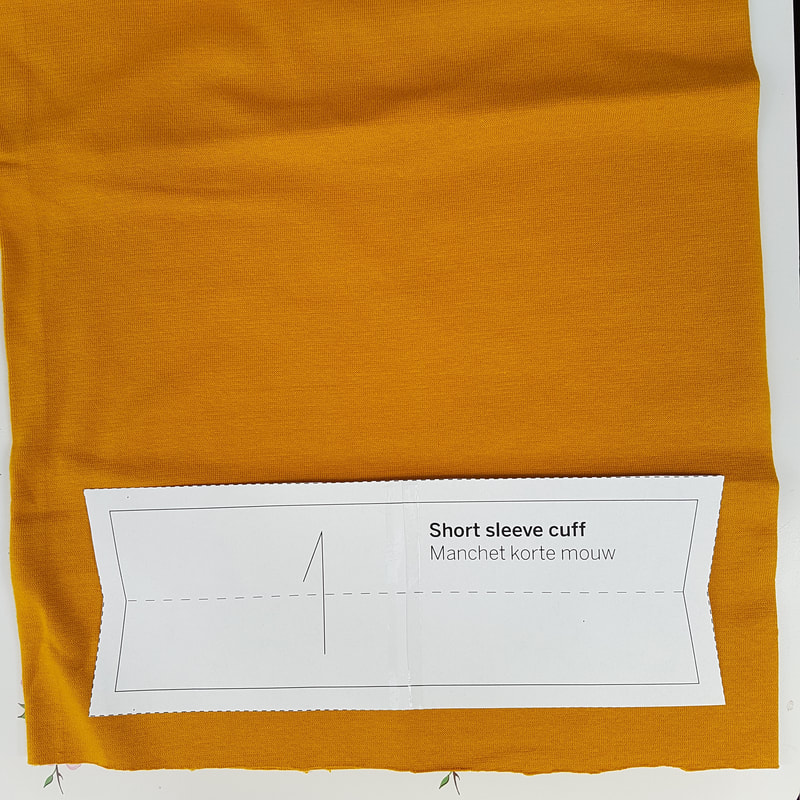
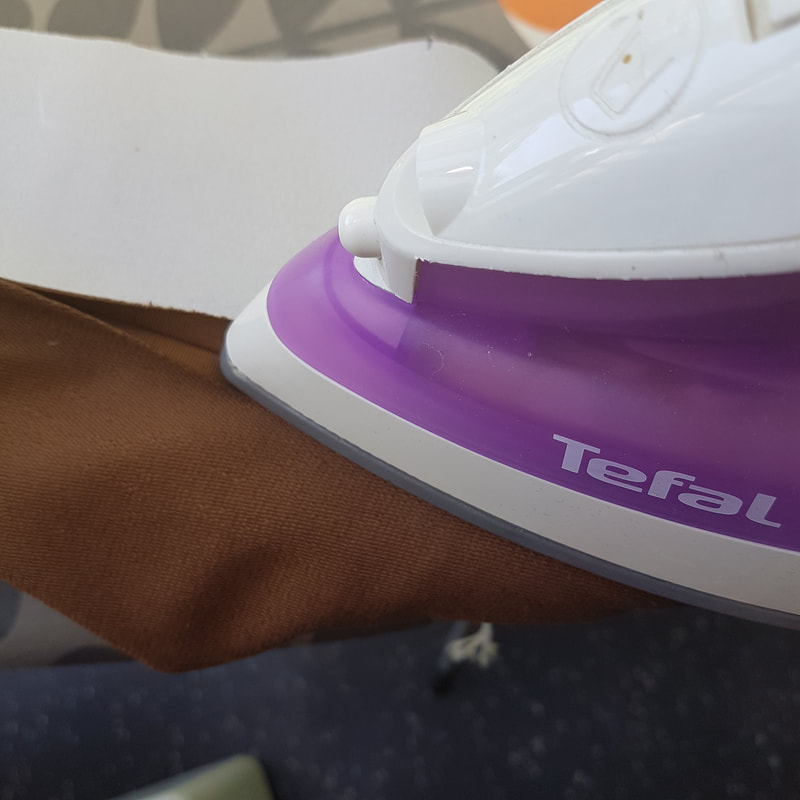
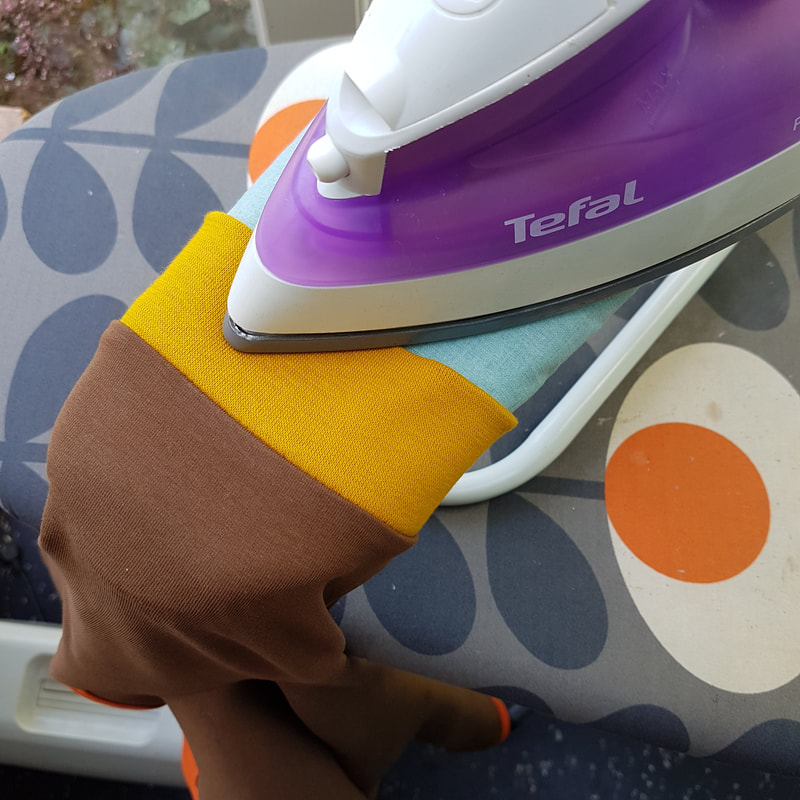
11e. Als je de mouw aan de buitenkant perst gebruik dan een vochtige doek. Deze zorgt ervoor dat je de naden niet door perst. When pressing the sleeves on the outside, make sure you use a damp cloth. This will prevent pressing through. 12. Zijnaden dichtmaken, zomen en manchetten Closing sideseams, hems and cuffs
Je hebt het gedaan! Je ‘wave’ jurk is klaar! You did it! your ‘wave’ dress is ready!  Comments are closed.
|
For all the latest patterns to buy visit my Etsy shop today. |