Easy T-Shirt Jurk
Introduction
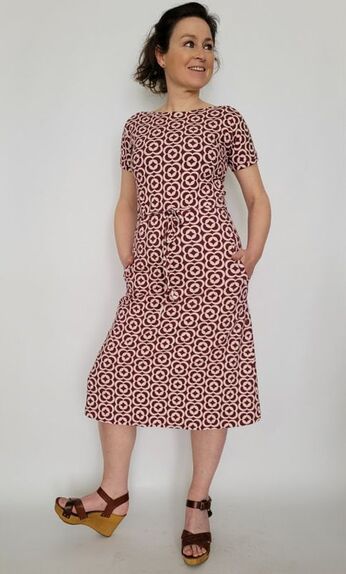
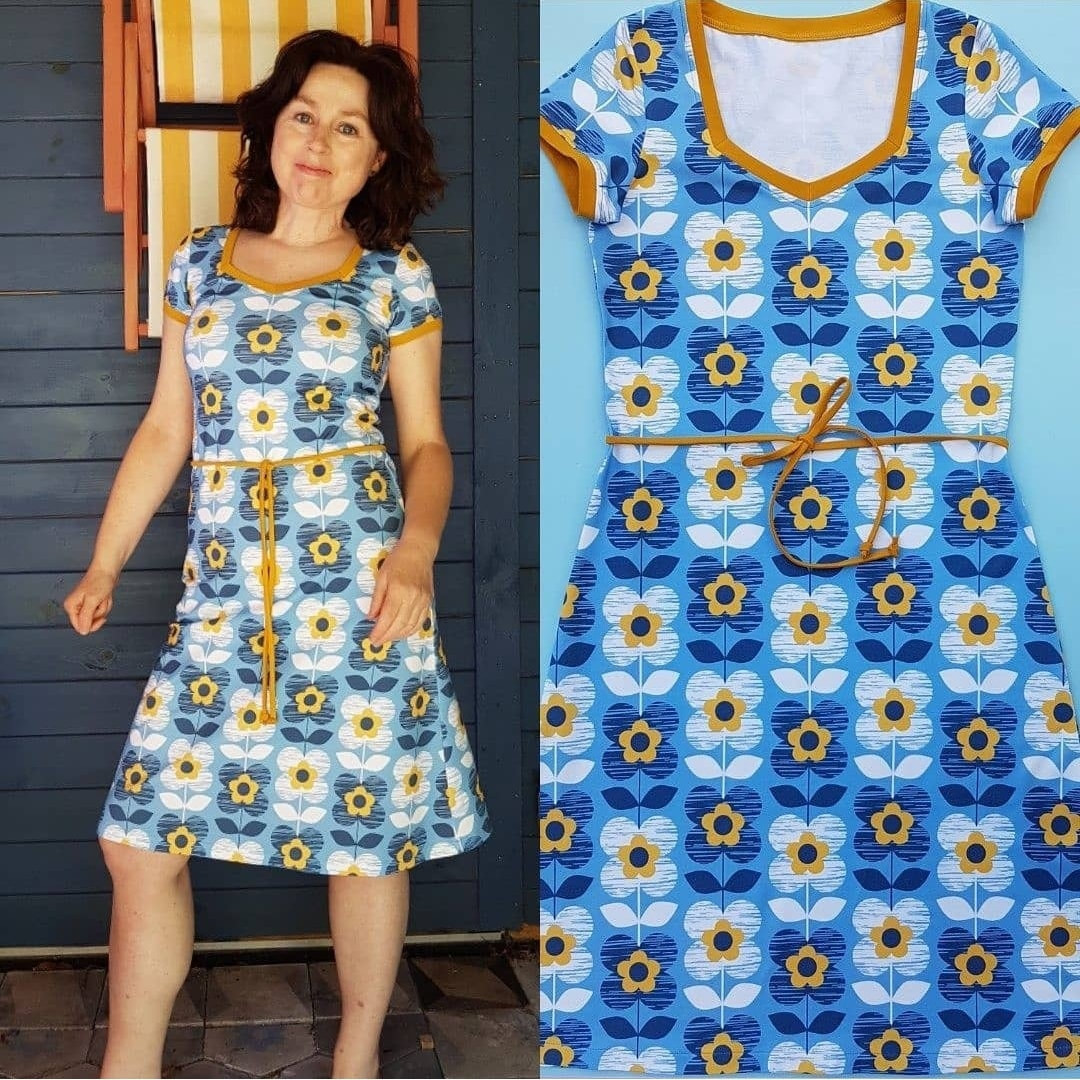
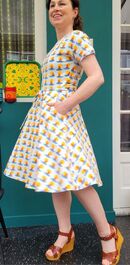
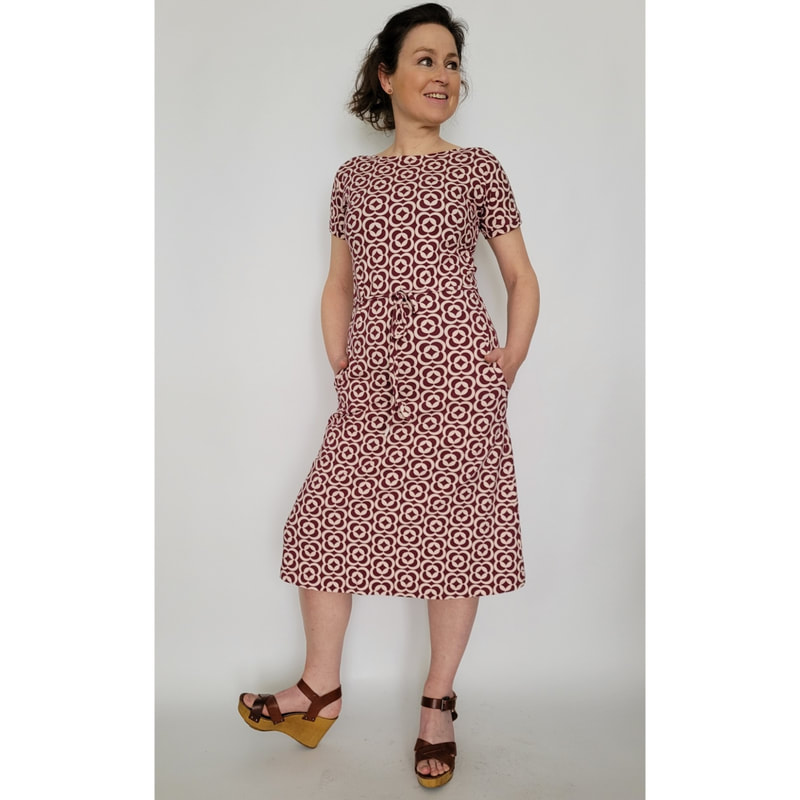
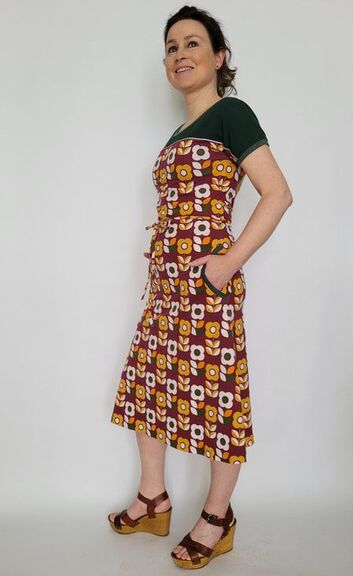
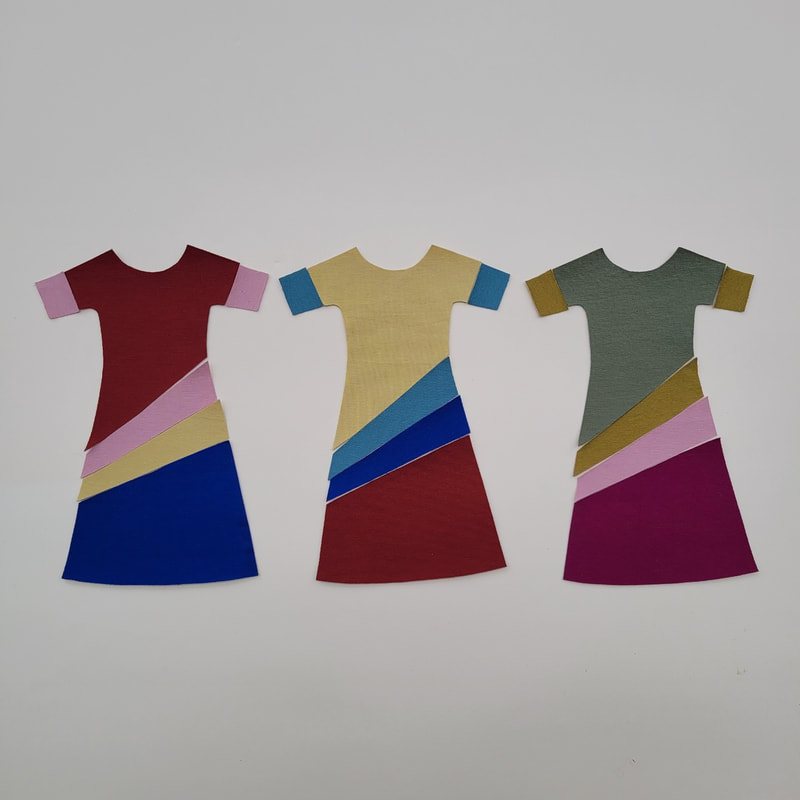
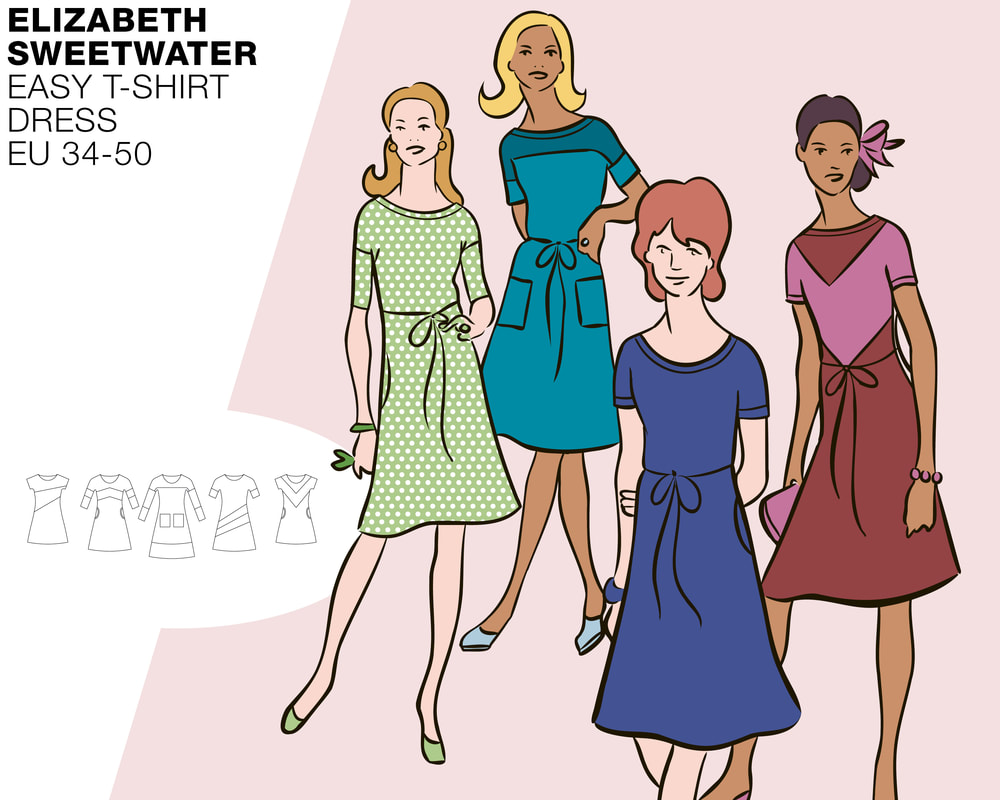
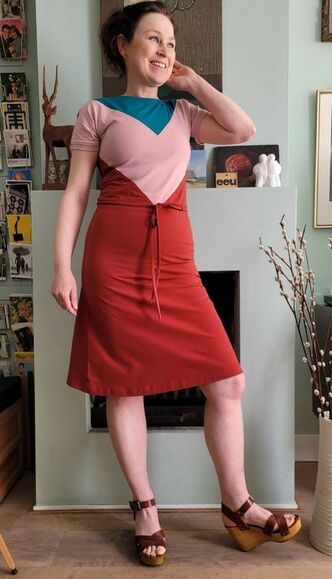
The easy tee dress is a quick and especially easy to make jersey dress with many variations! There are no darts or dividing seams and will work very well for (large) prints. In the tutorial you can read how you can add dividing seams to play with color blocking. The dress has simple round insert pockets or square patch pockets This pattern has a great extra feature: it fits exactly with existing t-shirt patterns. You can read how to turn your favorite t-shirt into a dress using this pattern in the pattern adjustments in step 2. Suitable fabrics are bi-stretch cotton or viscose single jersey and French terry. You can make a whole stack of this cute dress in no time. The model is 158cm tall and is wearing size 36.
1.
Voorbereiding Preparation
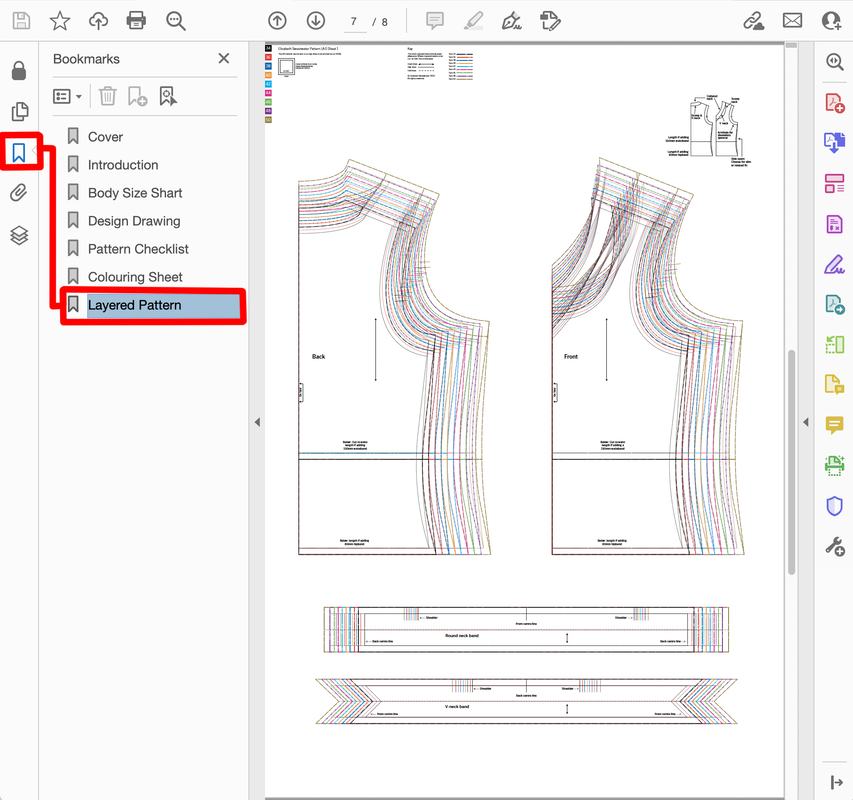
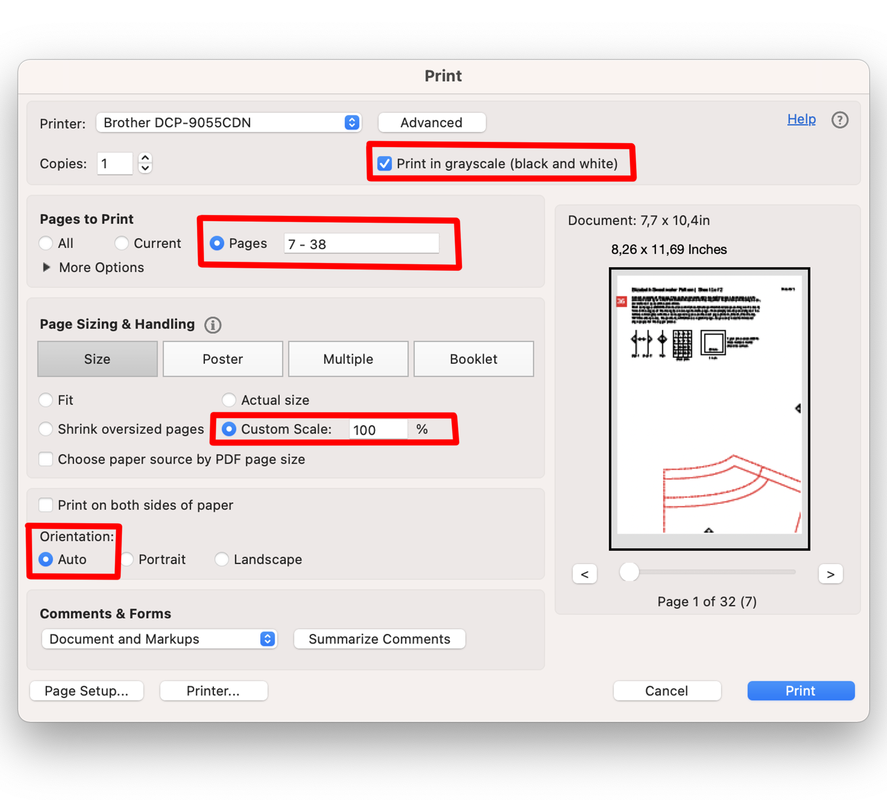
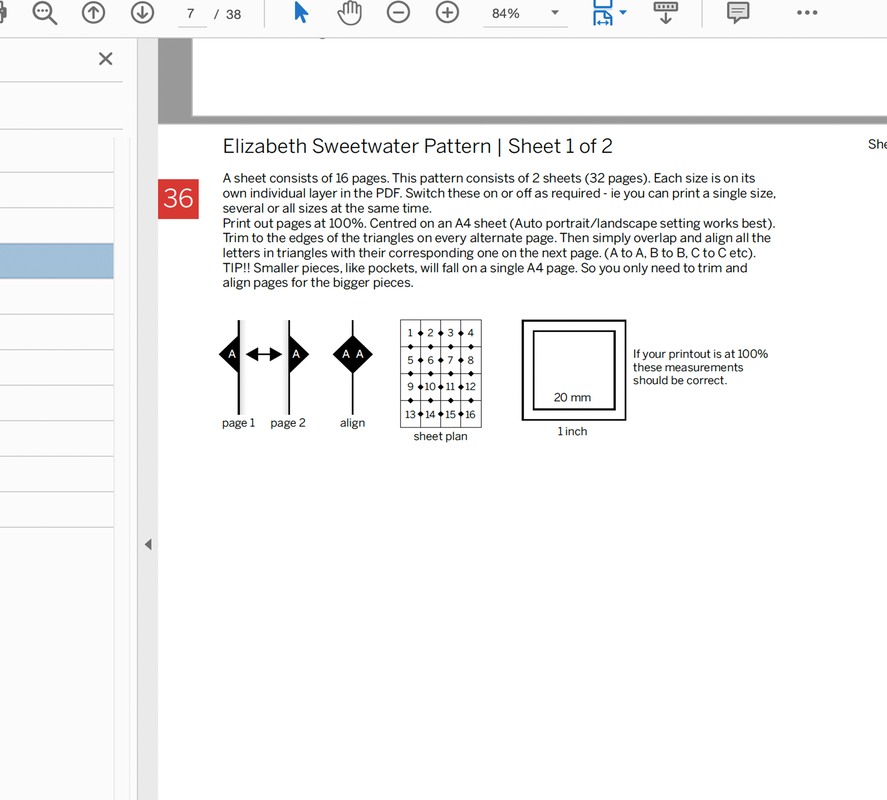
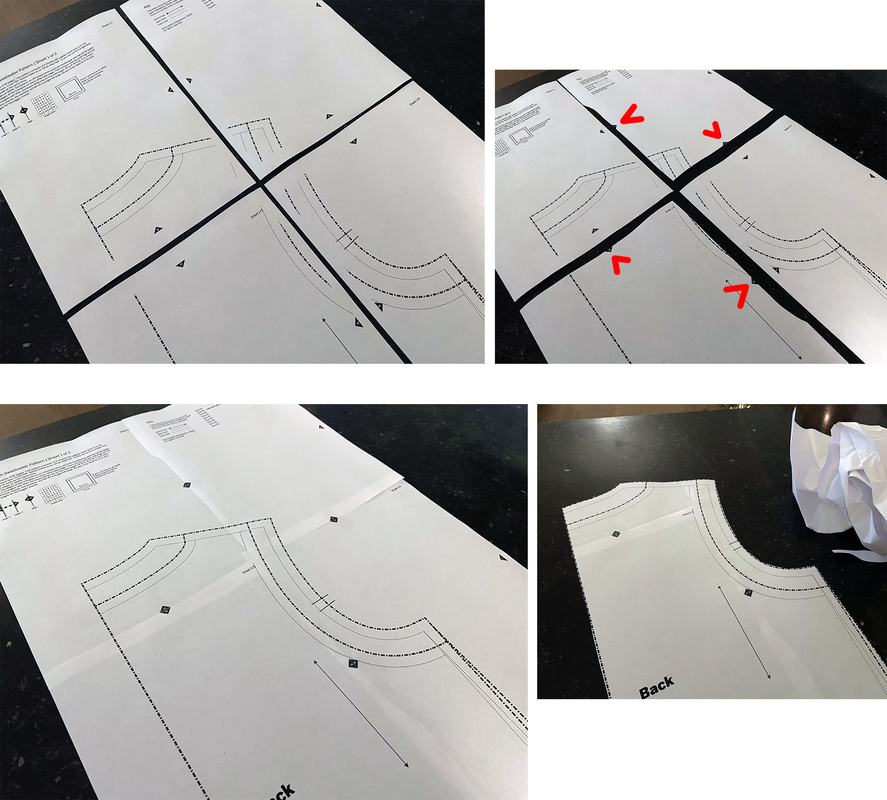
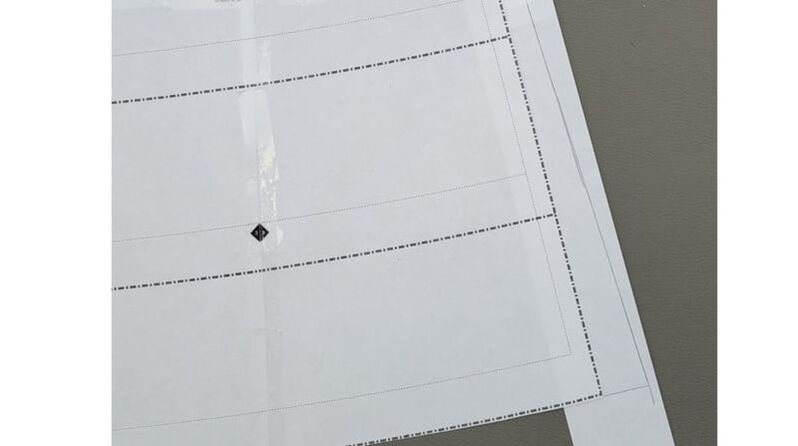
Bij aankoop van een van onze patronen ontvangt u 3 PDF-bestanden: een voor thuisprinters om op A4-papier af te drukken, een tweede voor A0-gebruikers om af te drukken in een printshop en een derde is voor mensen die een overheadprojector gebruiken. De volgende algemene introductietekst geeft een overzicht van hoe onze patroon-pdf's zijn opgezet en legt uit hoe je de A4-versie kunt afdrukken en hoe je de pagina's aan elkaar kunt plakken. A0-gebruikers kunnen bij hun printshop aangeven welke pagina's ze nodig hebben. Op de projector bestanden staan alle panden in dezelfde richting.
On purchasing any of our patterns you will receive 3 PDF files: one for home printers to print on A4 paper, a second at A0 is for printshop users and a third is for sewers who use an overhead projector. The following general introduction text provides an overview of how our pattern pdfs are set up and explains how to print out the A4 version and how to stick the pages together. A0 users should simply instruct their printshop which pages they require. Projector users will note that all pieces have the grain direction facing the same way.
1g.
Raadpleeg het onderstaande overzicht van alle modellen om je voor te bereiden op het uitknippen van de door jou gekozen stof. Consult the overview of all styles below to prepare yourself for the next stage of cutting out the pieces from your chosen material.
Style opties/Style options
Er zijn vijf voorbeeldmodellen, uiteraard kunnen alle details onderling gecombineerd worden.
There's four example styles shown below, and of course all details can be combined.
Hoeveelheid stof nodig/amount of fabric needed
Geschikte stoffen voor alle modellen zijn bi-stretch katoen of viscose single jersey en French terry.
Kies je een viscose single jersey doe dan de aanpassing voor de losse fit: stap 2e. Suitable fabrics for all styles are various types of jersey such as nicky velours, french terry en viscose of katoen single jersey. If you choose a viscose single jersey, make the adjustment for the loose fit: step 2e. Model A t/m C Tricot/jersey: 150cm breed/width Maat/size 34 t/m 38: 110cm-130cm* Maat/size 40 t/m 50: 150-170cm* *Afhankelijk van de lengte/depending on dress length. Model D/colourblock Tricot/jersey: 150cm breed/150cm width Maat/size 34 t/m 38: 100-110cm* Maat/size 40 t/m 50: 140-150cm* *Afhankelijk van het model/depending on the design. Voor de accentkleuren meet je de hoogte van het grootste patroondeel voor de benodige stof hoeveelheid. For the accentcolours measure the height of the largest patterpart for the amount of fabric needed. De stofafmeting is een schatting en is afhankelijk van het soort model wat je maakt, maat, aanpassingen, stofbreedte, print etc. Ik adviseer om de patroondelen eerst in te leggen op een tafel waar je de juiste stofbreedte hebt afgemeten alvorens de stof te bestellen/kopen. Zo koop je nooit teveel/te weinig. The amount of fabric needed is an estimate and depends on the type of dress you make, size, adjustments, fabric width, print etc. I recommend placing the pattern pieces on a table where you have measured the correct fabric width before ordering/buying the fabric. That way you never buy too much/too little. Kies voor je begint aan de jurk de details die je wilt gebruiken. Bekijk ook even de patroon aanpassingen in stap 1 en de colourblock opties in stap 6 Before you start on the dress, choose what details you want to use. Also have a look at the pattern adaptions in step 1 and colourblock options in step 6.
Fournituren/Haberdasheries
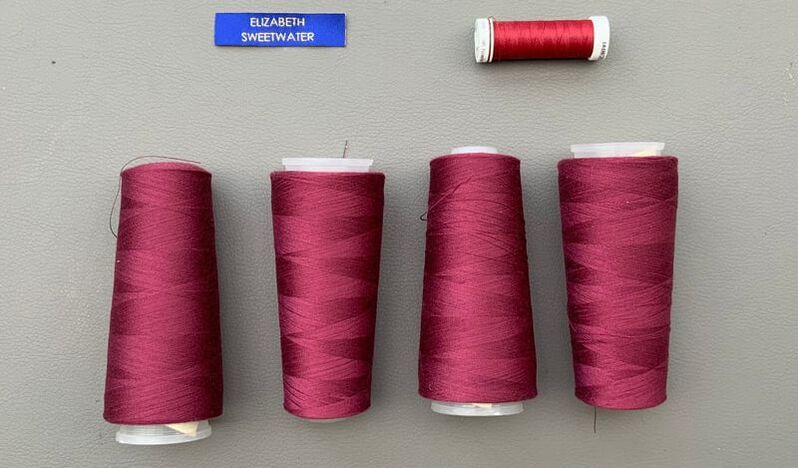
Fournituren alle variaties:
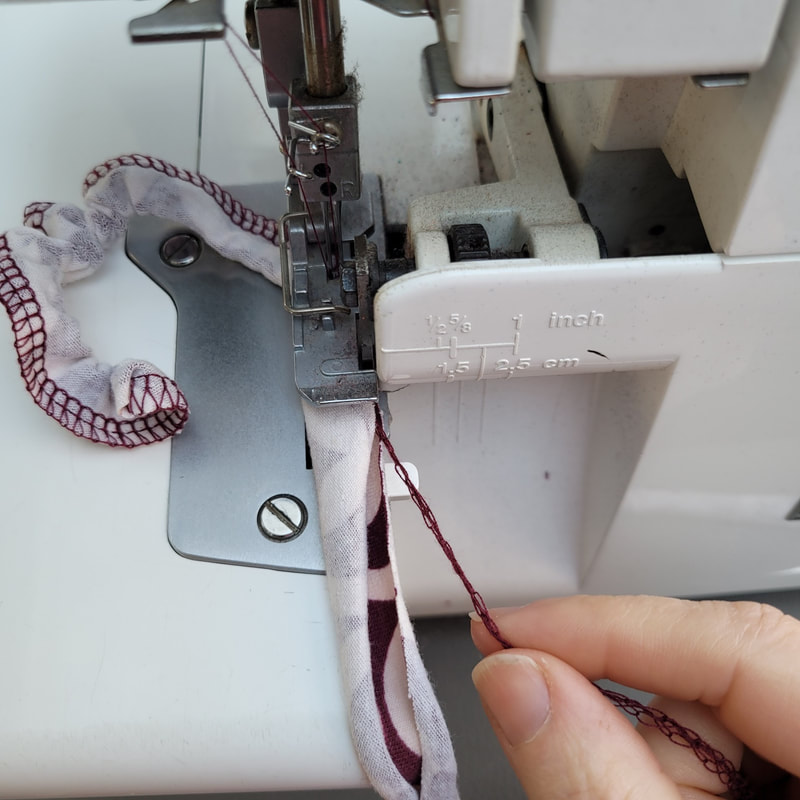
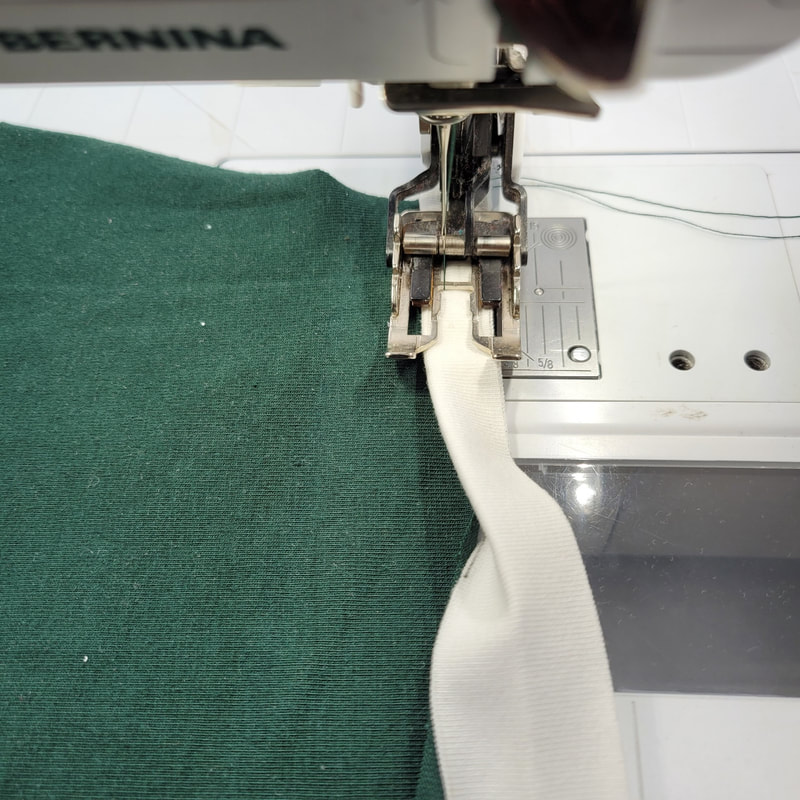
- Eventueel een geweven label. - Eventueel rekbaar stikgaren (seraflex van mettler bijvoorbeeld) of gewoon stikgaren, eventueel in meerdere kleuren voor het doorstikken van de colourblock naden. - Lockgaren. - Maak je een striklintje knip dan een strook van 3cm hoog over de gehele breedte van de stof. - Een pipingbies is 2,5cm hoog. Haberdasheries all variations: - Optionally a woven label. - Optionally stretch yarn(seraflex from mettler for example) or regular yarn, optionally in various colours for topstitching the colourblock seams. - Overlock yarn. - If you are making a ribbon, cut a 3cm high strip across the whole width of the fabric. - A piping band is 2.5 cm high.
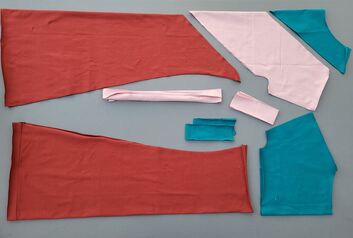
Patroondelen checklist/pattern checklist
Goed om te weten:
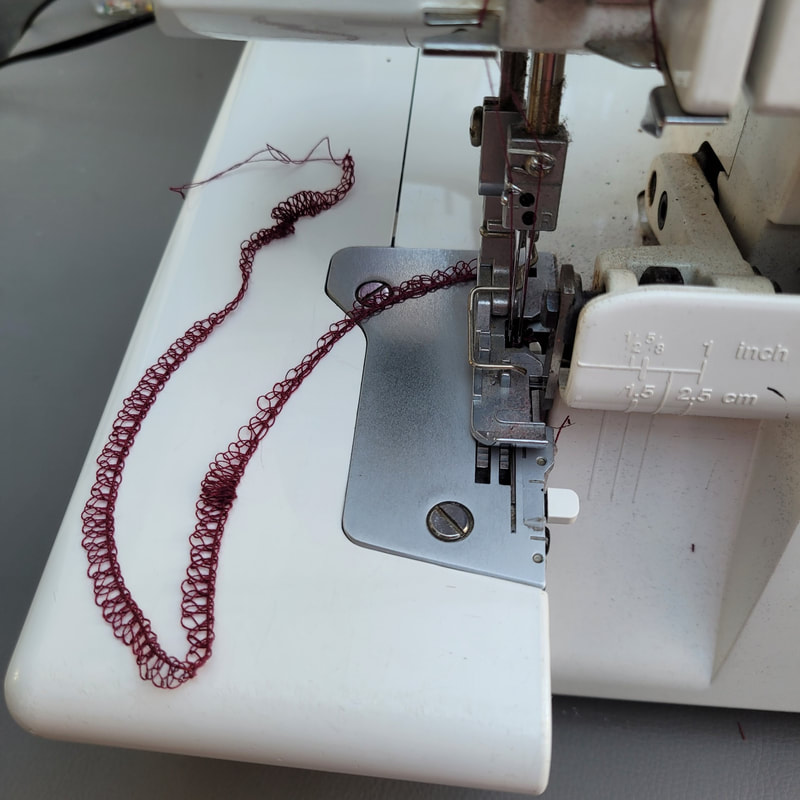
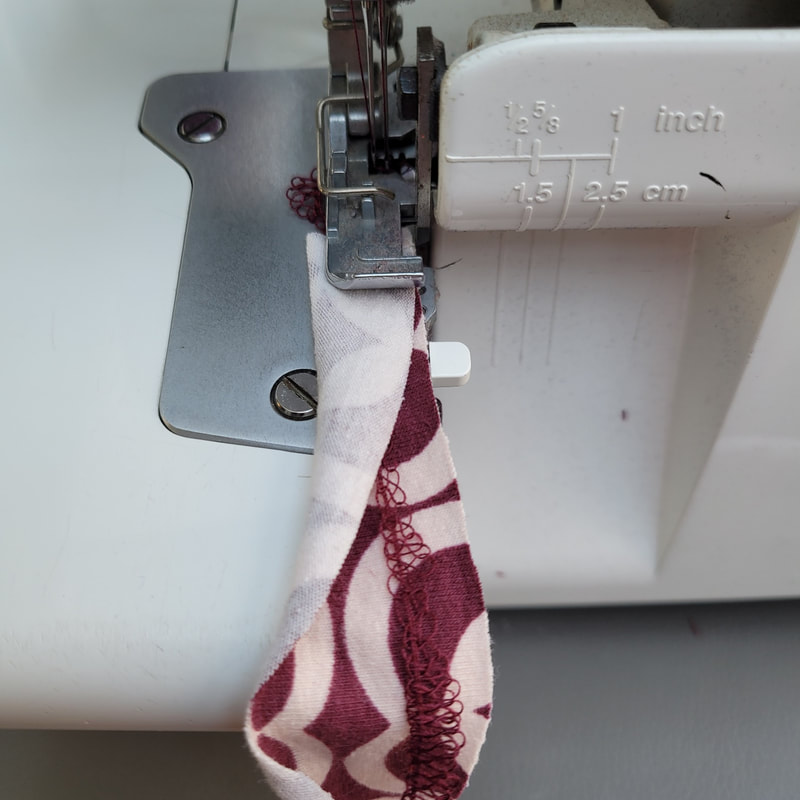
Ik ga in deze werkbeschrijving uit van het gebruik van een overlock machine. Mocht je daar niet over beschikken dan kun je een zig-zag steek gebruiken op een gewone naaimachine. Ik raad dan wel aan om er altijd een stretch stiksel naast te plaatsen. De naadtoeslag van de patronen is 1cm. Check wat de breedte instelling van je naad is op je lockmachine is. Is het 0,7cm dan kun je tijdens het stikken 3mm wegsnijden. De stretchnaden stik je met een stretchsteek instelling op de gewone naaimachine. Behalve een stretchsteek setting op je naaimachine kun je ook voor stretch garen kiezen, bijvoorbeeld seraflex van mettler. Zet de garen spanning in een zo laag mogelijke instelling als je werkt met stretch garen. De naden werk je af met een overlockmachine (of een zigzag steek op een reguliere machine). Good to know For this tutorial an overlock machine was being used for sewing most of the garment. However, it is possible to use a regular sewing machine and sew with a zigzag stitch. I do recommend sewing an extra stretch stitch next to it to create clean lines. The seam allowance of the patterns is 1cm. Check the seam width setting of your overlock machine. If it is 0.7cm you can cut away 3mm while sewing. The stretch seams can be sewn using the stretch setting on a regular sewing machine. Apart from using a stretchstitch setting on your sewing machine ypu can also choose stretch yarn (seraflex by Mettler). Adjust the tension to the lowest possible setting when using stretch yarn. Finish seams with an overlock machine or zigzag on a regular machine.
2.
Opmerkingen en algemene Aanpassingen Remarks and common Adjustments
Tip
Ik adviseer om eerst een proefmodel te maken voor je in een dure stof knipt. Onderstaand vind je wat aanpassingen die je kunt doen aan het jurk patroon. I recommend making a test model before cutting in expensive fabric. Underneath you'll find some adjustments you can make on the dress pattern.
2a.
Het aanpassen van taille Adjusting the waist
2a-5.
De onderkant wordt dan wijder, teken de onderkant haaks op de nieuwe zijnaad. The bottom will then become wider, draw the bottom perpendicular to the new side seam.
2b.
Comfort fit Comfort fit 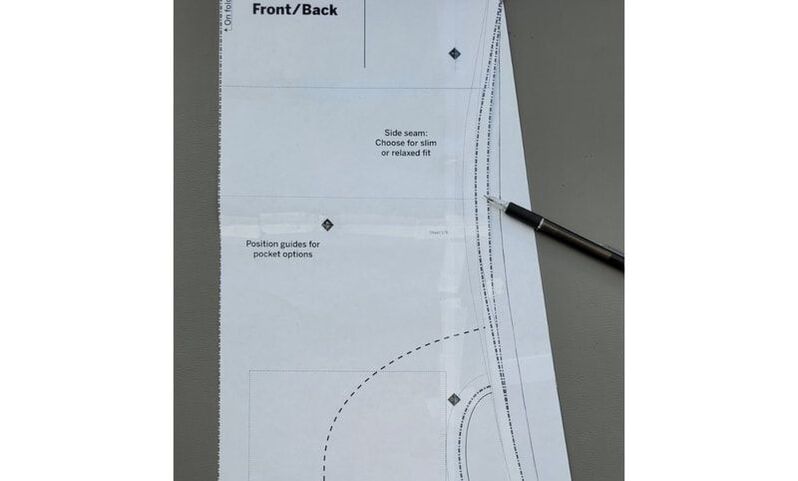
2b-1.
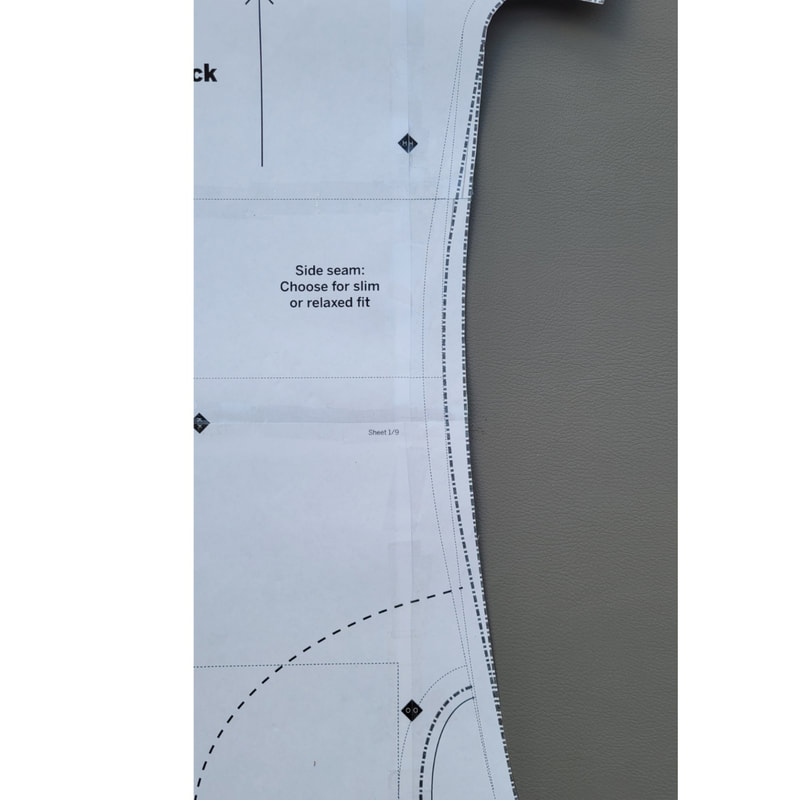
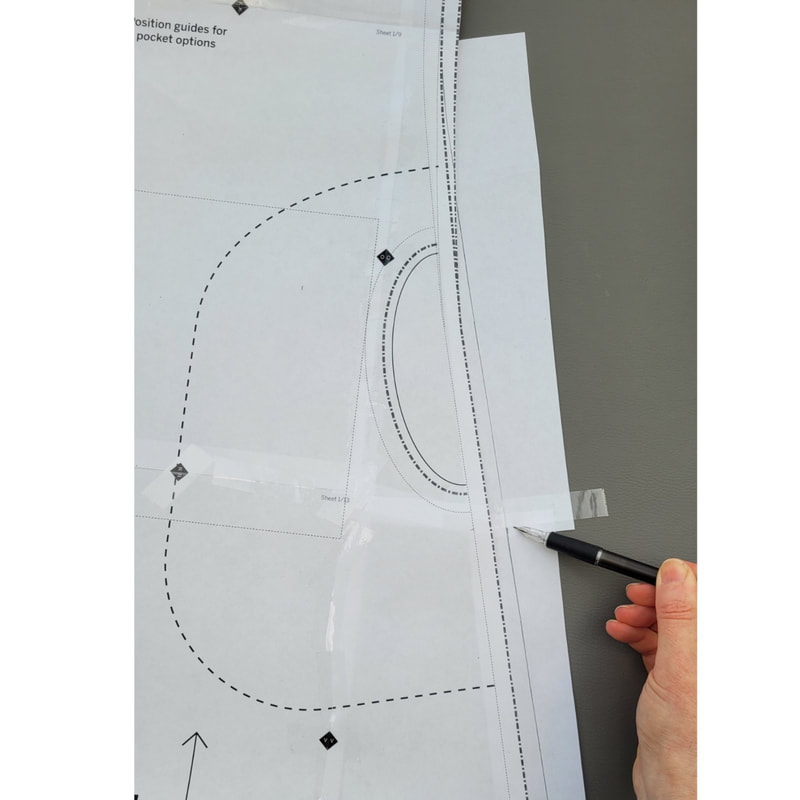
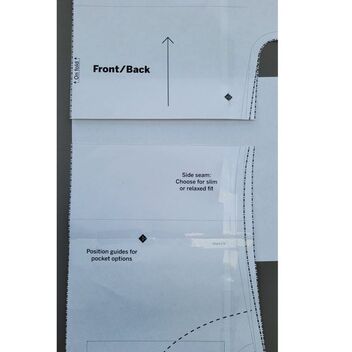
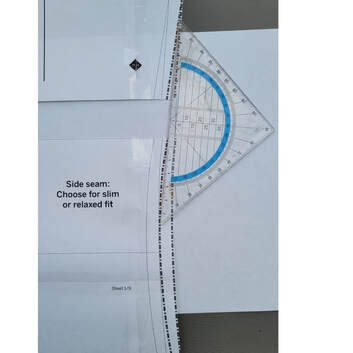
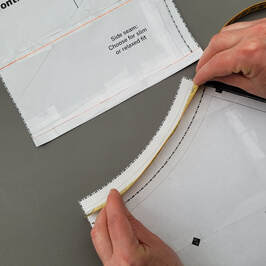
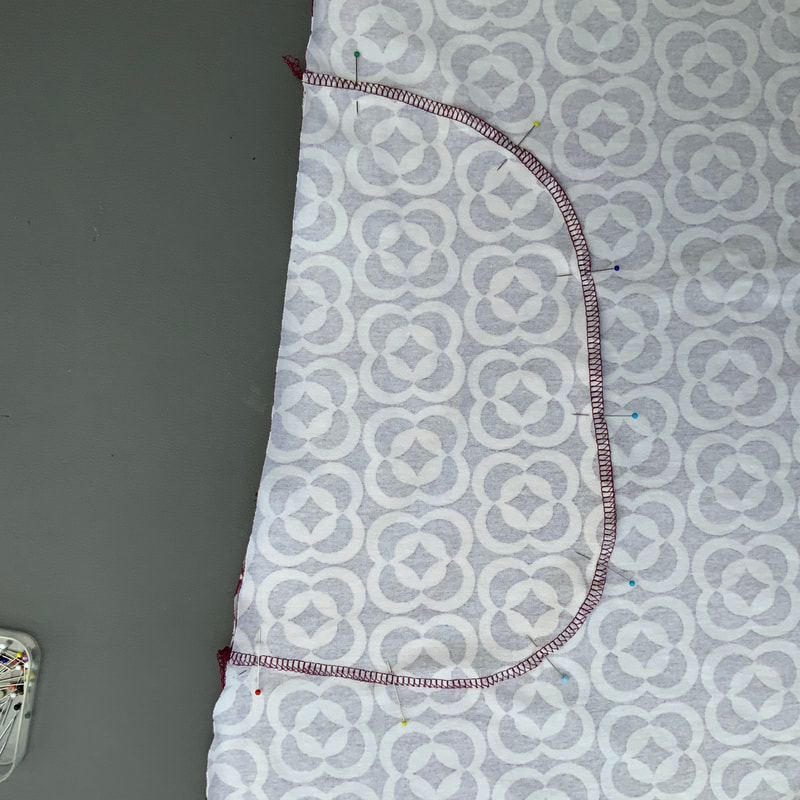
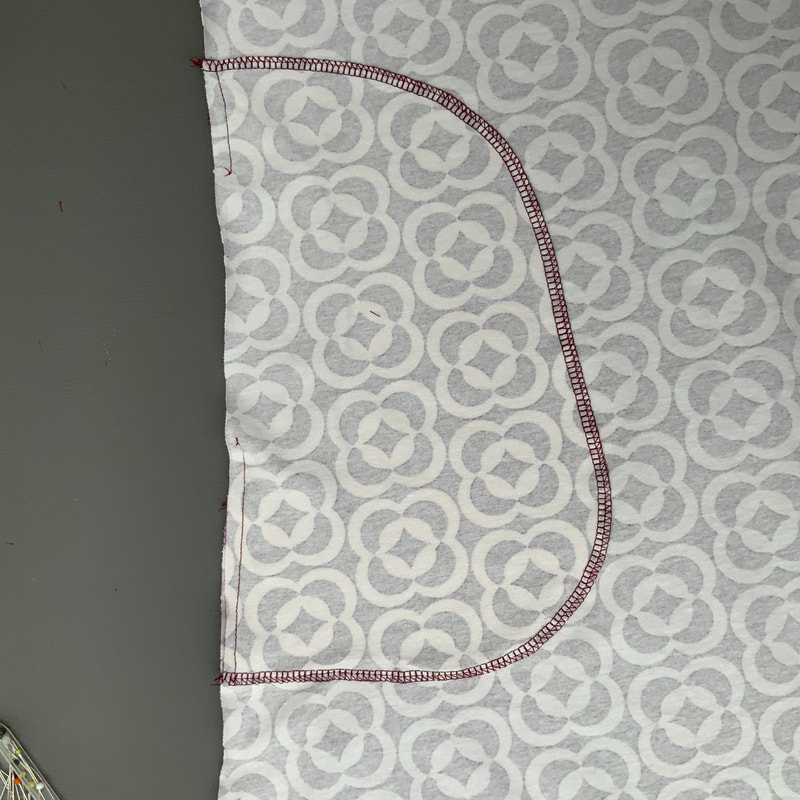
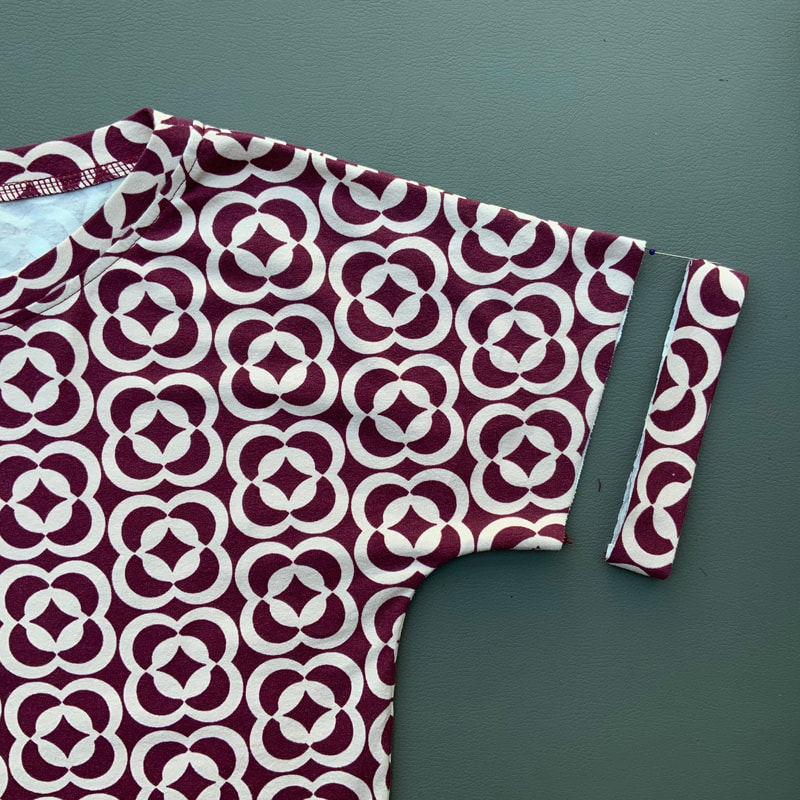
Comfort fit: Wil je dat de jurk wat losser om taille en buik zit, teken dan een cm aan bij de relaxed fit taille. Teken een nieuwe stukje zijnaad vanaf het punt waar de relaxed en regular fit samenkomen tot iets onder de zak (zie foto). Comfort fit: If you want the dress to be a bit looser around the waist and stomach, add an cm to the relaxed fit waist. Draw a new side seam from the point where the relaxed and regular fit meet to just below the pocket (see photo).
2c.
Jurk en mouwlengtes Dress and sleeve lengths 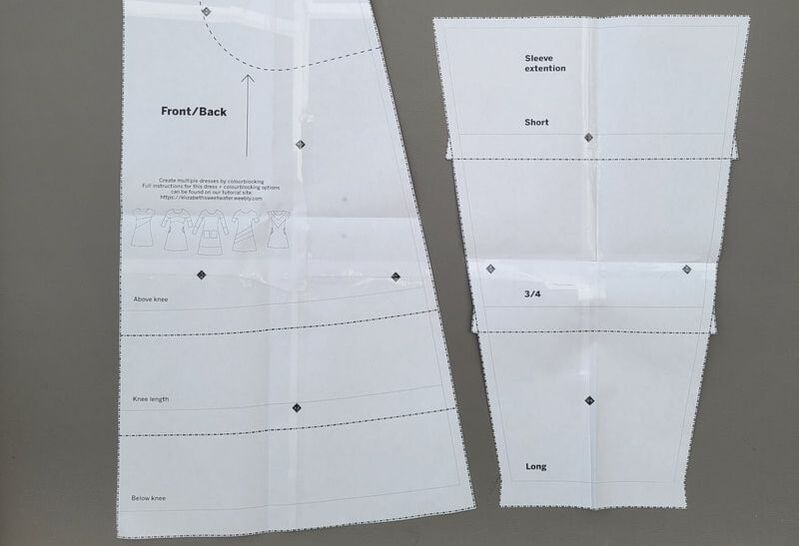
2c-1.
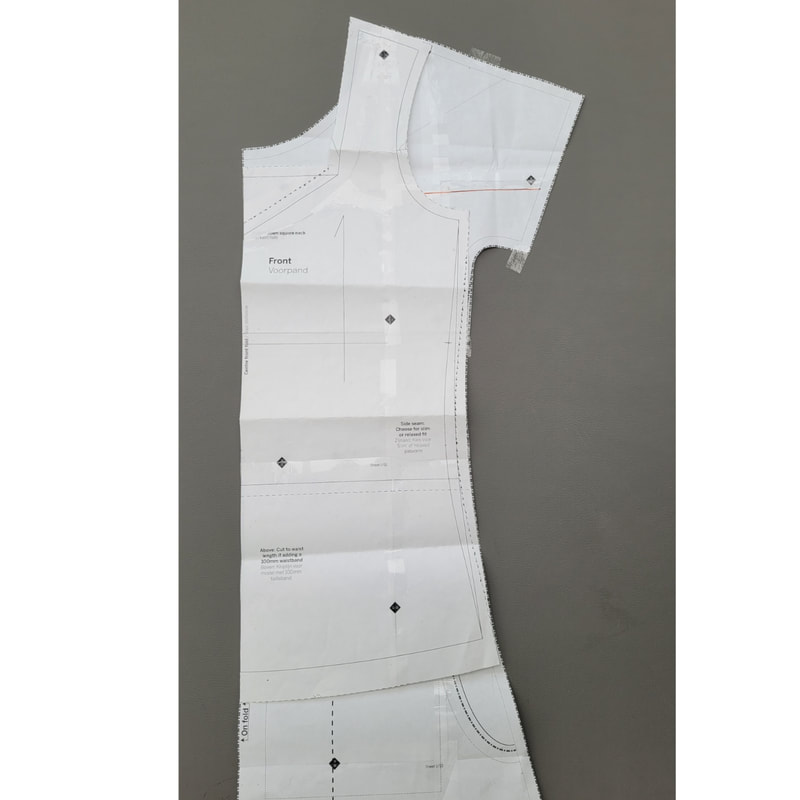
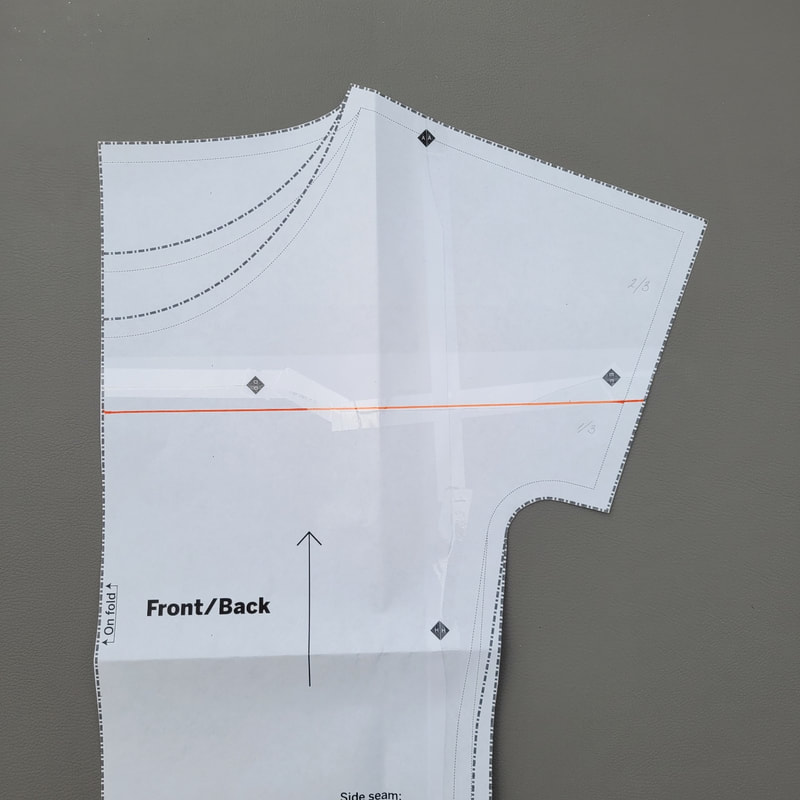
Jurk en mouwlengtes: Het patroon heeft drie verschillende roklengtes en drie verschillende mouwlengtes. Langs de lijnen kun je het patroon afknippen op de gewenste lengte. Je kunt de lijnen ook gebruiken voor een colourblock strepen effect. ! Hoe langer de jurk, hoe wijder deze wordt aan de onderkant. Indien wenselijk kun je dit aanpassen, zolang de zijnaad maar haaks op de onderkant staat. Dress and sleeve lengths: The pattern has three different skirt lengths and three different sleeve lengths. You can cut the pattern along the lines to the desired length. You can also use the lines for a color block stripes effect. ! The longer the dress, the wider the bottom becomes. If desired you can adjust this, as long as the sideseam is perpendicular to the bottom.
2d.
Verlengen van bovenlijf Lengthening the upper body
2e.
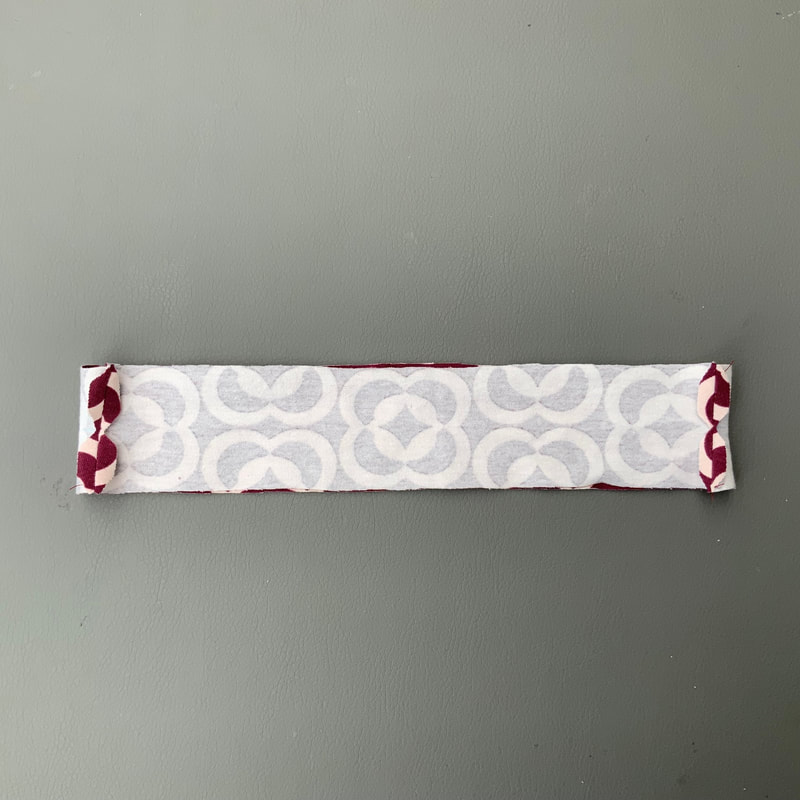
Patroondelen biezen aanpassen voor boordstof Adjust pattern pieces for cuff fabric 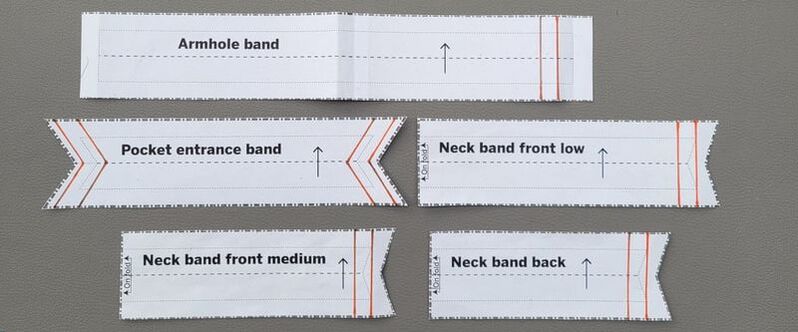
2e-1.
Patroondelen biezen aanpassen voor boordstof. Boordstof rekt meer dan tricot dus bij gebruik van boordstof dienen de boordjes iets korter geknipt worden. * armsgat bies - 2cm * zakbies aan beide kanten - 0,5 * halsbies achter maak de zijkant recht -0,5 vanaf het smalste punt. * halsbies voor maak de zijkant recht -0,5 vanaf het smalste punt. (Je kunt ook halsbies achter en voor aan elkaar leggen waarbij je de naadtoeslag laat overlappen. Je hebt dan 1 schoudernaadje). Adjust pattern pieces for cuff fabric. Cuff fabric stretches more than jersey, so when using cuff fabric, the bands should be cut slightly shorter. * armhole bands - 2cm * pocket bands on both sides - 0.5 * neckband back straighten the side -0.5 from the narrowest point. * neckband front straighten the side -0.5 from the narrowest point. (You can also attach neckbands together at the back and front, overlapping the seam allowance. You then have 1 shoulder seam).
2f.
Het combineren van classic tee (t-shirt) patronen met de easy t-shirt dress Combining classic tee (t-shirt) patterns with the easy t-shirt dress
2f-1.
Om van een easy tee patroon een jurk te maken leg je het tshirt patroon simpelweg op het jurk patroon met de middenvoor en schouders op elkaar. Vouw dan het deel van de jurk en/of onderkant tshirt weg wat je niet nodig hebt. Neem het geheel eventueel nog over op patroonpapier. To make a dress from an easy tee pattern, simply place the tshirt pattern on top of the dress pattern with center front and shoulders on top of each other. Then fold away the part of the dress and/or bottom of the tshirt that you don't need. Transfer to pattern paper if desired.
2g.
Een wijde rok combineren met het easy tee jurk patroon Combining a wide skirt with the easy tee dress pattern
3.
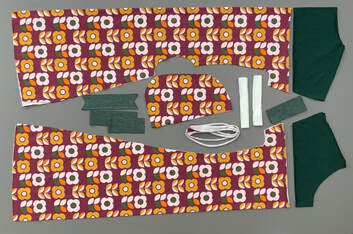
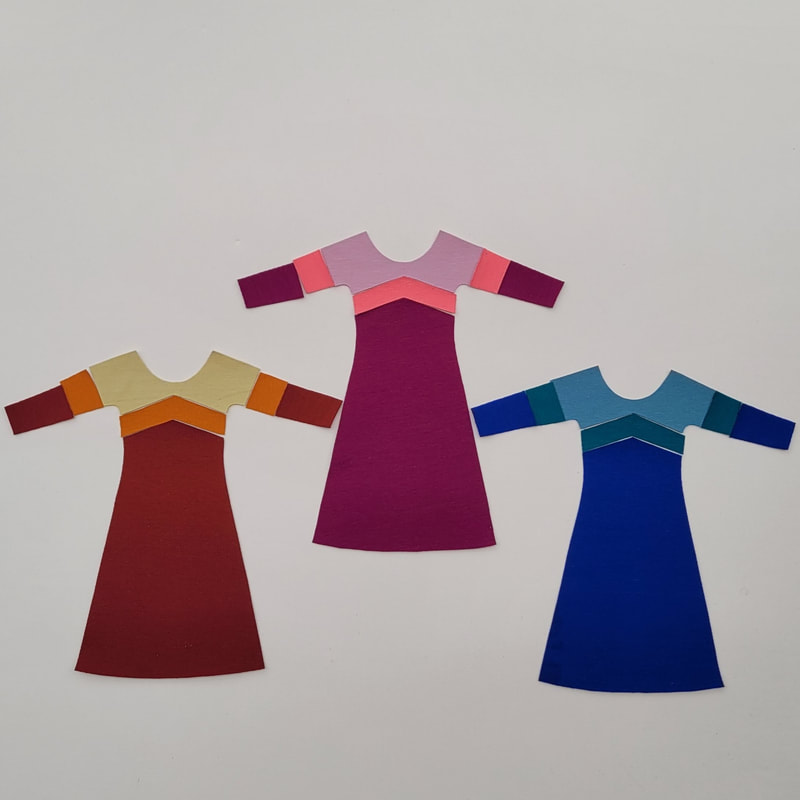
Model A en D Model A en D
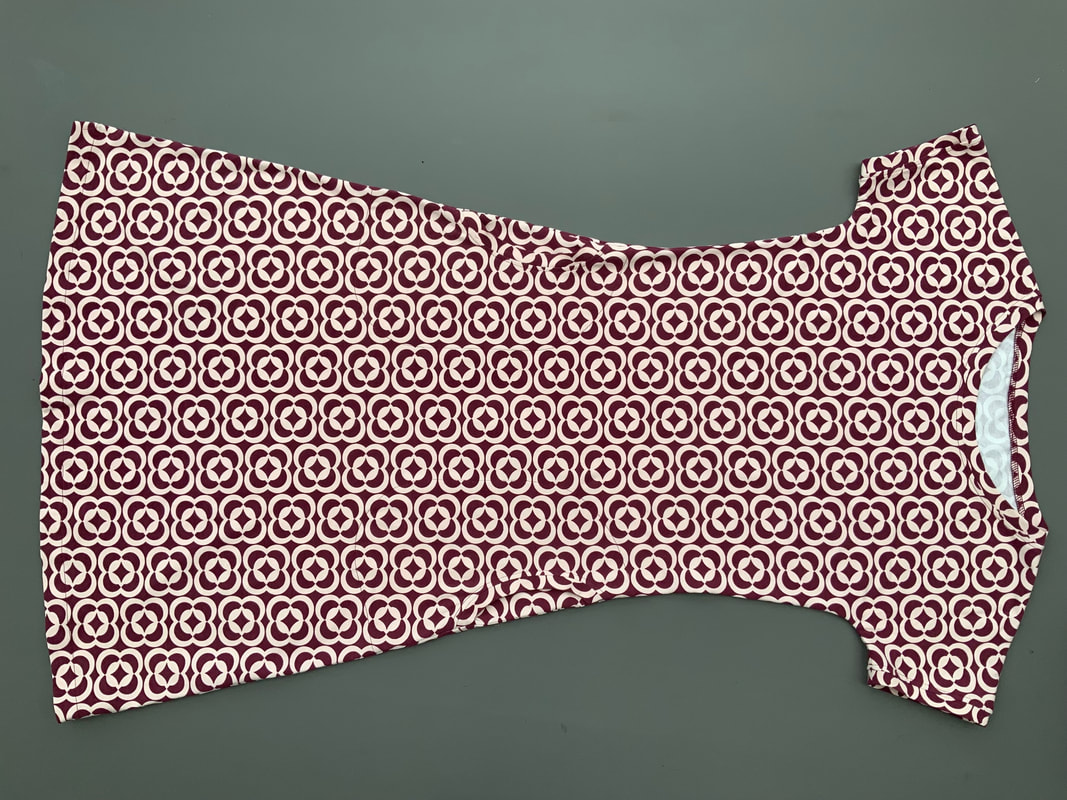
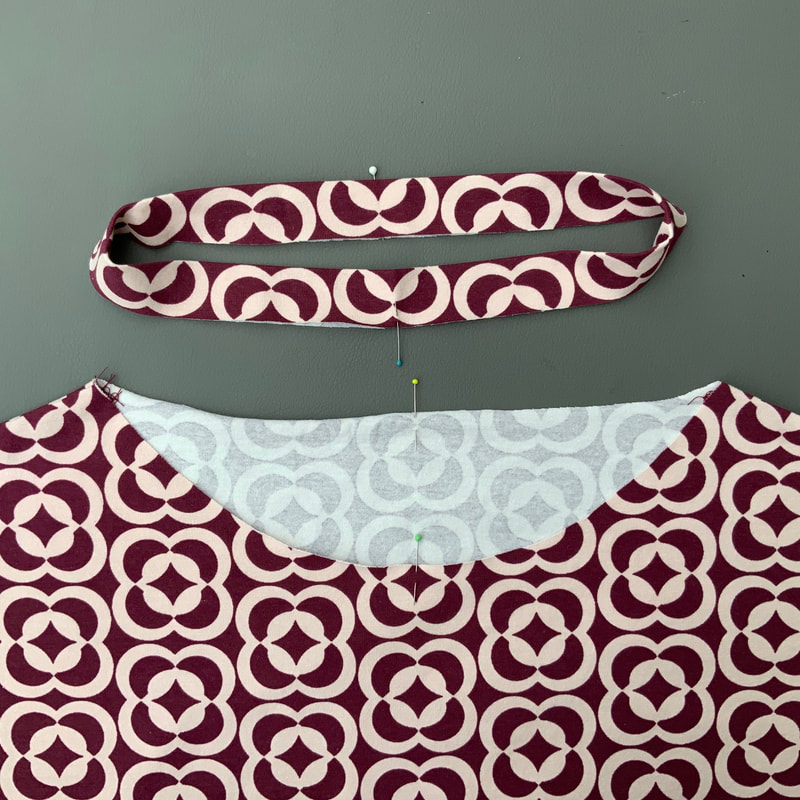
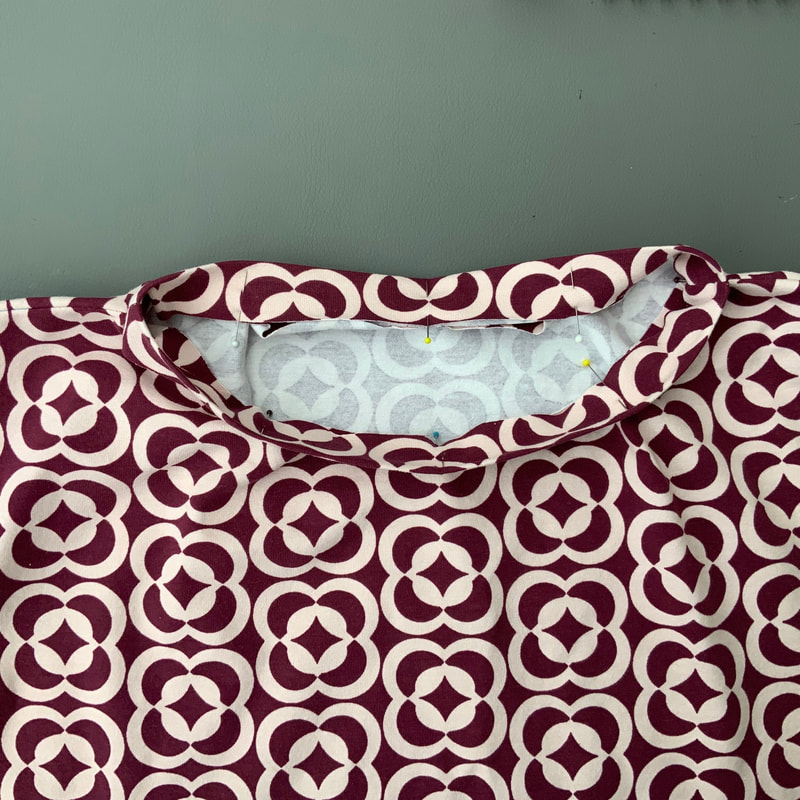
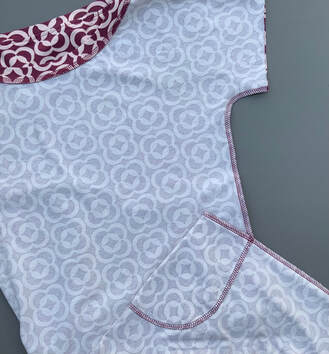
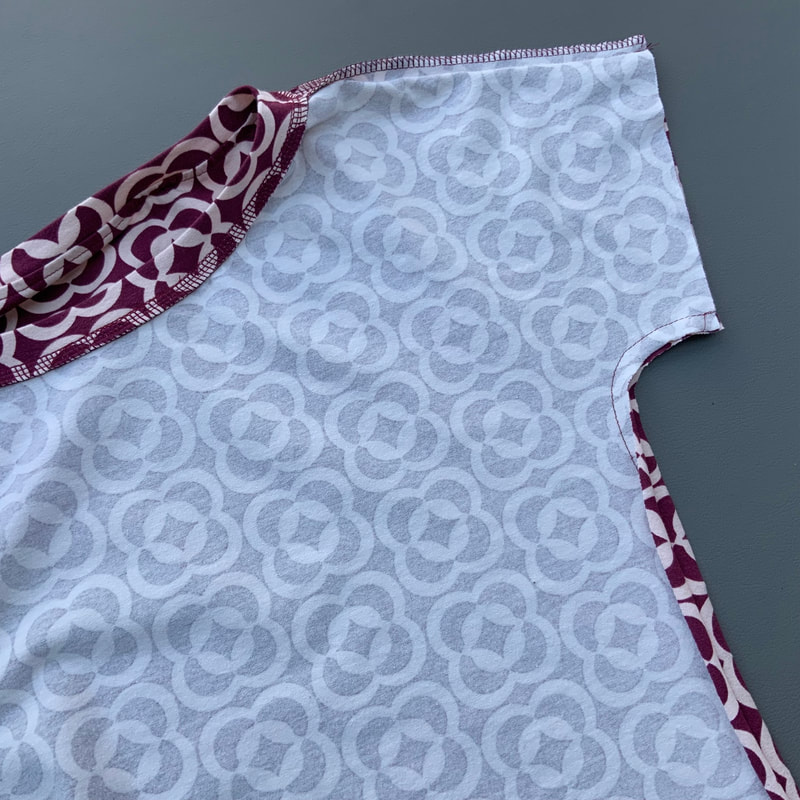
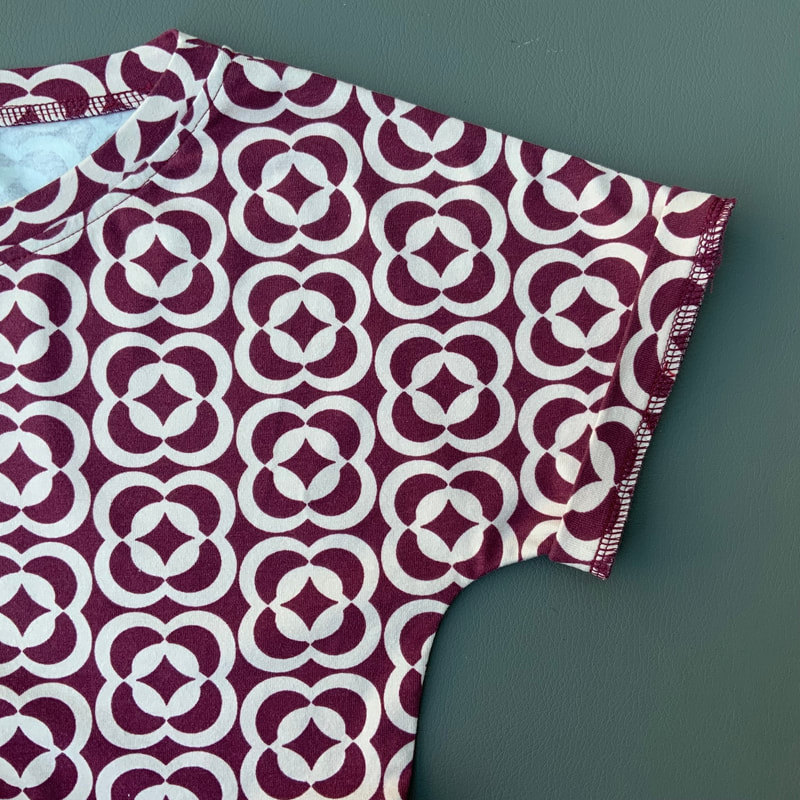
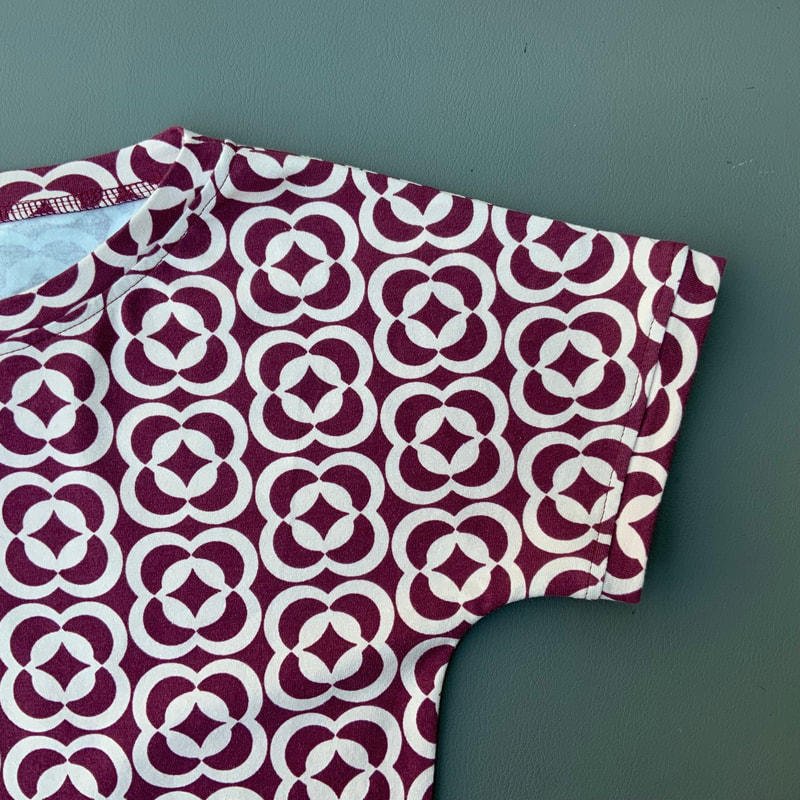
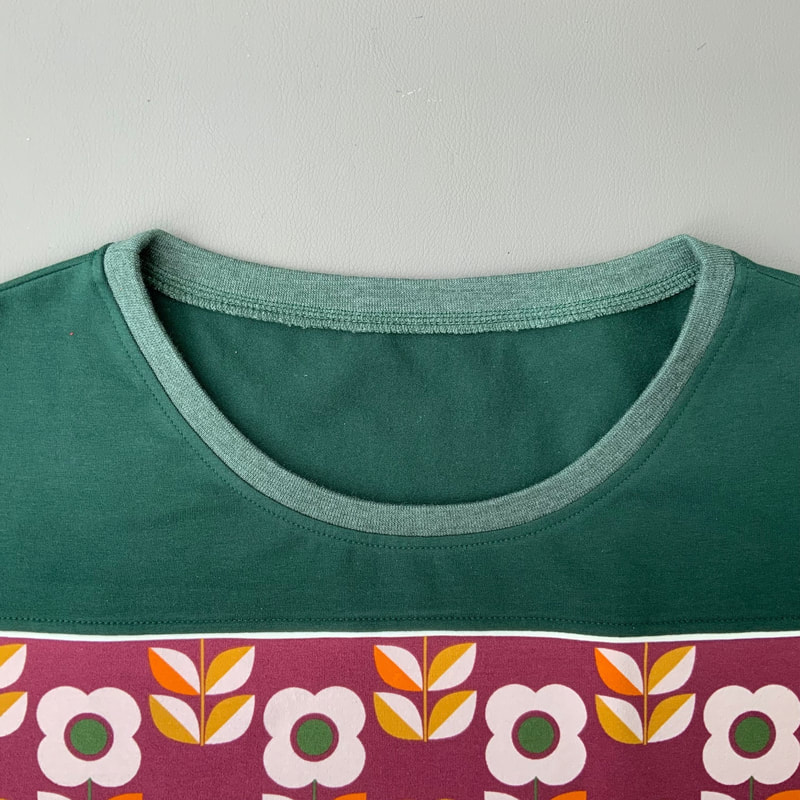
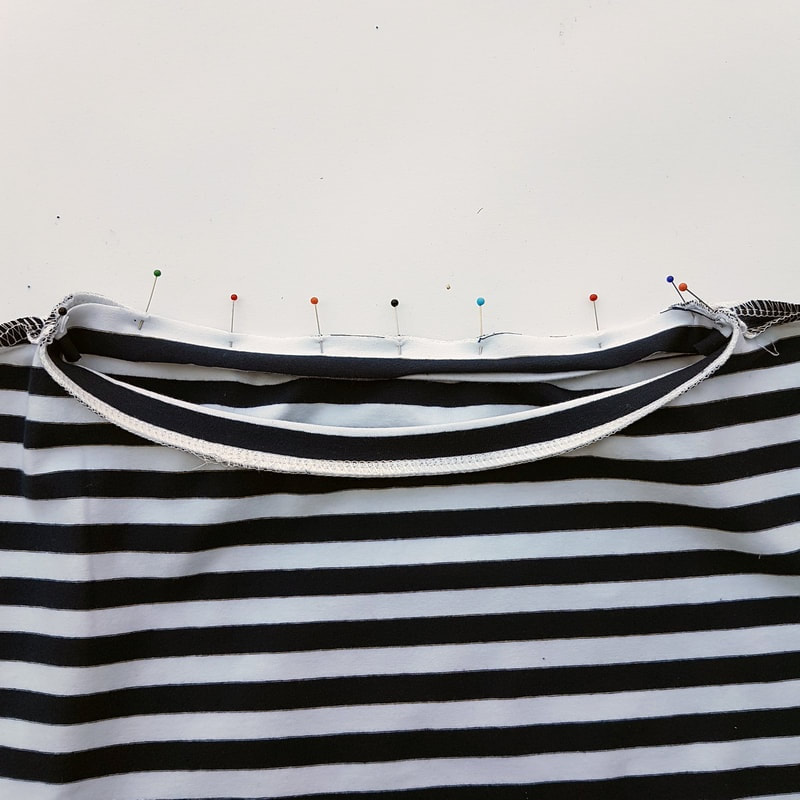
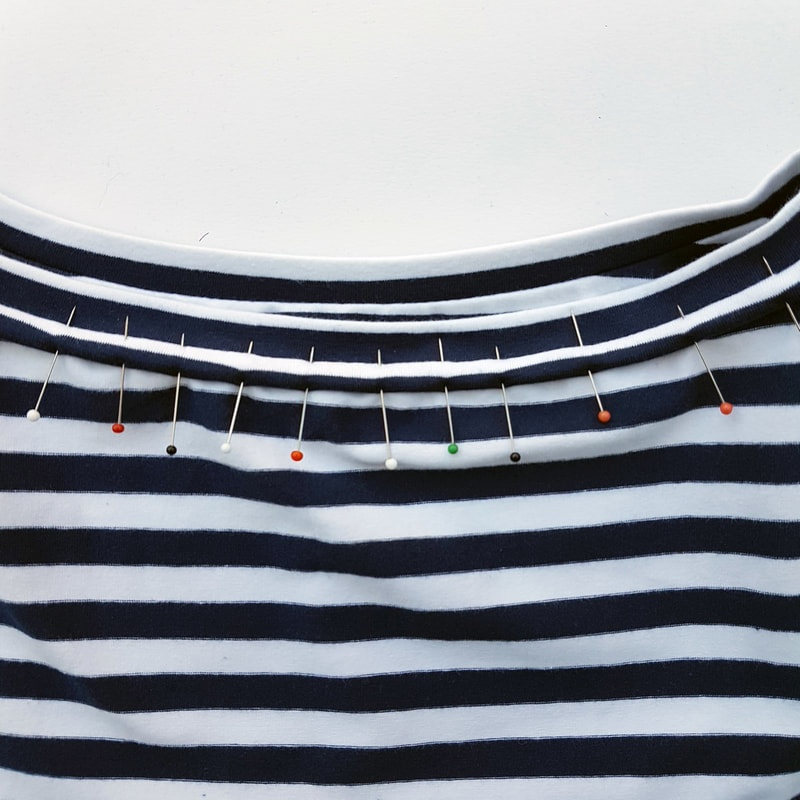
Deze versie heeft een hoge halsuitsnijding met biezen langs mouwen, hals en zakken.
This version has a high neckline with piping along the sleeves, neckline and pockets.
4.
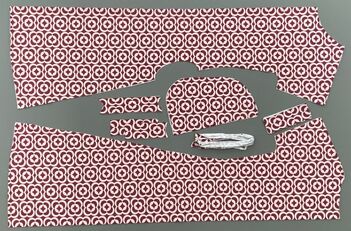
Model B Model B
Deze versie heeft een diepe halsuitsnijding, biezen gemaakt van boordstof en een pasje voor en achter. Hoe je de pas intekent op het patroon lees je in stap 6a-1 en hoe je de biesjes aanpast voor boordstof vind je in stap 2-e.
This version has a deep neckline, bands made of cuff fabric and a yoke at the front and back. You can read how to draw the yoke on the pattern in step 6a-1 and how to adjust the piping for cuff fabric in step 2-e.
4.
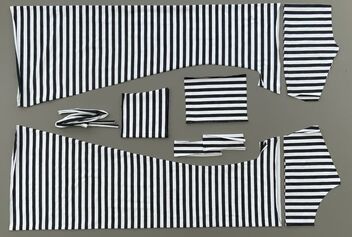
Model C Model C
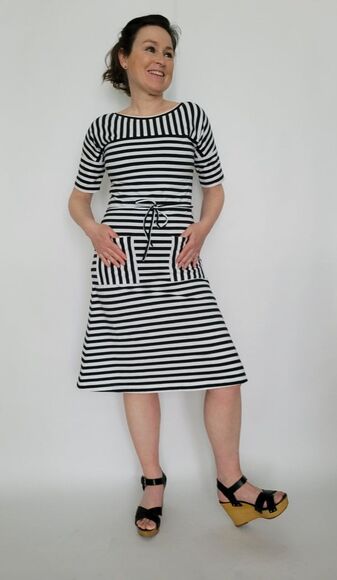
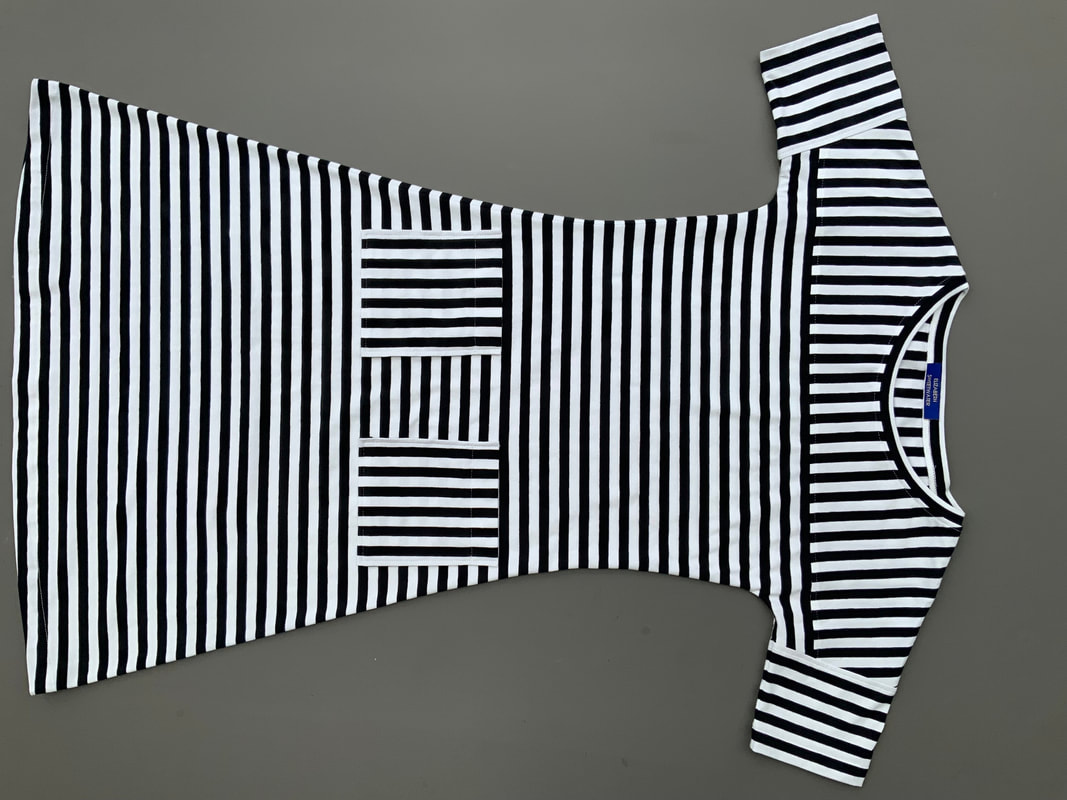
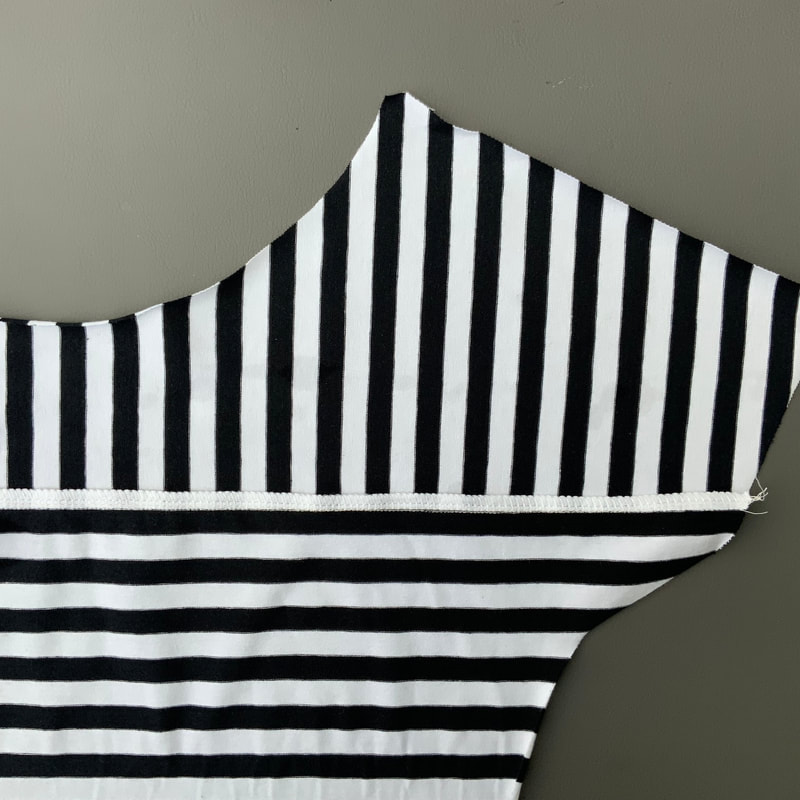
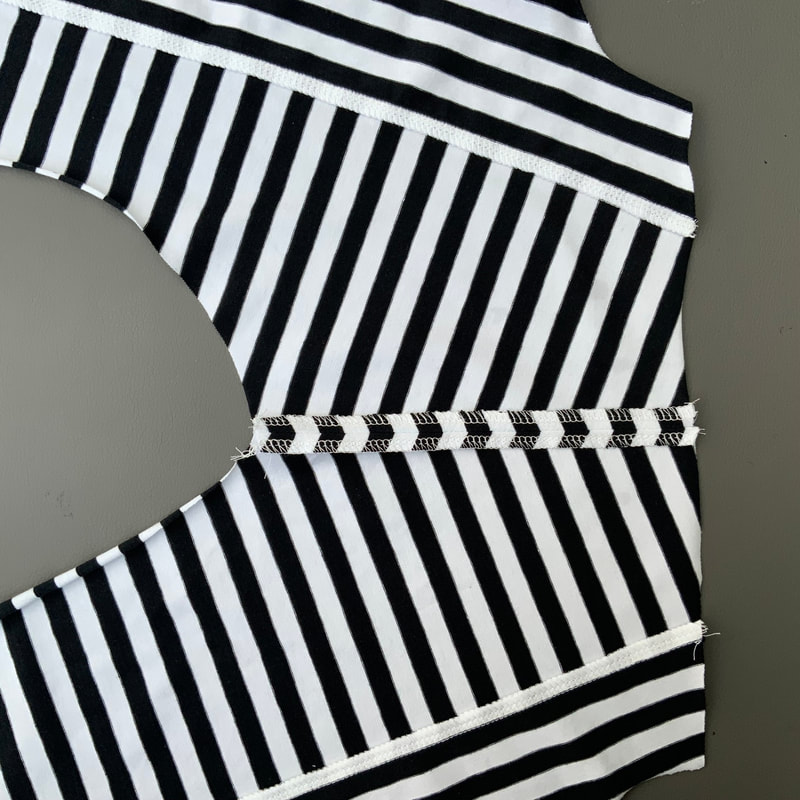
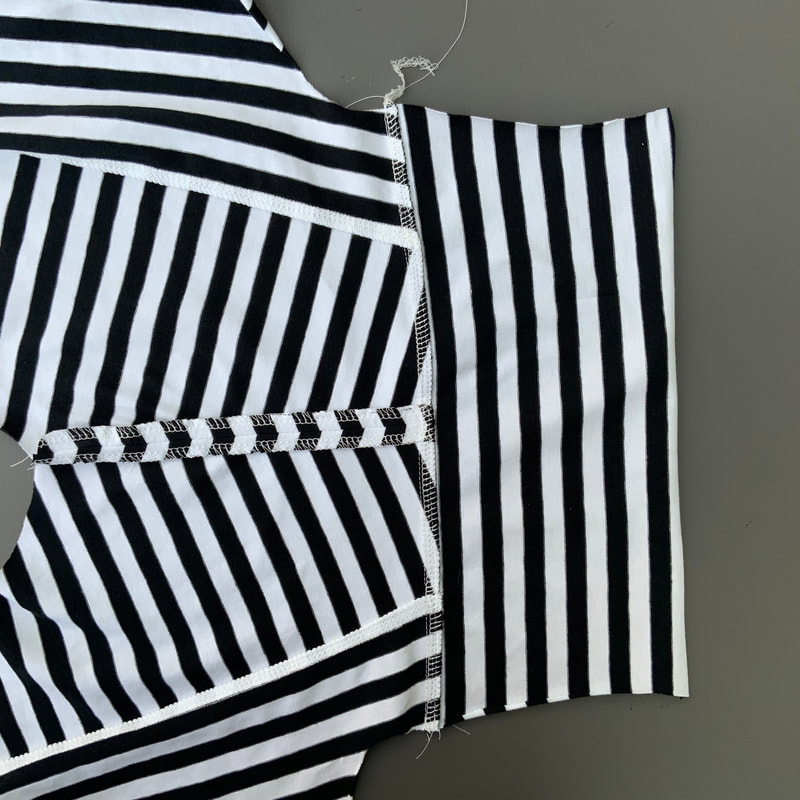
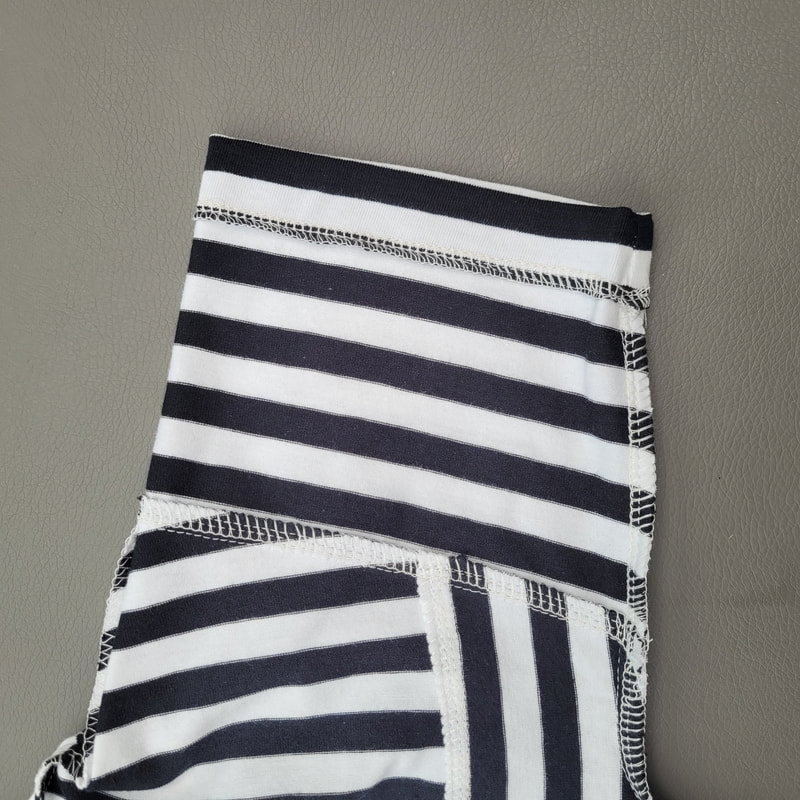
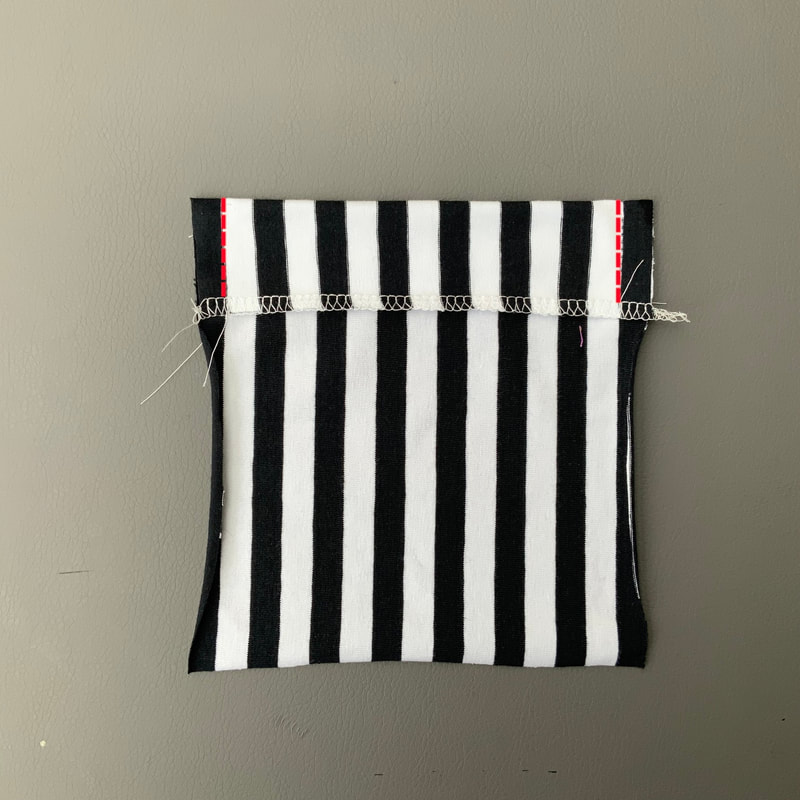
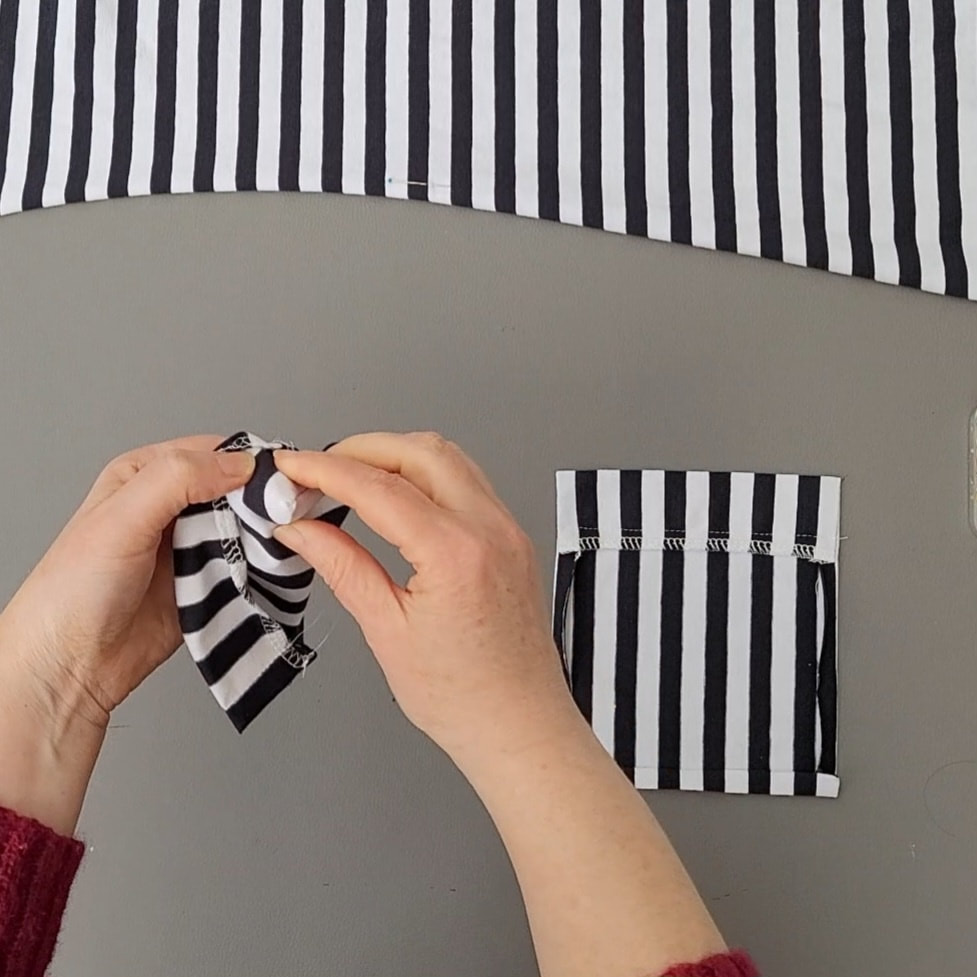
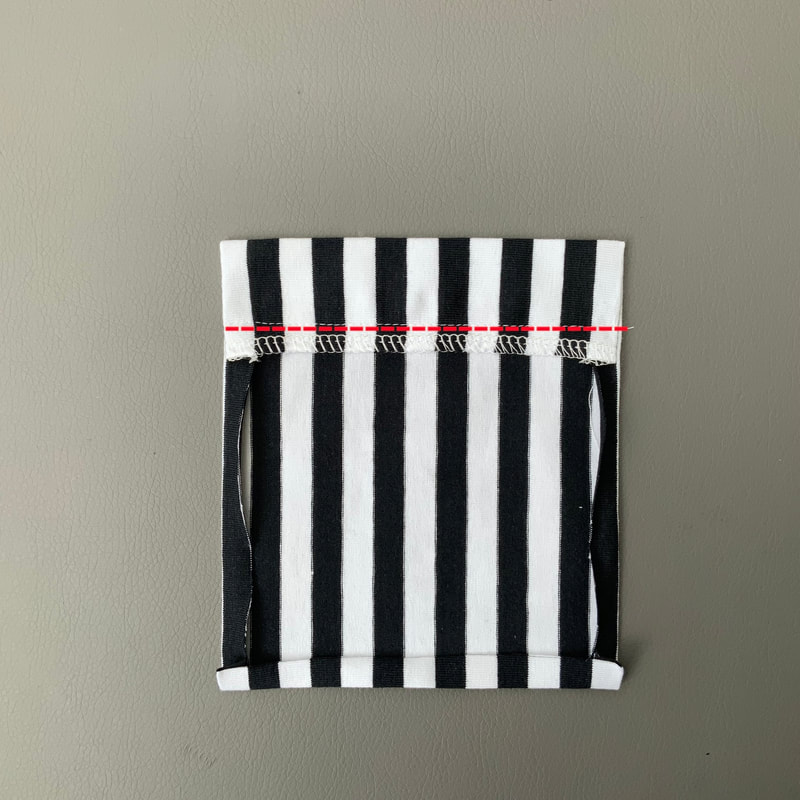
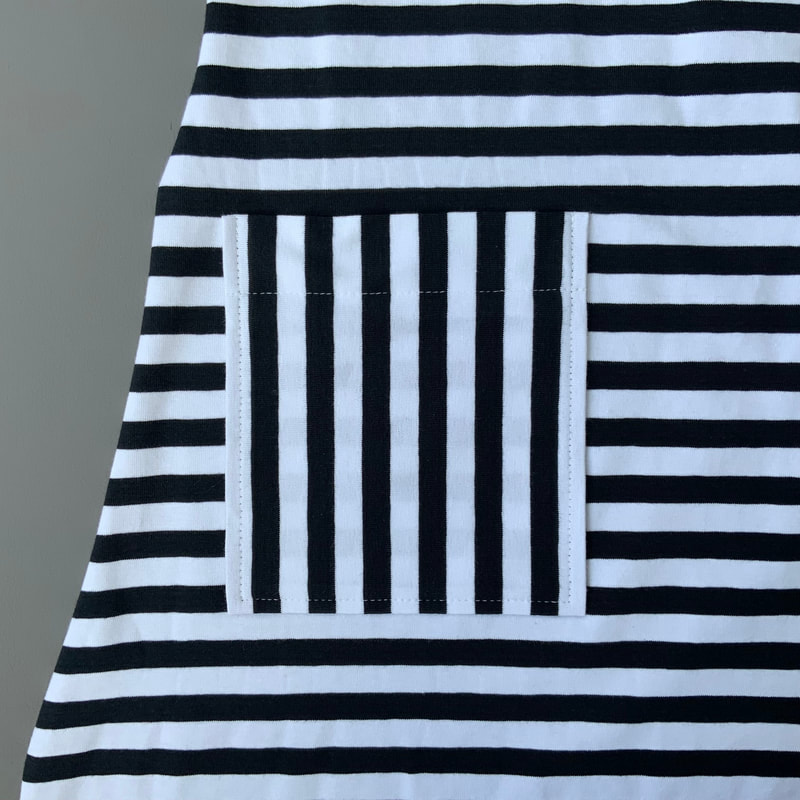
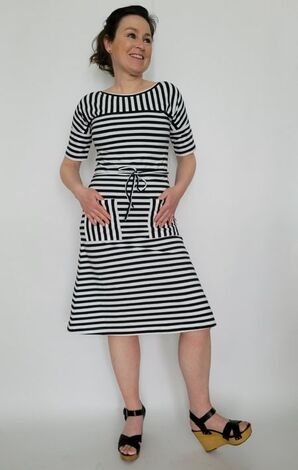
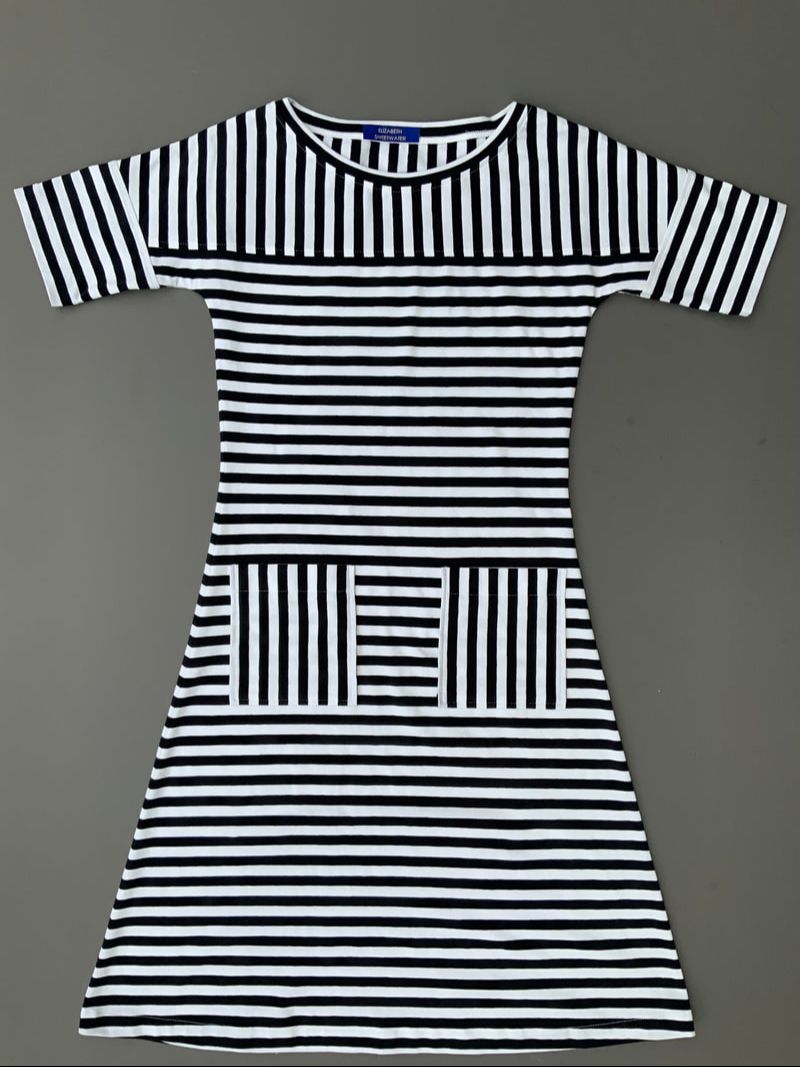
Versie gemaakt van een single jersey streeptricot. Deze is verwerkt in verschillende richtingen. Het heeft de ondiepe hals, mouwtjes en opgestikte zakken. Uiteraard kun je deze ook maken in (een) uni kleur(en) of print.
Version made from a striped single jersey. The stripes are cut in different directions. It has the medium neckline, sleeves and patch pockets. Of course you can also make these in (a) plain color(s) or print.
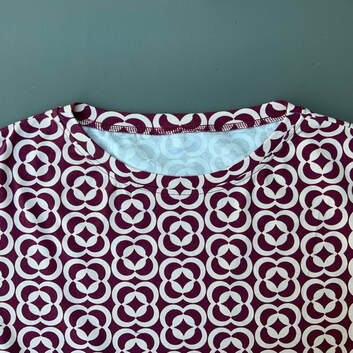
5i.
En er is er weer eentje klaar! Another dress finished!
6.
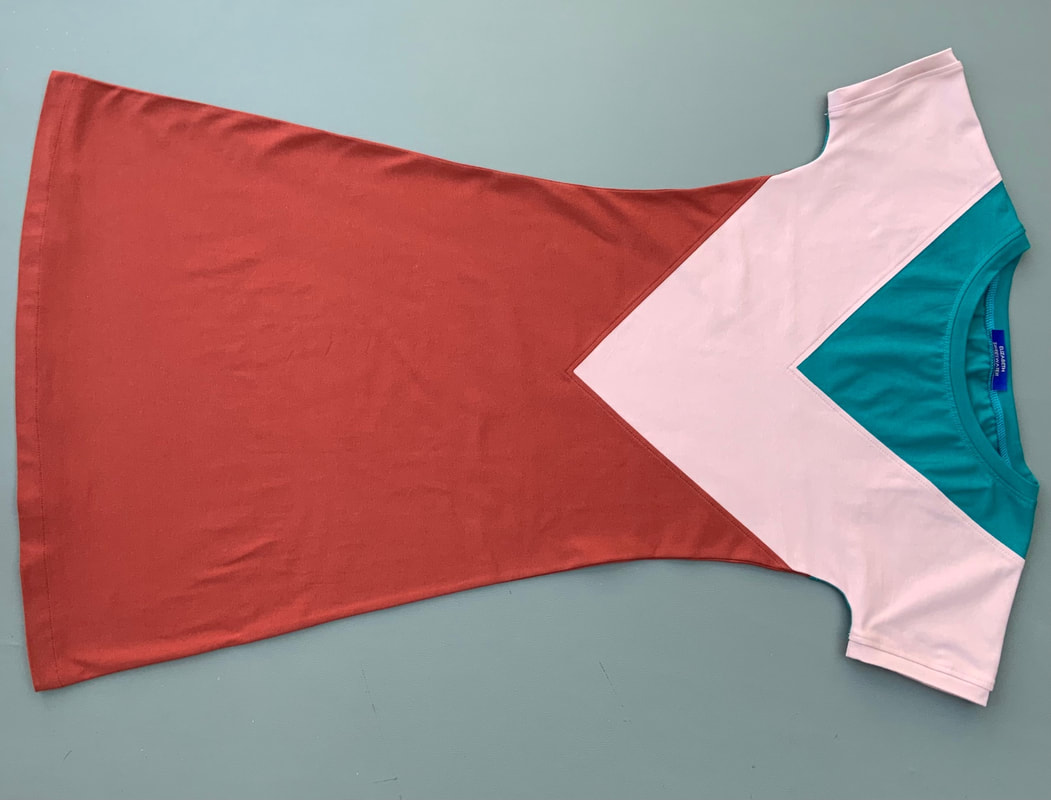
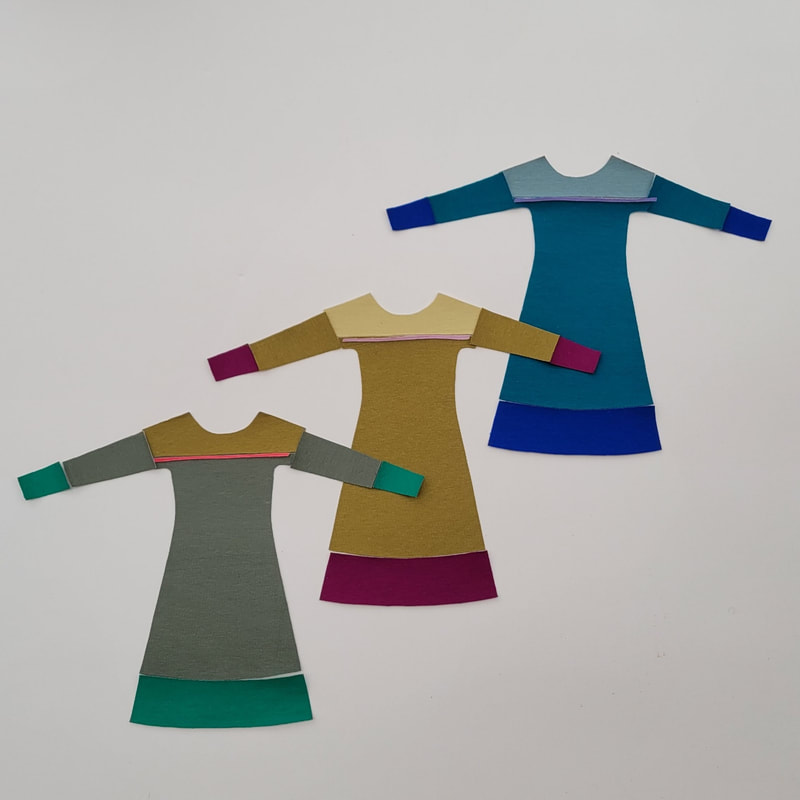
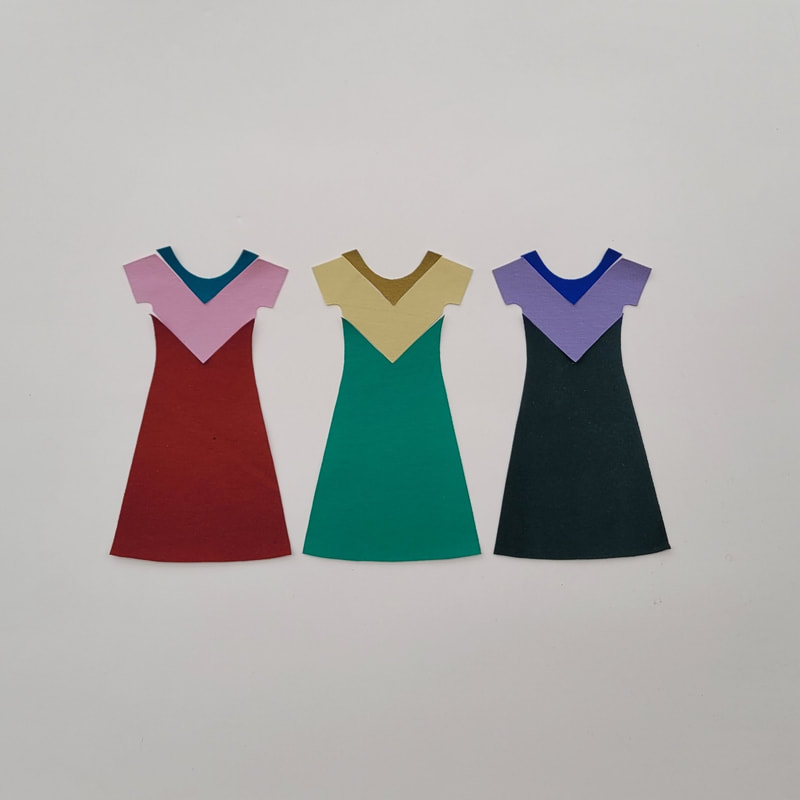
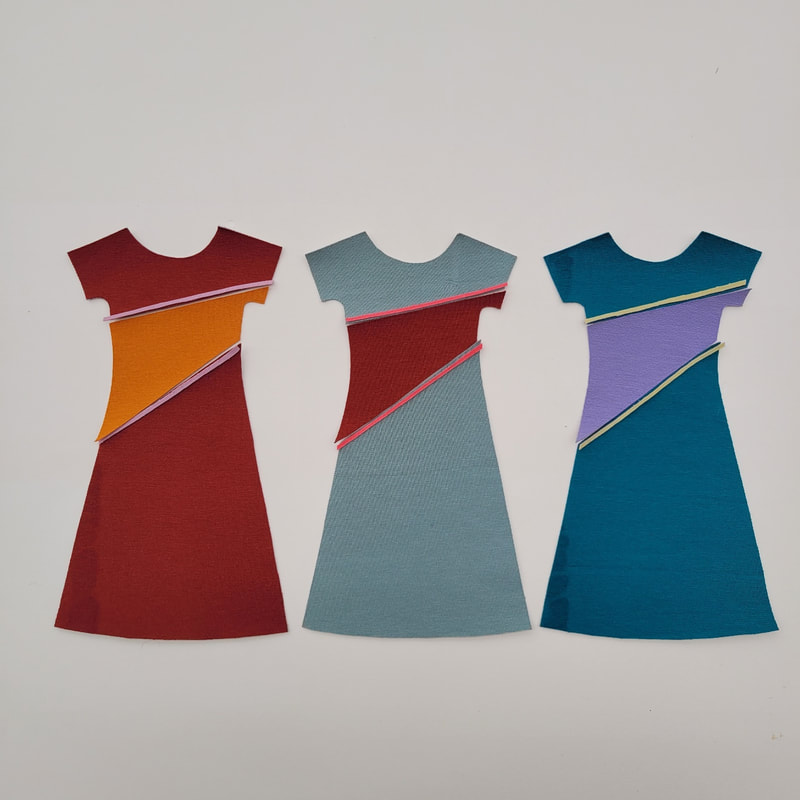
Model D en diverse colourblock opties Style D and various colourblock options 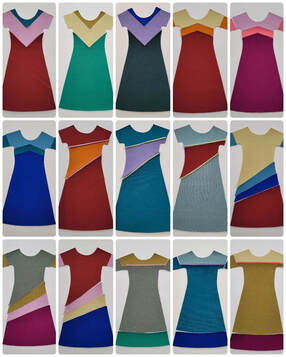
6.
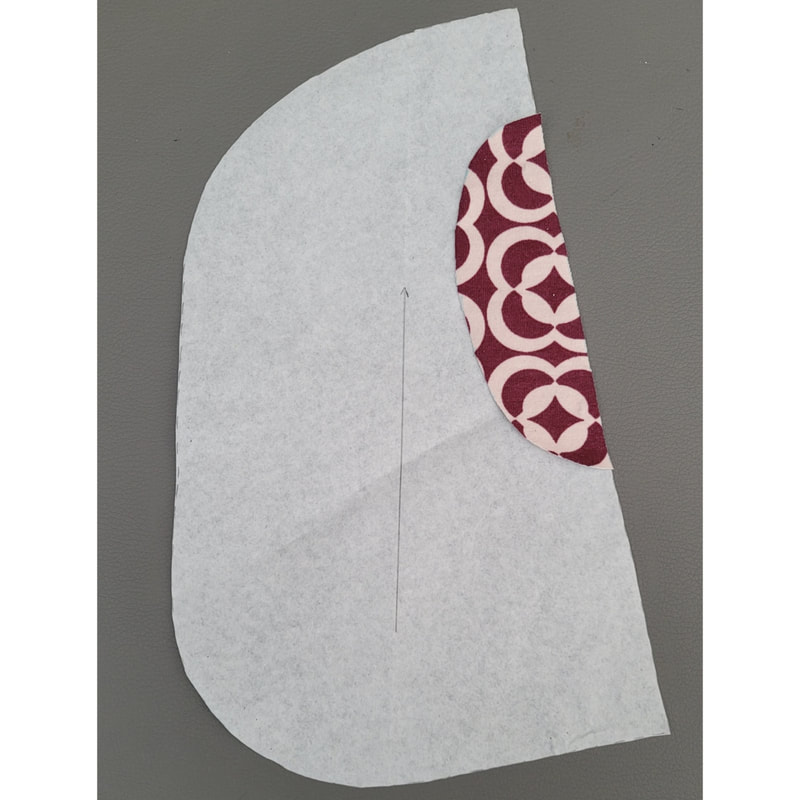
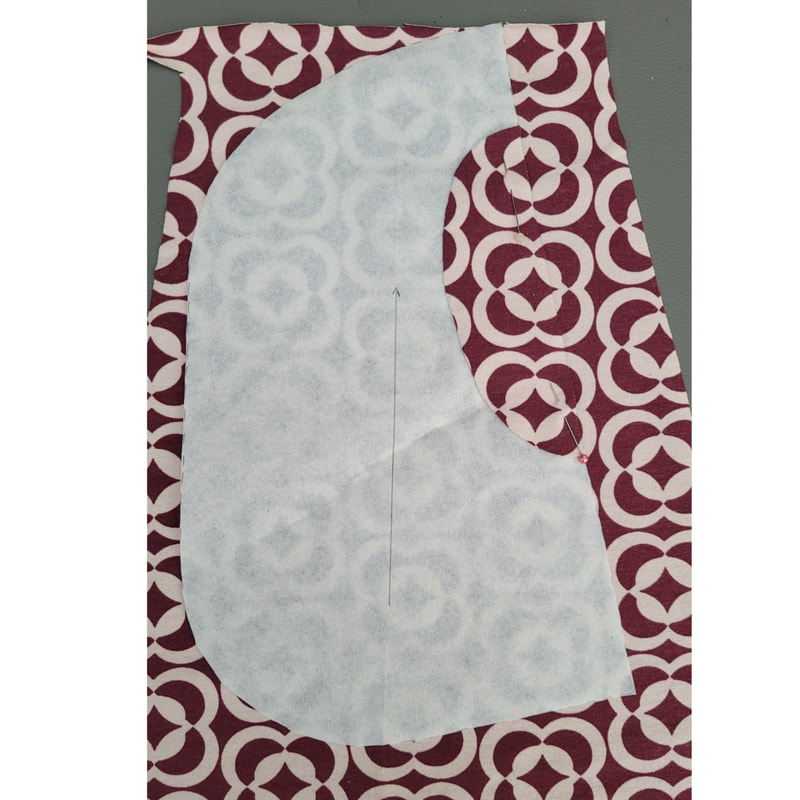
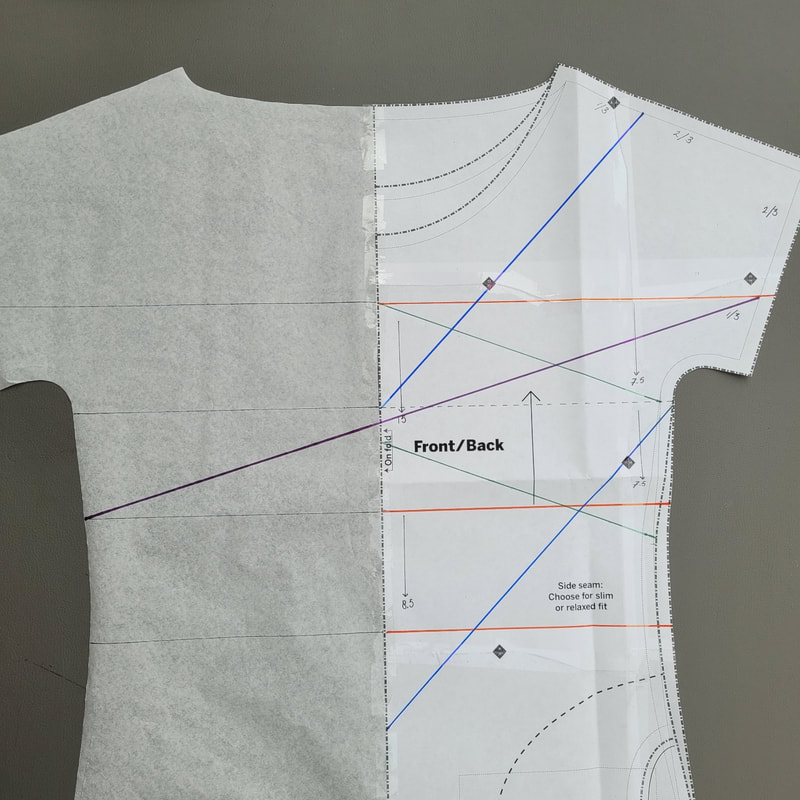
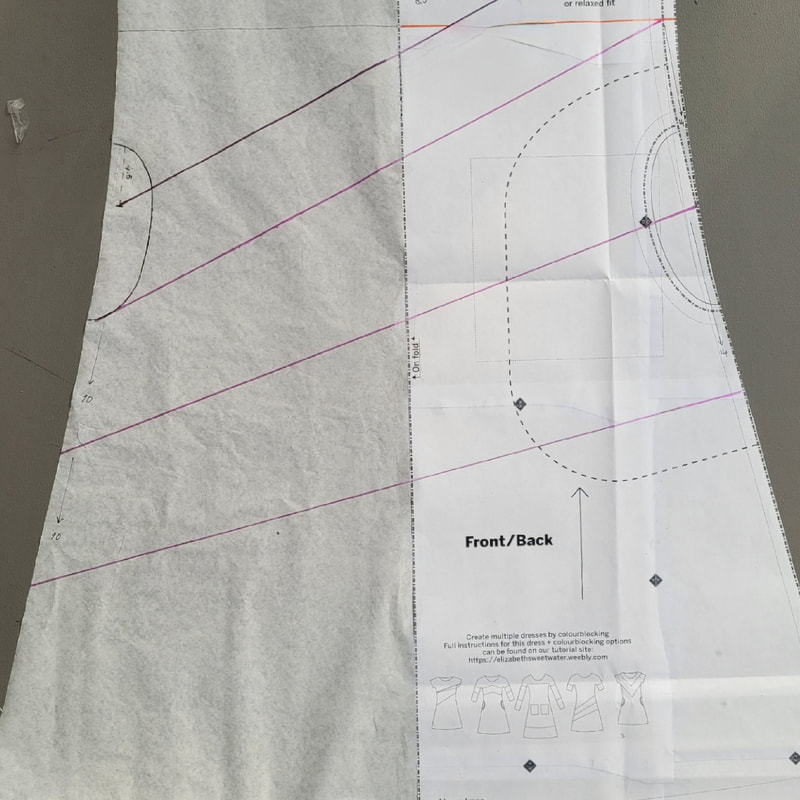
Omdat er geen coupnaden of belijning inzitten is de easy tee jurk perfect voor colour blocking. In dit hoofdstuk vind je diverse colourblock variaties en hoe je deze intekent op het patroon. Tevens krijg je uitleg over de werkvolgorde en het inzetten van de V-vorm van model d. Because there are no seams or darts in this pattern, the easy tee dress is perfect for colourblocking. In this chapter you will find various colourblock variations and how to draw them onto the pattern. Here you will also find the method of the inserting the V- shape of style d.
6a.
Horizontale colourblock variatie 1 Horizontal colourblock variation 1
6a-2.
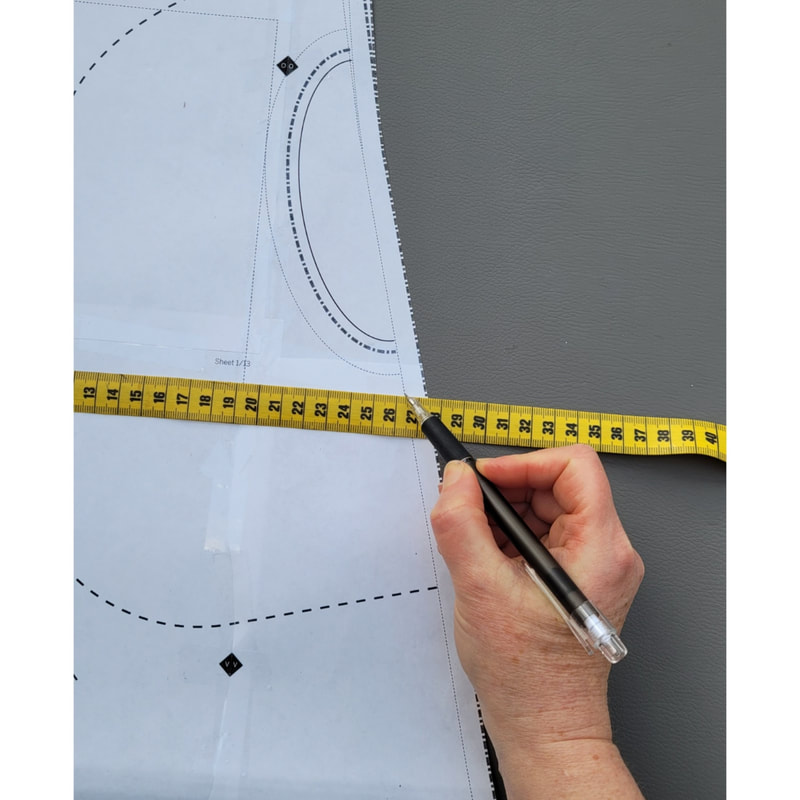
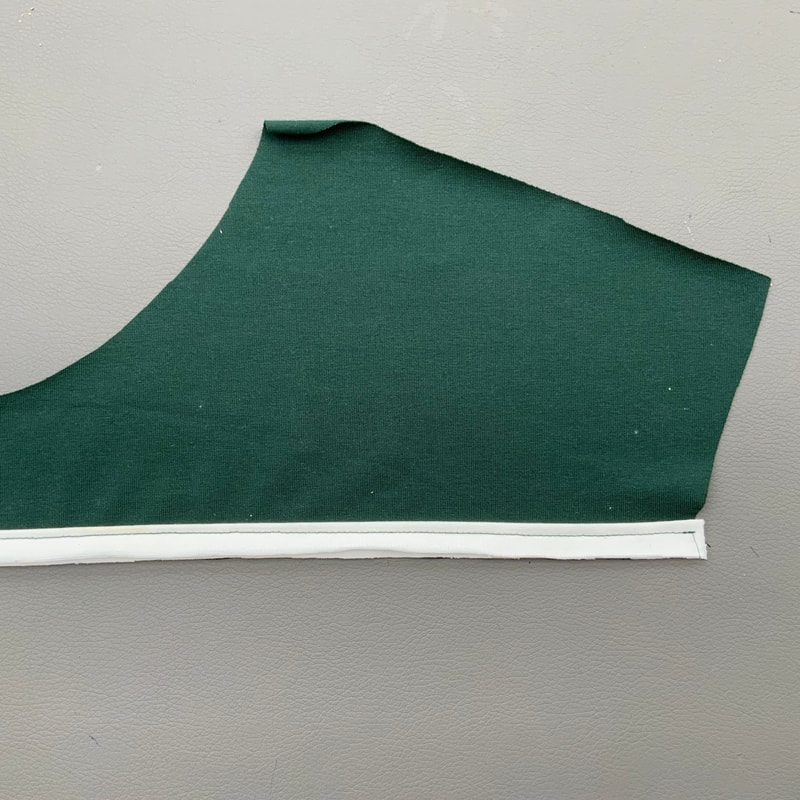
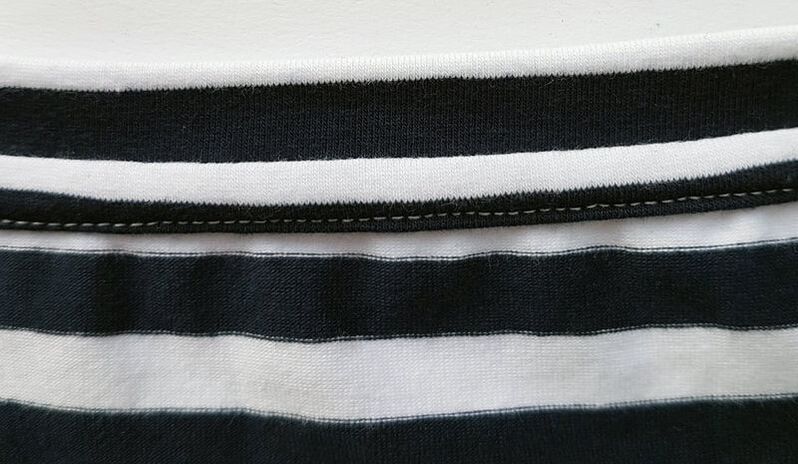
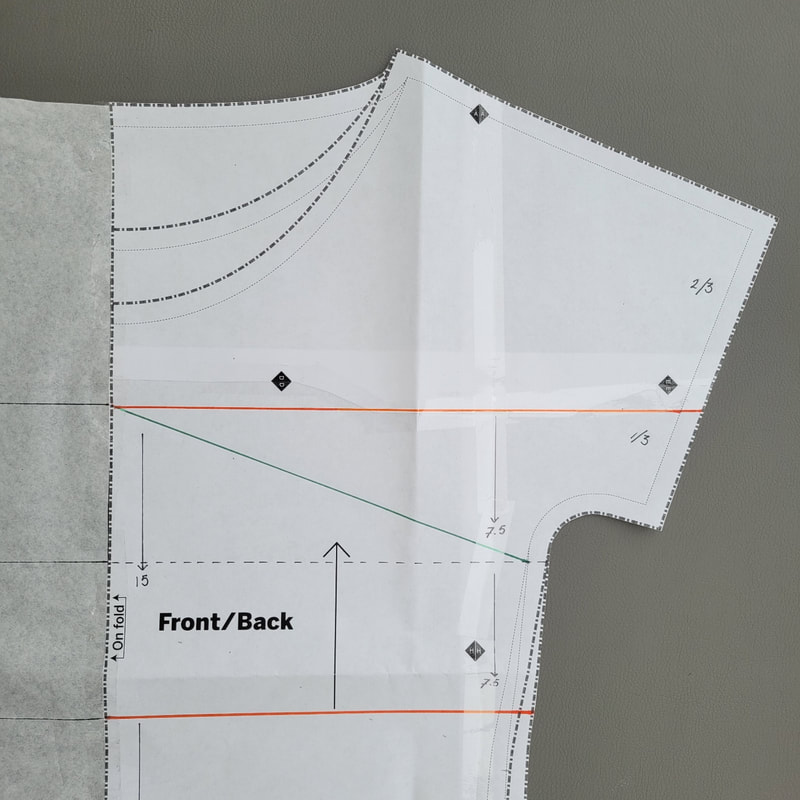
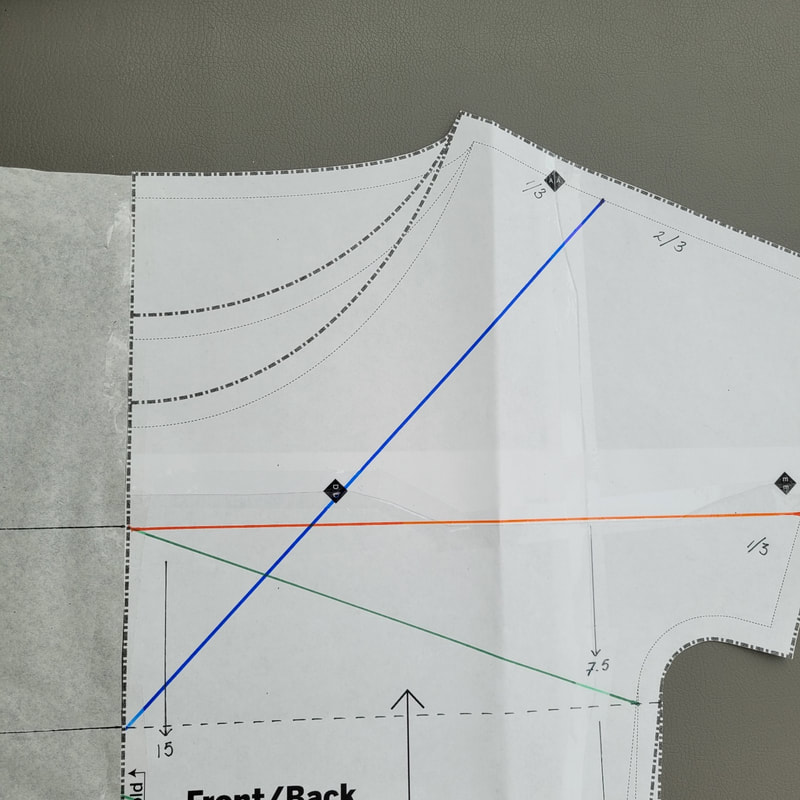
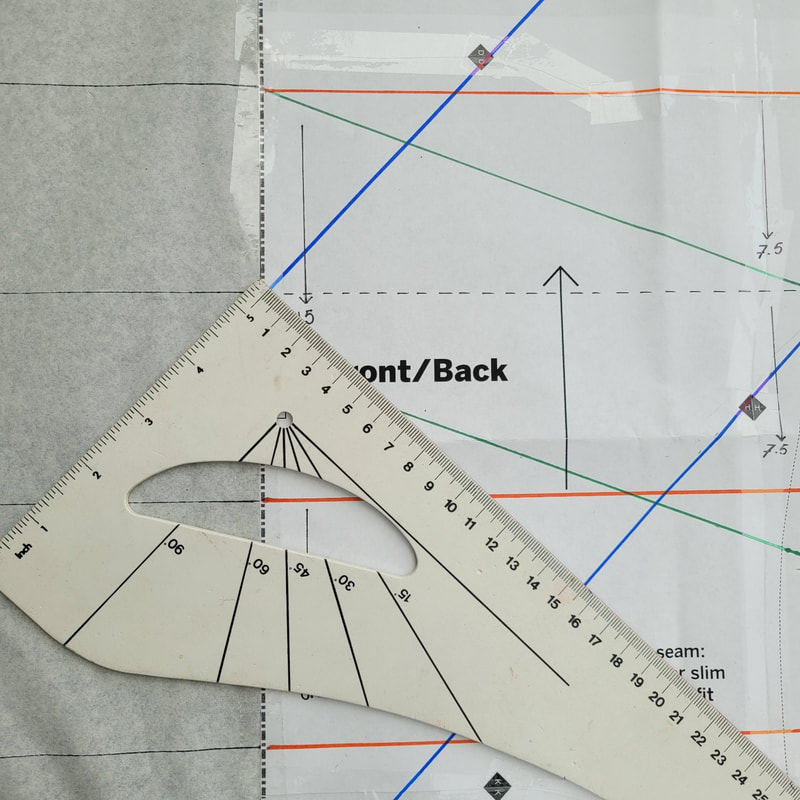
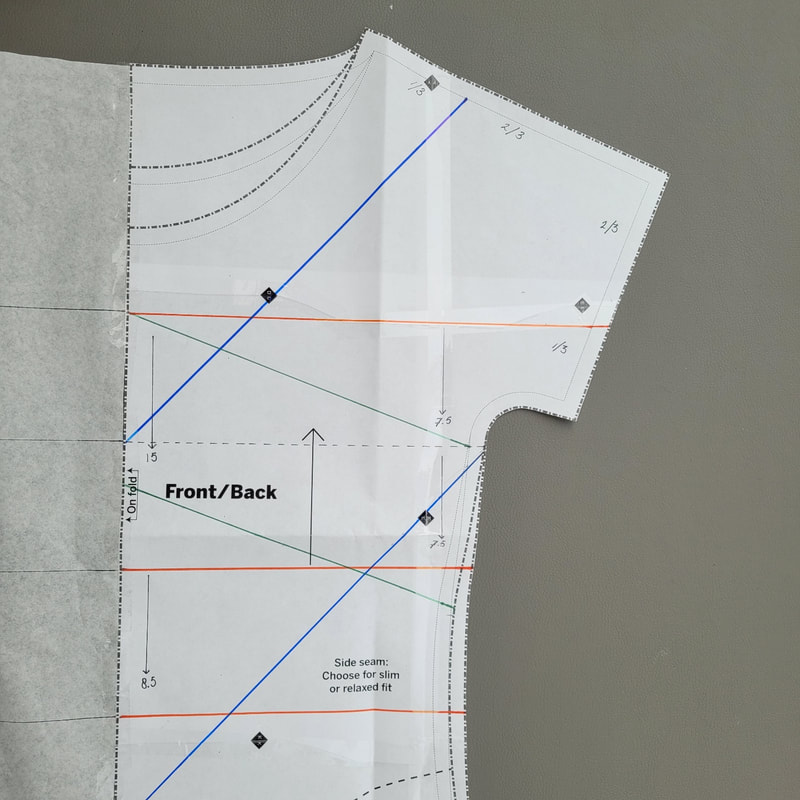
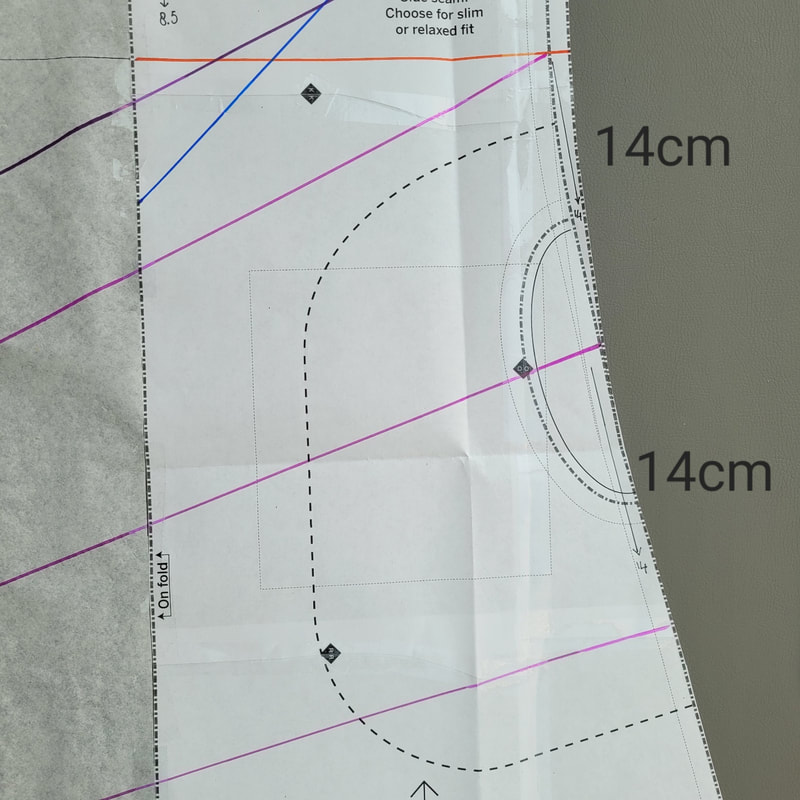
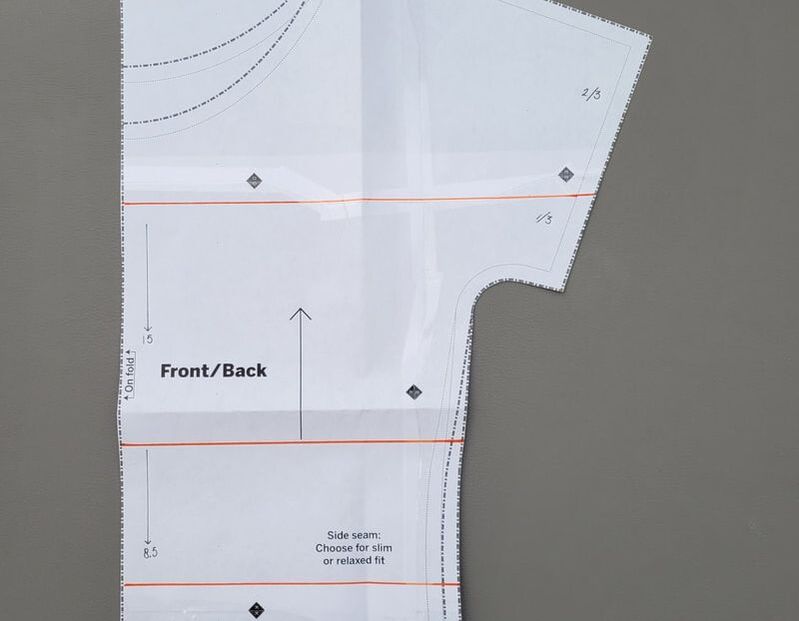
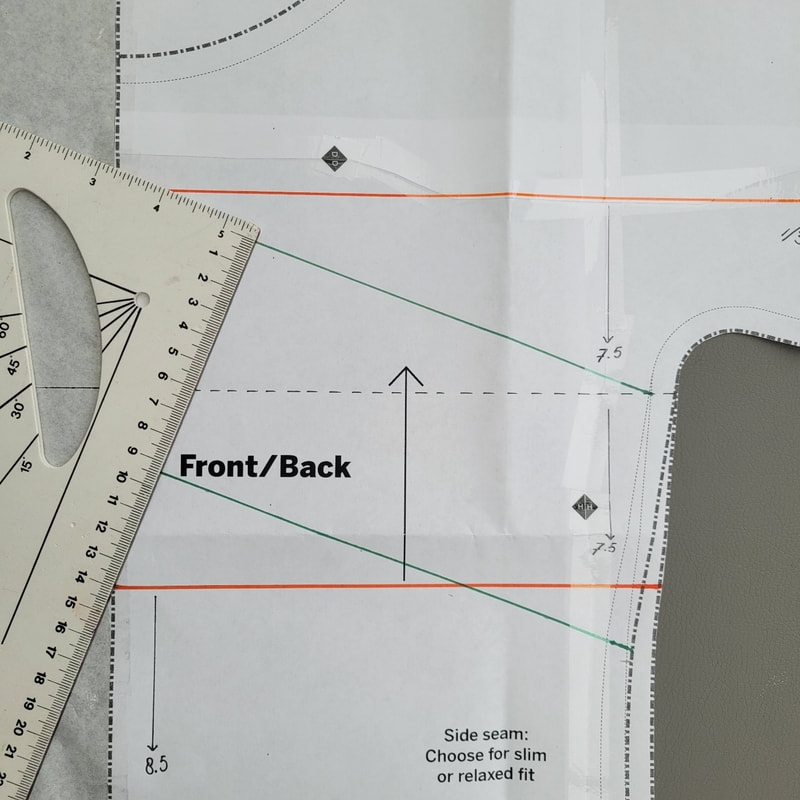
Verhoogde taillelijn: trek een lijn 15 cm onder de pas van zijnaad naar middenvoor haaks op de middenvoor lijn. Taillelijn: trek een lijn 8,5cm onder de verhoogde taille van zijnaad naar middenvoor haaks op de middenvoor lijn. Maak je dit model zoals in het voorbeeld dan knip je: *pas voor en achter in kleur A. *mouw tot de 3/4 lijn, jurk in de kortste lengte voor en achter in kleur B. *mouwdeel van 3/4 lengte tot lange lengte, 1 jurkverlenging of 2 samen afhankelijk van de gewenste lengte in kleur C. *eventueel een pipingbies van 2,5 cm hoog in kleur D. Deze stik je tussen de naden van de voor- en achterpas. Bij het uitknippen leg je alle delen aan de stof vouw. Aan beide kanten van de lijnen teken je naadwaarde aan. Raised waistline: draw a line 15 cm below the yokeline from side seam to mid front perpendicular to mid front line. Waistline: Draw a line 8.5cm below the raised waistline from side seam to center front perpendicular to center front line. If you make this style as in the example, you cut: *yoke front and back in color A. *sleeve to the 3/4 line, dress in shortest length front and back in color B. *sleeve part from 3/4 length to long length, 1 dress extension or 2 together depending on desired length in color C. *possibly a piping band of 2.5 cm high in color D. You sew this between the seams of the front and back yoke. When cutting out, place all parts at the fold of the fabric. Mark your seam allowance on both sides of the lines.
6b.
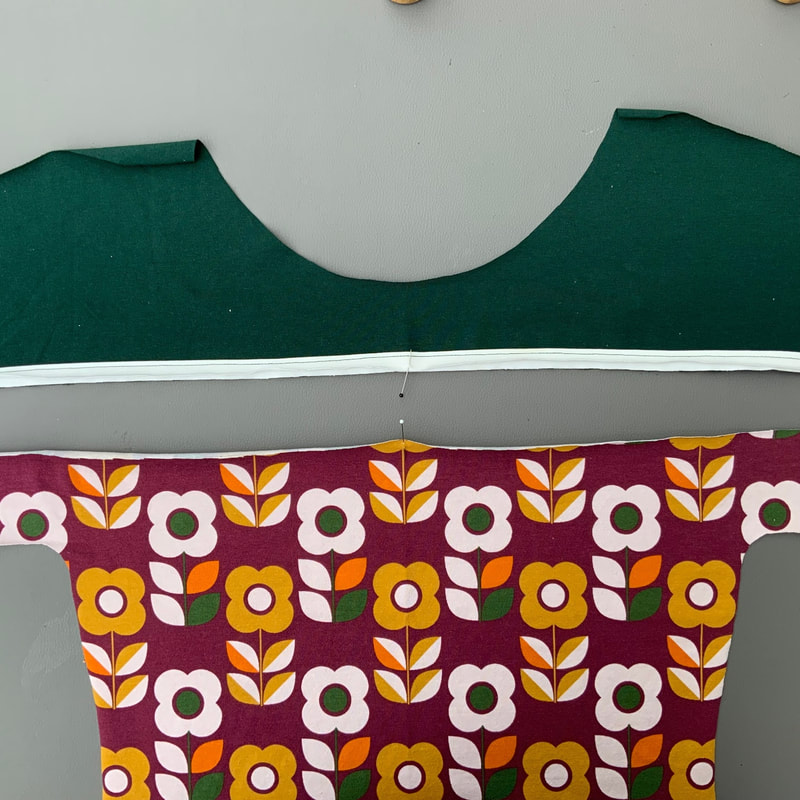
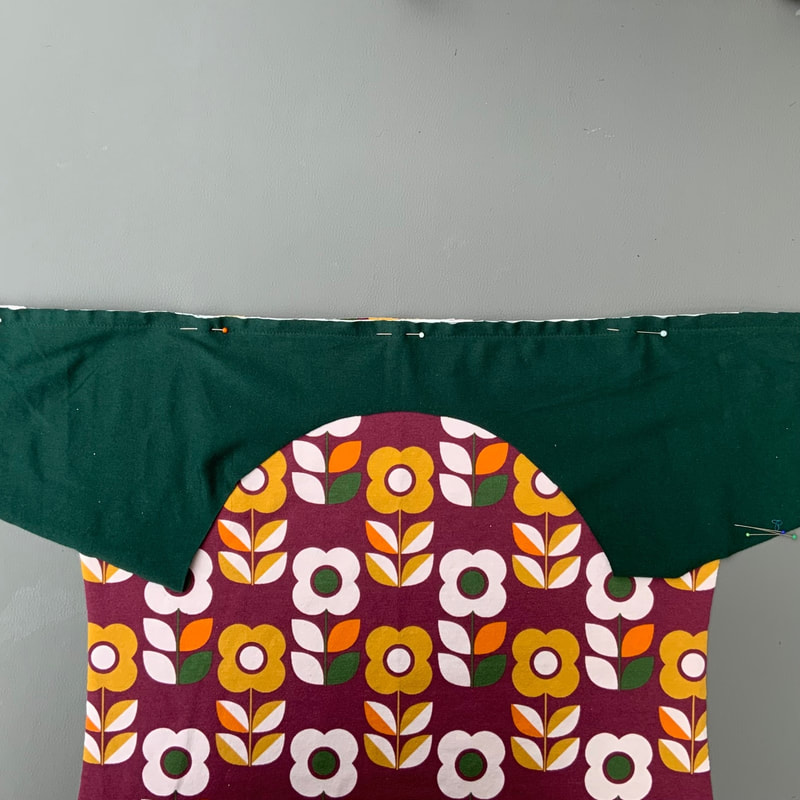
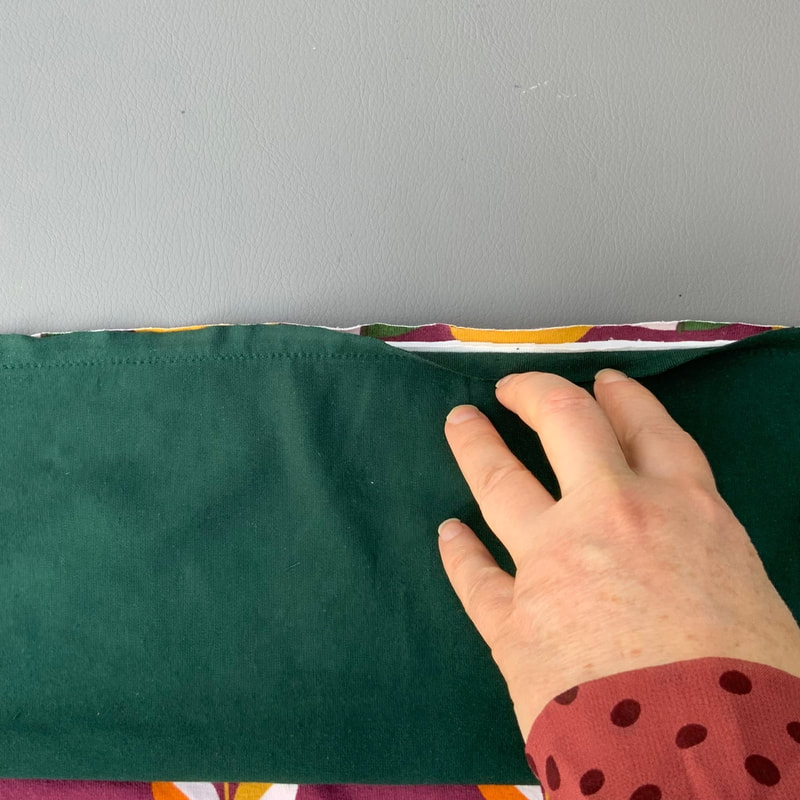
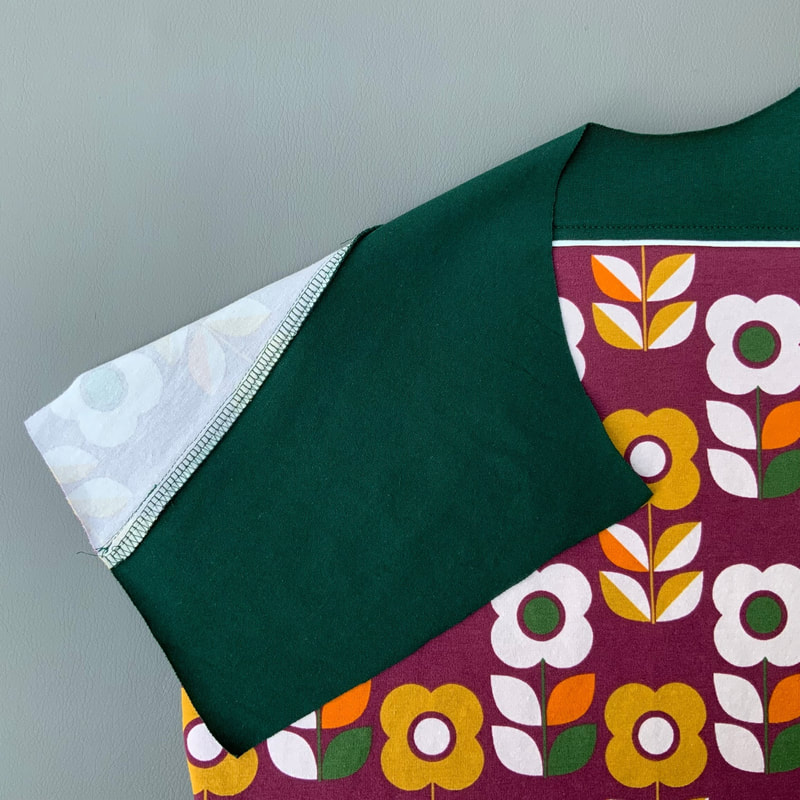
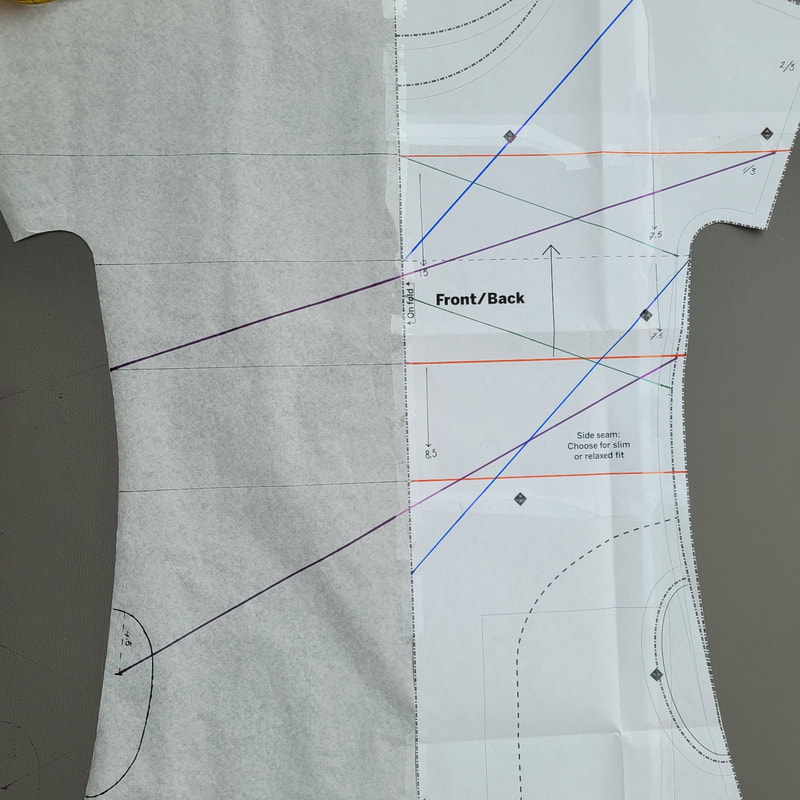
Omgekeerde V colourblock variatie b/groene lijnen. Reversed V colourblock variation b/green lines.
6b-2
Trek een tweede lijn parallel aan de eerste van 9,5cm. Maak je dit model zoals in het voorbeeld dan knip je: *het deel boven de omgekeerde V in kleur A. *korte mouwlijn, omgekeerde V in kleur B. *(eventueel) mouwdeel van korte lengte tot lange lengte, jurkdeel in lengte naar keuze in kleur C. *maak het achterpand in kleur C met een pasje in kleur A. Bij het uitknippen leg je alle delen aan de stof vouw. Aan beide kanten van de lijnen teken je naadwaarde aan. Draw a second line parallel to the first of 9.5 cm. If you make this style as in the example, you cut: *the part above the inverted V in color A. *short sleeveline, inverted V in color B. * (optional) sleeve part from short length to long length, dress part in length of your choice in color C. *make the back piece in color C with a yoke in color A. When cutting out, place all parts at the fold of the fabric. Mark your seam allowance on both sides of the lines.
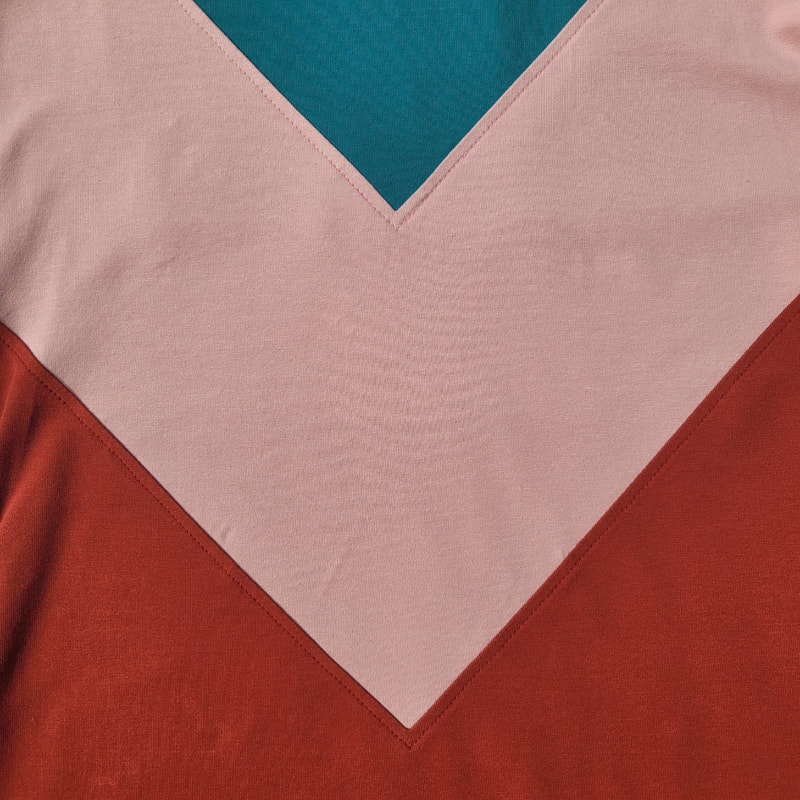
6c.
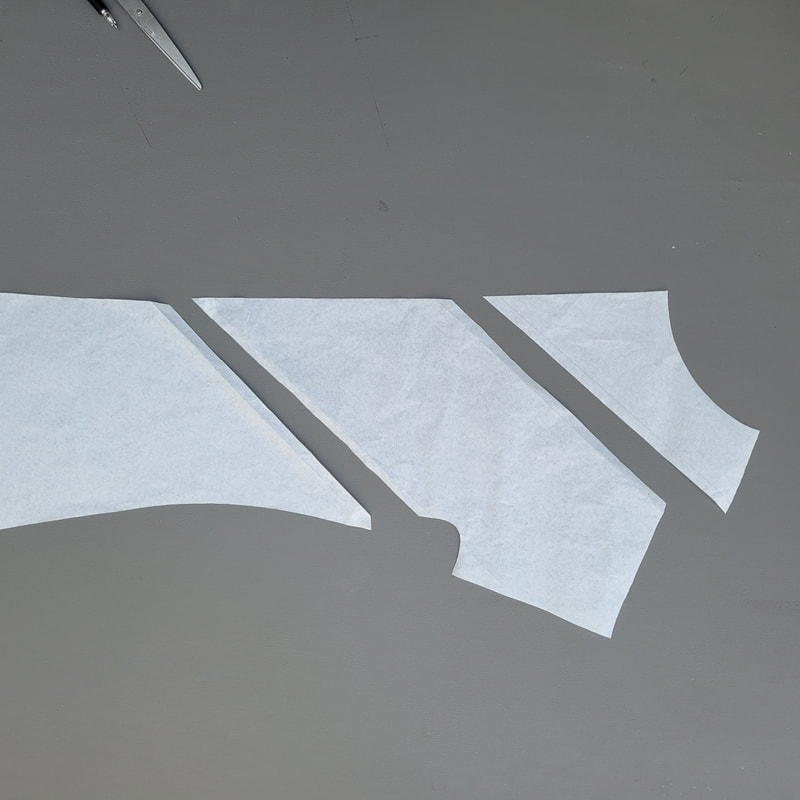
Diepe V colourblock variatie c/blauwe lijnen. Deep V colourblock variation c/blue lines
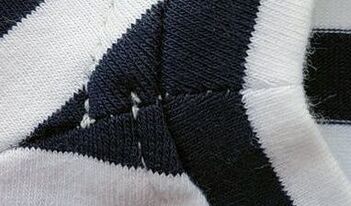
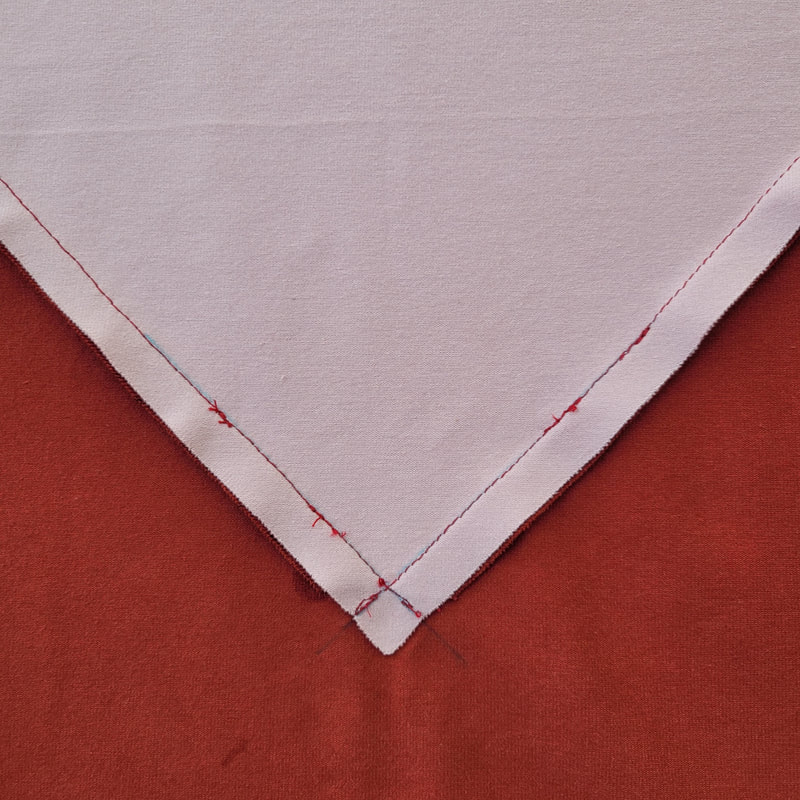
6c-4.
Voor de werkbescrijving van het inzetten van de punten zie stap 7. For an explanation on how to sew the points in this variation. Go to step 7.
6d.
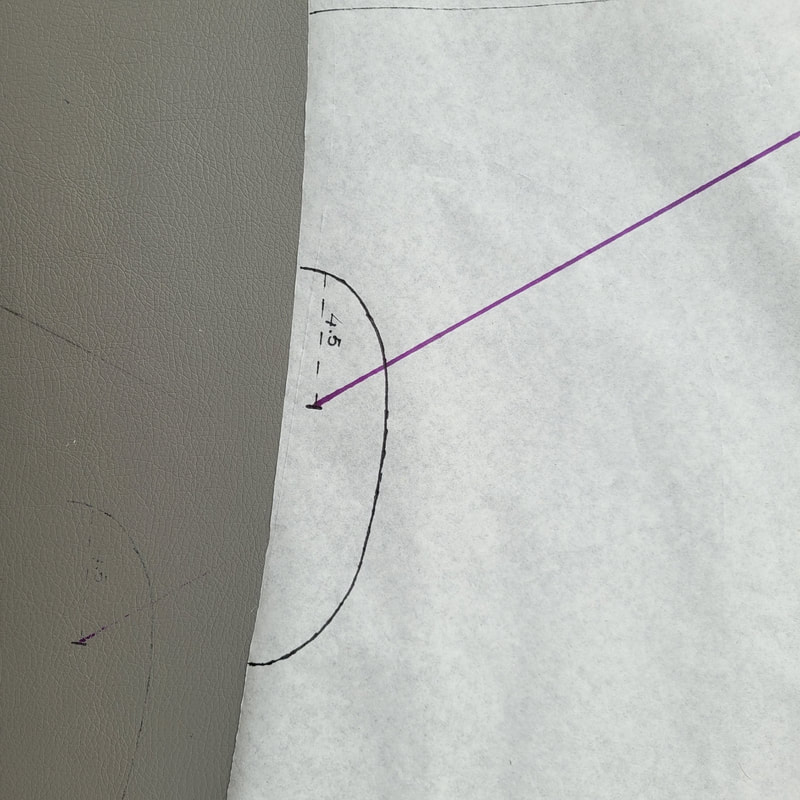
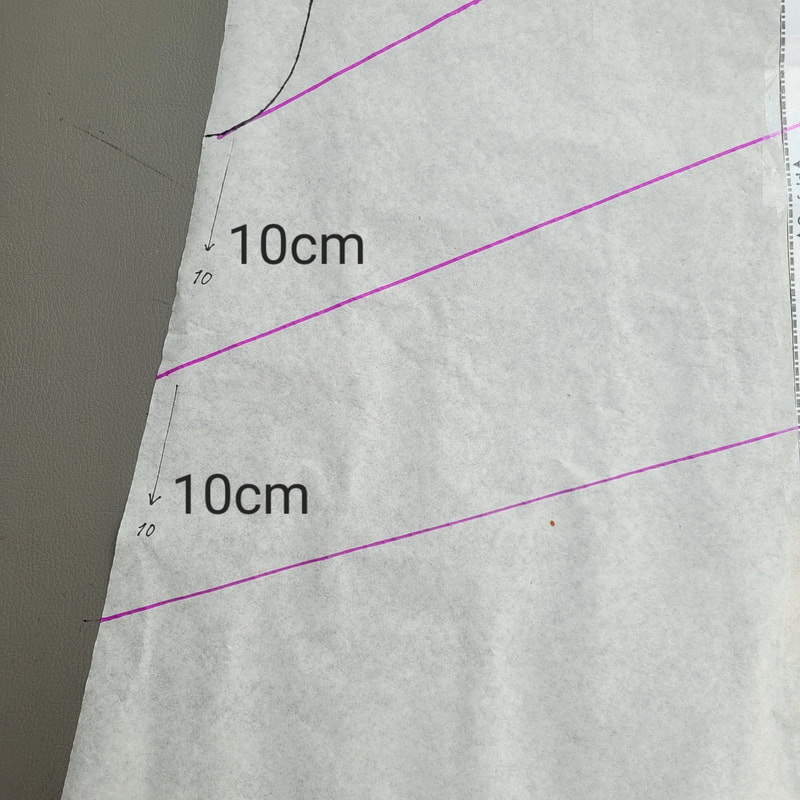
Diagonale colourblock variatie d/paarse lijnen Diagonal color block variation d/purple lines
6e.
Diagonale colourblock variatie /roze lijnen Diagonal colourblock variation /pink lines
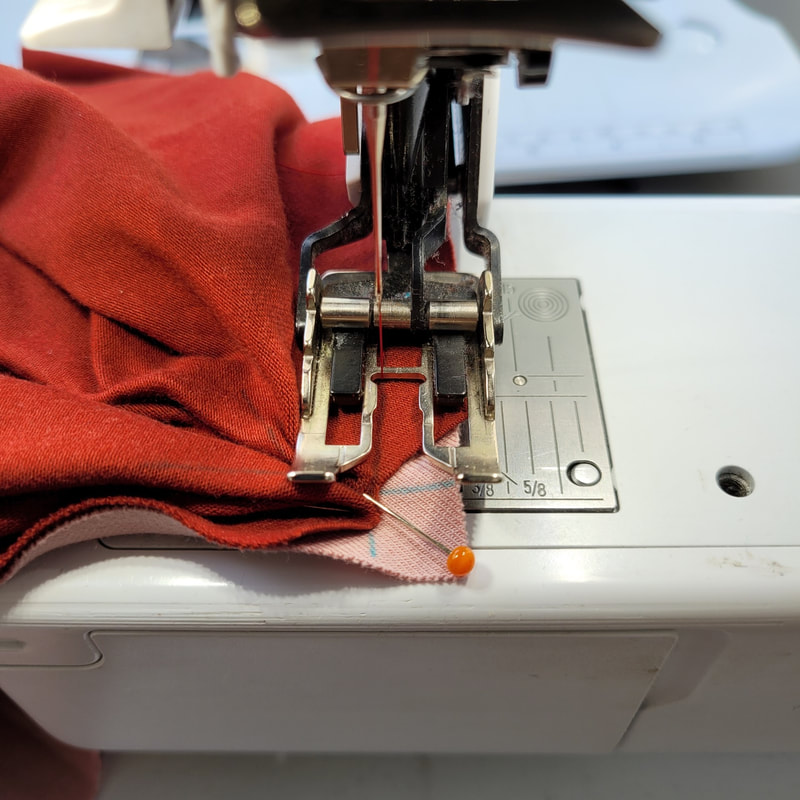
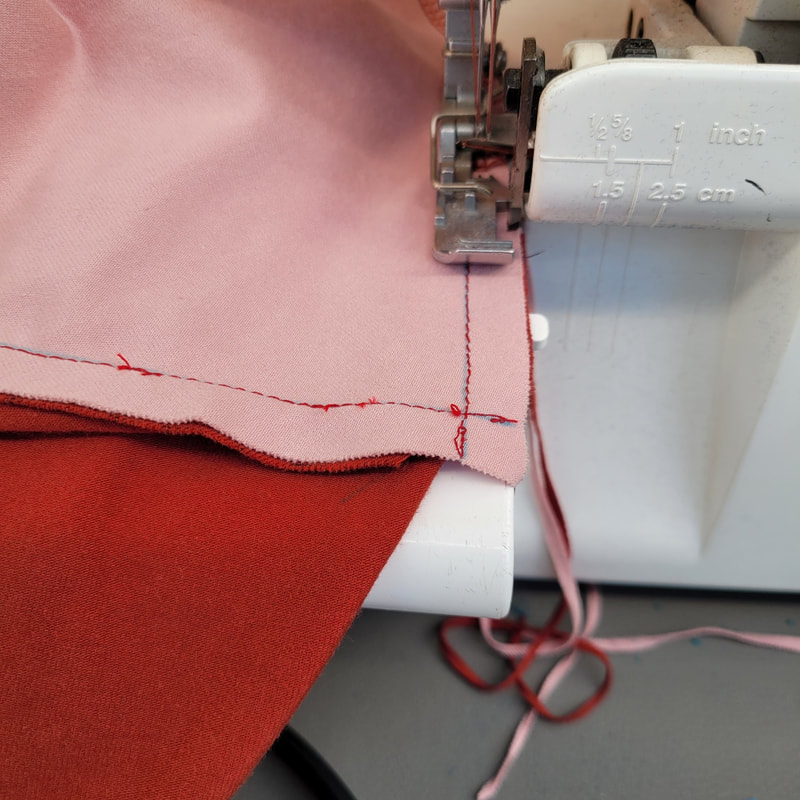
7.
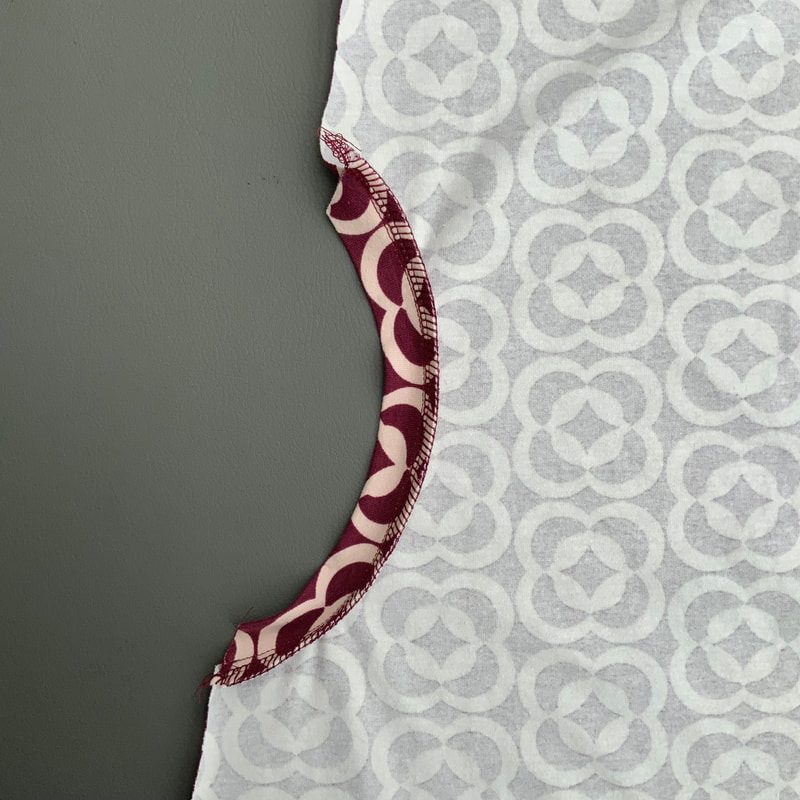
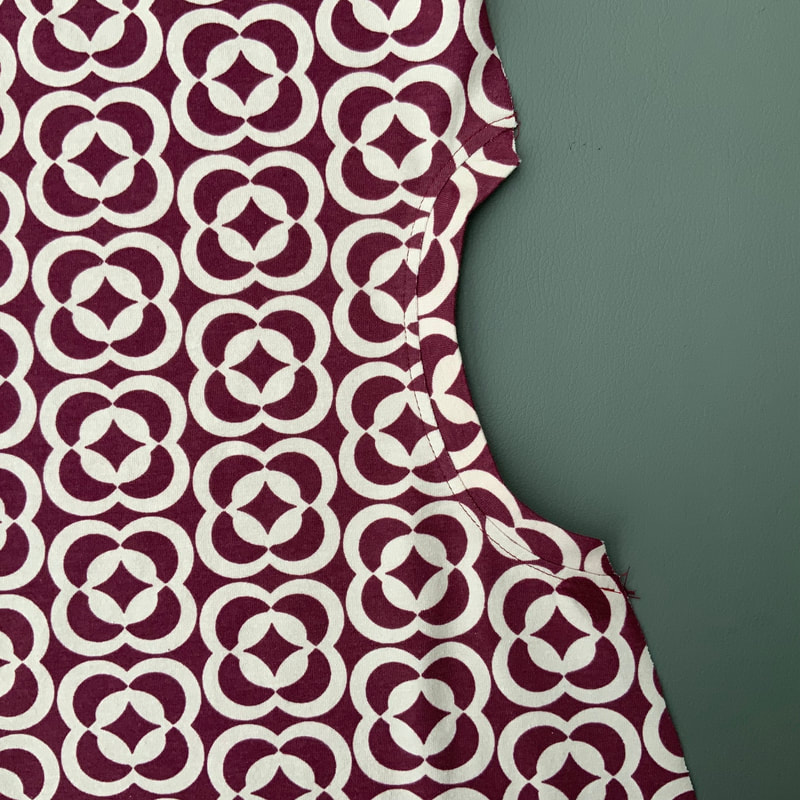
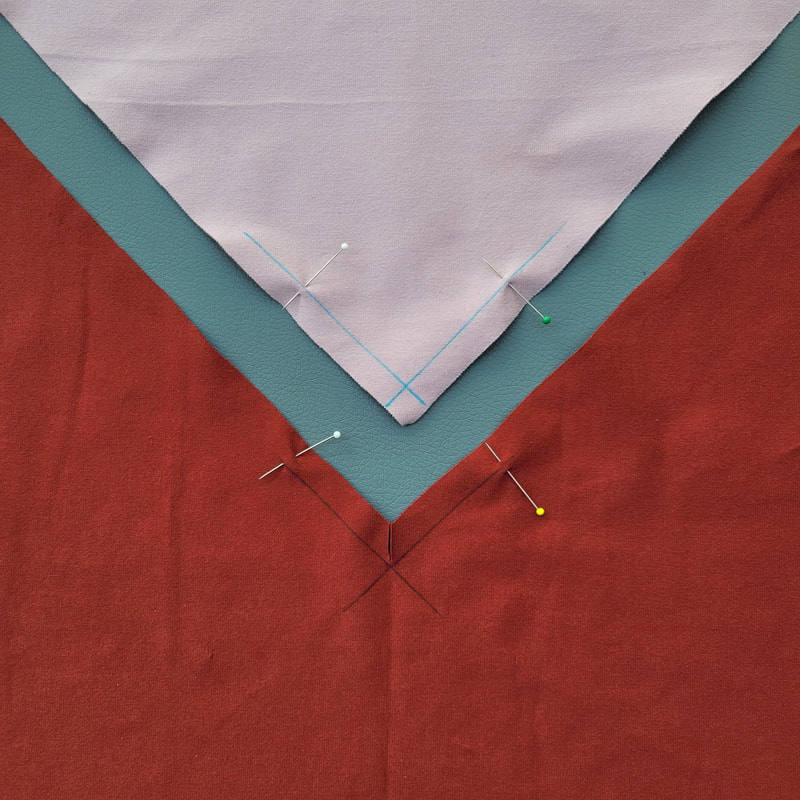
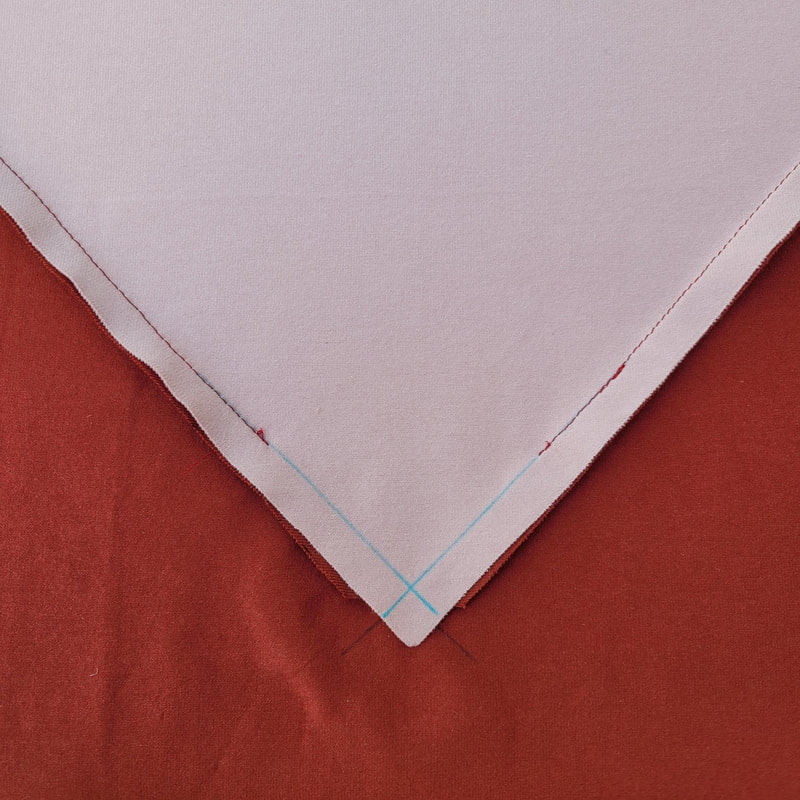
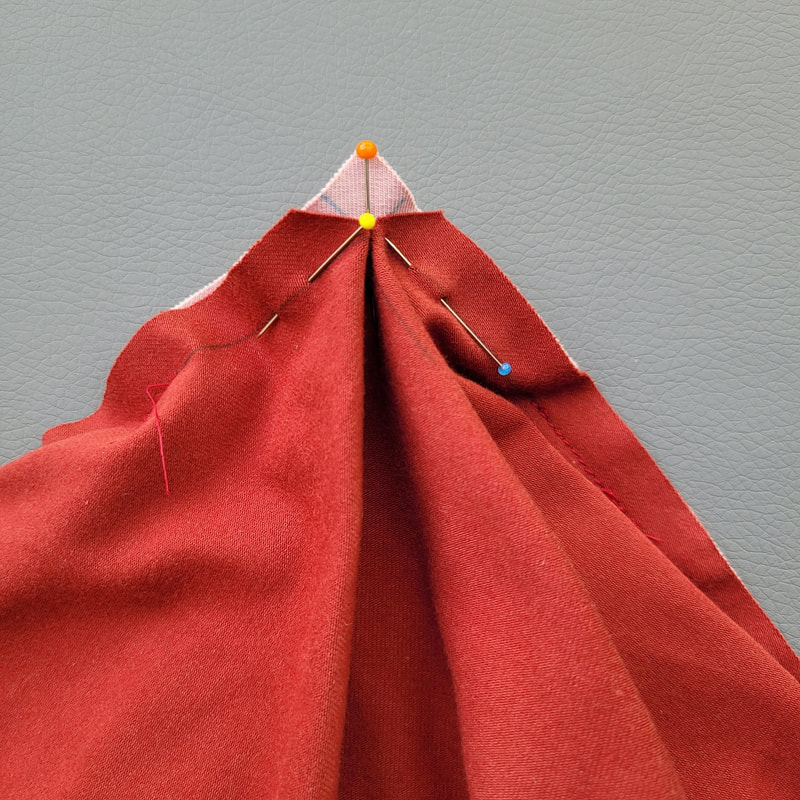
Colourblock variatie 6c werkbeschrijving Colourblock variation 6c sewing instructions
7i.
Volg nu stap 3 voor het in elkaar zetten van de jurk. Maak je een pasje in het achterpand ga dan naar stap 4 Go to step 3 for the assembling of the dress. If your design has a yoke go to step 4. Comments are closed.
|
For all the latest patterns to buy visit my Webshop. |